Tripp Lite SNMPWEBCARD Installation Instructions Manual
Snmp/web management accessory card
Hide thumbs
Also See for SNMPWEBCARD:
- Installation manual (45 pages) ,
- User manual (22 pages) ,
- Owner's manual (9 pages)
Advertisement
Quick Links
Installation Manual
SNMP/Web Management
Accessory Card
Model: SNMPWEBCARD
Version 12.06.006X
Read this manual carefully before installation. A separate User's Guide (PDF
format) is included on the CD-ROM bundled with the accessory card. Refer to
the User's Guide for additional information about configuration and operation.
1111 W. 35th Street, Chicago, IL 60609 USA
www.tripplite.com/support
1
201203126 933179.indb 1
4/5/2012 5:11:05 PM
Advertisement

Related Manuals for Tripp Lite SNMPWEBCARD


Summary of Contents for Tripp Lite SNMPWEBCARD
- Page 1 Installation Manual SNMP/Web Management Accessory Card Model: SNMPWEBCARD Version 12.06.006X Read this manual carefully before installation. A separate User's Guide (PDF format) is included on the CD-ROM bundled with the accessory card. Refer to the User's Guide for additional information about configuration and operation.
- Page 2 Address Assignment: If your network' s DHCP server will assign a dynamic IP address to the SNMPWEBCARD automatically, proceed to 2 - Dynamic IP Address Assignment. If you will assign a static IP address to the SNMPWEBCARD manually, proceed to 3 - Static IP Address Assignment. If you are uncertain which method to use, contact your network administrator for assistance before continuing the installation process.
-
Page 3: Installation
UPS. While the UPS is turned on, align the SNMPWEBCARD with the guides in the accessory slot and push the card into the slot until the ports are nearly even with the rear surface of the UPS. - Page 4 Set the terminal emulation program to use the COM port that corresponds to the DB9 serial port. Specify the parameters required to Bits per second: 9600 communicate with the SNMPWEBCARD Data bits: Parity: None terminal interface: Stop bits: Flow control:...
- Page 5 UPS. While the UPS is turned on, align the SNMPWEBCARD with the guides in the accessory slot and push the card into the slot until the ports are nearly even with the rear surface of the UPS.
- Page 6 To make changes through the terminal program after this, a reboot is required. A reboot can be accomplished in a few ways: 1. Pull the SNMPWEBCARD out of the device, and then reinsert it. 2. Using a small paper clip, press the reset button through the small 3.
- Page 7 TrippLite. Sample IP settings are shown—supply your own IP information when you configure your card. ETHERNET INTERFACE SETTINGS: Network Service Configuration 3-5-2 The following prompts configure the connection methods that the SNMPWEBCARD will accept. 201203126 933179.indb 7 4/5/2012 5:11:06 PM...
- Page 8 Users/SNMP 3-5-4 The SNMPWEBCARD allows for twelve users. Users require a username and password of at least eight characters that can be a combination of alpha numeric characters and dashes “-“. A user can be defined as a SNMP user or not by defining the SNMP version when setting up the user.
- Page 9 Root Passwords if they have been lost or forgotten. Tripp Lite CANNOT provide technical support for an SNMPWEBCARD without knowledge of the Root Password. If this occurs, a new SNMPWEBCARD will be needed. Note: Facilities are areas of the program that a user may be given access to, or restricted from.
- Page 10 Installation Access options to these facilities are rw, ro or none. For Example: default=rw indicates the user has read write access to every facility not otherwise specified. This is the level of access user “localadmin” has. default=rw, security=none indicates that the user has rw access to every facility, but due to the addition of the security facility tag, the user would be restricted from the security settings of the program.
- Page 11 Installation IPv6 Example: To allow someone from the 3291:2251::0/64 range Address: Mask: To allow only a small handful of people on the range 4923:2241::3200/120 Address: Mask: This will admit addresses 4923:2241::3200 - 4923:2241::32FF 201203126 933179.indb 11 4/5/2012 5:11:07 PM...
- Page 12 Radius Server Configuration 3-5-6 These prompts allow the configuration of the only two allocated Radius Servers Entries for the SNMPWEBCARD. Sample Radius configurations are shown - supply your own Radius Server information when you configure your card. RADIUS SERVER CONFIGURATION SETTINGS: 201203126 933179.indb 12...
- Page 13 These prompts determine the method and order of authentication for accessing the SNMPWEBCARD. Note: Tripp Lite recommends that the "RadiusOnly" authentication method should only be used after the Radius Server had been configured for User Interface accessibility on the SNMPWEBCARD.
- Page 14 PowerAlert Status page will appear in the browser window. For more information about configuration and operation of the managed device, refer to the SNMPWEBCARD User's Guide, included on the CD-ROM bundled with the card.
- Page 15 Installation Figure 2-1 Use a Web browser to open the PowerAlert console window for your SNMPWEBCARD (see 3.1 Opening the Web Console for instructions). Click the Configuration menu and access the Actions submenu Select Device Shutdown in the Device Actions section.
- Page 16 Installation Figure 2-2 6b. Select the device to shut down in the Select Trigger Device section Set how long the delay should be before the action will take place Select the Event(s) that will trigger the action Click the Save button on the bottom of the screen Note: Whenever changes are made, the save button must be pressed to submit the changes before moving off of the page.
- Page 17 Installation Other Default Settings 4-2-2 Additional Setting Default Value Information Obtain from DHCP IP address Section 3.8.1 Telnet Access Disabled Section 3.8.1 SSH Access Enabled Section 3.8.1 Enabled HTTP Access Section 3.8.1 HTTPS Access Enabled Section 3.8.1 SNMPv1 Enabled – Community –public Section 3.8.2 Access SNMPv2...
- Page 18 Network Management System (NMS) is sending to this device or receiving from this device through SNMPv3. Note: The privacy passphrase maps to a user’s password. Authentication Protocol The Tripp Lite implementation of SNMPv3 supports only MD5 authentication. Privacy Protocol The Tripp Lite implementation of SNMPv3 supports only DES as the protocol for encrypting and decrypting data.
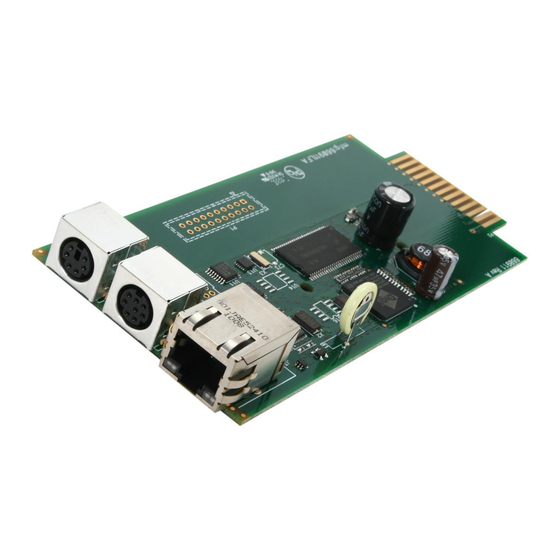
- Page 19 Mini-DIN Serial Port: Use this port to provide a direct terminal connection to a computer with a terminal emulation program. A serial cable (part number 73-1025) is included with the SNMPWEBCARD. If you need to order a replacement cable, contact Tripp Lite Customer Support at (773) 869-1234.
-
Page 20: Technical Support
Service under this Warranty can only be obtained by your delivering or shipping the product (with all shipping or delivery charges prepaid) to: Tripp Lite, 1111 W. 35th Street, Chicago, IL 60609, USA. Seller will pay return shipping charges. Visit www.