Honeywell UDC2300 Product Manual
Universal digital controller
Hide thumbs
Also See for UDC2300:
- Product manual (106 pages) ,
- User manual (82 pages) ,
- Replacement instructions (2 pages)
Table of Contents
Advertisement
Quick Links
Advertisement
Table of Contents
Troubleshooting

Related Manuals for Honeywell UDC2300


Summary of Contents for Honeywell UDC2300
- Page 1 UDC2300 Universal Digital Controller Product Manual 51-52-25-98 12/00...
- Page 2 Chassis Ground. Identifies a connection to the chassis or frame of the equipment shall be bonded to Protective Earth at the source of supply in accordance with national and local electrical code requirements. UDC2300 Controller Product Manual 12/00...
- Page 3 4.10 Input 2 Set Up Group........................35 4.11 Control Set Up Group........................36 4.12 Options Set Up Group ........................38 4.13 Communications Set Up Group....................39 4.14 Alarms Set Up Group ........................41 4.15 Configuration Record Sheet ......................43 12/00 UDC2300 Controller Product Manual...
- Page 4 Minimum and Maximum Range Values..................84 Preliminary Information ....................... 85 Input 1 Set Up Wiring ........................87 Input 1 Calibration Procedure ...................... 89 Input 2 Set Up Wiring ........................91 Input 2 Calibration Procedure ...................... 92 Restore Factory Calibration......................93 UDC2300 Controller Product Manual 12/00...
- Page 5 12.2.19 BRNOUT (BURNOUT PROTECTION - SENSOR BREAK) ........126 12.2.20 ComADD (STATION ADDRESS) ................. 127 12.2.21 ComSTA (COMMUNICATIONS STATE) ..............127 12.2.22 CSP BI (COMPUTER SETPOINT BIAS) ..............127 12.2.23 CTRALG (CONTROL ALGORITHM) ................127 12/00 UDC2300 Controller Product Manual...
- Page 6 12.2.69 PIDSET (NUMBER OF TUNING PARAMETER SETS) ..........146 12.2.70 PVSTRT (PV START)....................147 12.2.71 PWROUT (THREE POSITION STEP CONTROL OUTPUT START-UP MODE) ..147 12.2.72 PWR UP (POWER UP CONTROLLER MODE RECALL) .......... 148 12.2.73 RATE T (RATE TIME)....................148 UDC2300 Controller Product Manual 12/00...
- Page 7 12.2.106 TX DLY (RESPONSE DELAY) .................. 157 12.2.107 UNITS (COMMUNICATION OVERRIDE UNITS) ........... 157 12.2.108 UNITS (TEMPERATURE UNITS)................157 12.2.109 XMITR1 (TRANSMITTER CHARACTERIZATION) ..........158 12.2.110 XMITR2 (TRANSMITTER CHARACTERIZATION) ..........159 INDEX........................ 161 CE MARK MULTILANGUAGE SAFETY SHEETS 12/00 UDC2300 Controller Product Manual...
- Page 8 Table 8-2 Equipment Needed __________________________________________________________ 86 Table 8-3 Set Up Wiring Procedure for Thermocouple Inputs Using an Ice Bath _________________ 87 Table 8-4 Set Up Wiring Procedure for Thermocouple Inputs using Thermocouple Source _________ 87 viii UDC2300 Controller Product Manual 12/00...
- Page 9 Table 10-9 Troubleshooting Alarm Relay Output Failure ___________________________________ 112 Table 10-10 Troubleshooting a Keyboard Failure _________________________________________ 113 Table 11-1 Parts Identification ________________________________________________________ 115 Table 11-2 Parts Not Shown __________________________________________________________ 116 Table 12-1 Function Parameter Look-up Table ___________________________________________ 118 12/00 UDC2300 Controller Product Manual...
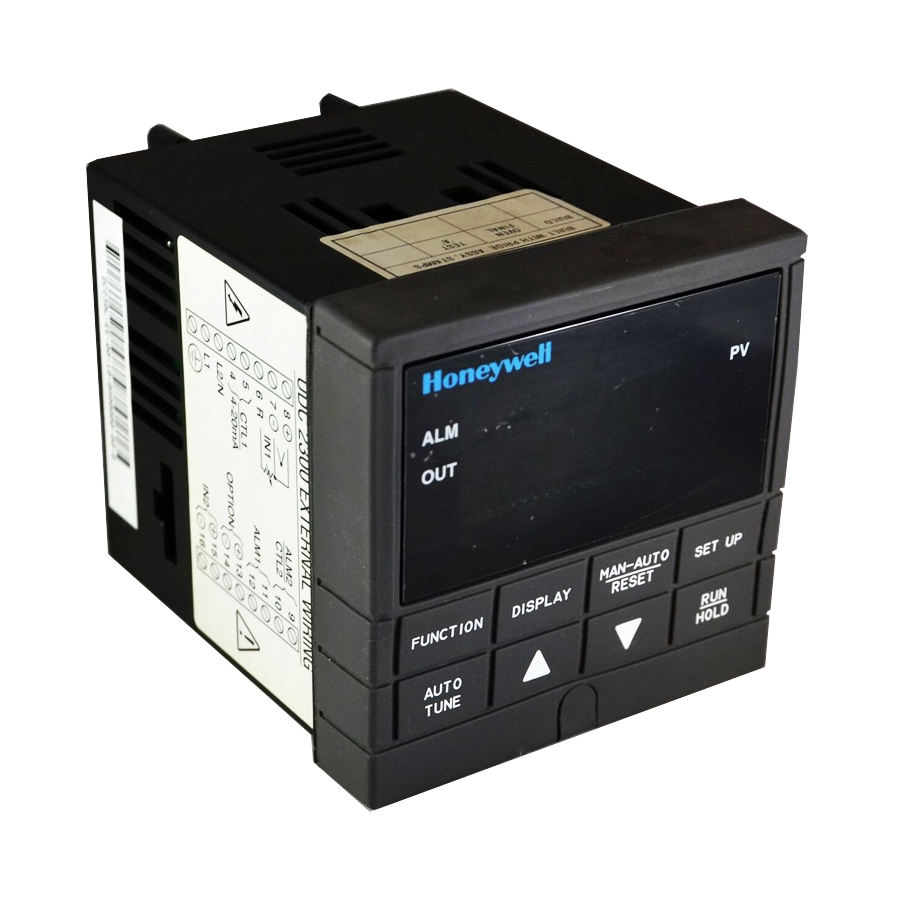
- Page 10 Figures Figure 1-1 UDC2300 Operator Interface __________________________________________________ 1 Figure 2-1 Model Number Interpretation __________________________________________________ 5 Figure 2-2 Jumper Placements __________________________________________________________ 7 Figure 2-3 Mounting Dimensions (not to scale) _____________________________________________ 9 Figure 2-4 Mounting Method __________________________________________________________ 10 Figure 2-5 Composite Wiring Diagram __________________________________________________ 13...
-
Page 11: Introduction
• Setpoint Ramp/Rate/Program • Three Position Step Control • Duplex (Heat/Cool) The UDC2300 is also downward compatible with existing UDC 2000 applications and installations except for RTD and 0-10 Volt inputs. See wiring diagrams in Section 2 - Installation. 2300... -
Page 12: Ce Conformity (Europe)
Declaration of Conformity: 51309602-000 Deviation from the installation conditions specified in this manual, and the special conditions for CE conformity in Subsection 2.1, may invalidate this product’s conformity with the Low Voltage and EMC Directives. UDC2300 Controller Product Manual 12/00... -
Page 13: Installation
2 Installation 2.1 Overview Introduction Installation of the UDC2300 consists of mounting and wiring the controller according to the instructions given in this section. Read the pre-installation information, check the model number interpretation (Subsection 2.2), and become familiar with your model selections, then proceed with installation. -
Page 14: Table 2-1 Condensed Specifications
± 1 digit for display 15-bit resolution typical Shielded twisted-pair cables are required for all analog I/O, CE Conformity Special process variable, RTD, thermocouple, dc millivolt, low level Conditions (Europe) signal, 4-20 mA, digital I/O, and computer interface circuits. UDC2300 Controller Product Manual 12/00... -
Page 15: Model Number Interpretation
1 _ = T/C, RTD, Radiamatic, mV, 0-5 V, 0-20 mA, 4-20 mA 2_ = T/C, RTD, Radiamatic, mV, Volts, milliamps, 0-10 Volts Optional Input 2 _ 0 = None _ 1 = 0-5 V, 1-5 V, 0-20 mA, 4-20 mA Figure 2-1 Model Number Interpretation 12/00 UDC2300 Controller Product Manual... -
Page 16: Preliminary Checks
See Alarm Relay Caution Note, Page 8. Note: Solid State and Open Collector must have jumper set to N.O. (Normally Open). 3 Position Step and Time Duplex must have Output 2 jumper (W202) set to N.O. UDC2300 Controller Product Manual 12/00... -
Page 17: Figure 2-2 Jumper Placements
Position 1: thermocouple (default) Position 2: mV, Volt, RTD Output #1 Position 3: not used W101 Position 4: No jumper: 0 -10 volts NO (Default) 1. For Current Output use the N.O. position Figure 2-2 Jumper Placements 12/00 UDC2300 Controller Product Manual... -
Page 18: Control And Alarm Relay Contact Information
Table 2-4 Alarm Relay Contact Information Unit Alarm Relay Variable NOT in Alarm State Variable in Alarm State Power Wiring Relay Indicators Relay Indicators Contact Contact N.O. Open Open N.C. Closed Closed N.O. Closed Open N.C. Open Closed UDC2300 Controller Product Manual 12/00... -
Page 19: Mounting
3.622 Panel Cutout 3.780 -0.0 Max Panel 2.62 Max (2) with optional Thickness .945 rear cover .394 .103 90.7 3.57 Dimensions: Millimeters Inches 105.4 21.0 4.19 20751 .826 Figure 2-3 Mounting Dimensions (not to scale) 12/00 UDC2300 Controller Product Manual... -
Page 20: Table 2-5 Mounting Procedure
Insert the prongs of the clips into the two holes in the top and bottom of the case. • Tighten both screws to secure the case against the panel. • Carefully slide the chassis assembly into the case, press to close, and tighten the screw. Replace the screw cover. UDC2300 Controller Product Manual 12/00... -
Page 21: Wiring
(See Permissible Wiring Bundling - Table 2-6) and route the individual bundles through separate conduit metal trays. Use Suppression Devices—For additional noise protection, you may want to add suppression devices at the external source. Appropriate suppression devices are commercially available. 12/00 UDC2300 Controller Product Manual... -
Page 22: Wiring Diagrams
N/A = The output form or the individual output is Not Available or is not used for this output form. Not Needed = Auxiliary Output is not needed to provide the desired output function and can be used for another purpose. Auxiliary Output could also be used as a substitute for current Output 1. UDC2300 Controller Product Manual 12/00... -
Page 23: Figure 2-5 Composite Wiring Diagram
2 Provide a switch and non-time delay (North America), quick-acting, high breaking capacity, type F (Europe), 1/2 A, 250 V fuse(s), or circuit-breaker as part of the installation. Figure 2-6 Mains Power Supply 12/00 UDC2300 Controller Product Manual... -
Page 24: Figure 2-7 Input 1 Connections
For solid state relay outputs, see Figure 2-13. See Figure 2-15 for Alarm and Duplex Output Connections. See Table 2-3 and Table 2-4 for Control and Alarm Relay Contact information. Figure 2-9 Electromechanical Relay Output UDC2300 Controller Product Manual 12/00... -
Page 25: Figure 2-10 Solid State Relay Output
External relays should be fused between power and relay load. See Figure 2-15 for Alarm and Duplex Output Connections. See Tables 2-3 and 2-4 for Control and Alarm Relay Contact information Figure 2-11 Open Collector Relay Output 12/00 UDC2300 Controller Product Manual... -
Page 26: Figure 2-12 Current Output
24863R This Solid State relay is rated at 15 Amps at 25°C, linearly derated to 10 Amps at 55°C. Customer should size fuse accordingly Figure 2-13 External Solid State Relay Option (Internal Open Collector Output) UDC2300 Controller Product Manual 12/00... -
Page 27: Figure 2-14 Three Position Step Control Connections
5 A, 120 Vac and 24 Vdc, 2.5 A, 240 Vac. Alarm #2 not available for Time Proportional Duplex or Three Position Step Control. Figure 2-15 Alarm and Duplex Output Connections 12/00 UDC2300 Controller Product Manual... -
Page 28: Figure 2-16 External Interface Option Connections
CONTROLLERS Do not run these lines in the same conduit D– as AC power. 120 OHMS ON LAST LEG 1 AuxOut , Digital Input and Communications are mutually exclusive. Figure 2-16 External Interface Option Connections UDC2300 Controller Product Manual 12/00... -
Page 29: Output (Model Dc230B-Xt-Xx-Xx-Xxxxxxx-Xx-X)
INPUT 1 13 + AUXOUT Configure: 14 - AUXOUT = OUT Auxiliary Output Calibration ZEROVAL = 4095 SPANVAL = 4095 Figure 2-18 Transmitter Power for 4-20 mA — 2 Wire Transmitter Using Auxiliary Output (Model DC230B-XX-2X-XX-XXXXXXX-XX-X) 12/00 UDC2300 Controller Product Manual... - Page 30 Installation UDC2300 Controller Product Manual 12/00...
-
Page 31: Initial Start-Up
If one or more of these tests fail, the controller will go to the Failsafe Manual Mode, and FAILSF will flash in the lower display and a message indicating which test failed will appear in the lower display. Then, “DONE” will appear in the lower display. 12/00 UDC2300 Controller Product Manual... -
Page 32: Operator Interface And Key Functions
When a key is pressed and the prompt KEYERR appears in the lower display, it will be for one of the following reasons: • parameter is not available, • not in Set Up mode, press key first, SET UP • key malfunction. UDC2300 Controller Product Manual 12/00... -
Page 33: Configuration
4.9 Input 1 Set Up Group 4.10 Input 2 Set Up Group 4.11 Control Set Up Group 4.12 Options Set Up Group 4.13 Communications Set Up Group 4.14 Alarms Set Up Group 4.15 Configuration Record Sheet 12/00 UDC2300 Controller Product Manual... -
Page 34: Configuration Prompt Hierarchy
SHDTIM PARITY BAUD WS_FLT TXDLY SDMODE SHD_SP UNITS CSRATO CSP_BI LOOPBK ALARMS A1S1VA A1S2VA A2S1VA A2S2VA A1S1TY A1S2TY A2S1TY A2S2TY A1S1HL A1S1EV A1S2HL A1S2EV A2S1HL A2S1EV A2S2HL A2S2EV ALHYST ALARM1 BLOCK STATUS VERSON FAILSF TESTS UDC2300 Controller Product Manual 12/00... -
Page 35: Configuration Procedure
It stores any changes you have made. If you do not press any keys for 30 seconds, the controller times out and reverts to the mode and display used prior to entry into Set Up mode. 12/00 UDC2300 Controller Product Manual... -
Page 36: Timer Set Up Group
AL2 (Alarm 2) Timer Display TREM (time remaining) TREM L DISP ET (elapsed time) RESET Timer Reset Key (Run/Hold key) Control AL1 (Alarm 1 or Key) Timer Count MIN (Counts HR/MIN) INCRMT Increment SEC (Counts MIN/SEC) UDC2300 Controller Product Manual 12/00... -
Page 37: Tuning Set Up Group
Rate 2 in 0.00 to 10.00 minutes 0.00 RATE2T Minutes 0.08 or less = OFF I2 MIN Reset in 0.02 to 50.00 minutes/repeat Reset in 0.02 to 50.00 I2 RPM repeats/minute Table continued next page 12/00 UDC2300 Controller Product Manual... - Page 38 0 to 4095 SECUR LOCK Lockout NONE CONF VIEW Auto/Manual Key ENAB AUTOMA Lockout ENAB Autotune Key ENAB A TUNE Lockout ENAB RN HLD Run/Hold Key ENAB Lockout ENAB Setpoint Select ENAB SP SEL Function Lockout ENAB UDC2300 Controller Product Manual 12/00...
-
Page 39: Sp Ramp Set Up Group
- - - STRSEG Number End Segment 2 to 12 (always end in a - - - ENDSEG soak segment 2, 4, … 12) Number SOK 2 SOK 4 SOK 6 SOK 8 SOK 10 SOK 12 12/00 UDC2300 Controller Product Manual... - Page 40 Enter a Value within the - - - Setpoint Value Setpoint Limits x = 2 through 12 SG10 SG12 SGx TI Segment Soak 0-99 Hours:0-59 Minutes - - - Duration x = 2 through 12 SG10 SG12 UDC2300 Controller Product Manual 12/00...
-
Page 41: Accutune Set Up Group
Selection or Range of Setting Factory Reference Setting Guide English Numeric Numeric English Page Code Code Fuzzy Overshoot FUZZY Suppression ENAB TUNE Demand Tuning TUNE TUNE Accutune Error NONE - - - AT ERR Codes (Read Only) IDFL ABRT 12/00 UDC2300 Controller Product Manual... -
Page 42: Algorithm Set Up Group
RLYD (Time duplex) CURD (Current duplex) CURT (Current/time duplex) TCUR (Time/current duplex) 4-20RG Current Duplex 100 (Full) Range 50 (Split) Relay Cycle MECH (one sec. increments) MECH RLY TYP Time Increment S S (1/3 sec increments) UDC2300 Controller Product Manual 12/00... -
Page 43: Input 1 Set Up Group
Temperature Units UNITS NONE Numeric English Numeric English Input 1 Actuation IN1TYP Type 100H 100L RADH NNMH RADI NNML 0-20 N90H 4-20 N90L 0-10 100m Transmitter XMITR1 Characterization 100H 100L NNMH NNML N90H RADH N90L RADI 12/00 UDC2300 Controller Product Manual... - Page 44 RADI only) FREQ Power Line Frequency Defalut Display SP (Setpoint) — DISPLY (Single Display PRY ( PV with Label) models only) PRN (PV without Label) Language ENGL ENGL LNGUAG Selection FREN GERM SPAN ITAL NUMB (Numeric) UDC2300 Controller Product Manual 12/00...
-
Page 45: Input 2 Set Up Group
IN2 LO Value engineering units RATIO2 Ratio on Input 2 -20.0 to 20.0 1.00 Bias on Input 2 -999 to 9999 BIAS 2 Filter for Input 2 0 to 120 seconds FILTR2 0 = No Filter 12/00 UDC2300 Controller Product Manual... -
Page 46: Control Set Up Group
Control) Output Start-up Mode Setpoint High Limit 0 to 100 % of the PV range 2400 SP Hi SP Lo Setpoint Low Limit 0 to 100 % of the PV range Control Output ACTION Direction UDC2300 Controller Product Manual 12/00... - Page 47 100 (Open position) FSMODE Failsafe Mode No L (Mode does not clear NO_L once unit goes to FS Output) LACH (Unit goes to manual and FS output) PBorGN Proportional Band GAIN GAIN Units Reset Units MINRPM 12/00 UDC2300 Controller Product Manual...
-
Page 48: Options Set Up Group
Init SP to PV Remote SP MNLT Latching Manual TRAK Output tracks Input 2 DI COM Digital Input Disable Combinations + PD2 PID Set 2 +DIR Direct +SP2 Set Point 2 +SP1 Set Point 1 +RUN Start SPP UDC2300 Controller Product Manual 12/00... -
Page 49: Communications Set Up Group
Response Delay 1 to 500 milliseconds TX_DLY 1007 WS_FLT 1008 Word/Byte Order Byte Contents FP_B for floating point seeeeeee communications emmmmmmm data mmmmmmmm mmmmmmmm Choice Byte Order FP_B 0123 FPBB 1032 FP_L 3210 FPLB 2301 12/00 UDC2300 Controller Product Manual... - Page 50 PCT Percent UNITS 1011 Override Units Engineering Units Computer -20.0 to 20.0 CSRATIO 1012 Setpoint Ratio CSP_BI 1013 Computer -999 to 9999 in Engineering Setpoint Bias Units LOOPBK 1014 Local Loopback Disable Test EnAB Enable UDC2300 Controller Product Manual 12/00...
-
Page 51: Alarms Set Up Group
ShedCommunications E-ON Event ON(SP Prog) E-OF Event OFF(SP Prog) Alarm on Manual Remote Setpoint FSAF Failsafe PrRT PV Rate of Change Alarm on Digital Input DE 11 DEV Alarm based on BRAK Loop break alarm 12/00 UDC2300 Controller Product Manual... - Page 52 0.0 to 100.0 % of span or ALHYST 1113 full output as appropriate Latching Alarm NO L NO L ALARM1 1114 Output LACH BLOCK 1115 Alarm Blocking Disable Blocking Block Alarm 1 only Block Alarm 2 only BK12 Blocks both Alarms UDC2300 Controller Product Manual 12/00...
-
Page 53: Configuration Record Sheet
_______ 2400 EUHRDN _______ IN1 LO _______ SPPROG _______ RATIO1 _______ 1.00 BIAS 1 _______ RILTR1 _______ BRNOUT _______ EMIS _______ FREQ _______ DISPLY _______ LNGUAG _______ ENGL Configuration Record Sheet continued on next page 12/00 UDC2300 Controller Product Manual... - Page 54 A2S2HL _______ HIGH FSMODE _______ A2S2EV _______ BEGN PBorGN _______ GAIN ALHYST _______ MINRPM _______ ALARM1 _______ BLOCK _______ AUXOUT _______ OPTIONS 0 PCT _______ 100 PCT _______ DIG IN _______ NONE DIG COM _______ UDC2300 Controller Product Manual 12/00...
-
Page 55: Monitoring The Controller
What’s in this section? The following topics are covered in this section. TOPIC See Page 5.2 Operator Interface 5.3 Entering A Security Code 5.4 Lockout Feature 5.5 Monitoring The Controller 12/00 UDC2300 Controller Product Manual... -
Page 56: Operator Interface
NONE. Thereafter, that selected number must be used to change the lockout level from something other than NONE. CAUTION Write the number on the Configuration Record Sheet in the configuration section so you will have a permanent record. UDC2300 Controller Product Manual 12/00... -
Page 57: Lockout Feature
This will be your security code. 5.4 Lockout Feature Introduction The lockout feature in the UDC2300 is used to inhibit changes (via keyboard) of certain functions or parameters by unauthorized personnel. Lockout levels There are different levels of Lockout depending on the level of security required. These levels are: •... - Page 58 When a key is pressed and the prompt “Key Error” appears in the lower display, it will be for one of the following reasons: • Parameter not available or locked out • Not in setup mode, press key first SET UP • Individual key locked out. UDC2300 Controller Product Manual 12/00...
-
Page 59: Monitoring Your Controller
R— RSP or LSP 2 is active The upper display is used to show other annunciator functions TUNE—Accutuning in progress RUN—SP Program in progress HOLD—SP Program on hold CSP—Controlling to the Computer Setpoint LOOPBK—Loopback Test running 12/00 UDC2300 Controller Product Manual... -
Page 60: Table 5-3 Lower Display Key Parameter Prompts
SETPOINT RAMP TIME—Time remaining in the setpoint ramp in minutes. AUXILIARY OUTPUT SP RATE SETPOINT—Current setpoint for setpoint rate applications BIAS—Displays the manual reset value for algorithm PD+MR. TO BEGIN—Resets Setpoint Program back to beginning of the program. To BGn UDC2300 Controller Product Manual 12/00... -
Page 61: Table 5-4 Error Messages
Monitoring Diagnostic Error Messages The UDC2300 performs background tests to verify data and memory integrity. If there is a malfunction, an error message will be displayed. In the case of more than one simultaneous malfunction, the messages will be displayed sequentially on the lower display. - Page 62 Monitoring UDC2300 Controller Product Manual 12/00...
-
Page 63: Operation
6.8 Fuzzy Overshoot Suppression 6.9 Using Two Sets Of Tuning Constants 6.10 Alarm Setpoints 6.11 Three Position Step Control Algorithm 6.12 Setting A Failsafe Output Value For Restart After A Power Loss 6.13 Setting Failsafe Mode 12/00 UDC2300 Controller Product Manual... -
Page 64: Single Display Functionality
6.2 Single Display Functionality Introduction A UDC2300 instrument, which has been configured with a ‘0’ for software options (i.e., DC230x-xx-x0-xx), will only have a single display capability. This means that the displayed value of PV, Setpoint, Setpoint2, Remote Setpoint, Input 2, Output, Bias, Aux Out, and Deviation will appear on the top display and a prompt identifying the value will appear on the bottom display. -
Page 65: Table 6-1 Single Display Parameters
Remote Setpoint Default selection Output Deviation Input #2 Aux Output value PD+MR bias value PIDS x Process Variable Active PID set RP xxxM Process Variable SP Ramp time left HH.MM or MM.SS Process Variable Timer display 12/00 UDC2300 Controller Product Manual... -
Page 66: Start Up Procedure For Operation
Until “A” indicator is ON. Select Automatic MAN/AUTO The controller is in Automatic mode. Mode RESET The controller will automatically adjust the output to maintain the process variable at setpoint. N/A for Single Display model. UDC2300 Controller Product Manual 12/00... -
Page 67: Control Modes
(0 % to 100 % for a time proportioning output or –5 % to 105 % for a current output). Manual not available with Single Display model. 12/00 UDC2300 Controller Product Manual... -
Page 68: What Happens When You Change Modes
If LSP tracking is not configured, the local setpoint will not be altered when the Setpoint transfer is made. 6.5 Setpoints Introduction You can configure the following setpoints for the UDC2300 controller. • A Single Local Setpoint • 2 Local Setpoints •... -
Page 69: Timer
• A TIMER FUNCTION START has been selected (KEY or AL2) • A TIMER display has been selected (Time remaining or Elapsed time) • A timer increment selected • Timer reset selected Refer to Subsection 4.4 - Timer Set Up Group for details. 12/00 UDC2300 Controller Product Manual... - Page 70 • Alarm 1 relay is inactive • The time display shows the time-out period • The time-out period can be changed at this time using the keys. • The Timer is ready to be activated UDC2300 Controller Product Manual 12/00...
-
Page 71: Accutune Ii
Operation “TUNE” (Accutune II) algortihm provides foolproof, trouble-free on-demand tuning in the UDC2300 controller. No knowledge of the process is required at start-up. The operator simply initiates the tuning while in the automatic mode. The UDC controller immediately starts controlling to the setpoint while it identifies the process, calculates the tuning constants and enters them into the Tuning group, and begins PID control with the correct tuning parameters. -
Page 72: Table 6-8 Procedure For Using Tune At Start-Up For Duplex Control
The output will cycle between 0 % and 50 % (or low output limit). “TUNE” FLASHES IN THE UPPER DISPLAY UNTIL TUNING IS COMPLETED AND FINAL COOL PARAMETERS ARE ENTERED FOR PID SET 2 IN THE TUNING GROUP. UDC2300 Controller Product Manual 12/00... -
Page 73: Table 6-9 Procedure For Accessing Accutune Error Codes
Completing Accutune When Accutune is complete, the calculated tuning parameters are stored in their proper memory location in the controller, and the controller will control at the local setpoint using the newly calculated tuning constants. 12/00 UDC2300 Controller Product Manual... -
Page 74: Fuzzy Overshoot Suppression
• automatically switched when a predetermined setpoint value is reached. Set up Procedure The following procedure (Table 6-11) to: • select two sets, • set the switch-over value, • set tuning constant value for each set. UDC2300 Controller Product Manual 12/00... -
Page 75: Table 6-11 Set Up Procedure
Upper Display = (the PV value) Lower Display = PIDS X (X= 1 or 2) To change PID SET 1 to PID SET2 or Vice Versa. [ ] [ ] You can use Accutune on each set. 12/00 UDC2300 Controller Product Manual... -
Page 76: Alarm Setpoints
MAN, RSP, AND FSAF selections do not have setpoint values. Change a value [ ] [ ] To change any alarm setpoint value in the upper display. Return to Normal DISPLAY Display UDC2300 Controller Product Manual 12/00... -
Page 77: Three Position Step Control Algorithm
Motor Position Display Table 6-14 Procedure for Displaying 3Pstep Motor Position Step Operation Press Result Access the Until you see: DISPLAY Displays Upper Display = PV Lower Display = OT (The estimated motor position in %) 12/00 UDC2300 Controller Product Manual... -
Page 78: Setting A Failsafe Output Value For Restart After A Power Loss
Lower Display = FAILSF Select a value [ ] [ ] To select a failsafe output value in the upper display Return to Normal At power up, the output will go to the value set. DISPLAY Display UDC2300 Controller Product Manual 12/00... -
Page 79: Setting Failsafe Mode
Lower Display = FSMODE Select a value [ ] [ ] To select a failsafe mode in the upper display. Return to Normal At power up, the output will go to the value set. DISPLAY Display 12/00 UDC2300 Controller Product Manual... - Page 80 Operation UDC2300 Controller Product Manual 12/00...
-
Page 81: Setpoint Rate/Ramp/Program Operation
You can start or stop the Ramp or Program using the RUN/HOLD key. What’s in this section? The following topics are covered in this section. TOPIC See Page 7.2 Setpoint Rate 7.3 Setpoint Ramp 7.4 Setpoint Ramp/Soak Programming 12/00 UDC2300 Controller Product Manual... -
Page 82: Setpoint Rate
• SP RATE and SPPROG are disabled • A Ramp Time (TIMIN) in minutes has been configured • A final setpoint value (FINLSP) has been configured. See Subsection 4.6 – Configuration group “SPRAMP” for details. UDC2300 Controller Product Manual 12/00... -
Page 83: Table 7-1 Running A Setpoint Ramp
The ramp is placed in hold at the beginning. Configure the mode at Set Up Group “CONTROL”, function prompt “PWRUP”. See Subsection 4.11 – CONTRL GROUP FUNCTION Prompts. 12/00 UDC2300 Controller Product Manual... -
Page 84: Setpoint Ramp/Soak Programming
(Figure 7-2) and fill in the information for each segment. This will give you a record of how the program was developed. Operation Refer to Table 7-3 Run/Monitor the program. Program Contents Table 7-2 lists all the program contents and a description of each. UDC2300 Controller Product Manual 12/00... -
Page 85: Table 7-2 Program Contents
(even number). Range = 2 to 12 The recycle number allows the program to recycle a specified number of times Recycle number from beginning to end. Range = 0 to 99 12/00 UDC2300 Controller Product Manual... - Page 86 • LAST = controls to last setpoint • FSAF = manual mode and failsafe output. When enabled, this selection allows you to reset the program to the beginning Reset Program to from the keyboard. Beginning UDC2300 Controller Product Manual 12/00...
- Page 87 “Program Record Sheet” (Figure 7-2) and fill in the associated information. An example of a Ramp-Soak Profile is shown in Figure 7-1. Start setpoint is at 200 degrees F. 12/00 UDC2300 Controller Product Manual...
-
Page 88: Figure 7-1 Ramp/Soak Profile Example
SG11 RP Soak SP Ramp Time 3 hr.:30 min. SG2 TI Soak Time 1 hr.:30 min. SG12 SP Soak SP SG3 RP Ramp Time 1 hr. SG12TI Soak Time 0 hr.:30 min. SG4 SP Soak SP UDC2300 Controller Product Manual 12/00... -
Page 89: Figure 7-2 Program Record Sheet
PV value SG1 RP SG10 TI Ramp Time Soak Time SG2 RP Soak SP SG11RP Ramp Time SG2 TI Soak Time SG12SP Soak SP SG3 RP Ramp Time SG12TI Soak Time SG4 SP Soak SP 12/00 UDC2300 Controller Product Manual... -
Page 90: Table 7-3 Run/Monitor Functions
Upper Display = PV value DISPLAY ramp or soak Lower Display = XXHH.MM segment number until you see Time remaining in the SEGMENT in hours and and time minutes. XX = 1 to 12 continued UDC2300 Controller Product Manual 12/00... - Page 91 Program can be placed in RUN or HOLD state through a remote dry contact connected to optional digital input terminals, as follows: RUN—contact closure places Program in RUN state, OR HOLD—contact closure places Program in HOLD state Opening contact reverts to original state. 12/00 UDC2300 Controller Product Manual...
- Page 92 Setpoint Rate/Ramp/Program Operation UDC2300 Controller Product Manual 12/00...
-
Page 93: Input Calibration
Introduction This section describes the field calibration procedures for Input 1 and Input 2. • Every UDC2300 controller contains all input actuation ranges which are fully factory- calibrated and ready for configuration to range by the user. • However, these procedures can be implemented if the factory calibration of the desired range is not within specification. -
Page 94: Minimum And Maximum Range Values
0 to682 0.000 mV 31.825 mV Nicrosil Nisil (Nic) 0 to 2372 –18 to1300 –0.461 mV 47.513 mV 0 to 3100 –18 to1704 –0.090 mV 20.281 mV 0 to 3100 –18 to1704 –0.092 mV 17.998 mV UDC2300 Controller Product Manual 12/00... -
Page 95: Preliminary Information
Tag and disconnect any field wiring connected to the input (#1 or #2) terminals on the rear of the controller. Input 2 Input 1 Connections Connections 24869 Figure 8-1 Input 1 and Input 2 Wiring Terminals 12/00 UDC2300 Controller Product Manual... -
Page 96: Table 8-2 Equipment Needed
Place current source at zero before switching ON. • Do not switch current sources OFF/ON while connected to the UDC2300 input. ATTENTION: For radiamatic inputs only, set emissivity value to 1.0. See Subsection 4.9– Configuration Set Up prompt INPUT1, function prompt EMISS. UDC2300 Controller Product Manual 12/00... -
Page 97: Input 1 Set Up Wiring
Thermocouple Source Step Action Connect the thermocouple extension wires to the terminals for Input #1 as shown in Figure 8-3. Thermocouple Source 24873 Thermocouple Extension Wire Figure 8-3 Wiring Connections for Thermocouple Inputs Using Thermocouple Source 12/00 UDC2300 Controller Product Manual... -
Page 98: Table 8-5 Set Up Wiring Procedure For Rtd Inputs
Connect the copper leads from the calibrator to the Input #1 terminals as shown in Figure 8-4. Place current source at zero before switching on. Do not switch current sources ON/OFF while connected to the UDC2300 input. Decade Resistance 24875... -
Page 99: Input 1 Calibration Procedure
Connect the copper leads from the calibrator to the Input #1 terminals as shown in Figure 8-6. Place current source at zero before switching on. Do not switch current sources ON/OFF while connected to the UDC2300 input. Volt Source 24877 Figure 8-6 Wiring Connections for 0 to 10 Volts 8.5 Input 1 Calibration Procedure... -
Page 100: Table 8-8 Input 1 Calibration Procedure (Numeric Code 10000)
100 % range values. • Wait 15 seconds, and If … Then … you are calibrating a Thermocouple input go to step 4 you are calibrating other than a go to step 5 Thermocouple input Continued next page UDC2300 Controller Product Manual 12/00... -
Page 101: Input 2 Set Up Wiring
• Make sure jumper at S201 is set for mA (position 1). See Figure 2-2 Jumper Placements. 0 – 20 mA 4 to 20 mA Source 24878 Copper Leads Figure 8-7 Wiring Connections for 4 to 20 mA Input – Input 2 12/00 UDC2300 Controller Product Manual... -
Page 102: Input 2 Calibration Procedure
• Please read Subsection 8.6 – Input 2 Set Up Wiring before beginning the procedure. • Make sure you have LOCK set to NONE. See Subsection 4.5 - Tuning Set Up Group. Continued next page UDC2300 Controller Product Manual 12/00... -
Page 103: Restore Factory Calibration
“Factory Calibration” for a given input actuation type by simply changing the actuation type to another type and then changing it back to the original type. Refer to Table 8-10 Restore Factory Calibration for procedure. 12/00 UDC2300 Controller Product Manual... -
Page 104: Table 8-10 Restore Factory Calibration
You will see: Upper Display = Original Input Selection that matches your type of sensor. Lower Display = INxTYP to return to Normal operating mode. Return to Normal DISPLAY Operation The factory calibration will be restored. UDC2300 Controller Product Manual 12/00... -
Page 105: Output Calibration
9.4 Three Position Step Control Output Calibration WARNING—SHOCK HAZARD OUTPUT CALIBRATION MAY REQUIRE ACCESS TO HAZARDOUS LIVE CIRCUITS, AND SHOULD ONLY BE PERFORMED BY QUALIFIED SERVICE PERSONNEL. MORE THAN ONE SWITCH MAY BE REQUIRED TO DE-ENERGIZE UNIT BEFORE CALIBRATION. 12/00 UDC2300 Controller Product Manual... -
Page 106: Current Proportional Output Calibration
Tag and disconnect the field wiring, at the rear of the controller, from terminals 4 (–) and 5 (+). See Figure 9-1. Connect a milliammeter across these terminals. Milliammeter 24880 Figure 9-1 Wiring Connections for Calibrating Current Proportional Output UDC2300 Controller Product Manual 12/00... - Page 107 4 mA For 4 to 20 mA Reverse Action • 0 mA For 0 to 20 mA Reverse Action Exit the The controller stores the span value. FUNCTION Calibration Mode To exit the calibration mode. DISPLAY 12/00 UDC2300 Controller Product Manual...
-
Page 108: Auxiliary Output Calibration
Tag and disconnect the field wiring, at the rear of the controller, from terminals 13 (+) and 14 (–). See Figure 9-2. Connect a milliammeter across these terminals. Milliammeter 24881 Figure 9-2 Wiring Connections for Calibrating Auxiliary Output UDC2300 Controller Product Manual 12/00... -
Page 109: Table 9-4 Auxiliary Output Calibration Procedure (Numeric Code 50000)
Lower Display = SPNVAL (50002) [ ] [ ] until the desired 100 % output is read on the milliammeter. Exit the The controller stores the span value. FUNCTION Calibration Mode To exit the calibration mode. DISPLAY 12/00 UDC2300 Controller Product Manual... -
Page 110: Three Position Step Output Calibration
Range of setting = 5 to 1800 Seconds Exit the Calibration The controller will store the 100 % value. FUNCTION Mode To exit the calibration mode. DISPLAY SET UP UDC2300 Controller Product Manual 12/00... -
Page 111: Troubleshooting/Service
10.6 Controller Failure Symptoms 10.7 Troubleshooting Procedures • Power Failure • Current Proportional Output Failure • Time Proportional Output Failure • Time/Current - Current/Time Proportional Output Failure • Alarm Relay Output Failure • Keyboard Failure 12/00 UDC2300 Controller Product Manual... -
Page 112: Troubleshooting Aids
Troubleshooting/Service Installation related problems Read the Installation section in this manual to make sure the UDC2300 has been properly installed. The installation section provides information on protection against electrical noise, connecting external equipment to the controller, and shielding and routing external wiring. -
Page 113: Table 10-1 Procedure For Identifying The Software Version
A2xx Limit Controller Lower Display = VERSON (1201) Please give this number to your service support representative. It will indicate which version of UDC2300 you have and help them determine a solution to your problem. 12/00 UDC2300 Controller Product Manual... -
Page 114: Power-Up Tests
Upper Display = NO ( 0 ) or YES ( 1 ) YES indicates a failure Lower Display = FAILSF ( 1202) FUNCTION Upper Display = PASS ( 0 ) or FAIL ( 1 ) Lower Display = TEST (1203) UDC2300 Controller Product Manual 12/00... -
Page 115: Background Tests
Troubleshooting/Service 10.5 Background Tests Introduction The UDC2300 performs ongoing background tests to verify data and memory integrity. If there is a malfunction, an error message will be displayed (blinking) in the lower display. In the case of simultaneous malfunctions, the messages will appear in sequence in the lower display. - Page 116 3. Recheck the calibration. Use a Ratio2 of 1.0 and a Bias2 of 0.0. Setpoint Program start segment 1. Check SP Program configuration, subsection SEGERR number is less than ending segment 4.6 Set up Group SPPROG function prompts number. “STRSEG” and “ENDSEG”. UDC2300 Controller Product Manual 12/00...
-
Page 117: Controller Failure Symptoms
This may lead to a different troubleshooting procedure. If the symptom still persists, refer to the installation section in this manual to ensure proper installation and proper use of the controller in your system. 12/00 UDC2300 Controller Product Manual... -
Page 118: Troubleshooting Procedures
Equipment needed You will need the following equipment in order to troubleshoot the symptoms listed in the tables that follow: • DC Milliammeter – mAdc • Calibration sources – T/C, mV, Volt, etc. • Voltmeter UDC2300 Controller Product Manual 12/00... -
Page 119: Table 10-5 Troubleshooting Power Failure Symptoms
Use a DC milliammeter at the rear terminals to verify the output. Recalibrate the Current Refer to Section 9 - Output Calibration for Proportional output. details. Change Main board. Installation instructions provided with new board. Change Controller 12/00 UDC2300 Controller Product Manual... -
Page 120: Table 10-7 Troubleshooting Time Proportional Output Failure
Observe OUT indicator on the operator interface. Contact should change state. 1E 0 % open, 100 % closed. Check relay. Change relay. Change Main board. Installation instructions supplied with the new board. UDC2300 Controller Product Manual 12/00... - Page 121 0 % to 100 % (4-20 mA). Use a DC milliammeter at the rear terminals to verify the output. Recalibrate the controller. Refer to Section 9 - Output Calibration for details. Change Main board. Installation instructions supplied with new board. 12/00 UDC2300 Controller Product Manual...
-
Page 122: Table 10-9 Troubleshooting Alarm Relay Output Failure
Check the contacts. Make sure the NO or NC contact wiring is correct. Refer to Section 2 - Installation for relay jumper placement and relay contact information. Change Main board. Installation instructions supplied with new board. UDC2300 Controller Product Manual 12/00... -
Page 123: Table 10-10 Troubleshooting A Keyboard Failure
Refer to Section 4 – Configuration. ATTENTION Using “1000” as a security code number will override the 4-digit code previously entered. Replace the display/keyboard if Installation instructions supplied any keys are not functioning. with new display/keyboard. 12/00 UDC2300 Controller Product Manual... - Page 124 Troubleshooting/Service UDC2300 Controller Product Manual 12/00...
-
Page 125: Parts List
11.1 Exploded View Introduction Figure 11-1 is an exploded view of the UDC2300 Controller. Each part is labeled with a key number. The part numbers are listed by key number in Table 11-1. Parts not shown are listed in Table 11-2. -
Page 126: Table 11-2 Parts Not Shown
Open Collector Output Printed Wiring Jumper 30756764-002 Rear Terminal Cover Kit 30756018-001 SS Relay 10 Amp (external) 30756725-501 SS Relay 1 Amp (internal) 30754465-501 0-10 Volt Input Resistor Assembly (100K pair) 30754142-003 Terminal Strip Assembly 30755306-501 Electro-mechanical Relay (5 Amp) UDC2300 Controller Product Manual 12/00... -
Page 127: Function Parameter Reference Guide
• Description, • Definition of parameter selections or range of setting Reader assumptions It is assumed that you are familiar with the operation of the UDC2300 controller, and that you have read the Configuration section - Section 4. In this section Refer to Table 12-1 for a listing of each function parameter and respective reference subsection. -
Page 128: Table 12-1 Function Parameter Look-Up Table
RN HLD 12.2.80 CT1 X3 XMITR2 12.2.110 L DISP RPUNIT 12.2.53 12.2.81 CYC2T2 or 12.2.26 LNGUAG RSPSRC 12.2.54 12.2.82 CT2 X3 D BAND 12.2.27 LOCK 12.2.55 SECUR 12.2.83 DECMAL LOOPBACK SGx RP 12.2.28 12.2.56 12.2.84 UDC2300 Controller Product Manual 12/00... -
Page 129: Function Prompts
The PID heat parameters apply when the output is greater than 50 % and the PID cool parameters apply when the output is less than 50 %. The second current output is not required for this type of duplex operation. 12/00 UDC2300 Controller Product Manual... - Page 130 Each alarm output can be configured to be Latching or Non-latching. ATTENTION When configured for latching, the alarm will stay on, after the alarm condition ends, until the RUN/HOLD key is pressed. Selections Definitions NO L Non-Latching LACH Latching UDC2300 Controller Product Manual 12/00...
- Page 131 This prompt is part of the Tuning Set up group. This selection allows you to disable/enable the key. AUTO/MANUAL “LOCK” must be set to “None” for the prompt to the displayed. Selections Definitions Disable the AUTO/MANUAL ENAB Enables the AUTO/MANUAL 12/00 UDC2300 Controller Product Manual...
- Page 132 Cannot be used with 3 Position Step Control. SETPOINT – represents the value of the setpoint in units of PV. LSP1 Local Setpoint One – Auxiliary output represents local setpoint one regarless of active setpoint. UDC2300 Controller Product Manual 12/00...
- Page 133 Select whether you want the alarm type chosen in prompt AxSxTY to alarm High or Low ATTENTION Select if Setpoint Programming is disabled or if the Alarm Type is not configured for Event On/Off. Selections Definitions HIGH High Alarm Low Alarm 12/00 UDC2300 Controller Product Manual...
- Page 134 PV to be corrected by a pre-determined amount and time, the alarm activates. For loop break alarms, the timer value may be changed only for controllers configured for On-Off control. UDC2300 Controller Product Manual 12/00...
- Page 135 Bias is used to compensate the input for drift of an input value due to deterioration of a sensor, or some other cause. Select the bias value you want on Input 2. Range of Setting: –999 to 9999 12/00 UDC2300 Controller Product Manual...
- Page 136 NOFS NO FAILSAFE —This selection does not provide input failure detection and should only be used when an absolute accuracy is the most important criteria. (For this selection, no burnout signal went to the sensor.) UDC2300 Controller Product Manual 12/00...
- Page 137 DUPLEX ON/OFF is an extension of this algorithm when the output is configured for Duplex. It allows the operation of a second ON/OFF output. There is a deadband between the operating ranges of the two inputs and an 12/00 UDC2300 Controller Product Manual...
- Page 138 The Three Position Step Control algorithm provides an output display (OUT) which is an estimated motor position since the motor is not using any feedback. Although this output indication is only an approximation, it is UDC2300 Controller Product Manual 12/00...
- Page 139 Cycle times are in either second or 1/3-second increments depending upon the configuration of RLY TY in the Output Algorithm Set Up group. Range of Setting: 1 to 120 ATTENTION If 1/3 second increments are used, 1 = .33 seconds and 120 = 40 seconds. 12/00 UDC2300 Controller Product Manual...
- Page 140 This prompt is part of the Input 1 Set up group. This selection determines where the decimal point appears in the display. Selections Definitions 8888 None 888.8 One Place 88.88 Two Places (range is only ± 99.99 UDC2300 Controller Product Manual 12/00...
- Page 141 When contact reopens, the controller starts from the Hold point of the Ramp/Program unless the Ramp/Program was not previously started via the key. RUN/HOLD This selection applies to either loop. PID2 TO PID2 – Contact closure selects PID Set 2. 12/00 UDC2300 Controller Product Manual...
- Page 142 PID action will then take over control. The transfer is bumpless. NOTE: Output Tracking does not apply to Three Position Step Control. UDC2300 Controller Product Manual 12/00...
- Page 143 The ramping (current) setpoint can be viewed as SPn in the lower display. Entering a 0 will imply an immediate change in Setpoint (i.e., no rate applies). Range of Setting: 0 to 9999 in Engineering Units per Hour 12/00 UDC2300 Controller Product Manual...
- Page 144 If the time expires before the final setpoint is reached, it will jump to the final setpoint. Range of Setting: within the setpoint limits UDC2300 Controller Product Manual 12/00...
- Page 145 Only applicable for ON-OFF control. Range of Setting: 0.0 to 100.0 % of PV (On/Off Control) 12/00 UDC2300 Controller Product Manual...
- Page 146 Range of Setting: 0.02 to 50.00 12.2.46 INCRMT (TIME COUNT INCREMENT) This prompt is part of the Timer Set Up group. This selection determines how the timer’s count will increment. Selections Definitions Counts in hours:minutes. Counts in minutes:seconds. UDC2300 Controller Product Manual 12/00...
- Page 147 Low Range display value = 0 Then 4 mA = 0 Gal/Min The control setpoint will be limited by the range of units selected here. Range of Setting: -999 to 9999 (floating) in Engineering Units 12/00 UDC2300 Controller Product Manual...
- Page 148 0-20—0 to 20 Milliamperes 4-20 4-20—4 to 20 Milliamperes 10m—0 to 10 Millivolts 50m—0 to 50 Millivolts 0-5—0 to 5 Volts 1-5—1 to 5 Volts 0-10 0-10—0 to 10 Volts 100m 100m—0 to 100 Millivolts UDC2300 Controller Product Manual 12/00...
- Page 149 Low Range display value = 0 Then 4 mA = 0 Gal/Min The control setpoint will be limited by the range of units selected here. Range of Setting: -999 to 9999 (floating) in Engineering Units 12/00 UDC2300 Controller Product Manual...
- Page 150 (LANGUAGE) This prompt is part of the Input 1 Set up group. Select what the language will be for the displays. Selections Definitions ENGL English FREN French GERM German SPAN Spanish ITAL Italian NUMB Numeric UDC2300 Controller Product Manual 12/00...
- Page 151 The UDC does not have to be connected to the RS-485 link to perform this test. If it is connected, only one UDC2300 should run the loopback test at a time. The computer should not be transmitting on the link while the loopback test is active.
- Page 152 0 % to 100 % output. RLYD TIME DUPLEX — Type of output using two SPST relays. Its normally open (NO) or normally closed (NC) contacts are wired at the rear terminals. Other prompts affected: “D BAND” and “HYST” UDC2300 Controller Product Manual 12/00...
- Page 153 This prompt is part of the Communications Set up group. PARITY pertains to the use of a self-checking code employing binary digits in which the total number of ONE's (or ZERO's) in each permissible code expression is either ODD or EVEN. 12/00 UDC2300 Controller Product Manual...
- Page 154 The selection of Prop. Band or Gain is made in the Control parameter group under prompt “PB or GN.” Range of Setting: PB 2 = 0.1 to 1000 % GAIN 2 = 0.01 to 1000 UDC2300 Controller Product Manual 12/00...
- Page 155 This prompt is part of the Setpoint Ramp/Program Set up group. The program termination state function determines the status of the controller upon completion of the program. Selections Definitions LAST Hold at last Setpoint in program FSAF Manual Mode/Failsafe Output 12/00 UDC2300 Controller Product Manual...
- Page 156 Gain, Rate, Reset, and Cycle. When the setpoint is LESS than the value set at prompt SW VAL, the controller will use Gain #2, Rate #2, Reset #2, and Cycle #2. Other prompts affected: SW VAL UDC2300 Controller Product Manual 12/00...
- Page 157 0 % or 100 % output position, whichever is selected at prompt FAILSF. For Burnout/None, when the unit goes into FAILSAFE, it will go to manual mode; motor will be driven to the configured failsafe position. 12/00 UDC2300 Controller Product Manual...
- Page 158 Defined as “COOL” Rate on Duplex models for variations of Heat/Cool applications or for a Second Set of PID constants. Range of Setting: 0.08 to 10.00 minutes 0.08 or less = OFF UDC2300 Controller Product Manual 12/00...
- Page 159 SOLID STATE RELAY—Cycle time in 1/3-second increments. This is useful for solid state relay applications that require shorter cycle times. DO NOT use this setting unless cycle times of less than 1 second are required. 12/00 UDC2300 Controller Product Manual...
- Page 160 This prompt is part of the Control Set up group. This selection determines what your Remote setpoint source will be when toggled by the key or Digital Input. FUNCTION Selections Definitions NONE NONE—No remote setpoint. INP2 INPUT 2—Remote Setpoint is Input 2. UDC2300 Controller Product Manual 12/00...
- Page 161 This prompt is part of the Setpoint Ramp/Program Set up group. A soak segment is a combination of soak setpoint (value) and a soak duration (see SGx TI). This is Segment x Soak Setpoint Value .Range of Setting: within the setpoint limits 12/00 UDC2300 Controller Product Manual...
- Page 162 This prompt is part of the Communications Set up group. The number that represents how many sample periods there will be before the controller sheds from communications. Each period equals 1/3 seconds; 0 equals No shed Range of Setting: 0 to 255 Sample Periods UDC2300 Controller Product Manual 12/00...
- Page 163 The setting must be equal to or greater than the lower range of input 1 and input 2. Input 2, when configured for remote setpoint, will be restricted to this lower limit. Range of Setting: 0 to 100 % of span input in engineering units with decimal place 12/00 UDC2300 Controller Product Manual...
- Page 164 This selection allows you to configure a specific rate of change for any local setpoint change. “SPRAMP” and “SPPROG” must be disabled Selections Definitions Disables the Setpoint Rate option. ENAB Enables the Setpoint Rate option. SP Rate parameters (EUHRUP, EUHRDN) appear when Rate is enabled. UDC2300 Controller Product Manual 12/00...
- Page 165 (PROGRAM STATE AT PROGRAM END) This prompt is part of the Setpoint Ramp/Program Set up group. The program state selection determines the program state after completion. Selections Definitions Program disabled at program end. HOLD Program held at program end. 12/00 UDC2300 Controller Product Manual...
- Page 166 12.2.104 ToBEGN (RESET PROGRAMMING TO BEGINNING) This prompt is part of the Setpoint Ramp/Program Set up group. This selection enables or disables programming reset. Selections Definitions Disables programming reset. Allows programming reset from the keyboard. UDC2300 Controller Product Manual 12/00...
- Page 167 UNITS (TEMPERATURE UNITS) This prompt is part of the Input 1 Set up group. This selection will be indicated on the annunciator—what display of temperature you want. Selections Definitions Degrees Fahrenheit Degrees Centigrade NONE None 12/00 UDC2300 Controller Product Manual...
- Page 168 T L—T Thermocouple Low W H—W5W26 Thermocouple High W L—W5W26 Thermocouple Low 100H 100H—100 Ohm RTD High 100L 100L—100 Ohm RTD Low 200—200 Ohm RTD 500—500 Ohm RTD RADH RADH—Radiamatic RH RADI RADI—Radiamatic RI LIN—Linear SrT—Square Root UDC2300 Controller Product Manual 12/00...
- Page 169 T L—T Thermocouple Low W H—W5W26 Thermocouple High W L—W5W26 Thermocouple Low 100H 100H—100 Ohm RTD High 100L 100L—100 Ohm RTD Low 200—200 Ohm RTD 500—500 Ohm RTD RADH RADH—Radiamatic RH RADI RADI—Radiamatic RI LIN—Linear SrT—Square Root 12/00 UDC2300 Controller Product Manual...
- Page 170 Function Parameter Reference Guide UDC2300 Controller Product Manual 12/00...
-
Page 171: Index
Auxiliary Output, 38 Controller Grounding, 11 AUXILIARY OUTPUT, 122 Current Duplex Range, 32 Auxiliary Output Calibration, 98 CURRENT DUPLEX RANGE, 119 Auxiliary Output Calibration Procedure, 99 Current Output, 6, 16 Current Proportional Output Calibration, 96 12/00 UDC2300 Controller Product Manual... - Page 172 INPUT 2 RATIO, 149 FAILSAFE MODE, 135 Input 2 Set Up Group, 35 Failsafe Output Value, 37 Input 2 Set Up Wiring, 91 FAILSAFE OUTPUT VALUE, 68, 134 Input 2 Type, 35 Input Calibration, 83 UDC2300 Controller Product Manual 12/00...
- Page 173 Proportional Band Units, 37 Mounting, 9 PROPORTIONAL BAND UNITS, 145 Mounting Method, 10 PV Hot Start, 71 Mounting Procedure, 10 Ramp time or rate segments, 75 Non-Latching, 69 Ramp unit, 75 Number of Program Recycles, 30 12/00 UDC2300 Controller Product Manual...
- Page 174 Set Up Wiring Procedure for Auxiliary Output, 98 Temperature Units, 33 Setpoint High Limit, 36 TEMPERATURE UNITS, 157 SETPOINT HIGH LIMIT, 153 Test Failures, 21, 104 Setpoint Low Limit, 36 Thermocouple Inputs Using a Thermocouple Source, SETPOINT LOW LIMIT, 153 UDC2300 Controller Product Manual 12/00...
- Page 175 108 Wiring Connections for RTD (Resistance Troubleshooting/Service, 101 Thermometer Device), 88 TUNE, 31, 61 Wiring Diagrams, 12 Tune for Duplex (Heat/Cool), 62 Wiring the Controller, 13 Tuning, 27 worksheet, 74 Tuning indicators, 61 12/00 UDC2300 Controller Product Manual...
- Page 176 Index UDC2300 Controller Product Manual 12/00...
- Page 179 ¦µ¦®¹¬¸ª®¸ ¦¸»¦°ª®¦¸ GR2I-6060 ¨ÎÆ ÙÌÒ ÆÕÔÛÚÈà ÙÔÚ ÏÎÒÉâÒÔÚ ÌÐÊÏÙÖÔÕÐÌÓÄÆ× ÕÔÚ ÍÆ ÑÕÔÖÔâØÊ ÒÆ ÕÖÔÏÆÐÂØÊÎ ÕÖÔØ ÞÕÎÏá ÙÖÆÚÑÆÙÎØÑá, ÆÏÔÐÔÚÍÊÄØÙÊ áÐÊ× ÙÎ× ÚÕÔÉÊÄÓÊÎ× ÆØÛÆÐÊÄÆ× ÆÚÙãÒ ÙÞÒ ÔÉÌÈÎãÒ. ¹Ô ØâÑÇÔÐÔ ÆÚÙá ÕÖÔÊÎÉÔÕÔÎÊÄ ÙÔ ÜÖÃØÙÌ ÈÎÆ ÕÎÍÆÒá ÌÐÊÏÙÖÎÏá ÏÄÒÉÚÒÔ ØÊ ÕÊÖÄÕÙÞØÌ ÊÕÆÛÃ× ÑÊ ÊÕÎÏÄÒÉÚÒÆ ÑÂÖÌ ÙÌ× ØÚØÏÊÚÃ×. µÖÔØÙÆÙÊÚÙÎÏá...
- Page 185 Offered By: Power Equipment Company 2011 Williamsburg Road Richmond, Virginia 23231 Phone (804) 236-3800 (804) 236-3882 www.peconet.com...