Fujitsu ETERNUS AF250 Setup Manual
All-flash arrays
Hide thumbs
Also See for ETERNUS AF250:
- Design manual (171 pages) ,
- User manual (423 pages) ,
- Configuration manual (171 pages)
Table of Contents
Advertisement
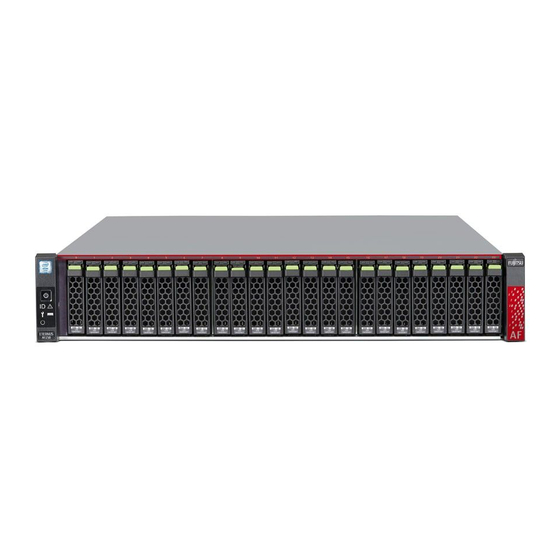
FUJITSU Storage
ETERNUS AF250 All-Flash Arrays
Preparation
STEP
An installation space and network environment must be prepared in advance.
Prepare the following manuals:
●
Manuals for the ETERNUS AF250
●
Related manuals, such as manuals for the server or the networking equipment that is used
Installation Space
Site Planning Guide
Installation space
Check that the installation area meets the space requirements of the rack in which the ETERNUS AF250 (hereafter
referred to as "ETERNUS AF") is to be installed.
Environmental considerations for installation
Check if the installation area for the ETERNUS AF meets the environmental conditions and installation environment
conditions.
Power outlets
Check the type and the number of power outlets/sockets that are required to install the ETERNUS AF.
Network Environment
Configuration Guide (Basic)
•
Configuration Guide (Web GUI)
•
Completing and attaching the Network Settings label
Write down the IP address for the ETERNUS AF on the Network Settings label and attach it inside the rack.
Settings for the PC
●
Set up the network environment
-
IP address : 192.168.1.2
-
Subnet mask : 255.255.255.0
●
Set the Web browser
Refer to "Configuration Guide (Web GUI)" for details on the settings that are required.
Setup Guide
Setup Guide
P3AG-1862-02ENZ0
Advertisement
Table of Contents

Related Manuals for Fujitsu ETERNUS AF250


Summary of Contents for Fujitsu ETERNUS AF250
- Page 1 Installation Space Site Planning Guide Installation space Check that the installation area meets the space requirements of the rack in which the ETERNUS AF250 (hereafter referred to as "ETERNUS AF") is to be installed. Environmental considerations for installation Check if the installation area for the ETERNUS AF meets the environmental conditions and installation environment conditions.
-
Page 2: Installation In A Rack
To fasten the controller enclosure Use three M5 screws to fasten the controller enclosure to the rack pillars and attach the flange cover. M5 screws Flange cover M5 screws Flange cover FUJITSU Storage ETERNUS AF250 All-Flash Arrays Setup Guide P3AG-1862-02ENZ0 Copyright 2017 FUJITSU LIMITED... - Page 3 Flange cover screws Flange cover Make sure to install or remove the controller enclosure or the drive enclosure in the rack with two or more IMPORTANT people. FUJITSU Storage ETERNUS AF250 All-Flash Arrays Setup Guide P3AG-1862-02ENZ0 Copyright 2017 FUJITSU LIMITED...
-
Page 4: Cable Connection
(for FC cable connection) (for Copper Twinax cable connection) (for Copper Twinax cable connection) Port#0 Port#1 Port#0 Port#1 iSCSI 10Gbit/s (10GBASE-T) ● iSCSI 10Gbit/s (10GBASE-T) Port#0 Port#1 FUJITSU Storage ETERNUS AF250 All-Flash Arrays Setup Guide P3AG-1862-02ENZ0 Copyright 2017 FUJITSU LIMITED... - Page 5 Plug in the connectors on which the " " symbol is printed. DI (IN) port ● Example of mini SAS HD cable connections between enclosures Drive enclosure Controller enclosure FUJITSU Storage ETERNUS AF250 All-Flash Arrays Setup Guide P3AG-1862-02ENZ0 Copyright 2017 FUJITSU LIMITED...
-
Page 6: Basic Setup
LAN cable RMT port of Controller 0 (CM #0) Controller enclosure Powering On Turn on the PC terminal and the ETERNUS AF. Power switch Drive enclosure Controller enclosure FUJITSU Storage ETERNUS AF250 All-Flash Arrays Setup Guide P3AG-1862-02ENZ0 Copyright 2017 FUJITSU LIMITED... -
Page 7: Initial Setup
ETERNUS DX Discovery function is enabled for the MNT port. Make sure to set up the network environment and disable the ETERNUS DX Discovery function. FUJITSU Storage ETERNUS AF250 All-Flash Arrays Setup Guide P3AG-1862-02ENZ0 Copyright 2017 FUJITSU LIMITED... -
Page 8: Raid Configuration Settings
Select which RAID group to use the selected drive as a Dedicated Hot Spare for and click the [Assign] button. In the confirmation screen that appears, click the [OK] button. FUJITSU Storage ETERNUS AF250 All-Flash Arrays Setup Guide P3AG-1862-02ENZ0 Copyright 2017 FUJITSU LIMITED... -
Page 9: Host Affinity Settings
(LUN group). To display the screen to add a LUN group: Click the [Connectivity] tab, click [LUN Group] in [Category], and then click [Add LUN Group] in [Action]. FUJITSU Storage ETERNUS AF250 All-Flash Arrays Setup Guide P3AG-1862-02ENZ0 Copyright 2017 FUJITSU LIMITED... -
Page 10: Monitoring Setup
After the server connection setup, confirm that the volumes in the ETERNUS AF can be recognized by the server. All necessary settings are complete, and the ETERNUS AF is now ready for normal operation. Configuration Guide (Basic) • Configuration Guide -Server Connection- • FUJITSU Storage ETERNUS AF250 All-Flash Arrays Setup Guide P3AG-1862-02ENZ0 Copyright 2017 FUJITSU LIMITED... -
Page 11: Operation And Maintenance
However, Fujitsu shall assume no responsibility for any operational problems as the result of errors, omissions, or the use of information in this manual. • Fujitsu assumes no liability for damages to third party copyrights or other rights arising from the use of any information in this manual.