
Related Manuals for Philips CE600N


Summary of Contents for Philips CE600N
- Page 1 User manual CE600N Car Audio/ Video System Register your product and get support at www.philips.com/support...
- Page 1 User manual CE600N Car Audio/ Video System Register your product and get support at www.philips.com/support...
-
Page 2: Table Of Contents
Contents Voice Control 1 Safety Answer phone calls Use the Phonebook 2 Your car entertainment system What's in the box 10 AV-IN Overview 11 Additional devices 3 Setup Connect additional devices Connect wires Mount into the dashboard 12 Sound Select the equalizer settings 4 Basics Select the channel settings Switch on or off... -
Page 3: Safety
Safety 2 Your car entertainment system Read and understand all instructions before you use the device. If damage is caused by failure to follow instructions, the warranty does not apply. What's in the box • The device is designed for negative ground (earth) 12 V DC operation Check and identify the contents of the only. -
Page 4: Overview
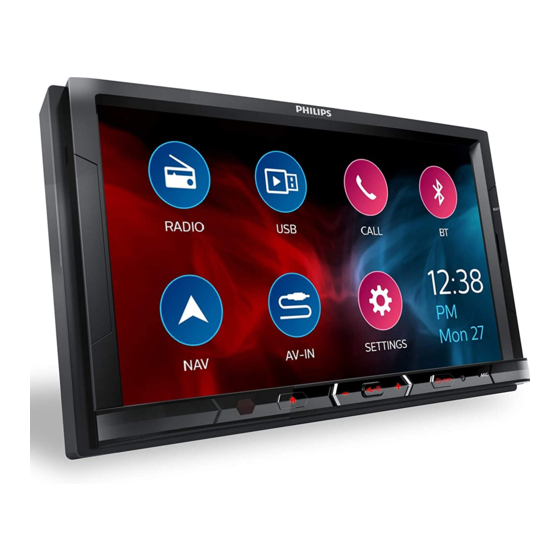
g Trim Plate Home screen h Printed materials Overview Main unit Tap the icons to select functions: • : Tune to FM/AM radio stations. • : Play music/videos from the connected USB storage device. • : Make/ answer phone calls from the connected mobile phone. -
Page 4: Overview
g Trim Plate Home screen h Printed materials Overview Main unit Tap the icons to select functions: • : Tune to FM/AM radio stations. • : Play music/videos from the connected USB storage device. • : Make/ answer phone calls from the connected mobile phone. -
Page 5: Setup
3 Setup Connect wires Note Always follow the instructions in this • chapter in sequence. Make sure that all loose leads are insulated with electrical tape. These instructions are for a typical • Consult a professional to connect wires as installation. -
Page 5: Setup
3 Setup Connect wires Note Always follow the instructions in this • chapter in sequence. Make sure that all loose leads are insulated with electrical tape. These instructions are for a typical • Consult a professional to connect wires as installation. - Page 6 ISO male Connect to Connectors External sockets connectors and sockets on or connectors rear panel Blue strip, white Amplifier relay strip control lead SWC (Steering (Black/ brown Wheel Control) Black strip Ground wire) Yellow strip The +12V car Reverse camera battery which is (Purple wire) (B+)
- Page 6 ISO male Connect to Connectors External sockets connectors and sockets on or connectors rear panel Blue strip, white Amplifier relay strip control lead SWC (Steering (Black/ brown Wheel Control) Black strip Ground wire) Yellow strip The +12V car Reverse camera battery which is (Purple wire) (B+)
- Page 7 Remark: The device supports DVR Video In function. Contact the dealer for detailed operation!
- Page 7 Remark: The device supports DVR Video In function. Contact the dealer for detailed operation!
-
Page 8: Mount Into The Dashboard
• Since the unit cannot be used if Mount into the the dashboard opening's slant dashboard angle is above 20 degrees, make sure that the horizontal slant of the car dashboard opening is Note between 0 and 20 degrees. • Make sure that wires are correctly Remove the mounting sleeve with connected before you mount the main unit... -
Page 8: Mount Into The Dashboard
Mount into the dashboard Note • The package does not include trim plate and mounting parts such as *radio mounting brackets for the reason that they are specific to car type. Before installation, consult the dealer or professional installer for the right mounting kit. •... -
Page 9: Basics
4 Basics Attach the trim plate. Switch on or off Press to switch on. • For the first-time use, follow the onscreen instructions to complete the setup. To switch off, press and hold until the screen dims. Use the touch screen Press to enter the Home screen. -
Page 9: Basics
4 Basics Install the sleeve into the dashboard and bend the tabs outward to fix the sleeve. Switch on or off Press to switch on. • For the first-time use, follow the onscreen instructions to complete the setup. To switch off, press and hold until the screen dims. -
Page 10: Set The Date And Time
5 Radio Set the date and time Press to enter the Home screen. Tap Tune in to radio stations Auto tune The first time you tune in to the radio, start On the Home screen, tap > Auto tune to search for stations. Tap FM or AM to select a band. -
Page 10: Set The Date And Time
5 Radio Set the date and time Press to enter the Home screen. Tap Tune in to radio stations Auto tune The first time you tune in to the radio, start On the Home screen, tap > Auto tune to search for stations. Tap FM or AM to select a band. -
Page 11: Play With Rds
6 Play with RDS On the play screen, tap and hold or . » You tune in to the next station from current frequency. The RDS (Radio Data System) function For fine tuning, press or operates only in areas with FM stations repeatedly. -
Page 11: Play With Rds
6 Play with RDS On the play screen, tap and hold or . » You tune in to the next station from current frequency. The RDS (Radio Data System) function For fine tuning, press or operates only in areas with FM stations repeatedly. -
Page 12: Select Alternate Frequencies
Item Program Description Item Program Description type type Politics and Oldies Music current affairs Folk Music Special Documentary information Alarm Test programs Alarm Sports Education and advanced training Radio plays and Select alternate literature frequencies Culture, religion and society If the radio signal is poor, turn on AF Science (Alternate Frequency) to search for another station with stronger signal. -
Page 13: Set Rds Clock
7 USB Note • If the currently received TA signal remains weak for over 120 seconds, the unit will On the unit, you can play the media files activate TA Seek mode automatically to seek for other stations with better TA signal. that you have stored on a USB storage device. -
Page 13: Set Rds Clock
7 USB Note • If the currently received TA signal remains weak for over 120 seconds, the unit will On the unit, you can play the media files activate TA Seek mode automatically to seek for other stations with better TA signal. that you have stored on a USB storage device. -
Page 14: Play Videos
Select play options Select view options • • / : Tap to start, pause, or resume : Tap to select an aspect play. ratio. • • : Tap to select a repeat : Tap to zoom in or out the scene. mode: To pan through the enlarged scene, •... -
Page 14: Play Videos
Select play options Select view options • • / : Tap to start, pause, or resume : Tap to select an aspect play. ratio. • • : Tap to select a repeat : Tap to zoom in or out the scene. mode: To pan through the enlarged scene, •... -
Page 15: Navigation System
Home screen. Tap > to switch on Bluetooth. On your Bluetooth device, search for and select Philips CE600N. Follow the onscreen instructions to complete Bluetooth connection. • If necessary, enter the passcode on your Bluetooth device (0000 by default). -
Page 15: Navigation System
Home screen. Tap > to switch on Bluetooth. On your Bluetooth device, search for and select Philips CE600N. Follow the onscreen instructions to complete Bluetooth connection. • If necessary, enter the passcode on your Bluetooth device (0000 by default). -
Page 16: Enjoy Music From Your Bluetooth Device
• : Tap to go to the song list. Enjoy music from your Select sound settings Bluetooth device • : Tap to select sound settings. Make phone calls Note • Keep the Bluetooth connection active between the system and your mobile phone. -
Page 16: Enjoy Music From Your Bluetooth Device
• : Tap to go to the song list. Enjoy music from your Select sound settings Bluetooth device • : Tap to select sound settings. Make phone calls Note • Keep the Bluetooth connection active between the system and your mobile phone. -
Page 17: Voice Control
To dial the last called numer the Phonebook • to display the phone book Voice Control interface. to start synchronizing the phone book with your mobile Once the smartphone and the device phone. are paired, you can use the voice »... -
Page 17: Voice Control
To dial the last called numer the Phonebook • to display the phone book Voice Control interface. to start synchronizing the phone book with your mobile Once the smartphone and the device phone. are paired, you can use the voice »... -
Page 18: Av-In
10 AV-IN 11 Additional devices On the unit, you can enjoy music/ video that plays on an external media player Through the audio/ video output on that is connected through AV cables. the unit, you can allow the audio/ video Check that you have properly play on this unit to be enjoyed through connected your media player with... -
Page 19: Sound
12 Sound Select the channel settings In Radio / Media playback mode, tap to select your sound settings. Select the equalizer settings to enter the option list of equalizer settings. to select a preset sound to enter the option list of equalizer. -
Page 19: Sound
12 Sound Select the channel settings In Radio / Media playback mode, tap to select your sound settings. Select the equalizer settings to enter the option list of equalizer settings. to select a preset sound to enter the option list of equalizer. -
Page 20: Select The Bass Settings
Select the Bass settings Select the crossover settings You can enable DBB (Dynamic Bass to switch on or off Boost) to enhance bass level. the high pass filter of front speakers. to switch on or off the to enter the option list of high pass filter of rear speakers. -
Page 21: Settings
13 Settings Screen See “Adjust the screen” on page 9. Bluetooth settings Tap to enter the options list. • Set the passcode for a Bluetooth device to connect with the unit. Press to enter the Home screen. • Set the name of the unit that is to enter the functional menu displayed on your Bluetooth device of settings... -
Page 22: Reset
14 Reset 15 Product information If the unit is not working properly or the display Power freezes, you can reset it. • Power supply: 12 V DC (11 V - 16 V), negative ground • Fuse: 15 A Operating temperature -20˚C ~ 70˚C •... -
Page 22: Reset
14 Reset 15 Product information If the unit is not working properly or the display Power freezes, you can reset it. • Power supply: 12 V DC (11 V - 16 V), negative ground • Fuse: 15 A Display • Type: LCD Touch-sensitive screen •... -
Page 23: Troubleshooting
16 Troubleshooting • Usable sensitivity - FM: 2 uV • Usable sensitivity - AM (MW): 25 uV • Output for power charging: 1 A Warning • File format: FAT16, FAT32 • Never remove the casing of this product. - Directory nesting up to a maximum of 8 levels - Number of albums/folders: maximum 99... -
Page 23: Troubleshooting
16 Troubleshooting Bluetooth • Frequency band: 2.4GH z - 2.4835GHz • Bluetooth Standard: Bluetooth V3.0 Warning Specification • Output Power: Class II (1mW,0dBm) • Never remove the casing of this product. • Compatible bluetooth profile: HFP/ A2DP/AVRCP1.5 General • Output for power charging: 1 A •... -
Page 24: Bluetooth
Preset stations are lost. the system or remove any obstacle • Battery cable is not correctly between the mobile phone and the connected. Connect the battery system. • cable to the terminal that is always Some mobile phones may connect live. -
Page 24: Bluetooth
Preset stations are lost. the system or remove any obstacle • Battery cable is not correctly between the mobile phone and the connected. Connect the battery system. • cable to the terminal that is always Some mobile phones may connect live. -
Page 25: Notice
2017 © Gibson Innovations Limited. All of packaging materials, and old rights reserved. equipment. The Philips trademark and the Disposal of your old product Philips Shield Emblem are registered trademarks of Koninklijke Philips N.V. used under license. -
Page 25: Notice
2017 © Gibson Innovations Limited. All of packaging materials, and old rights reserved. equipment. The Philips trademark and the Disposal of your old product Philips Shield Emblem are registered trademarks of Koninklijke Philips N.V. used under license. - Page 26 This product has been manufactured by, and is sold under the responsibility of Gibson Innovations Ltd., and Gibson Innovations Ltd. is the warrantor in relation to this product. The Philips trademark and the Philips Shield Emblem are registered trademarks of Koninklijke Philips N.V. used under license.
- Page 26 This product has been manufactured by, and is sold under the responsibility of Gibson Innovations Ltd., and Gibson Innovations Ltd. is the warrantor in relation to this product. The Philips trademark and the Philips Shield Emblem are registered trademarks of Koninklijke Philips N.V. used under license.