
Related Manuals for Hafco MetalMaster CS-350V


Summary of Contents for Hafco MetalMaster CS-350V
-
Page 1: Instruction Manual
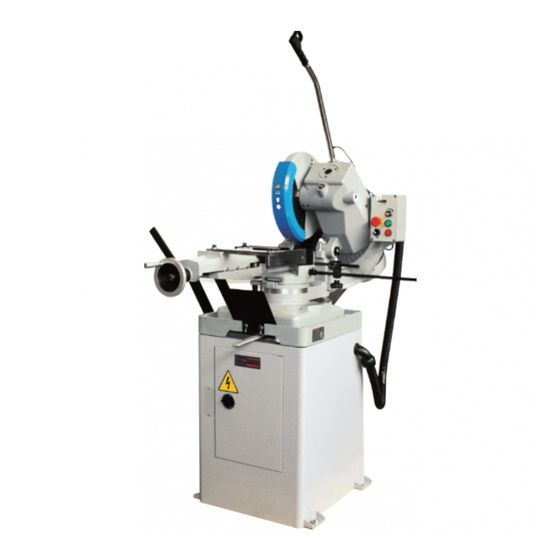
Page 1 Instruction Manual for CS-350V (S830) 03/12/2014 INSTRUCTION MANUAL CS-350V MetalMaster Cold Saw, Includes Stand (415V) 160 x 90mm S830... -
Page 2: Table Of Contents
Page 2 Instruction Manual for CS-350V (S830) 03/12/2014 Table of Contents 8.1 Disk Head ........10 1 SAFETY REGULATIONS ......2 1.1 General Safety Advice ...... 2 8.2 Adjusting the Mitering Lock Lever ... 10 1.2 Blade Guard Safety ......2 8.3 Changing the Disk ...... -
Page 3: Safety Regulations
Page 3 Instruction Manual for CS-350V (S830) 03/12/2014 This machine complies with the national and local accident prevention regulations. Improper use and/or tampering of the machine will relieve the manufacturer of all responsibility. 1.1 General Safety Advice Always wear suitable eye protection. ... -
Page 4: Technical Characteristics
Page 4 Instruction Manual for CS-350V (S830) 03/12/2014 3.1 General Characteristics Cutting Capacity 105 x 105mm 160 x 90mm 0 ْ ◌ 85mm 3.5” 120mm 4.7” 4” x 4” 6.3” x 3.5” 85x 85mm 85 x 70mm 45 ْ◌ 75mm 3” 100mm 4”... -
Page 5: Machine Base
Page 5 Instruction Manual for CS-350V (S830) 03/12/2014 5.2 Machine Base A heavy cast iron structure that supports the miter system, vise system, and head assembly. 5.3 Vice clamping system that provides the basic support and security for the work material. Operations are conducted by hand-wheel, which opens and closes the vise jaws. -
Page 6: Getting Started
Page 6 Instruction Manual for CS-350V (S830) 03/12/2014 Make sure that the electrical supply and the machine’s voltage are the same. Refer to the identification plate on the motor for the correct voltage. Use a good quality grounded electrical system. ... - Page 7 Page 7 Instruction Manual for CS-350V (S830) 03/12/2014 The machine has been fixed on the stand already to use. Giving the picture by appearing the foxing points for reference. Align the four setscrews (G) on the underside of the machine base to their corresponding holes in the stand.
- Page 8 Page 8 Instruction Manual for CS-350V (S830) 03/12/2014 Attach the bar stop to the vise. Insert the thread end of the long rod (R) into the side of the vise. Turn the long rod clockwise until snug. Use a hex wrench 5mm to lock the screw M12x10 (Q) on the sleeve counter-clockwise, so that bar stop unit is secure.
-
Page 9: Electrical Connection Of The Machine
Page 9 Page 9 Instruction Manual for CS-350V (S829) Instruction Manual for CS-350V (S830) 03/12/2014 03/12/2014 6.4 Electrical Connection of the Machine Make sure whether the voltage of the acquired machine is 220V/ 1 phase or (220V,380V,400,440V)/ 3 phase prior to connection. -
Page 10: Deactivating The Machine
Page 10 Instruction Manual for CS-350V (S830) 03/12/2014 7.3 Deactivating the Machine If the machine is to be inactive for a long period, prepare the machine as follows: Detach the plug from the electric supply panel Release the head return spring ... -
Page 11: Adjusting The Machine
Page 11 Instruction Manual for CS-350V (S830) 03/12/2014 BEFORE PERFORMING THE FOLLOWING OPERATIONS, THE ELECTRIC POWER SUPPLY AND THE POWER CABLE MUST BE COMPLETELY DISCONNECTED. 8.1 Disk Head If excessive axial play is found on the hinge, it will be sufficient to tighten the screws. Pay attention and avoid making the joint too tight. -
Page 12: Troubleshooting The Inverter
Page 12 Instruction Manual for CS-350V (S830) 03/12/2014 8.5 Troubleshooting the inverter Troubleshooting the inverter Prior to operating all electronic parts, the following aspects should be taken into consideration first Note: Only eligible and qualified personnel can make electronic adjustments. Disconnect machine from power supply. - Page 13 Page 13 Instruction Manual for CS-350V (S830) 03/12/2014...
- Page 14 Page 14 Instruction Manual for CS-350V (S830) 03/12/2014...
-
Page 15: The Operation Cycle
Page 15 Instruction Manual for CS-350V (S830) 03/12/2014 Before operating all the main parts of the machine must be set to optimum conditions (see the chapter on “regulating the machine”) 9.1 Miter Angle Use the miter lock lever (A) to release the disk head assembly. ... -
Page 16: Loading The Work-Piece
Page 16 Instruction Manual for CS-350V (S830) 03/12/2014 9.3 Loading the Work-piece Use the vise hand-wheel to open the vise wider than the width of the work-piece. Measure and mark off the length of material desired to be cut-off. ... -
Page 17: Routine And Special Maintenance
Page 17 Instruction Manual for CS-350V (S830) 03/12/2014 Set the coolant switch (B). Grasp the control handle (G). Press the trigger switch (F) to start. Pull down the control handle (G). Apply a steady and constant pressure. ... -
Page 18: Monthly Maintenance
Page 18 Instruction Manual for CS-350V (S830) 03/12/2014 10.3 Monthly Maintenance Check that all screws on the motor, the pump, the vise jaws, and the guard are tight and secure. Check that the guard is free from defect. Grease the hinge pin for the head assembly. 10.4 Six-Monthly Maintenance Change the oil in the reduction unit using oil type DN SUPER GEAR 460 by IDEMITSU or DAPHON or equivalent oil, proceeding as follows:... -
Page 19: Troubleshootion
Page 19 Instruction Manual for CS-350V (S830) 03/12/2014 This chapter lists the probable faults and malfunctions that could occur while the machine is being used and suggests possible remedies for solving them. The first paragraph provides diagnosis for TOOLS and CUTS, the second for ELECTRICAL COMPONENTS. - Page 20 Page 20 Instruction Manual for CS-350V (S830) 03/12/2014 FAULT PROBABLE CAUSE REMEDY CHIPPED DISK Hardness, shape or flaws in the material Reduce the cutting pressure and/or the (oxides, inclusions, lack of homogeneity, advance. etc…) Wrong cutting speed. Change disk speed and/or diameter. See Chapter ”Material classification and choice of disks”...
- Page 21 Page 21 Instruction Manual for CS-350V (S830) 03/12/2014 FAULT PROBABLE CAUSE REMEDY CUT OFF THE Too fast advance. Decrease advance, exerting less cutting pressure. STRAIGHT Ineffective gripping of the part in the vise. Check the gripping of the part which may Disk head off the straight.
-
Page 22: Wiring Diaram And Parts List . 21 12.1 Wiring Diaram
Page 22 Instruction Manual for CS-350V (S830) 03/12/2014... -
Page 23: Parts List
Page 23 Instruction Manual for CS-350V (S830) 03/12/2014 12.2 PARTS LIST Item Description and Technical Suppliers Quantity Supplier Remarks name function data reference 30x6.2mm 250V Fuses 0.5A BOSSING JMC-63 0.5A ROHS Fuses base 10A 1P CHIA WEI FSB-104 AC 24V KR 1 250VAC Relay... - Page 24 Page 24 Instruction Manual for CS-350V (S830) 03/12/2014 12.3 Explosion draw...
- Page 25 Page 25 Instruction Manual for CS-350V (S830) 03/12/2014 12.4 Parts List- Part A Index Index Description Size Q'TY Description Size Q'TY Lock handle Vise bench Lock Nut Hex socket cap screw M5x25 Hex socket cap screw Small grooved jaw Hex socket cap screw M8x25 Grooved jaw Washer 5/16"...
- Page 26 Page 26 Instruction Manual for CS-350V (S830) 03/12/2014 12.5 Parts List- Part A Index NO. Description Size Q'TY Index NO. Description Size Q'TY Lower length setting Taper roller 32008 A112 Spindle sleeve A113 Lock bolt with knob Star washer A114 Locking nut Locking nut A115...
- Page 27 Page 27 Instruction Manual for CS-350V (S830) 03/12/2014 12.6 Explosion draw...
- Page 28 Page 28 Instruction Manual for CS-350V (S830) 03/12/2014 12.7 Parts List- Part B Index NO. Description Size Q'TY Index NO. Description Size Q'TY Stand, Hex cap screw M6x15 Washer 1/4" Washer 1/4" Suppot plate for tank Suppot plate Protector, plate Washer 1/4"...