Table of Contents
Advertisement
Advertisement
Table of Contents

Related Manuals for Honeywell V2.X


Summary of Contents for Honeywell V2.X
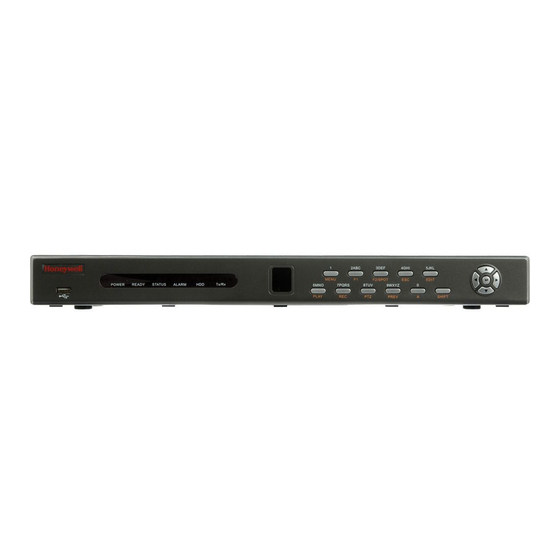
- Page 1 DVR Installation Manual V2.X HRGX Series DVR’s...
-
Page 2: Table Of Contents
MOTION DETECTION SETUP ............................23 CONFIGURE I-VIEW NOW ENTRY DELAYS ......................23 TEST SETTINGS ................................24 Picture Clarity ....................................24 APPENDIX A – REQUIRED PARAMETERS ....................... 25 Honeywell HRGX Series Installation Guide rev 2.X I-View Now, LLC. All Rights Reserved. © 2014 Page 2... -
Page 3: Workflow
9. Trouble Shooting: This section is provided to help the technician troubleshoot common problems encountered while installing HRG series DVR’s Honeywell HRGX Series Installation Guide rev 2.X I-View Now, LLC. All Rights Reserved. © 2014 Page 3... -
Page 4: Installation Worksheet
DVR unit. The mouse must be plugged in before the DVR is turned on, or the DVR will not recognize it. User Name: admin Password: 12345 VGA Cable USB Mouse VGA Port Honeywell HRGX Series Installation Guide rev 2.X I-View Now, LLC. All Rights Reserved. © 2014 Page 4... -
Page 5: Network Setup (Upnp)
Right click on the screen and select “Menu” from the list. Click in the password box and use the virtual keyboard to enter the password. Click on “Enter” when complete and then click “OK”. Honeywell HRGX Series Installation Guide rev 2.X I-View Now, LLC. All Rights Reserved. © 2014... - Page 6 After clicking on “Network”, the sub-menus will show at the top of the screen. The second to the last option says “UPnP”. Click on this menu item. Honeywell HRGX Series Installation Guide rev 2.X I-View Now, LLC. All Rights Reserved. © 2014...
- Page 7 8. UPnP Reporting is now enable and the DVR will begin reporting its IP address and ports to the I-View Now Server. The initial reporting could take up to 5 minutes and can only be tested after completing the SMTP configuration section. Honeywell HRGX Series Installation Guide rev 2.X I-View Now, LLC. All Rights Reserved. © 2014 Page 7...
-
Page 8: Network Setup (Non - Upnp)
Right click on the screen and select “Menu” from the list. Click in the password box and use the virtual keyboard to enter the password. Click on “Enter” when complete. After logging into the system, the main menu will appear. Honeywell HRGX Series Installation Guide rev 2.X I-View Now, LLC. All Rights Reserved. © 2014 Page 8... - Page 9 After clicking on “Network”, the submenus will show at the top of the screen. The first sub-menu item says “General”. Click on this menu item. Honeywell HRGX Series Installation Guide rev 2.X I-View Now, LLC. All Rights Reserved. © 2014...
- Page 10 5. Set HTTP Port to 8001 6. Set the RTSP Port to 8002 7. Click “Apply” at the bottom right of the screen. Honeywell HRGX Series Installation Guide rev 2.X I-View Now, LLC. All Rights Reserved. © 2014 Page 10...
-
Page 11: Dynamic Ip Address
Dynamic IP Address – Optional SKIP THIS SECTION IF UPnP IS ENABLED OR IF THE IP ADDRESS IS STATIC This section describes how to configure Honeywell’s DDNS Service and will be required if the site does not have a static external IP address. ... -
Page 12: Router Settings & Port Forwarding
For information on how to port forward, see Appendix A. Note: Any ports used must be unblocked in any firewall devices (typically just the router). Honeywell HRGX Series Installation Guide rev 2.X I-View Now, LLC. All Rights Reserved. © 2014... -
Page 13: Smtp Settings
Special characters such as the @ symbol can be accessed by the clicking on the special characters virtual key. 1. Click on Special characters key 2. Scroll to the right until finding the @ symbol. Click on symbol to insert it. Honeywell HRGX Series Installation Guide rev 2.X I-View Now, LLC. All Rights Reserved. © 2014 Page 13... -
Page 14: User Settings
I-View Now Suggests not using the default password. Additional Users can be configured with the System Settings Menu add button. User Settings Honeywell HRGX Series Installation Guide rev 2.X I-View Now, LLC. All Rights Reserved. © 2014 Page 14... -
Page 15: Recording Setup
For the HRG to send clips to I-View Now, the recording parameters must be configured. To access the recording parameters, go to the main menu and select “Record”. Configuration details for both event based recording and scheduled recording are detailed next. Honeywell HRGX Series Installation Guide rev 2.X I-View Now, LLC. All Rights Reserved. © 2014 Page 15... -
Page 16: Scheduled Recording Mode
3. Note that the day is Mon. This is fine for now as we will copy this to all days. 4. Check “All Day” 5. Under “Type” next to “All Day”, select “Motion|Alarm”. Honeywell HRGX Series Installation Guide rev 2.X I-View Now, LLC. All Rights Reserved. © 2014 Page 16... - Page 17 6. Click “Apply” 7. Click “Copy” and apply to all days. 8. Click “Apply” and then click “OK”. Honeywell HRGX Series Installation Guide rev 2.X I-View Now, LLC. All Rights Reserved. © 2014 Page 17...
- Page 18 3. Select “OK” in the dialog box 4. Select “Apply” from the main Schedule menu. 5. All cameras have been scheduled for all days Honeywell HRGX Series Installation Guide rev 2.X I-View Now, LLC. All Rights Reserved. © 2014 Page 18...
-
Page 19: Event Recording Mode
3. Bitrate Type to Variable 4. Video Quality to Medium 5. Frame Rate to 15fps 6. Max Bitrate Mode to General 7. Max Bitrate(Kbps) to 512 Honeywell HRGX Series Installation Guide rev 2.X I-View Now, LLC. All Rights Reserved. © 2014 Page 19... - Page 20 7. Max Bitrate (Kbps) to 128 (4 & 8 channel) and 192 (16 channel). 8. Click Apply 9. Using the Copy button, copy this configuration to all cameras. Honeywell HRGX Series Installation Guide rev 2.X I-View Now, LLC. All Rights Reserved. © 2014 Page 20...
-
Page 21: Alarm Input Setup
Once returned back to the main Alarm Input menu, use the Copy function to copy these parameters to all cameras. The same alarm inputs must be configured in the I-View Now Central Station Portal. Honeywell HRGX Series Installation Guide rev 2.X I-View Now, LLC. All Rights Reserved. © 2014... - Page 22 2. Select the “Trigger Channel” submenu 3. Select the all of the channels by clicking in the box next to Analog 4. Click OK Honeywell HRGX Series Installation Guide rev 2.X I-View Now, LLC. All Rights Reserved. © 2014 Page 22...
-
Page 23: Motion Detection Setup
Configure I-View Now Entry Delays Entry Delays are configurable through the I-View Now Dealer Portal. Log in to configure. Honeywell HRGX Series Installation Guide rev 2.X I-View Now, LLC. All Rights Reserved. © 2014 Page 23... -
Page 24: Test Settings
DVR. The substream should be set to CIF with a frame rate of 6. This will provide higher quality frames at a reduced rate. Honeywell HRGX Series Installation Guide rev 2.X I-View Now, LLC. All Rights Reserved. © 2014... -
Page 25: Appendix A - Required Parameters
Directions for port forwarding can be found by following the link called “Port Forwarding Manuals” at the bottom of the page on IPAlarmtools.com. Honeywell HRGX Series Installation Guide rev 2.X I-View Now, LLC. All Rights Reserved. © 2014 Page 25...