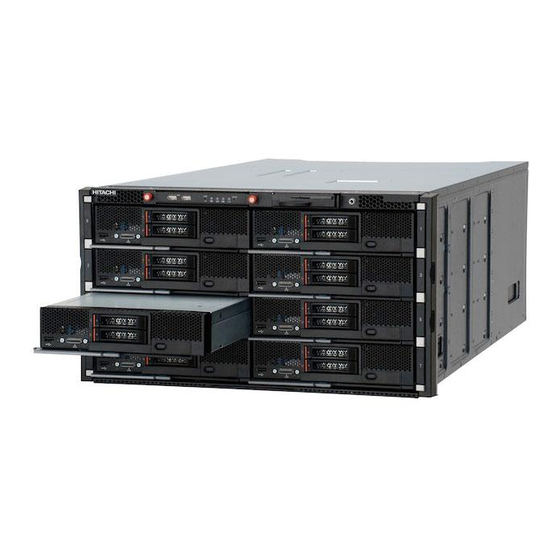
Hitachi compute blade 500 series Getting Started Manual
Hide thumbs
Also See for compute blade 500 series:
- User manual (506 pages) ,
- Management module setup manual (362 pages) ,
- Web console users manual (240 pages)

Related Manuals for Hitachi compute blade 500 series


Summary of Contents for Hitachi compute blade 500 series
-
Page 1: Getting Started Guide
Hitachi Compute Blade 500 Series Getting Started Guide Document Organization Product Version Getting Help Contents MK-91CB500002-06... - Page 2 Hitachi, Ltd. Hitachi, Ltd., reserves the right to make changes to this document at any time without notice and assumes no responsibility for its use. This document contains the most current information available at the time of publication.
-
Page 3: Table Of Contents
Items to prepare ahead of installation..............1-2 System Console....................1-2 LAN cable......................1-2 2 Initial setup..................2-1 Overview........................2-2 System console configuration...................2-2 Network settings....................2-3 Browser settings....................2-3 LAN cable connection..................2-3 Management module configuration................2-4 Initial setting procedure..................2-4 Login....................... 2-4 Hitachi Compute Blade 500 Series Getting Started Guide... - Page 4 Network information settings................2-9 Logout......................2-11 Switch module configuration.................. 2-13 Brocade 10 Gb/sec DCB switch module initial configuration........2-31 3 Powering on/off system unit..............3-1 Powering on system unit..................3-2 Powering off system unit..................3-2 Hitachi Compute Blade 500 Series Getting Started Guide...
-
Page 5: Preface
This document provides site planning information for Compute Blade. Please read this document carefully, and maintain a copy for reference. Notice: The use of Compute Blade 500 series and all other Hitachi Data Systems products is governed by the terms of your agreement(s) with Hitachi Data Systems. -
Page 6: Safety Information
Example label 3: Unplug Power Cable Icons represented by indicate required actions. A graphic that indicates the required action, such as Unplug Power Cable, is placed inside . Note that indicates a general, required action. Preface Hitachi Compute Blade 500 Series Getting Started Guide... -
Page 7: Common Precautions Concerning Safety
Do not continuously subject the power cables to ultraviolet or strong ¢ visible light. Do not use damaged power cables. ¢ Do not use the power cables in a high-temperature environment. ¢ Preface Hitachi Compute Blade 500 Series Getting Started Guide... - Page 8 Abnormal heat, smoke, abnormal noise, or abnormal odors If anything abnormal occurs, turn off the power and unplug all the equipment power cables (a maximum of 4) from the electrical outlets. viii Preface Hitachi Compute Blade 500 Series Getting Started Guide...
- Page 9 Do not install the product in a place with weak floors or walls. Do not subject the product to excessive vibration. Dropping the ¢ product or allowing it to fall over might cause an equipment failure. Installing the unit in a rack Preface Hitachi Compute Blade 500 Series Getting Started Guide...
- Page 10 If the batteries are stored without insulation, the terminals can contact each other to cause a short circuit and overheat or burst, leading to injury or fire. Insertion of foreign objects into the equipment Preface Hitachi Compute Blade 500 Series Getting Started Guide...
- Page 11 When you install the equipment next to another electronic device, the radio waves might interfere with each other. In particular, noise might be observed in nearby television sets or radios. Strong magnetism generator Preface Hitachi Compute Blade 500 Series Getting Started Guide...
- Page 12 If you are using an OS that requires a shutdown procedure, always ¢ finish the shutdown procedure, and then turn off the power. If you turn off the power before the shutdown is complete, data might be lost. Preface Hitachi Compute Blade 500 Series Getting Started Guide...
-
Page 13: Intended Audience
The reader has a background in hardware installation of computer systems. • The reader is familiar with the location where the Compute Blade will be installed, including knowledge of physical characteristics, power systems and specifications, and environmental specifications. xiii Preface Hitachi Compute Blade 500 Series Getting Started Guide... -
Page 14: Product Version
The term "Compute Blade" refers to all the models of the Compute Blade, unless otherwise noted. This document uses the following typographic conventions: Convention Description Regular text bold In text: keyboard key, parameter name, property name, hardware labels, hardware button, hardware switch. Preface Hitachi Compute Blade 500 Series Getting Started Guide... -
Page 15: Convention For Storage Capacity Values
1 gigabyte (GB) 1,000 MB or 1,000 bytes 1 terabyte (TB) 1,000 GB or 1,000 bytes 1 petabyte (PB) 1,000 TB or 1,000 bytes 1 exabyte (EB) 1,000 PB or 1,000 bytes Preface Hitachi Compute Blade 500 Series Getting Started Guide... -
Page 16: Getting Help
Getting help The Hitachi Data Systems customer support staff is available 24 hours a day, seven days a week. If you need technical support, log on to the Hitachi Data Systems Portal for contact information:https://portal.hds.com. Comments Please send us your comments on this document: doc.comments@hds.com. -
Page 17: Safety Guidelines
Safety guidelines This section contains warnings and important safety guidelines for using a Hitachi Compute Blade System. Read and understand the information in this section before removing, replacing, and installing system components. □ Safety and warning labels xvii Safety guidelines... -
Page 18: Safety And Warning Labels
The location and content of the safety and warning labels on the server chassis are shown here. Server blade The following figures show the location and content of the safety and warning label on the server blade. xviii Safety guidelines Hitachi Compute Blade 500 Series Getting Started Guide... - Page 19 Half-wide blade / Full-wide blade The following shows the location and content of the safety and warning label on the storage expansion blade. Safety guidelines Hitachi Compute Blade 500 Series Getting Started Guide...
- Page 20 Storage Expansion blade The following shows the location and content of the safety and warning label on the CB 520X server blade. Safety guidelines Hitachi Compute Blade 500 Series Getting Started Guide...
- Page 21 520X model Safety guidelines Hitachi Compute Blade 500 Series Getting Started Guide...
- Page 22 Safety guidelines Hitachi Compute Blade 500 Series Getting Started Guide...
-
Page 23: Preparing For Installation
Preparing for installation This chapter describes preparing for the installation of the Compute Blade. □ Items to prepare ahead of installation Preparing for installation Hitachi Compute Blade 500 Series Getting Started Guide... -
Page 24: Items To Prepare Ahead Of Installation
Terminal emulator Terminal software that supports SSH V2. Display Minimum: 1024 x 768resolution Recommended: 1280 x 1024 resolution or higher LAN cable A UTP Category 5 or better Ethernet cable Preparing for installation Hitachi Compute Blade 500 Series Getting Started Guide... -
Page 25: Initial Setup
Initial setup This chapter describes setting up the Compute Blade before use. □ Overview □ System console configuration □ Management module configuration □ Switch module configuration Initial setup Hitachi Compute Blade 500 Series Getting Started Guide... -
Page 26: Overview
This chapter describes the required settings and connections for the system console. Initial setup Hitachi Compute Blade 500 Series Getting Started Guide... -
Page 27: Network Settings
Management module configuration on page 2-4. • When not connecting to a management network: Connect the LAN port of the system console to the management LAN port #0(MGMT0) of the management module directly. Initial setup Hitachi Compute Blade 500 Series Getting Started Guide... -
Page 28: Management Module Configuration
Start a new web browser from the system console. Enter the URL of management module web console (enter "https:// 192.168.0.1/" when factory default setting) into the address field box of the browser. Initial setup Hitachi Compute Blade 500 Series Getting Started Guide... - Page 29 IP address>:< port number> or https://< IP address>:< port number> • The default port number: - http: 80 - https: 443 The login dialog box will be displayed when connected successfully. Initial setup Hitachi Compute Blade 500 Series Getting Started Guide...
-
Page 30: Changing Password
4 Application area Displays details of module or tree that is selected in the navigation area. Changing password Change the system administrator's password from the factory default setting. Click Administration tab > User Account > administrator (as user ID) > Edit. Initial setup Hitachi Compute Blade 500 Series Getting Started Guide... -
Page 31: Chassis Id Code Settings
Chassis ID code settings The system chassis ID code (Chassis ID) is used to identify the system chassis.The factory default value of the chassis ID is the system chassis serial Initial setup Hitachi Compute Blade 500 Series Getting Started Guide... - Page 32 You can use the default value, but Hitachi recommends that you change the chassis ID to suit to your environment. Make sure that the chassis ID of every system chassis is unique. Click Resources tab > Chassis. Click Settings tab, and then click Edit Chassis ID.
-
Page 33: Network Information Settings
The procedure for setting up IPv4 addresses is described below. To set up IPv6 addresses, perform the same procedure in the IPv6 Address tab. Click Resources tab > Systems > Management LAN. Initial setup Hitachi Compute Blade 500 Series Getting Started Guide... - Page 34 The Edit IP Address dialog box is displayed. Enter the IP address, subnet masks,and default gateway for the management module in the Edit IP Address dialog box. Then click Confirm. 2-10 Initial setup Hitachi Compute Blade 500 Series Getting Started Guide...
-
Page 35: Logout
Web console. Connect the Web console again with the changed IP address. Logout Click Logout in the upper right corner of the web console dialog box. 2-11 Initial setup Hitachi Compute Blade 500 Series Getting Started Guide... - Page 36 Click OK in the logout dialog box. Once the login dialog box is displayed after logout, you may close the browser dialog box. 2-12 Initial setup Hitachi Compute Blade 500 Series Getting Started Guide...
-
Page 37: Switch Module Configuration
Set the management LAN port. • Password changing Change the password of administrator (admin). • New user ID creation Create the new user ID. This subsection describes initial setting procedures. 2-13 Initial setup Hitachi Compute Blade 500 Series Getting Started Guide... - Page 38 Login on page 2-4 Initial setting procedure on page 2-4 Management module configuration on page 2-4. The Web console menu is displayed after login, and then click Resources tab. Click Systems tab. 2-14 Initial setup Hitachi Compute Blade 500 Series Getting Started Guide...
- Page 39 Click Network tab. Click Management LAN. 2-15 Initial setup Hitachi Compute Blade 500 Series Getting Started Guide...
- Page 40 Click IP address tab > Edit. Slide the scroll bar of IP address setting dialog box for displaying the information of "switch module 0". 2-16 Initial setup Hitachi Compute Blade 500 Series Getting Started Guide...
- Page 41 Click ▼ mark in the connection type of switch module 0, and then select Management LAN network (using management module setting). Enter IP address, subnet mask, and default gateway of switch module 0. 2-17 Initial setup Hitachi Compute Blade 500 Series Getting Started Guide...
- Page 42 Directly log in to the console of the internal LAN switch module and then set the default gateway. Uncheck Not apply this Default Gateway setting to the LAN switch module if it is checked. 2-18 Initial setup Hitachi Compute Blade 500 Series Getting Started Guide...
- Page 43 Tip: For management module firmware version A0125 or earlier, this item, Not apply this Default Gateway setting to the LAN switch module, is not displayed. Go to the next step. Click Confirm. 2-19 Initial setup Hitachi Compute Blade 500 Series Getting Started Guide...
- Page 44 IP address. If a message indicating the failure appears, wait for about a minute and then click Confirm again. The confirmation dialog box is displayed. Confirm IP address, subnet mask, and default gateway of switch module 0, and then click OK. 2-20 Initial setup Hitachi Compute Blade 500 Series Getting Started Guide...
- Page 45 Table 2-4 Factory default setting for the system administrator Item Factory default setting User ID operator Password (not set) Input <operator> as the user ID, and then press Enter. 2-21 Initial setup Hitachi Compute Blade 500 Series Getting Started Guide...
- Page 46 Set a password to the new user ID. Input <new password>, and then press Enter. Input <new password> again, and then press Enter. Go back to normal user mode, input disable, and then press Enter. 2-22 Initial setup Hitachi Compute Blade 500 Series Getting Started Guide...
- Page 47 Input <newuser ID>, and then press Enter. Input the defined <password>, and then press Enter. Confirm the following whether the login was successful. Input logout, and then press Enter. 2-23 Initial setup Hitachi Compute Blade 500 Series Getting Started Guide...
- Page 48 Input enable, and then press Enter. Add a new user ID. Input adduser <yyyyyyyy>, and then press Enter. Set a password to the user ID. Input <new password>, and then press Enter. 2-24 Initial setup Hitachi Compute Blade 500 Series Getting Started Guide...
- Page 49 Input <new password> again for confirmation, and then press Enter. Go back to user mode, input disable, and then press Enter. Input logout, and then press Enter. 2-25 Initial setup Hitachi Compute Blade 500 Series Getting Started Guide...
- Page 50 URL corresponding to the new settings. • The format of URL is as below: http://< IP address>:< port number> or https://< IP address>:< port number> • The default port number: - http: 80 2-26 Initial setup Hitachi Compute Blade 500 Series Getting Started Guide...
- Page 51 Table 2-6 Factory default account settings for the system administrator Item Factory default User ID administrator Password password The following Web console menu will be displayed when the login is successful. 2-27 Initial setup Hitachi Compute Blade 500 Series Getting Started Guide...
- Page 52 Select Modules from the menu tree of Resource tab and click Switch modules > Switch module x. Click Action on the top right and select Authentication settings from the pull down menu. 2-28 Initial setup Hitachi Compute Blade 500 Series Getting Started Guide...
- Page 53 User ID creation on page 2-22. Start a terminal emulator to the switch module from the system console. Input <newuser>, and then press Enter. Input <new password>, and then press Enter. 2-29 Initial setup Hitachi Compute Blade 500 Series Getting Started Guide...
- Page 54 Delete the default user ID <operator>. Input rmuser operator, and then press Enter. Enter the <y> key when <Delete user'operator'? (y/n):> is displayed. Go back to user mode, input disable, and then press Enter. 2-30 Initial setup Hitachi Compute Blade 500 Series Getting Started Guide...
-
Page 55: Brocade 10 Gb/Sec Dcb Switch Module Initial Configuration
Input <user ID> and <password> in the following Table to login. Table 2-7 Factory default setting for the system administrator Item Factory default setting User ID admin Password password 2-31 Initial setup Hitachi Compute Blade 500 Series Getting Started Guide... - Page 56 IP address configured at Management LAN port configuration on page 2-14. The system administrator's user ID and password have factory default values. Input the following user ID and password to login. 2-32 Initial setup Hitachi Compute Blade 500 Series Getting Started Guide...
- Page 57 Change the system administrator password, input <old password>, and then press Enter. Input <new password>, and then press Enter. Input <new password> again for confirmation, and then press Enter. 2-33 Initial setup Hitachi Compute Blade 500 Series Getting Started Guide...
- Page 58 Input <new password>, and then press Enter. Input <new password> again, and then press Enter. Logout Input exit, and then press Enter. User ID confirmation Confirm whether <newuser ID> has been created correctly. 2-34 Initial setup Hitachi Compute Blade 500 Series Getting Started Guide...
- Page 59 Input <newuser ID> in the Login prompt, and then press Enter. Input <password>, and then press Enter. Confirm whether the login was successful. Input logout, and then press Enter. 2-35 Initial setup Hitachi Compute Blade 500 Series Getting Started Guide...
- Page 60 2-36 Initial setup Hitachi Compute Blade 500 Series Getting Started Guide...
-
Page 61: Powering On/Off System Unit
Powering on/off system unit This chapter describes procedures to power on/off the system unit. □ Powering on system unit □ Powering off system unit Powering on/off system unit Hitachi Compute Blade 500 Series Getting Started Guide... -
Page 62: Powering On System Unit
Click Resources tab > Chassis. The following dialog box will be displayed, and then click Action > ▼ > Shutdown. The confirmation dialog box is displayed, and then click OK. Powering on/off system unit Hitachi Compute Blade 500 Series Getting Started Guide... - Page 63 Disconnect the system unit from the power source. Tip: Reconnect the power cable into the outlet when using the system unit again. The Management module and switch module will be turned on automatically. Powering on/off system unit Hitachi Compute Blade 500 Series Getting Started Guide...
- Page 64 Powering on/off system unit Hitachi Compute Blade 500 Series Getting Started Guide...
- Page 65 Hitachi Compute Blade 500 Series Getting Started Guide...
- Page 66 Hitachi Data Systems Corporate Headquarters 2845 Lafayette Street Santa Clara, California 95050-2639 U.S.A. www.hds.com Regional Contact Information Americas +1 408 970 1000 info@hds.com Europe, Middle East, and Africa +44 (0)1753 618000 info.emea@hds.com Asia Pacific +852 3189 7900 hds.marketing.apac@hds.com MK-91CB500002-06...