Honeywell Dolphin 75e User Manual
Hide thumbs
Also See for Dolphin 75e:
- User manual (126 pages) ,
- Quick start manual (17 pages) ,
- Power up instructions (2 pages)
Table of Contents
Advertisement
Advertisement
Table of Contents

Related Manuals for Honeywell Dolphin 75e


Summary of Contents for Honeywell Dolphin 75e
- Page 1 Dolphin™ 75e with Windows Embedded 8.1 Handheld User’s Guide...
- Page 2 Disclaimer Honeywell International Inc. (“HII”) reserves the right to make changes in specifications and other information contained in this document without prior notice, and the reader should in all cases consult HII to determine whether any such changes have been made.
-
Page 3: Table Of Contents
Chapter 1 - Getting Started Out of the Box ........................1-1 Memory Card Specifications ..................1-1 Initial Setup for Dolphin 75e Terminal ..................1-1 Unlocking the Screen ......................1-5 Customizing the Start Screen and Accessing Apps.............1-6 Accessing the Action Center from the Status Bar ..............1-7 Customizing the Quick Actions ..................1-7... - Page 4 Features of the Dolphin 75e ....................2-3 Front, Bottom, and Right Panels..................2-3 Back, Top, and Left Panels.................... 2-6 The I/O Connector ....................... 2-8 Battery ..........................2-8 Replacement Battery Specifications ................2-8 Battery Authorize Failed ....................2-9 Charging Options......................2-9 Charging Times ......................
- Page 5 Personalization ........................5-1 Changing Start and the Screen Theme ................. 5-1 Changing the Sound Settings ..................5-2 Managing Security and Customizing the Screen Lock ..........5-2 Changing App Specific Notifications................5-3 Selecting What to Sync....................5-4 Setting Up Quiet Hours with Cortana................5-5 Email + Messaging Accounts ....................
- Page 6 Chapter 6 - Communication Wireless & Network Settings ....................6-1 Connecting the Terminal to a Wireless Network ..............6-1 Wi-Fi Network Connections ....................6-1 Turning Wi-Fi Networking On or Off ................6-2 Connecting to a Wi-Fi Network ..................6-2 Connecting to a Hidden Wi-Fi Network................6-2 Managing Wi-Fi Networks....................
- Page 7 Chapter 8 - Dolphin 70e Black HomeBase (Model 70e-HB) Overview..........................8-1 Unpacking the HomeBase....................8-1 Optional Equipment ....................... 8-1 Charging Overview ......................8-1 Convenient Storage......................8-1 Capacity..........................8-2 Dimensions.......................... 8-2 Weight ..........................8-2 Parts and Functions......................8-3 Front Panel ........................8-3 Back Panel .........................
- Page 8 Chapter 10 - Dolphin 70e Black Mobile Base (Model 70e-MB) Overview..........................10-1 Charging Overview ......................10-1 Convenient Storage......................10-1 Dimensions........................10-1 Weight ..........................10-1 Mobile Base Components ....................10-2 Adjustable Arm with Suction Cup Base for Windshield Mounting ........10-2 Mounting the Mobile Base ....................
- Page 9 Bottom Panel ....................... 12-5 Optional DIN Rail Mount ....................12-6 Additional Hardware ....................12-6 Installing the DIN Rail ....................12-6 Appendix A - Dolphin 75e Terminal Agency Information Label Locations ........................A-1 Model Number and Serial Number ................A-1 RF Exposure Information (SAR)..................A-1...
-
Page 11: Customer Support
• The duration of the limited warranty for touch screens is one year. The duration of the limited warranty for batteries is one year. Use of any battery from a source other than Honeywell may result in damage not covered by the warranty. Batteries returned to Honeywell International Inc. in a reduced state may or not be replaced under this warranty. -
Page 13: Chapter 1 - Getting Started
Dolphin terminal for service. Memory Card Specifications Honeywell recommends the use of Single Level Cell (SLC) industrial grade microSD or microSDHC™ memory cards with Dolphin terminals for maximum performance and durability. Contact a Honeywell sales representative for additional information on qualified memory card options. - Page 14 Dolphin terminals ship with the battery significantly discharged of power. After installing the battery in the terminal, charge the battery with a Dolphin 75e compatible charging peripheral for a minimum of 4 hours for the standard battery pack or 6 hours for the extended battery pack. When using the 70e-USB Charge/Communication cable to charge from a 500mA USB port on a host device, charge the battery for a minimum of 6 hours for the standard battery and 8 hours for the extended battery.
- Page 15 USB-IF compliance program when using the micro USB port as a charging source. Option 1: Charging from a power outlet Use only a UL Listed power supply, which has been qualified by Honeywell with an output rated at 5VDC and 1A with the device. Micro USB Port...
- Page 16 Step 3. Power On and Set Up the Terminal The first time you power up the Dolphin terminal, you have the option to set up your handheld using one of the following methods: • Use a custom provisioning file (Prov.xml) to configure the terminal on startup. Custom provisioning allows you to set up multiple devices with organization-specific settings so they are ready to use.
-
Page 17: Unlocking The Screen
3. Touch NFC. 4. Hold the NFC tag close to the back of the terminal. When an NFC tag is recognized, “configuration received” appears under the NFC option. 5. Touch next. “Configuration in progress” appears on the screen. When the terminal is done booting, the Start screen appears. -
Page 18: Customizing The Start Screen And Accessing Apps
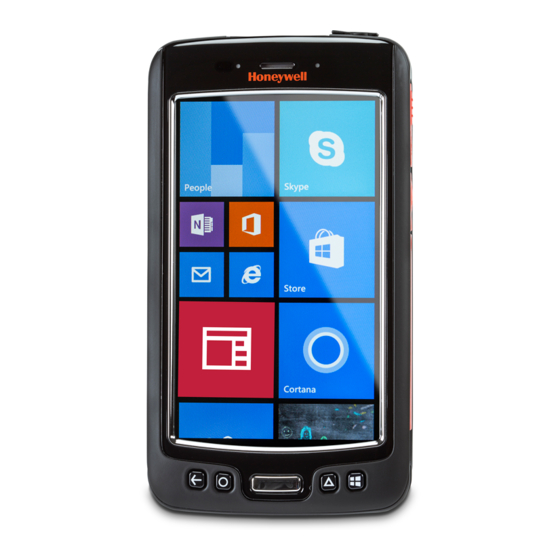
Customizing the Start Screen and Accessing Apps Start is the first screen you see once you power on the terminal and unlock screen. You can add, delete, move, resize, or group Tiles into folders for easy quick access. Tiles can be apps, contacts, maps, albums, or office files. Live Tiles provide notifications and updates in real time (e.g., weather stats). -
Page 19: Accessing The Action Center From The Status Bar
Accessing the Action Center from the Status Bar To view the battery charge level (%), details about a notification or to quickly access and modify settings, touch and hold the status bar at the top of the screen and then drag down. •... -
Page 20: Changing Notifications
Changing Notifications If you want to keep notifications hidden when you access the Action Center from the Lock screen: 1. From the Action Center, select ALL SETTINGS > notifications + actions. 2. Remove the check from the box next to Show notifications in action center when my phone is locked. The default setting is enabled (checked). -
Page 21: Using The Search Bar
Turning Cortana Off To turn Cortana On or Off: 1. Press the Search button 2. Touch Cortana's Notebook , and then select Settings. and restart the terminal. 3. Turn Cortana Off Using the Search Bar You can search for an item on the terminal or Internet using Cortana or Bing. An active Internet connection is required. Touch to initiate a voice search Touch inside the box to... -
Page 22: Navigation/Function Buttons
Search for . . . Display Bing search results for a term. Examples: Find . . . • “Search for a map of Boston” • “Find weather in Seattle ” Ask a question. • “What time is it in Paris?” Navigation/Function Buttons The Dolphin terminal has seven navigation/function buttons. -
Page 23: Using The Virtual Keyboard
Using the Virtual Keyboard During text input, you may need to switch between keyboard modes to access additional character sets (e.g., function keys, symbols, and numbers). Each keyboard mode, includes navigation keys, which allow you to quickly switch between modes. Touch the abcd key to switch to the Qwerty Mode, and the &123 key to switch to the Numeric Mode. -
Page 24: Replacing The Battery
Ensure all components are dry prior to mating terminals/batteries with peripheral devices. Mating wet components may cause damage not covered by the warranty. We recommend use of Honeywell Li-ion battery packs. Use of any non-Honeywell battery may result in damage not covered by the warranty. -
Page 25: Restarting The Terminal
4. Insert the new battery and install the battery door. 5. Apply pressure to the edges of the battery door to ensure the door is properly closed. Engage the door lock. 6. Press the Power button Important: All battery and connector doors must be present, undamaged, and properly closed to maintain the environmental rating of the terminal. -
Page 26: Connecting The Terminal To A Computer (Pc) Via A Usb Connection
To perform a Factory Reset if your touchscreen is unresponsive and all other recovery methods have failed: 1. Press and hold the Volume Down and Power buttons simultaneously until a large exclamation mark appears on the screen. 2. Press the following buttons in this order: Volume Up >... -
Page 27: Changing Usb Permissions And Notifications
• Notify me when I connect to a slower charger. The Dolphin 75e should only be connected via its microUSB connector to CTIA certified adapters, products that bear the USB- IF logo or products that have completed, the USB-IF compliance program. - Page 28 1 - 16...
-
Page 29: Chapter 2 - Hardware Overview
Dolphin 70e Black Net Base (Model 70e-NB) The Net Base enables up to four Dolphin 75e terminals to communicate with a host device over an Ethernet network. In addition, the Net Base provides a second RJ45 Ethernet port for connection to an additional device such as a printer, workstation, eBase, or another Net Base. -
Page 30: Accessories For The Dolphin 75E
1-14. Holsters (Model HOLSTER-2 and 6000-HOLSTER) A holster provides convenient storage for the Dolphin 75e terminal in mobile environments. Long and short holster models with integrated belt clips and spare battery pouches are available. Wrist Lanyard (Model SL-LANYARD-1) The black wrist lanyard attaches to the bottom corner of the terminal providing additional security from accidental drop during terminal use. -
Page 31: Features Of The Dolphin 75E
Features of the Dolphin 75e Front, Bottom, and Right Panels Battery Charging Status and General Notification LED Front Speaker Scan Status Notification LED Right Scan/Image Button Touch Panel Display USB Door/Micro USB Port Scan Button Search Button Start Button Administrator or... -
Page 32: Start Button
Feature Descriptions: Front, Bottom, and Right Panels Back Button The Back button returns you to the previous screen. When you press and hold the Back button, the App switcher opens allowing you to view and switch between recently used apps. Bottom Speaker The integrated bottom speaker sounds audio signals as you scan bar code labels and enter data. - Page 33 Connecting the Terminal to a Computer (PC) via a USB Connection on page 1-14. The Dolphin 75e should only be connected via its microUSB connector to CTIA certified adapters, products that bear the USB-IF logo or products that have completed, the USB-IF compliance program.
-
Page 34: Back, Top, And Left Panels
Back, Top, and Left Panels For a description of each callout, see page 2-7. Audio Jack Image Engine Window (LED Aperture) Power Button Color Camera Lens Camera Flash Left Scan/Image Button Volume Control Button Battery Door Lock Battery Door (standard model shown) I/O Connector (see page 2-8) Battery Latch (battery and battery door not shown) - Page 35 Feature Descriptions: Back, Top, and Left Panels Audio Jack The audio jack is located under the protective door on the top of the terminal. To access the jack gently lift the edge of the door marked with an arrow. The 3.5mm audio jack supports both speaker (stereo) and microphone (mono) headsets. Battery The 3.7V Li-ion rechargeable battery provides the main power for the terminal and is protected by the battery door.
-
Page 36: The I/O Connector
The primary power source for the Dolphin terminal is the 3.7V Li-ion rechargeable battery located under the battery door on the back panel of the device. Honeywell recommends, you keep the battery in the terminal charged at all times to help prevent data loss. -
Page 37: Battery Authorize Failed
Charging Options Dolphin 75e terminals ship with the battery significantly discharged of power. Before using a terminal for the first time, charge the battery with a Dolphin charging device for a minimum of 4 hours for the standard battery and 6 hours for the extended battery. -
Page 38: Understanding The Battery Charge Status Led Indicator
USB Charge/Communication Cable with provided power 4 hours 6 hours supply (Model 70e-USB ADAPTERKIT) USB Charge/Communication Cable (Model 70e-USB) 6 hours 8 hours connected to a workstation (PC) 500mA USB port QuadCharger (Model COMMON-QC) 4 hours 6 hours Understanding the Battery Charge Status LED Indicator The activity of the Battery Charge Status LED provides feedback about the charge level and charging status of the battery in the terminal. -
Page 39: Managing Battery Power
Managing Battery Power Letting the battery become fully discharged causes the terminal to lose all data in RAM. Honeywell recommends, you keep a charged battery in the terminal at all times to help prevent data loss. Removing the battery from the terminal erases all non-persistent memory. - Page 40 Checking Battery Power and Monitoring Battery Power Use On the App list, select Battery Saver . From the settings screen you can view statistics about the battery charge and access to options for conserving battery power (see below). Swipe left or select usage to view and adjust how individual apps consume battery (see page 2-13).
-
Page 41: Storing Batteries
Honeywell International Inc. or an authorized service center for inspection. • If you are not sure the battery or charger is working properly, send it to Honeywell International Inc. or an authorized service center for inspection, see Customer Support. -
Page 42: System Resets
Installing a Memory Card You can expand the terminal’s memory capacity by installing a microSD or microSDHC card. Honeywell recommends the use of Single Level Cell (SLC) industrial grade microSD or microSDHC memory cards with Dolphin terminals for maximum performance and durability. - Page 43 4. Lift the card retention flap for the memory socket, slide the card (contacts facing down) into the socket, and then close the retention flap. Memory Card (contacts facing down) Memory Card Retention Flap 5. Install battery and battery door. Apply pressure to the edges of the battery door to ensure the door is properly closed, and then engage the door lock.
- Page 44 2 - 16...
-
Page 45: Overview
Using the Scan Image Engine Overview The Dolphin 75e terminal houses a compact image engine that instantly reads popular 1D and 2D bar codes and supports omni-directional aiming and decoding for greater flexibility in real-world settings. The image engine can also capture black and white digital images, such as signatures and pictures of damaged inventory. -
Page 46: Supported Bar Code Symbologies
Supported Bar Code Symbologies Symbology Type Symbology Name Codabar Interleaved 2 or 5 Code 3 of 9 ISBT 128 Code 11 Matrix 2 of 5 Code 32 Pharmaceutical (PARAF) MSI Plessey Code 93 Straight 2 of 5 IATA Code 128 Straight 2 of 5 Industrial 1D Symbologies EAN with Add-On... - Page 47 3. Touch Scan or press the Scan button (center button). If you touch and hold Scan a red beam appears to assist with aiming; see Aiming Beam on page 3-5. Note: By default, the left and right side buttons also trigger the scan/imager. 4.
-
Page 48: Configuring The Scan Demo Application
2. Swipe left or touch Settings, and then select Scan. 3. Change the Scan Mode to Continuous. 4. Press the Back button to return to the Scan screen. 5. Press and hold the Scan button to activate the imaging engine. The imager scans and decodes bar codes pre- sented in the terminal’s field of view as long as the button is pressed. -
Page 49: Aiming Beam
Profile Description HON:ScanButtonEnable Enables scanner driver handling when the scan button is pressed and released. When using the Scan Demo, this profile has no visible effect since the demo application handles all scan button events. Example: When the scan button is pressed, the scanner driver starts scanning and sends the ClaimedBarcodeScanner.TriggerPressed event. - Page 50 3 - 6...
-
Page 51: Chapter 4 - Using The Color Camera
Using the Color Camera Overview Dolphin 75e terminals are equipped with 8.0-Megapixel auto focus cameras to provide easy integration of color picture and video capture into business applications. The camera lens and camera flash are located on the back panel of the terminal. -
Page 52: Taking A Burst Photo
3. Point the camera lens at the object you want to capture. The camera lens is located on the back panel of the terminal. 4. Touch to take the photo. 5. Swipe right if to view the captured photo. By default, single photos are saved to Camera Roll album (Phone\Pictures\Camera Roll) in the Photos Hub (Apps list >... -
Page 53: Uploading Pictures And Videos
Uploading Pictures and Videos Picture and Video files can be uploaded to a computer using a USB connection. For additional information, see page 1-14. 4 - 3... - Page 54 4 - 4...
-
Page 55: Chapter 5 - Settings
Settings Overview The Settings allows you to verify and/or alter system parameters to customized your terminal to meet your specific needs. Touch Apps list > Settings or pull down the Action Center from the top of the screen and select ALL SETTINGS. -
Page 56: Changing The Sound Settings
Show more Tiles To increase the number of Tiles shown on the Start screen and decrease the Tile sizes, turn On the Show more Tiles option. Changing the Sound Settings 1. In the Apps list, touch Settings > ringtones + sounds under personalization. 2. -
Page 57: Changing App Specific Notifications
Changing or Removing a Password Lock To change the Password lock: 1. In the Apps list, touch Settings > lock screen under personalization. 2. Touch change password. 3. Enter the current password. 4. Enter the new password. 5. Enter the new password again to confirm, and then select done. To remove a password lock, touch the toggle box to turn password protection Off and then enter your current password. -
Page 58: Selecting What To Sync
7. Touch the LED Notification check box to turn LED feedback On (check) or Off (not checked). When turned On, left LED (closest to the H in the Honeywell logo) briefly blinks blue to indicate a new message has been received. -
Page 59: Setting Up Quiet Hours With Cortana
2. Touch the toggle box to turn sync On or Off for the following settings: • Theme • App settings • Internet Explorer • Passwords Setting Up Quiet Hours with Cortana You can set up quiet hours when Cortana handles texts and other notifications. In the Apps list, touch Settings >... -
Page 60: Adding An Exchange Account
7. For some accounts, you may need to validate your identity by entering a Microsoft code. The code is sent to you using the contact information you provided when setting up the account. 8. If you are adding a Google account, select accept. Manual Set Up If you prefer to manually input the account settings (e.g., email server addresses and account type) during account set up:... -
Page 61: Workplace Accounts
To remove an account: 1. In the Apps list > Settings 2. Touch email + accounts. 3. Touch and hold the account you want to delete, and then select delete. 4. Touch delete to confirm deletion. Workplace Accounts Some organizations provide a workplace account for easy terminal setup. The workplace account may include an app or account profile that can be installed on the terminal or additional information on the specific settings needed to access the organization’s network. -
Page 62: Viewing Software And Hardware Information
2. Swipe up or down to scroll through the following: • System Date/Time • Device Information • Scanner Information • Honeywell Apps (version number) • Radio Information (includes MAC, Bluetooth, IP Addresses) • Battery Information • Memory Information 3. If you want to export the diagnostic information to a text file, touch Save 4. -
Page 63: Viewing Storage Statistics And Managing Apps And Files
1. In the Apps list, touch Settings > brightness. 2. Select the toggle box to turn the screen Rotation lock On Sleep The touch screen dims and then turns off after a specified period of inactivity to save battery power. To wake the terminal press the power button and swipe up to unlock the screen. -
Page 64: Changing The Battery Settings
Cleaning up Storage Space 1. In the Apps list, touch Storage Sense 2. Select phone or SD card (if installed). 3. Select one of the following categories and actions: • Touch photos > delete burst photos to delete unsaved burst photos. •... -
Page 65: Time And Language Settings
To update the terminal using an SD card: 1. Copy the provisional FFU image onto the root directory of the SD card. The file name must be Flash.ffu and be signed by the OEM for the manual flash feature to recognize the image. 2. -
Page 66: Changing The Terminal Language
Changing the Terminal Language 1. In the Apps list, touch Settings 2. Select language, and then touch add languages. 3. Select all the languages you want available on the terminal, and then touch . The selected languages appear in the available language list. -
Page 67: Input And Accessibility
3. Select all the languages you want available on the keyboard, and then touch The selected languages are added to the available keyboard list. The next time you access the keyboard, a language key is shows in bottom row. Touch the key to switch the between the keyboard languages. To remove a language on the list, touch and hold the language and then select remove. -
Page 68: Privacy
3. Modify one or more of the following settings: • Set when to Read aloud incoming text messages. • Set the type of Text-to-Speech voice used for turn-by-turn directions and other 3rd party apps. • Select the Speech language. • Turn On or Off allowing Speech to be used when terminal is locked. •... -
Page 69: Enabling Automatic Updates
• data sense and battery saver settings do not limit data usage Enabling Automatic Updates To set the terminal to automatically download and install updates: 1. In the Apps list, touch Settings 2. Select phone update. 3. Check the box next to Automatically download updates if my data settings allow it. 4. -
Page 70: Deleting A Backup
Deleting a Backup To delete a backup: 1. In the Apps list, touch Settings 2. Select backup > apps + settings. 3. Select manage backups. 4. Do one of the following: • To delete the entire backup, select the Settings backup check box and then touch delete. •... -
Page 71: Modifying Wi-Fi Radio Settings
adjust the length of time between the terminal display going off and entering sleep mode. By default this option is disabled. Modifying Wi-Fi Radio Settings For information on setting up and changing the Wi-Fi settings, see Wireless & Network Settings, beginning on page 6-1. - Page 72 5 - 18...
-
Page 73: Chapter 6 - Communication
7-1. Wi-Fi Network Connections The Dolphin 75e supports Wi-Fi network connections for open or secure networks that use any of the following security protocols: WPA/WPA2-Enterprise (PEAP, TLS and TTLS), WPA/WPA2-PSK (AES and Mixed-Mode), WEP, and OPEN. default, the terminal Wi-Fi radio is turned On. -
Page 74: Turning Wi-Fi Networking On Or Off
Turning Wi-Fi Networking On or Off 1. In the Apps list, touch Settings 2. Select Wi-Fi. 3. Touch the toggle box to turn Wi-Fi networking On or Off 4. If you turned Wi-Fi networking Off , select when you want Wi-Fi turned back On . -
Page 75: Advanced Wi-Fi Radio Settings And Security
Stopping the Terminal from Automatically Connecting to a Wi-Fi Network If you do not want the terminal to automatically connect to a known network: 1. In the Apps list, touch Settings > Wi-Fi. 2. Select manage. 3. Under Known networks, touch the network name. 4. -
Page 76: Enabling Protected Management Frame (Pmf) Or Akm With Sha256 Key Derivation
Enabling Protected Management Frame (PMF) or AKM with SHA256 Key Derivation The Dolphin 75e supports AP Protected Management Frame (802.11w) authentication and encryption technology for data communication, which adds protection against attacks targeted for wireless management frames. You can configure the radio to restrict access to APs that meet the PMF standard and enable AKM with SHA256 Key Derivation for added security. -
Page 77: Connecting To A Vpn
• User name + password Select and enter your User name and Password in the boxes provided. • Certificate Select to have the terminal automatically search for certificates on the terminal. Touch the security certificate you want to use to connect to the VPN. •... -
Page 78: Disconnecting The Vpn
• Manual Touch the profile name to connect to the VPN and then use the organization’s app to access data on the private network, visit the organization’s intranet site or protected domains and IP addresses. Note: When a VPN connection is established over the Wi-Fi, appears in the status bar at the top of the screen. -
Page 79: Installing A Certificate Via Mdm
Installing a Certificate via MDM Administrators can use MDM software to add root and CA certificates or configure the terminal to enroll a client certificate with an enrollment server that supports Simple Certificate Enrollment Protocol (SCEP) used for certificate based client authentication (e.g., Wi-Fi, VPN, email). -
Page 80: Using The Ping App To Test A Network Connection
Using the Ping App to Test a Network Connection The Ping app provides a GUI-based version of the traditional command line ping utility. Pinging sends out an echo request to a specific computer on the network. Use Ping to verify communication links or to make sure a specific IP address is working. -
Page 81: Changing How Data Packets Are Routed
• Rec route for count hops Enter the number of hops to record in the IP header; 1–9. This field traces the route of the packets for each hop. The hop count is the number of network devices between the starting node and the destination node that an IP packet hits while traveling over a network. - Page 82 To clear the routing tables of all the gateway entries: 1. On the Input tab, select Clear from the Commands drop-down list. 2. Touch Execute. The system processes your request and the number of entries deleted appears on the Output screen.
-
Page 83: Chapter 7 - Working With Bluetooth And Nfc Technology
Working with Bluetooth and NFC Technology Bluetooth Technology Bluetooth is a short-range wireless communications technology used to exchanged data between devices over a distance of approximately 26.2 feet (8 meters). Windows Embedded 8.1 Handheld supports both Bluetooth™ 2.1 and 4.0 wireless communication technology. -
Page 84: Making The Terminal Discoverable
NFC technology provides the ability for short-range, wireless data transfer between the terminal and NFC tags or other NFC enabled devices placed in close proximity (tapped) to the back of the terminal. NFC equipped Dolphin 75e models support the following: •... -
Page 85: Hardware Requirements
Consult the user documentation for the device. • NFC functionality must be enabled on both devices. On the Dolphin 75e, Tap to share must be turned On under NFC settings. Depending on the OS of the other device, you may also need to enable other options. Consult the user documentation for the device. -
Page 86: Reading Nfc Tags
If you are sharing with another Dolphin 75e, “Done and saved. Tap to view.” appears at the top of the screen to indicate a successful file transfer. Reading NFC Tags Embedded NFC tags can be included in business cards, advertising media, books and posters. When the tag is read by the terminal, the information contained on the tag can be quickly saved, for example, a person’s contact information. -
Page 87: Chapter 8 - Dolphin 70E Black Homebase (Model 70E-Hb)
PC-based enterprise systems. The HomeBase also contains an auxiliary battery well that charges a spare Honeywell standard or extended battery. The 70e-HB charger is designed for use with the following Dolphin models and batteries manufactured for Honeywell International Inc: Dolphin Models Battery Model No. -
Page 88: Capacity
This means that one base can charge two battery packs: the one installed in the terminal and a spare. We recommend use of Honeywell peripherals, power cables, and power adapters. Use of any non-Honeywell peripherals, cables, or power adapters may cause damage not covered by the warranty. -
Page 89: Parts And Functions
Parts and Functions Front Panel Auxiliary Battery Well Terminal Well COMM LED Dock LED AUX Battery LED Terminal Well Place the terminal in this well to communicate with a host device, power the terminal, and charge the installed battery pack. The base completely charges the main battery in a Dolphin terminal in 4 hours for the standard battery or 6 hours for the extended battery. -
Page 90: Back Panel
Honeywell with output rated at 12VDC and 3 amps with the device. The operating temperature range is -10° to 50°C (14° to 122°F). Honeywell recommends that you leave the base connected to its power source at all times, so that it is always ready to use. -
Page 91: Connecting Power To The Homebase
When the terminal is docked, the base completes a full charge in 4 hours for the standard battery or 6 hours for the extended battery. For more information about Honeywell battery packs and how to check battery power levels in your terminal, refer to Battery (page 2-8). -
Page 92: Communication
Communication Dolphin terminals support USB communications out of the box. The base also supports USB communications via the USB port located on the back. The base acts as a USB device by interfacing the USB signals of the Dolphin terminal to the USB of the host workstation. -
Page 93: Installing The Din Rail
Installing the DIN Rail 1. Slide the DIN rail into the slot along the bottom panel of the base. DIN Rail Slot 2. Use the appropriate hardware to secure the DIN rail to the desk or flat surface. 8 - 7... - Page 94 8 - 8...
-
Page 95: Chapter 9 - Dolphin 70E Black Ebase (Model 70E-Ehb)
Dolphin 70e Black eBase (Model 70e-EHB) Overview The Ethernet Base (eBase) enables a single Dolphin 75e computer to communicate with a host device over an Ethernet network. The 70e-EHB charger is designed for use with the following Dolphin models and batteries, manufactured for Honeywell... -
Page 96: Dimensions
Dimensions 65.6 mm [2.58 inches] 116.3 mm 129.3 mm [4.58 inches] [5.09 inches] Weight eBase weight: 310g [.683 lbs] Note: Weight excludes packaging, cables and power supply. Parts and Functions Front Panel Auxiliary Battery Well Terminal Well COMM LED Dock LED AUX Battery LED Terminal Well Place the terminal in this well to communicate with a host device, power the terminal, and charge the installed battery pack. -
Page 97: Back Panel
Auxiliary Battery Well See "Auxiliary Battery Well" on page 9-3 AUX Battery LED Indicates status of the battery charging in the auxiliary battery well; see Back Panel on page 9-3. This color means… Orange The auxiliary battery is charging. Green The auxiliary battery has completed charging and is ready for use. -
Page 98: Bottom Panel
AC power source to 12 Volts DC. Use only a UL listed power supply, which has been qualified by Honeywell with output rated at 12VDC and 3 amps with the device. The operating temperature range is -10° to 50°C (14° to 122°F). Honeywell recommends that you leave the eBase connected to its power source at all times, so that it is always ready to use. -
Page 99: Connecting Power To The Ebase
Common Status and Notification Icons on page 1-8. We recommend use of Honeywell Li-Ion battery packs. Use of any non-Honeywell battery may result in damage not covered by the warranty. Charging a Spare Battery in the Auxiliary Battery Well The auxiliary battery well located on the back of the base charges a spare battery independently of the terminal well. -
Page 100: Communication
Communication Establishing Ethernet Communication Connecting the Dolphin Terminal to the eBase By default, the Dolphin terminal is configured to obtain IP addresses automatically via DHCP server. This means that in most cases you would simply plug-and-play the unit. 1. Connect power to the eBase (see Power on page 9-4). -
Page 101: Mounting The Ebase
Mounting the eBase Set the base on a dry, stable surface, such as a desktop or workbench near an electrical outlet. Be sure to provide enough workspace with good lighting for the user to view and operate the Dolphin terminal while it is in the base. When choosing a mounting location, bear in mind that the location must allow users' easy access to the Auxiliary Battery Well and the back panel of the eBase where the USB port, Ethernet port, and power jack are located. - Page 102 9 - 8...
-
Page 103: Chapter 10 - Dolphin 70E Black Mobile Base (Model 70E-Mb)
The Dolphin Mobile Base charging cradle is designed specifically for in-premise and in-transit data collection applications. The base features a mounting bracket and a cigarette lighter adapter to adapt it to your environment. The 70e-MB charger is designed for use with the following Dolphin models and batteries manufactured for Honeywell International Inc: Dolphin Model Battery Model No. -
Page 104: Mobile Base Components
Mobile Base Components Terminal Charging Well Speaker Spring Latch Power Adapter Power Jack Speaker Volume Control Mounting Lever Two point Adjustable Suction Cup Base Adjustable Arm with Suction Cup Base for Windshield Mounting The Mobile Base includes a two point adjustable arm with a suction cup base for fixed mount locations (e.g., a car windshield). Power Adapter The mobile base is provided with a power adapter cable that can be connected to a vehicle cigarette lighter outlet. -
Page 105: Mounting The Mobile Base
Mounting the Mobile Base Safety Precautions Honeywell is not responsible for any damages caused to you, your vehicle, or other individuals due to the installation of the Dolphin Mobile mount. Follow these safety precautions when mounting the mobile base: Do not mount the base in a location where it prevents safe operation of the vehicle and/or impedes the vehicle operator's field of view. -
Page 106: Charging The Main Battery
Dolphin terminals prevents overcharging, which means that terminal may be seated in the base indefinitely without damage to the terminal, battery pack, or the base. For more information about Honeywell battery packs and how to check battery power levels in your terminal, refer to Battery (page 2-8). -
Page 107: To Power A Terminal And Charge Its Main Battery
10-3. 3. Pull the spring latch back and insert the Dolphin 75e into the terminal well. Charging begins immediately if required by the Dolphin terminal. Note: Align the contacts on the back panel of the terminal with the charging contacts on the Mobile Base. -
Page 108: Removing The Cable
Removing the Cable Attempting to remove the cable without disengaging the lock may result in damage to the base and power cable not covered by the warranty. 1. Twist the cable 90° counterclockwise to disengage the cable lock. 2. Remove the cable from the power jack. 10 - 6... -
Page 109: Chapter 11 - Dolphin 70E Black Chargebase (Model 70E-Cb)
Guidelines for Battery Pack Use and Disposal on page 2-13. We recommend use of Honeywell Li-ion battery packs. Use of any non-Honeywell battery may result in damage not covered by the warranty. Convenient Storage The intelligent battery charging system makes this base a safe and convenient storage receptacle for your Dolphin terminal. -
Page 110: Dimensions
Dimensions 59.75 mm [2.35 inches] 427.11 mm [16.80 inches] 98.8 mm [3.89 inches] Weight ChargeBase weight: 674g [1.49 lbs.] Note: Weight excludes packaging, cables and power supply. Parts and Functions Front Panel Terminal Wells (Qty. 4) Dock LED (Qty. 4) Terminal Wells The base contains four terminal wells, which offer independent battery charging for each docked terminal. -
Page 111: Back Panel
Honeywell with output rated at 12VDC and 5 amps with the device. The operating temperature range is -10° to 50°C (14° to 122°F). Honeywell recommends that you leave the ChargeBase connected to its power source at all times, so that it is always ready to use. -
Page 112: Connecting Power To The Chargebase
Dolphin terminals prevents overcharging, which means that Dolphin terminals may be seated in the base indefinitely without damage to the terminals, batteries, or the base. For more information about Honeywell battery packs and how to check battery power level in your terminal, refer to Battery (page 2-8). -
Page 113: Optional Din Rail Mount
Bottom Panel DIN Rail Slot Rubber Feet, Qty. 6 Optional DIN Rail Mount A DIN rail (7.5 X 35 mm) may be installed on the bottom of the base to provide the optional security of mounting the base to a flat horizontal surface with hardware. Additional Hardware •... - Page 114 11 - 6...
-
Page 115: Chapter 12 - Dolphin 70E Black Net Base (Model 70E-Nb)
Overview The Net Base enables up to four Dolphin 75e handheld computers to communicate with a host device over an Ethernet network. In addition, the Net Base provides a second RJ45 Ethernet port for connection to an additional device such as a printer, workstation, Net Base, or another Net Base. -
Page 116: Dimensions
Dimensions 59.75 mm [2.35 inches] 427.11 mm [16.80 inches] 98.8 mm [3.89 inches] Weight Net Base weight: 694g [1.53 lbs.] Note: Weight excludes packaging, cables and power supply. Parts and Functions Front Panel Terminal Wells (Qty. 4) Dock LED (Qty. 4) Terminal Wells The base contains four terminal wells, which offer independent battery charging for each docked terminal. - Page 117 DOCK LEDs The Dock LED indicates if the terminal is properly seated in the charging well. Each well has a dedicated Dock LED, which illuminates blue when a terminal is properly seated in the charging well. Back Panel Yellow LED (Qty. 1 Per Port) Green LED (Qty.
-
Page 118: Bottom Panel
50°C (14° to 122°F). Honeywell recommends that you leave the Net Base connected to its power source at all times, so that it is always ready to use. We recommend use of Honeywell peripherals, power cables, and power adapters. Use of any non-Honeywell peripherals, cables, or power adapters may cause damage not covered by the warranty. -
Page 119: Communication
Common Status and Notification Icons on page 1-8. We recommend use of Honeywell Li-ion battery packs. Use of any non-Honeywell battery may result in damage not covered by the warranty. Communication Establishing Ethernet Communication Connecting the Dolphin Terminal to the Net Base By default, the Dolphin terminal is configured to obtain IP addresses automatically via DHCP server. -
Page 120: Optional Din Rail Mount
Optional DIN Rail Mount A DIN rail (7.5 X 35 mm) may be installed on the bottom of the base to provide the optional security of mounting the base to a flat horizontal surface with hardware. Additional Hardware • DIN Rail, Qty. 1 •... -
Page 121: Appendix A - Dolphin 75E Terminal Agency Information
Dolphin 75e Terminal Agency Information Dolphin 75e handheld computers meet or exceed the requirements of all applicable organizations that set standards for safe operation. The best way to ensure safe operation is to use the handheld computer according to the agency guidelines in this user guide and on the regulatory sheet shipped with the terminal. - Page 122 A - 2...
- Page 124 Honeywell Scanning & Mobility 9680 Old Bailes Road Fort Mill, SC 29707 www.honeywellaidc.com 75E-H81-ENUS-UG Rev A 8/15...