D-Link DNS-313 User Manual
Hide thumbs
Also See for DNS-313:
- User manual (67 pages) ,
- Quick installation manual (41 pages) ,
- Technical specifications (2 pages)
Table of Contents
Advertisement
Advertisement
Table of Contents

Related Manuals for D-Link DNS-313


Summary of Contents for D-Link DNS-313
-
Page 1: User Manual
USER MANUAL DNS-313 VERSION 2.2... -
Page 2: Table Of Contents
Click n’ Connect Utility ........... 11 FTP Server Status ........52 New Hard Drive Install ........13 FTP Server Behind a Router ..... 53 Modify Existing DNS-313 Settings ....18 Secure FTP Connections ......54 Repairing a Previously Incomplete DNS-313 UPnP AV Server ..........61 Installation ............ - Page 3 Help ............... 78 Schedule Downloads ..........79 Scheduling ............. 81 Scheduling Settings ......... 82 Schedule List ........... 83 Status ..............84 Help ............... 85 BitTorrent ............... 86 Managing Torrents ........... 87 Direct Attached Storage Function ......88 D-Link DNS-313 User Manual...
-
Page 4: Product Overview
If any of the above items are missing, please contact your reseller. System Requirements Note: The DNS-313 requires the installation of a hard drive before it can be used. The hard disk must be a 3.5” SATA Hard Drive of up to 2TB in capacity. -
Page 5: Introduction
DNS-313 on the network and map drives to your computer. Backup software is also included on the CD. This software allows you to backup your files from a computer to the DNS-313 manually, by a schedule, or in real-time. -
Page 6: Features
3. D-Link cannot guarantee full compatibility or proper playback with all codecs. Playback capability depends on the codec support of the UPnP™ AV media player. 4. When using the DNS-313 as a USB 2.0 portable drive, the Network Storage functionality will be disabled. To re-enable Network Storage functionality, please power off the DNS-313 and unplug USB cable. -
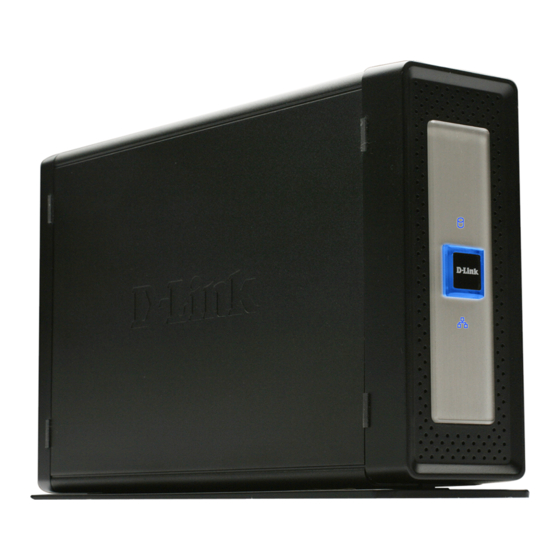
Page 7: Hardware Overview
5%. The LED will illuminate RED if the drive has failed. Power Button Push in to power-on the DNS-313. The edges of the button will illuminate with a BLUE back lighting when the device is powered on. Press again to turn off. There is a few seconds delay before the device powers on or off. -
Page 8: Rear Panel (Connections)
Do not block this opening. Reset Button Use this to reset the DNS-313 to factory Reset Button default settings. To reset, insert a ballpoint pen and hold the recessed button down for... -
Page 9: Direct Attached/Network Storage Mode
DESCRIPTION Direct This mode allows you to connect the DNS-313 to your computer as a USB 2.0 portable drive. To use this mode, move the Attached Direct Attached/Network Storage Mode switch so that you can see the USB connection and connect a USB cable between the DNS-313’s USB connection and a USB port on a desktop or notebook. -
Page 10: Hardware Setup
Follow the instructions below to install a hard drive, connect to the network and power on the DNS-313. Open the shipping carton for the DNS-313 and carefully remove and unwrap its contents. If this is the first time using the DNS-313 or if a new hard disk is installed, use the Click n’... - Page 11 Make sure to align the drive connector to the SATA connectors on the bottom edge inside the drive bay of the DNS-313. Gently push the drive in until it connects. When a drive is inserted properly, you will feel it “seat”...
- Page 12 6. Connect the power adapter to the power receptacle. Note: When a new hard disk is installed, the hard disk must be formatted in the DNS-313 before it can be used. Insert the Installation CD into your computer’s CD-ROM or DVD-ROM drive and follow the instructions in the “Setup Utilities”...
-
Page 13: Setup Utilities
Setup Utilities The Setup Utilities on the Installation CD are used to set up the DNS-313 for the first time or, after the hard disk has been formatted, can be used to establish and configure IP settings and map the drive to your Windows computer. -
Page 14: Click N' Connect Utility
Click n’ Connect Utility To use the D-Link Click n’ Connect utility, choose the preferred language, then click on the Quick Installation - Start button in the menu. The button appears green when the cursor is placed over the button. - Page 15 18. „ If you are attempting to complete an incomplete installation or need to re-install the DNS-313, choose the Repair option and follow the steps described in the “Repairing a Previously Incomplete DNS-313 Installation” section on page 20.
-
Page 16: New Hard Drive Install
Click on the Next button to proceed. 2. Connect the DNS-313 to the Ethernet port on your computer or router and click on the Next button to proceed to the last hardware setup illustration. - Page 17 Section 3 - Configuration 3. Connect the power and turn the DNS-313 on as shown. Click on the Next button to begin searching for the drive. It might take a few seconds to detect the DNS-313, depending on network conditions.
- Page 18 5. The hard disk is now ready to be formatted. To format the hard drive, click on the Next button. Remember that any data on the disk will be erased during the formatting. 6. Formatting might take several minutes if the drive is very large. D-Link DNS-313 User Manual...
- Page 19 Note: If the DNS-313 has an IP address that does not allow your computer to connect to it, you will need to change the IP address of the device. The drive must be in the same IP subnet as your computer to manage and use it.
- Page 20 Section 3 - Configuration 8. The DNS-313 is now ready to be mapped to your computer where it will appear as a network storage device. Choose a Drive Letter from the pull-down list and type a Name for the drive that will appear listed in My Computer with other storage devices..
-
Page 21: Modify Existing Dns-313 Settings
Click n’ Connect Utility Modify Existing DNS-313 Settings If selecting the Modify existing DNS-313 settings Click n’ Connect menu option, carry out the following steps: 1. The Click n’ Connect utility displays all of the D-Link DNS NAS devices that have been discovered on your network. - Page 22 3. Finally a summary appears of the basic drive information to confirm that the modifications have been made. Click Exit to close the menu or click Advanced Options to launch your web browser and connect to the web configuration manager to change other settings. D-Link DNS-313 User Manual...
-
Page 23: Repairing A Previously Incomplete Dns-313 Installation
The Click n’ Connect Utility includes a repair feature. The repair feature should be used if you had a problem installing a new hard drive in the DNS-313. The repair feature can also be used if you cannot use the Click n’ Connect Utility to modify existing DNS-313 settings. - Page 24 3. The following window informs you that the Click n’ Connect utility will format the system partition of your DNS-313 hard drive. Click the Next button to start formatting the system partition. Note: No data on your DNS-313 will be erased. D-Link DNS-313 User Manual...
- Page 25 Section 3 - Configuration 5. Formatting might take several minutes if the drive is very large. 6. The following window appears when formatting has completed. Click the Next button to proceed to the next window. D-Link DNS-313 User Manual...
- Page 26 8. After the device has restarted, the following window appears: Use the Drive Letter pull-down menu to select the Drive Letter that the DNS-313 will map to on your computer. Type a Name in the Device Name field. The Device Name is used by various network services to identify the DNS-313.
- Page 27 9. Finally a summary appears of the basic drive information to confirm that the repair has completed successfully. Click Exit to close the menu or click Advanced Options to launch your web browser and connect to the web configuration manager to change other settings. D-Link DNS-313 User Manual...
-
Page 28: Easy Search Utility
The DNS-313 will appear listed under Network Storage Devices. If none are listed, click the Refresh button. If a DHCP server is active on your network, the DNS-313 will receive an IP address by DHCP. If no DHCP server is present, the IP address 192.168.0.32 is used. -
Page 29: Utility Overview
It is recommended to use the included D-Link Easy Search Utility when accessing and configuring the DNS-313 for the first time. If you want to change the IP address before logging in or are unable to connect to the DNS-313 IP address, you can use the Easy Search Utility provided on the product CD to locate the device on your network and make any required changes. -
Page 30: Connecting To The Dns-313
Section 3 - Configuration Easy Search Utility Connecting to the DNS-313 Select the listed DNS-313 and click the Configuration button. This will launch the computer’s default web browser and direct it to the IP address listed for the device. Make sure the browser is not configured to use a proxy server. - Page 31 DHCP, the DNS-313 will automatically be in the same subnet. Note: After logging in to the DNS-313 for the first time it is recommended to add a password to the admin account. (See the “Admin Password” section on page 66 for more information.)
- Page 32 Section 3 - Configuration After logging in, you will be redirected to the DNS-313 Web UI: See the “Web UI” section on page 34 for more information on how to use the Web UI. D-Link DNS-313 User Manual...
-
Page 33: Mapping The Network Drive
Mapping the Network Drive The Easy Search Utility located on the Installation CD is used to map the DNS-313 to your Windows computer where it appears as a Network Storage Drive. Follow these steps to map the drive to your computer. - Page 34 Section 3 - Configuration 2. Select the DNS-313 you want to map to your system from the list. Any volumes located on the drive appear below in the Drive Mapping list. If this is the first time you are mapping the drive, the volume name Volume_1 should appear in the list.
- Page 35 4. A confirmation dialog box will inform you if the drive has been mapped successfully. 5. You will now be able to view the mapped drive using Windows Explorer. To view the mapped drive, click on the My Computer icon on the Windows desktop. D-Link DNS-313 User Manual...
- Page 36 Section 3 - Configuration 6. The DNS-313’s drive appears as a mapped drive, using the letter that you specified. D-Link DNS-313 User Manual...
-
Page 37: Web Ui
Section 3 - Configuration Web UI The DNS-313 web UI defaults to the Setup page. The main categories for configuration are located in the menu tabs at the top of the page. These categories include: Setup - Contains the DNS-313 Setup Wizard, as well as the LAN Configuration Settings, Device „... -
Page 38: Setup
Setup Wizard The DNS-313 has a setup Wizard that allows you to quickly configure some of the basic device settings. Click the Run Wizard button in the Setup>Wizard window to launch the Setup Wizard. When running the DNS-313 setup wizard, the welcome screen details the five steps of the wizard. - Page 39 Section 3 - Configuration Choose the appropriate Time Zone and Daylight Savings Time settings and click Next to continue. Edit or change the DNS-313 LAN information or keep the current settings. Click Next to continue. D-Link DNS-313 User Manual...
- Page 40 Section 3 - Configuration Enter your workgroup, name and description for the DNS-313, or leave the default values and click Next to continue. When the wizard completes, click Back to go back and make changes or click Finish to restart the DNS- 313 and save the configuration.
- Page 41 Section 3 - Configuration When the login prompt appears, login using the new administrator password and click Configuration. D-Link DNS-313 User Manual...
-
Page 42: Lan Setup
Section 3 - Configuration LAN Setup The Local Area Network settings for the DNS-313 are configured on the LAN Setup page. DHCP Client Selecting DHCP Client will cause the DNS-313 to obtain an IP address from the local DHCP server. -
Page 43: Device
Section 3 - Configuration Device The device settings page allows you to assign a workgroup, name and description to the DNS-313. Workgroup Assigns a workgroup name to the DNS-313. The Workgroup name is used by Microsoft Windows networking to organize networks into groups. -
Page 44: Time And Date
Section 3 - Configuration Time and Date The DNS-313 Time and Date page contains several different options for setting the device’s internal clock. It is important to set an accurate time so that backups and downloads can be accurately scheduled. -
Page 45: Advanced
(see the “Network Access” section on page 47 for more information) or for setting up FTP access rights. The DNS-313 allows up to 64 unique users and 10 groups to be created. -
Page 46: User And Group Creation
• Click the Group radio button. • Type in a Group Name in the Add New Group text box. User and Group Creation- Group Category • Click the Add button to finish creating the group. D-Link DNS-313 User Manual... -
Page 47: Group Settings
To remove a user from the group, click the user that you want to remove and click the <<Remove button. To remove all users from the selected group, tick the All accounts checkbox and click the <<Remove button. D-Link DNS-313 User Manual... -
Page 48: User List
Section 3 - Configuration Users and Groups User List User List Displays all the users that has been created. To change a user’s password, click the corresponding icon. To remove a user from the list, click the corresponding icon. D-Link DNS-313 User Manual... -
Page 49: Groups List
Section 3 - Configuration Users and Groups Groups List Groups List Displays all the groups that have been created. To remove a group from the list, click the corresponding icon. D-Link DNS-313 User Manual... -
Page 50: Network Access
The Network Access window allows you to configure the access rights for specific folders or volumes for users or groups that have been set up on the DNS-313. By default, all volumes are open to anyone on the local network with read/write access. -
Page 51: Ftp Server
The FTP server can be configured to allow user access to specific directories, and will allow up to 10 users to access the DNS-313 at the same time. -
Page 52: Ftp Account Settings
Set the user or group permission to Read Only or RW: Read/Write. When you have finished configuring the FTP account settings, click the Add button to add the new settings to the FTP access list. FTP Account Settings- Group Category D-Link DNS-313 User Manual... -
Page 53: Ftp Server Settings
Western European codepage when transferring files. Support has been added for non standard FTP clients that are capable of supporting these character sets. Click on the Apply button to apply and save the new settings. D-Link DNS-313 User Manual... -
Page 54: Ftp Access List
FTP Server FTP Access List Modify Access Click the icon next to the FTP Access List that List you want to modify. Delete Click the icon next to the FTP Access List that you want to delete. D-Link DNS-313 User Manual... -
Page 55: Ftp Server Status
Displays the idle time before disconnecting the user. Client Language Displays the client language that has been set for the FTP server. Start / Stop FTP Click this button to Start or Stop the FTP server. Server D-Link DNS-313 User Manual... -
Page 56: Ftp Server Behind A Router
FTP Server Behind a Router If you are behind a router, you will need to forward the FTP port from the router to the DNS-313. Additional filtering and firewall settings may need to be modified on your router to allow FTP Access to the DNS-313 from the Internet. -
Page 57: Secure Ftp Connections
Secure FTP Connections The DNS-313 supports secure FTP connection using SSL or TLS. Follow the instructions here to set up a secure FTP connection using FireFTP with the Firefox browser. The FireFTP add-on for the Mozilla Firefox browser supports FTP connections over SSL and TLS. - Page 58 Use the Create an account pull-down menu to create a new connection to the FTP server. Note: A user account must also be created on the DNS-313 and the FTP server started in the FTP Server menu for the connection to succeed. D-Link DNS-313 User Manual...
- Page 59 Category field. Alternatively, choose a Category from the Category drop-down menu. Enter the IP address of the DNS-313 „ in the Host entry field. Enter the user name and password of „...
- Page 60 Section 3 - Configuration In the Connection tab choose the security protocol to use and click OK. The FireFTP application is now ready to connect to the DNS-313. Click on Connect next to the connection name in the Firefox browser window.
- Page 61 Since this connection is from a trusted source on the LAN, you can make an exception to the normal security certification. Click the Or you can add an exception… button. Click the Add exception… button. Click the Get Certificate button. D-Link DNS-313 User Manual...
- Page 62 The browser is now ready for a secure FTP connection. Click on Connect to establish the connection. Note: A user account must also be created on the DNS-313 and the FTP server started in the FTP Server menu for the connection to succeed. D-Link DNS-313 User Manual...
- Page 63 Section 3 - Configuration Depending on the Read/Write capabilities configured for the User associated with the connection, select the files to be transferred to or from the DNS-313. D-Link DNS-313 User Manual...
-
Page 64: Upnp Av Server
UPnP AV Server The DNS-313 features a UPnP AV Server. This server provides the ability to stream photos, music and videos to UPnP AV compatible network media players. If the server is enabled, the DNS-313 will be automatically detected by UPnP AV compatible media players on your local network. -
Page 65: Itunes Server
Server The DNS-313 features an iTunes Server. This server provides the ability to share music and videos to computers on the local network running iTunes. If the server is enabled, the DNS-313 will be automatically detected by the iTunes program and the music and videos contained in the specified directory will be available to stream over the network. - Page 66 Section 3 - Configuration After enabling the iTunes server on the DNS-313, launch iTunes. When iTunes detects the DNS-313, select it and you will be prompted to enter the iTunes server password if required. Select the DNS-313. When prompted, enter the iTunes server password.
-
Page 67: Dhcp Server
DHCP Server The DNS-313 can be used as a DHCP Server. As a DHCP server, it can be used to serve IP addresses to other devices on your local network. However, this feature should not be enabled if you already have a DHCP server, such as a router on your local network. -
Page 68: Add-Ons
Adding features to the unit is simple, and only requires you to install an Add-On to enable its feature. Some Add-Ons are included with your DNS-313, and can be found in the Add-ons folder on the included Installation CD. You can also check the www.d-link.com website periodically for new Add-On releases. -
Page 69: Maintenance
Maintenance Admin Password The Admin menu allows you to set a password for your admin account. It is recommended to set a password when you first configure the DNS-313. User Name The administrator user name is admin, and this cannot be changed. -
Page 70: System
Section 3 - Configuration System The DNS-313 System menu provides options for system restarts, saving and loading configuration settings, and setting idle times. Click Restart to reboot the DNS-313. Restart Click Restore to reset the DNS-313 to its factory Defaults default settings. -
Page 71: Firmware Upgrade
Section 3 - Configuration Firmware Upgrade The DNS-313 Firmware menu makes it simple to check for new firmware releases and upload them to the device. Firmware This section provides a link to check for new Upgrade firmware on the D-Link support website. -
Page 72: E-Mail Alerts
Section 3 - Configuration E-Mail Alerts With the DNS-313 E-Mail Alerts feature, you can configure e-mails to be sent if the DNS-313 experiences certain operational conditions and drive status conditions. These alerts can prove helpful with the management and safeguarding of important data. -
Page 73: E-Mail Alert Settings
Enter the e-mail address that will receive the E-Mail alerts. This address must correspond with the SMTP server configured above. Test E-Mail Click the Test E-Mail button to send a test alert E-mail Alert Settings- Anonymous Category and confirm your settings are correct. D-Link DNS-313 User Manual... -
Page 74: E-Mail Alert Types
An alert will be sent if the firmware is upgraded. Upgraded System Temperature An alert will be sent if the DNS-313 device Has Exceeded temperature exceeds the set threshold. After the alert has been sent, the DNS-313 will power off for safety. -
Page 75: Power Management
Section 3 - Configuration Power Management The DNS-313 Power Management feature allows you to configure the drive to shut down while power remains constant to the device. The drive will power up again when data is accessed. Power Enable or Disable Power Management on the Management DNS-313 by clicking the appropriate radio button. -
Page 76: Format Disk
OK button, to cancel the format request click the Cancel button or close the dialog box. The format might take several minutes depending on the capacity of the hard disk. Disks are formatted with the Microsoft disk file format NTFS. D-Link DNS-313 User Manual... -
Page 77: Scan Disk
Section 3 - Configuration Scan Disk Scan Disk will scan the hard disk installed in the DNS-313 for errors and/or corruption. Click the Scan Disk button to begin checking the Scan Disk hard disk installed in the DNS-313. Any errors found will be listed along with a description and the available repair options. -
Page 78: Dynamic Dns
If the Dynamic DNS provider supplies only a key, enter that key in the three fields. Status Displays your DDNS status. Click on the Save Settings button to apply and save the new settings. D-Link DNS-313 User Manual... -
Page 79: Status
LAN Info Displays the local network settings of the DNS-313. System Info Displays the workgroup, name, description and current temperature of the DNS-313. Hard Drive Displays the hard drive information, including the Info volume name, hard drive capacity, used space, and remaining drive space. -
Page 80: Logs
Section 3 - Configuration Logs Use the Log window to view a summary of the System and FTP Log Events on the DNS-313. Choose System Log from the pull-down menu to view the System Log events. Choose FTP Log from the pull-down menu to view FTP Log events. -
Page 81: Help
Section 3 - Configuration Help The DNS-313 Help page provides a menu of Support topics explaining the features of the device. D-Link DNS-313 User Manual... -
Page 82: Schedule Downloads
Section 3 - Configuration Schedule Downloads To access the Schedule Downloads application menu, you must first logout of the DNS-313 configuration menus. The login menu appears in the web page. Type the default User Name and Password and click the Applications button. - Page 83 Section 3 - Configuration The DNS-313’s Scheduling configuration page will appear: D-Link DNS-313 User Manual...
-
Page 84: Scheduling
Schedule List This section is used to view and manage the files or folders that are being downloaded from an FTP server. Click on the Save Settings button to apply and save the new settings. D-Link DNS-313 User Manual... -
Page 85: Scheduling Settings
Click Local to download a file located on the DNS-313 hard drive. A pop-up window will open, allowing you to browse to the file you want to download from the DNS-313. Browse to the file and click OK. The file path will appear in the URL field. -
Page 86: Schedule List
If a file is available for download, click the Now Download button to start downloading the file. Save To Indicates the location on the DNS-313 that the download file/folder will be saved to. Time Displays the date and time the download is due to start on. -
Page 87: Status
Section 3 - Configuration Status Schedule List Displays the completed, active, and pending scheduled downloads and backups. Click the Refresh button to refresh the download list. D-Link DNS-313 User Manual... -
Page 88: Help
Section 3 - Configuration Help The Schedule Downloads Help page provides a menu of Help topics that explain the Schedule Downloads features. D-Link DNS-313 User Manual... -
Page 89: Bittorrent
Section 3 - Configuration BitTorrent The DNS-313 supports a BitTorrent download manager, which can be used to download files to the hard drive in the DNS-313. Note: In order to use the BitTorrent feature, it must first be added using the Add-ons menu. See the “Add-Ons”... -
Page 90: Managing Torrents
Note: The recommended maximum number of concurrent downloads is 10. downloading or sharing. Note: The DNS-313 BitTorrent downloading application has been tested to function properly with Windows Internet Explorer and Mozilla Firefox web browser software. BitTorrent downloads might not work using other browser software. -
Page 91: Direct Attached Storage Function
Vista, or Windows 7 computers. Note: Before using the Direct Attached Storage function, make sure you have configured the DNS-313 using the Click n’ Connect Utility. Refer to the “New Hard Drive Install” section on page 13 for further information. - Page 92 3. Connect the other end of the USB cable into the USB port on the desktop or notebook you are adding the DNS-313 to. 4. Turn on the Power Button of the DNS-313, In Windows 2000, XP, Vista, and Windows 7 the DNS-313 will automatically install once it is powered-on.