Miele HR1954 Operating Instructions Manual
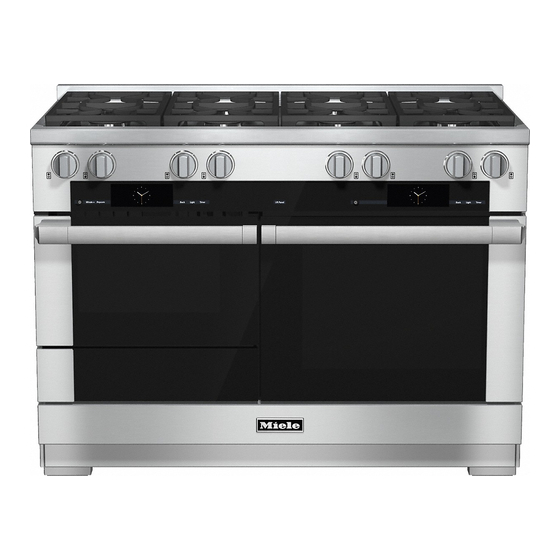
48" dual fuel range
(convection oven)
Hide thumbs
Also See for HR1954:
- Operating instructions manual (136 pages) ,
- Installation instructions manual (132 pages) ,
- Operating instrucitons (56 pages)

Related Manuals for Miele HR1954


Summary of Contents for Miele HR1954
-
Page 1: Operating Instructions
Operating Instructions 48" Dual Fuel Range (Convection Oven) To prevent accidents and damage to the range, you must read all instructions supplied before installing or using the appliance. en–US, CA M.-Nr. 09 898 081... -
Page 2: Important Safety Instructions
IMPORTANT SAFETY INSTRUCTIONS WARNING Children and adults can tip over the range if has not been secured. This may lead to fatal injuries. This range must be secured and connected using the anti-tip device according to the installation instructions. ... -
Page 3: Table Of Contents
Contents IMPORTANT SAFETY INSTRUCTIONS..............2 IMPORTANT SAFETY INSTRUCTIONS..............8 Guide to the range ....................20 HR 1954 ......................... 20 HR 1955, HR 1956 ....................20 Control panel ......................22 HR 1954 ......................... 22 HR 1955, HR 1956 ....................22 Sensor buttons....................... 23 M Touch display ..................... - Page 4 Contents Settings ......................... 41 Accessing the "Settings" menu ................41 Changing and saving settings ................41 Settings overview....................42 Language ......................44 Time of day ......................44 Display ......................44 Clock Type ......................44 Clock Format ....................44 Set........................44 Date........................
- Page 5 Contents Alarm + Timer ....................... 54 Using the Alarm ....................54 Setting the alarm....................54 Changing an alarm.................... 54 Deleting an alarm ....................54 Using the Timer ....................55 Setting the timer ....................55 Resetting the timer.................... 56 Canceling the timer................... 56 Guide to the modes....................
- Page 6 Contents MasterChef Plus Recipes..................74 Baguette ......................75 Banana Bread ....................76 Brioche......................77 Ciabatta ......................78 Cinnamon Raisin Bread ..................79 French Bread..................... 80 Italian Bread ...................... 81 Jalapeño Cheese Bread..................82 Multigrain Bread....................83 Rolls ........................84 Rye Bread ......................85 San Francisco Sourdough ................
- Page 7 Contents Dehydrate......................112 Reheat........................113 Warm-up Cookware..................... 113 Proof........................114 Pizza........................114 Sabbath Program ....................115 Gentle Bake ......................116 Canning........................ 117 Frozen food ......................118 Cleaning and care ....................119 Unsuitable cleaning agents.................. 119 Tips ........................120 Normal soiling ...................... 120 Wireless Roast Probe..................
-
Page 8: Important Safety Instructions
IMPORTANT SAFETY INSTRUCTIONS When using the appliance, follow basic safety precautions, including the following: Read all instructions before installation and use of the range to prevent accidents and machine damage. This appliance complies with current safety requirements. Improper use of the appliance can lead to personal injury and material damage. - Page 9 IMPORTANT SAFETY INSTRUCTIONS Children As with any appliance, close supervision is necessary when used by children. Do not leave children unattended: Children should not be alone or unsupervised in the area where the oven is installed. Do not allow them to sit or stand on the appliance.
- Page 10 IMPORTANT SAFETY INSTRUCTIONS Burn hazard! Keep the spaces above and behind the range clear of any items that could draw the attention of children. Otherwise, they can be tempted into climbing onto the appliance. Danger of injury. Never allow children to hang or lean on any part of the appliance.
- Page 11 Technical safety Installation, repair and maintenance work should be performed by a Miele authorized service technician in accordance with national and local safety regulations and the provided installation instructions. Contact Miele’s Technical Service Department for examination, repair or adjustment. Repairs and other work by unauthorized persons could be dangerous and may void the warranty.
- Page 12 All other servicing should be referred to a qualified technician. Defective components should be replaced by Miele original parts only. Only with these parts can the manufacturer guarantee the safety of the appliance.
- Page 13 IMPORTANT SAFETY INSTRUCTIONS If the range is installed behind a cabinet door, do not close the door while the appliance is in operation. Heat and moisture can build up behind the closed door and cause damage to the range and to the surrounding cabinets and flooring.
- Page 14 IMPORTANT SAFETY INSTRUCTIONS Proper use The oven becomes very hot while in use. Use caution to ensure that you are not burned on the heating elements or interior surfaces of the oven. Use pot holders when placing food in the oven, adjusting the racks, etc.
- Page 15 IMPORTANT SAFETY INSTRUCTIONS Open the door carefully to allow hot air or steam to escape before placing or removing food. To prevent burns, allow the heating elements to cool before cleaning by hand. Do not leave the oven door open unnecessarily as someone may trip over it or be injured by it.
- Page 16 IMPORTANT SAFETY INSTRUCTIONS WARNING NEVER cover any slots, holes or passages in the oven bottom or cover an entire rack with materials such as aluminum foil. Doing so blocks air flow through the oven and may cause carbon monoxide poisoning. Aluminum foil linings may also trap heat, causing a fire hazard.
- Page 17 IMPORTANT SAFETY INSTRUCTIONS To avoid damage, do not place aluminum foil, pots, pans or baking sheets directly on the oven floor. This can cause a build up of heat that will damage the oven floor. Do not slide pots or pans on the oven floor. This could scratch and damage the surface.
- Page 18 IMPORTANT SAFETY INSTRUCTIONS Cleaning and care Do not use a steam cleaner to clean this oven. Steam could penetrate electrical components and cause a short circuit. Only clean parts listed in these Operating and Installation Instructions. Scratches on the door glass can cause the glass to break. Do not use abrasive cleaners, hard sponges, brushes or sharp metal tools to clean the door glass.
- Page 19 Use only genuine original Miele parts. If parts or accessories from other manufacturers are used, the warranty will become void. Only use the Miele roast probe supplied with this oven. If it is faulty, it must only be replaced with a Miele genuine roast probe. ...
-
Page 20: Guide To The Range
Guide to the range HR 1954 HR 1955, HR 1956... - Page 21 Guide to the range a Controls for Speed Oven, oven and cooktop b Door lock with contact switch for Self Clean This switch ensures that the heating elements and convection fans turn off when the door is opened during use. c Browning/Broiling element d Oven interior lighting e Rotisserie motor...
-
Page 22: Control Panel
Control panel HR 1954 HR 1955, HR 1956 a Sensor button for lift panel e "Light" sensor button To lift up the control panel To turn the oven cavity lighting on and off b On / Off button in the cut-out f "Timer"... -
Page 23: Sensor Buttons
Control panel Sensor buttons The sensors react to touch. Each touch is confirmed with an audible tone. This tone can be turned off (see "Settings – Volume - Keypad tone"). Sensor Function Notes button Lift For raising and You can lift up and put down the control panel for panel lowering the the oven automatically or manually (see "Settings... -
Page 24: M Touch Display
Control panel M Touch display The touch screen can be scratched by hard objects, e.g. pens and pencils. Only touch the display with your fingers. Touching the display with your finger emits a small electrical charge, which in turn triggers an electrical pulse that is detected by the surface of the touch display. The display is divided into three sections: Main Menu Main Menu... -
Page 25: Symbols
Control panel Symbols The following symbols may appear in the display: Symbol Description Some settings, e.g. display brightness and buzzer volume, are selected using a bar chart. This symbol indicates that there is additional information and advice about using the oven. Select OK to access the information. -
Page 26: Basic Operation
Control panel Basic operation Each time you touch a possible option, the corresponding field will light up amber. Selecting or opening a menu Touch the desired field to select it. Scrolling You can scroll left or right. Swipe the screen, i.e., place your finger on the touch display and move it in the desired direction. - Page 27 Control panel Entering numbers You can enter numbers by scrolling through the roller and touching the desired value, or by using the numerical keypad. To enter numbers using the roller: Swipe the roller up or down to select the desired number. To enter numbers using the numerical keypad: ...
-
Page 28: Features
There you can find the model number, designed to be used with Miele ovens. the serial number and the connection They can be ordered from the data (voltage/frequency/maximum rated Mieleusa.com website or Miele. -
Page 29: Shelf Runners
Features Shelf runners Universal tray and wire oven rack with safety notches The shelf runners are located on the right and left sides of the oven interior Universal tray HUBB30-1: and provide the levels for inserting accessories. The shelf level numbers are indicated on the front of the oven frame. -
Page 30: Flexiclip Telescopic Runners Hfc92
The FlexiClip telescopic runners can be make up a shelf level. attached to any shelf level. The telescopic runner with the Miele Push the FlexiClip telescopic runners logo must be inserted on the right. all the way into the oven before placing accessories on them. - Page 31 Features Perforated baking tray HBBL71 The perforated baking tray has been specially developed for the preparation Then secure the FlexiClip runner to of baked goods. the bottom of the two rails as The tiny perforations assist in browning illustrated (3). the underside of baked goods.
- Page 32 Features Round baking form HBF27-1 Gourmet Casserole Dishes HUB and Lids HBD Miele Gourmet Casserole Dishes can be placed directly on the wire oven rack. They have an anti-stick coating. This circular form is suitable for cooking The oven dishes have depths of 8 1/2"...
-
Page 33: Rotisserie Hdgr30
(see "Roast - Wireless roast Miele Oven Cleaner probe"). Miele oven cleaner is suitable for It is located in the storage sleeve on the removing stubborn soiling. It is not necessary to preheat the oven before front right of the Cup &... -
Page 34: Oven Controls
Features Oven controls Cooling fan The cooling fan comes on automatically The oven controls allow you to use the when a cooking program is started. The various cooking modes to bake, roast cooling fan mixes hot air from the oven and broil. -
Page 35: Perfectclean Surfaces
Features PerfectClean surfaces The following have all been treated with PerfectClean: The revolutionary PerfectClean finish is – Universal tray a smooth, non-stick surface that is exceptionally easy to clean. – Grilling and Roasting insert Food and grime from baking or roasting –... -
Page 36: Before Using For The First Time
Before using for the first time Before using for the first time Setting the voltage (electrical version) The range may only be operated The voltage set must match that after it has been installed properly. of the house as to not damage the Read the Installation Instructions oven. - Page 37 Before using for the first time Set the time of day Set-up Successfully Completed displayed. You can enter numbers by scrolling through and touching the roller, or by Confirm with OK. using the numerical keypad. The oven is now ready to use. ...
-
Page 38: Heating Up The Oven For The First Time And Rinsing The Steam Injection System
Before using for the first time Heating up the oven for the Confirm with OK. first time and rinsing the steam Select Automatic burst of steam injection system After a short time, a burst of steam is New ovens can give off an unpleasant injected automatically. -
Page 39: Operating The Oven
Operating the oven Energy saving tips – Remove any accessories from the oven that you do not require for cooking. – Try not to open the door when cooking. – If a temperature range is given, it is best to select the lower temperature and check the food after the shortest cooking time given. -
Page 40: Quick Guide
Operating the oven Quick Guide Cooling fan Turn on the oven. After the cooking process the cooling fan will continue to run for a while after The main menu will appear. a program is complete to prevent Place the food in the oven. moisture from building up in the oven, on the control panel or surrounding ... -
Page 41: Settings
Settings Accessing the "Settings" menu Changing and saving settings Select Settings From the main menu: Swipe across the screen until the Select Settings desired setting appears, then touch it They can be checked and changed, if to select. -
Page 42: Settings Overview
Settings Settings overview Option Available settings ... / / ... Language deutsch english Country Time Display Night Dimming Clock Type Analog Digital Clock Format 24 h 12 h (am/pm) Date Lighting On for 15 seconds Start Screen Main Menu Operating Modes Gourmet Center Special Modes... - Page 43 Settings Option Available settings Self Clean With reminder Without reminder Default temperatures Safety System Lock Sensor Lock Catalyzer Electrical Version 208V / 60Hz 220V / 60Hz 240V / 60Hz Sensor group 0 – 9 Sensor group Calibrate Temperature Showroom Program Demo Mode Factory default...
-
Page 44: Language
Settings Language Clock Type You can choose from an analogue The desired country and language can clock face or a digital (h:min) display. be set. The date will also appear in the digital After selecting and confirming your clock display. choice, the language selected will appear in the display. -
Page 45: Date
Settings Date Start screen Set the date. The main menu will appear in the display when the oven is turned on. You When the oven is turned off, the date can change this default setting so that, only appears if the oven is set to for instance, the oven modes or "Time –... -
Page 46: Volume
Settings Volume Units of measurement Buzzer tones Weight The volume is represented by a bar with – seven segments. The weight of food in MasterChef programs is shown in grams. – lb/oz Maximum volume is selected when all segments are filled. If none of the The weight of food in MasterChef segments are filled, the volume is programs is shown in pounds and... -
Page 47: Cooling Fan
Settings Cooling fan Default temperatures The cooling fan will continue to run for If you often cook with temperatures that some time after the oven has been differ from the default, it makes sense turned off to prevent humidity from to change the default temperatures. -
Page 48: Self Clean
Settings Self Clean Safety – With reminder System lock A reminder to run the Self Program The system lock prevents the oven program will appear in the display. being turned on inadvertently. – Without reminder The system lock will remain activated You will not be reminded to run the even after a power failure. -
Page 49: Sensor Lock
Settings Sensor lock Catalyzer The sensor button lock prevents you The level of odor reduction is from accidently turning the oven off or represented by a bar with seven changing a cooking program. segments. – Before you can use a mode, touch Maximum odor reduction is selected for at least 6 seconds. -
Page 50: Voltage
If you have purchased a new Miele roast probe, you will need to reset the sensor group (e.g. to P1- If all of the segments are filled the oven D01-0000001). temperature is much higher than indicated in the display. -
Page 51: Showroom Program
Settings Showroom Program Factory default This mode enables the oven to be – Settings demonstrated in showrooms without Any settings that have been altered heating up. It should not be set for will be reset to the factory default domestic use. setting. -
Page 52: Mymiele
MyMiele You can personalize your oven using To add an entry the MyMiele function by inputting You can add up to 20 entries. frequently used processes. Select MyMiele It is particularly useful with Gourmet Center (oven) and MasterChef (speed ... -
Page 53: Editing Mymiele
MyMiele Editing MyMiele Sorting entries The order can be rearranged as long as After selecting you can Edit there are more than 4 entries. – add entries as long as MyMiele Select MyMiele contains fewer than 20 entries, Select Edit –... -
Page 54: Alarm + Timer
Alarm + Timer Using "Timer", you can set an alarm for At the set alarm time a specific time or set the timer duration – the Alarm symbol will flash next to to time an activity in the kitchen e.g. the time in the display. -
Page 55: Using The Timer
Alarm + Timer Setting the timer Using the Timer The timer can be used to time any When the setting Time Display activity in the kitchen , e.g. boiling set the oven must be turned on to set eggs. the timer. -
Page 56: Resetting The Timer
Alarm + Timer At the end of the timer Resetting the timer – the Timer symbol flashes, Select the timer in the upper right of the display, or select "Timer" and the – the time starts counting upwards, desired timer. -
Page 57: Guide To The Modes
Guide to the modes The oven has a wide range of modes for preparing a variety of foods. Due to country-specific preferences for preparation of food, default temperatures and temperature ranges in °F and C° do not correspond. The temperature values have been defined as given in the chart. -
Page 58: Maxi Broil
Guide to the modes Oven modes Default Temperature temperature range 400 °F (180 °C) 75–525 °F Surround Roast (30–280 °C) For roasting traditional recipes, e.g. pot roast, and braising or cooking at low temperatures. 375 °F (160 °C) 75–475 °F Convection Roast ... -
Page 59: Convection Broil
Guide to the modes Oven modes Default Temperature temperature range 400 °F (200 °C) 200–500 °F Convection Broil (100–260 °C) This mode distributes hot air from the Browning/ Broiling element over the food using the fan. This allows for a lower temperature to be used then when using Broil . -
Page 60: Additional Functions
Additional functions You have placed the food in the oven, Changing the temperature selected a mode and set the As soon as a cooking mode is selected, temperature. a default temperature will appear in the display together with its possible range By selecting you can Additional Settings... -
Page 61: Rapid Preheat
Additional functions Rapid PreHeat Rapid PreHeat – Rapid PreHeat can be used to speed up the preheating phase. The Browning / Broiling and convection heating elements turn on The Rapid heat-up function switches on together with the fan to enable the automatically if you set a temperature oven to reach the required of more than 212°F (100°C) for... -
Page 62: Using The Crisp Function (Moisture Reduction)
Additional functions Using the Crisp function Changing the oven mode (Moisture Reduction) You can change the oven mode during operation. It is a good idea to use this function when cooking items which are moist on Select Change the inside but which should be crispy ... -
Page 63: Setting Additional Durations
Additional functions Setting additional durations – Start at Set the time you would like cooking You have placed the food in the oven, to start at. The oven will turn on selected a mode and set the automatically at the time set. temperature. -
Page 64: Turning Off Automatically
Additional functions Turning off automatically Turning on and off automatically It is now 11:45. The food takes 30 It is recommended to use the minutes to cook and should be ready at automatic On/Off feature when 12:15. roasting. Do not delay the start of the program for too long when baking. -
Page 65: Sequence Of A Cooking Program That Turns On And Off Automatically
Additional functions Sequence of a cooking program that Changing the set time turns on and off automatically Select Change Up until the start time the mode, the All options that can be changed will selected temperature, and the Start at appear. -
Page 66: Moisture Plus
Moisture Plus Your oven is equipped with a steam – When roasting meat with a high fat injection system for cooking with content, injecting steam at the moisture. Baking, roasting and cooking beginning of roasting will help render with Moisture Plus guarantees the fat. -
Page 67: Cooking With The Moisture Plus Function
Moisture Plus Cooking with the Moisture Timing the bursts of steam Plus function This option will only appear in the display after you have selected 1, 2 or It is normal for condensation to form 3 bursts of steam. on the inside of the door during steam injection. -
Page 68: Changing The Type Of Heating
Moisture Plus Changing the type of heating You can combine Moisture Plus with four different heating types (Convection Bake, Surround, Intensive and Auto Roast). The default setting is Convection Bake. Select Change Select Change type of heating ... -
Page 69: Injecting Bursts Of Steam
Moisture Plus Injecting bursts of steam 1, 2 or 3 Bursts of steam Manual bursts of steam Steam can cause scalding. Do not open the door during bursts When has been selected, you Manual of steam. Also, condensation on the can trigger bursts of steam once Start sensors will cause then to have a... -
Page 70: Evaporating Residual Moisture
Moisture Plus Evaporating residual moisture The residual moisture evaporation process When cooking with added moisture, the The oven will heat up and the residual water will be equally distributed water in the oven compartment will between the number of steam bursts evaporate. -
Page 71: Starting Residual Water Evaporation Immediately
Moisture Plus Starting residual water evaporation Skipping residual moisture immediately evaporation Steam can cause scalding. Skipping the residual moisture Do not open the door while the evaporation process can cause residual water is being evaporated. water to overflow into the oven cavity. -
Page 72: Gourmet Center
Gourmet Center MasterChef Plus Your oven has a wide range of MasterChef, and MasterChef Plus a variety of bread MasterChef Plus programs that enable you to achieve programs are available. These excellent cooking results with ease. MasterChef programs work with Simply select the appropriate program Moisture Plus. -
Page 73: Using Masterchef And Masterchef Plus Programs
Gourmet Center Using MasterChef and Notes on using these programs MasterChef Plus programs – After cooking, allow the oven interior to cool down to room temperature From the Main Menu: again before starting a MasterChef or Select Gourmet Center MasterChef Plus program. -
Page 74: Search
Gourmet Center Search You can search the Gourmet Center the name of the food type and MasterChef program. This search is a full-text search and can also be used to search for parts of words. From the Main Menu: Select Gourmet Center A list of food types will appear in the display. -
Page 75: Baguette
Gourmet Center Baguette Yields: 3 Loaves Ingredients Divide the dough into three equal 26 oz. Bread Flour (approx. 5 cups plus portions 1 tablespoon) Shape the dough into 6" cylinders. 2 cups lukewarm water (16 oz) Working with one piece of dough at a 4 teaspoons instant yeast time, (keeping the other covered in 3 teaspoons salt... -
Page 76: Banana Bread
Gourmet Center Banana Bread Yields: 1 Loaf Ingredients 1 cup walnuts, coarsely chopped 1 3/4 cups bread flour 3/4 cup granulated white sugar 1 teaspoon baking powder 1/4 teaspoon baking soda 1/4 teaspoon salt 1 teaspoon ground cinnamon 2 large eggs, lightly beaten 1/2 cup unsalted butter, melted and cooled 3 ripe large bananas, mashed well... -
Page 77: Brioche
Gourmet Center Brioche Yields: 8 Brioches Ingredients for dough Transfer dough to a large greased bowl 15.2 oz. bread flour (approx., and cover with plastic wrap. Place the 2 3/4 cups plus 3 tablespoons) bowl into refrigerator for about 1 1/2 teaspoon osmotolerant yeast 15 hours. -
Page 78: Ciabatta
Gourmet Center Ciabatta Yields: 2 Loaves Ingredients for Sponge Then fold the bottom of the dough 16 oz. 00 flour or Italian-style flour down (towards you) and fold to the (approx. 3 1/4 cups) center. Do the same for the left and .3 oz. -
Page 79: Cinnamon Raisin Bread
Gourmet Center Cinnamon Raisin Bread Yields: 1 Loaf Ingredients for dough Roll dough into a rectangle about 3 1/2 cups (18.6 oz.) Bread Flour 1/2 inch thick, sprinkle heavily with 3 T + 2 t (2 oz.) Granulated Sugar cinnamon sugar. Roll like a jelly roll to fit 1 t (0.3 oz.) Salt the length of a loaf pan. -
Page 80: French Bread
Gourmet Center French Bread Yields: 2 Loaves Ingredients Score the loaves three times and place 26 oz. French Style Flour (approx. directly into the oven and select the 5 cups plus 1 tablespoon) MasterChef Plus program for French 2 cups lukewarm water (16 oz) Bread 4 teaspoons instant yeast Follow the directions on the display. -
Page 81: Italian Bread
Gourmet Center Italian Bread Yields: 2 Loaves Ingredients Score dough 3 times, lightly brush with 25.4 oz. bread flour (approx. 4 3/4 cups water and sprinkle with sesame seeds plus 3 tablespoons) immediately. 6 oz. extra fancy (fine grain) semolina Place in oven and select the flour (approx. -
Page 82: Jalapeño Cheese Bread
Gourmet Center Jalapeño Cheese Bread Yields: 2 Loaves Ingredients Then shape into loaves, place into a 2 cups hot water well-greased tea loaf pan and cover. .2 ounces instant yeast Proof for another 1 hour. 2 teaspoons sugar Grate extra cheddar to cover the top of 2 tablespoons olive oil the loaves as desired. -
Page 83: Multigrain Bread
Gourmet Center Multigrain Bread Yields: 2 Loaves Ingredients Place into oven immediately and select 15 oz. nine grain flour blend (approx. the MasterChef plus program for 3 cups plus 2 tablespoons) Multigrain Bread 16.5 oz. bread flour (approx. 3 cups Follow the directions on the display. -
Page 84: Rolls
Gourmet Center Rolls Yields: 8 Rolls Ingredients Immediately place rolls in oven and 21.2 oz. unbleached bread flour select MasterChef Plus program for (approx. 4 cups plus 1 tablespoon) Rolls 2 teaspoons instant yeast Follow the directions on the display 2 1/2 teaspoons salt 8 ounces sourdough starter (approx. -
Page 85: Rye Bread
Gourmet Center Rye Bread Yields: 2 Loaves Ingredients for Preferment Remove dough from the bowl and 5.6 oz. bread flour (approx.1 cup plus shape into a ball. Cover the dough and 2 tablespoons) proof for 1½ hours. .02 oz. instant yeast (approx. Divide dough in half. -
Page 86: San Francisco Sourdough
Gourmet Center San Francisco Sourdough Yields: 2 Loaves Ingredients Immediately place in oven and select 27.5 oz. bread flour (approx. 5 1/4 cups the MasterChef Plus Program for plus 2 tablespoons) Sourdough Bread .03 oz. instant (approx. Follow the directions in the display. 2 1/2 teaspoons) .7 oz. -
Page 87: Walnut Bread
Gourmet Center Walnut Bread Yields: 2 Loaves Ingredients Divide the dough in half and shape into 26 oz. French Style Flour (approx. round loaves. 5 cups plus 1 tablespoon) Place on perforated baking tray. Cover 2 cups lukewarm water (16 oz) with a towel and rest for 20 minutes. -
Page 88: White Bread
Gourmet Center White Bread Yields: 2 Loaves Ingredients Score the loaves three times and place 26 oz. Bread Flour (approx. 5 cups plus directly into the oven and select the 1 tablespoon) MasterChef Plus program for White 2 cups lukewarm water (16 oz) Bread 4 teaspoons instant yeast Follow the directions on the display. -
Page 89: Whole Grain Bread
Gourmet Center Whole Grain Bread Yields: 2 Loaves Ingredients Divide the dough into 2 portions. Shape 29.3 oz. bread flour (approx. 5 cups each portion into a rectangle; start by plus 2 tablespoons) taking one of the dough portions and 14.6 oz. -
Page 90: Favorites
Favorites You can create and save up to 20 of Creating a Favorite your own programs. Select Favorites – Each one can have up to 10 cooking Select Create Program stages. This enables you to save your most frequently used recipes You can now specify the settings for very accurately. -
Page 91: Starting A Favorite
Favorites Starting a Favorite You can add a line break for longer program names using the symbol. Place the food in the oven. Once you have entered the program Select Favorites name select Save The program names will appear in the A message will appear in the display display. -
Page 92: Changing Favorites
Favorites – Changing Favorites Display Stages A summary of your settings will Changing cooking stages appear in this display. You can adjust the setting under (see Change Cooking stages in a MasterChef "Changing Favorites"). program that have been saved under a different name cannot be changed. -
Page 93: Changing The Name
Favorites Changing the name Deleting a Favorite Select Favorites Select Favorites The program names will appear in the The program names will appear in the display. display. Select Edit Select Edit Select Change Program Select Delete Program ... -
Page 94: Bake
Convection Bake , Intensive , Moisture Plus Parchment paper / Greasing the pan or Surround . All Miele accessories (baking tray, universal tray, perforated baking tray Bakeware and round baking dish) are treated with The bakeware used depends on the PerfectClean finish. - Page 95 Bake Temperature Shelf levels As a general rule, select the lower The shelf level on which you place your temperature given in the chart. food to bake will depend on the oven mode and the number of trays being Choosing a baking temperature higher used.
-
Page 96: Roast
Roast Tips Always follow USDA guidelines on food safety. – Resting time: At the end of the program, take the roast out of the Oven modes oven, cover with aluminum foil and let stand for about 10 minutes. This Depending on how you would like the helps retain the juices when the meat food cooked, you can use Convection is sliced. -
Page 97: Wireless Roast Probe
Roast Wireless roast probe The core temperature value is sent via radio signal from the transmitter in the handle of the wireless roast probe via the antenna in the back wall of the oven to the electronic module of the appliance as soon as the food is put in The wireless roast probe allows you to the oven with the roast probe inserted. -
Page 98: When To Use The Wireless Roast Probe
Roast When to use the wireless roast probe Important notes on using the wireless roast probe Apart from MasterChef programs, Special Modes and Favorites, the To ensure that the probe works wireless roast probe can be used with correctly, please observe the the following functions: instructions below. - Page 99 Roast Please also note the following – When using roasting bags or information: aluminum foil, insert the probe through the bag or foil into the center – The meat can be placed in a pot or of the meat. You can also place meat on the universal tray and wire oven inside the bag/foil with the probe rack.
-
Page 100: Using The Wireless Roast Probe
Roast Using the wireless roast probe You can also start the process at a later time. Select and set a Additional Settings When cooking in the oven, use the time in the field. Start at wireless roast probe. cannot be set Duration Ready at It is located in the storage sleeve on... -
Page 101: Time Left Display
Roast Time left display Displaying the core temperature After a certain time, the estimated As soon as the time remaining appears, duration of the cooking process you can also display the actual core remaining (time left) will appear in the temperature. -
Page 102: Using Residual Heat
Roast Using residual heat Shortly before the end of the cooking program the oven heating will turn off. The residual heat in the oven is sufficient to complete the cooking process. Using the residual heat in the oven saves energy. will appear in the Energy Save Phase display to show that the oven is in... -
Page 103: Slow Roasting
Slow Roasting This cooking method is ideal for Cooking time / Core cooking beef, pork, veal or lamb when temperatures a tender result is desired. Always observe USDA food safety First, using a cooktop sear the meat on guidelines. -
Page 104: Using The Slow Roasting Function
Slow Roasting Using the Slow Roasting When the program is completed will appear in the Program Finished function display and a buzzer will sound, if Select Special Modes turned on (see Settings - Volume - Buzzer tone"). Select Slow Roasting ... -
Page 105: Adjusting The Slow Roasting Temperature
Slow Roasting Adjusting the Slow Roasting temperature Use the wire oven rack with the universal tray positioned on top. Do not use the Rapid PreHeat function to preheat the oven. Slide the universal tray and rack onto shelf level 2. ... -
Page 106: Broil
Broil Cookware Danger of burns! Broil with the oven door closed. If you broil with the door open the hot air will escape from the oven before it has been cooled by the cooling fan. Use the universal tray with the grilling The controls will get hot. - Page 107 Broil Testing doneness Shelf levels Select the shelf level according to the Always observe USDA food safety thickness of the food. guidelines. – Thin cuts: Shelf level 3 or 4 Preparing food for broiling – Thick cuts: Shelf level 1 or 2 Rinse the meat under cold water and Broiling time ...
- Page 108 Broil Broil Place the grilling and roasting insert (if available) in the universal tray. Place the food on top. Select the required oven mode and temperature. Preheat the Browning/Broiling element for approx. 5 minutes with the door closed. ...
- Page 109 Broil Using the rotisserie to broil The rotisserie is an optional accessory for use with the Rotisserie mode. The rotisserie can support a maximum weight of 11 lbs (5 kg). Slide the wire oven rack or the FlexiClips and wire rack onto level 1. ...
-
Page 110: Special Modes
Special Modes In addition to the MasterChef programs This section also gives information on your oven has a variety of Special the following applications: Modes. – Gentle Bake Select Special Modes – Canning The following Special Modes are – Frozen food available: –... -
Page 111: Defrost
Special Modes Defrost Tips – Remove the packaging and place the Use the Defrost mode to gently defrost frozen food on the universal tray or in frozen food. a suitable bowl or dish. The temperature can be set between – When defrosting poultry, place it on 75-150°F (25-50°C). -
Page 112: Dehydrate
Special Modes Dehydrate Select Special Modes Select This program is designed for traditional Dehydrate drying of food to preserve it. If necessary, adjust the default temperature and set the duration. The temperature can be set between 75-250°F (80-100°C). ... -
Page 113: Reheat
Special Modes Reheat Warm-up Cookware This program is designed for reheating This program is designed to warm your plated meals and uses added moisture. cookware. The available options are: The temperature can be set between 75-175°F (50-80°C). – Pizza Use heat-resistant cookware. –... -
Page 114: Proof
Special Modes Proof Pizza This program was designed to proof This program is designed specifically dough without humidity. for baking pizza. The temperature can be set between The temperature can be set between 75-125°F (30-50°C). 300-475°F (160-250°C). Select Select Special Modes Special Modes ... -
Page 115: Sabbath Program
Special Modes Sabbath Program Using the Sabbath Program The program can only be canceled by This program is designed for religious turnng the oven off. observance. Select Special Modes Select the Sabbath Program and then select the oven mode and temperature. ... -
Page 116: Gentle Bake
Special Modes Gentle Bake The Gentle Bake mode is ideal for casseroles and gratins. You can select a temperature setting from 200-475°F (100-250°C). Select . Operating Modes Select and change the Gentle Bake default temperature if necessary. Follow the instructions on the display. -
Page 117: Canning
Special Modes Canning Fruit / Cucumbers As soon as bubbles begin to rise Always observe USDA food safety evenly in the jars, reduce the guidelines. temperature to the lowest setting. Then, leave the jars in the warm oven Canning containers for an additional 25-30 minutes. -
Page 118: Frozen Food
Special Modes Frozen food Preparation Handling food carefully will help Tips for pizza, French fries, protect your health. croquettes and other similar items Cakes, pies, pizza, baguettes Select the oven mode and temperatures recommended on the – Bake frozen pizza on parchment food's packaging. -
Page 119: Cleaning And Care
Cleaning and care Unsuitable cleaning agents Danger of burns! Make sure the heating elements are To avoid damaging surfaces when turned off and allowed to cool cleaning, do not use: completely. – Cleaners containing soda, ammonia, acids or chlorides ... -
Page 120: Tips
Cleaning and care Normal soiling If stains and food residues are allowed to remain on surfaces for a There is a seal around the oven longer period of time, it may no interior which seals the inside of the longer be possible to remove them. door. -
Page 121: Stubborn Soiling
Cleaning and care Stubborn soiling Non-Miele oven spray must only be used in a cold oven and for no longer Spilt fruit and roasting juices may than 10 minutes. permanently discolor surfaces of the oven. This discoloration is If necessary, the rough side of a dish... -
Page 122: Cleaning The Oven Interior With Self Clean
Cleaning and care Cleaning the oven interior with Preparing for the Self Clean program Self Clean The high temperatures used during Instead of cleaning the oven by hand, self cleaning will damage accessories that are not designed for you can use the Self Clean cleaning in the Self Clean program. -
Page 123: Starting The Self Clean Program
Cleaning and care Starting the Self Clean program The buzzer will stop and the visual indicators will go out after you touch Danger of burns! the "Timer" sensor. When Self Cleaning the front of the Delaying the start of the Self Clean oven becomes hotter than with program normal oven use. -
Page 124: At The End Of The Self Clean Program
Cleaning and care At the end of the Self Clean program Extend and retract the FlexiClip telescopic runners several times after When the duration remaining reaches running the Self Clean cleaning 00:00 h, a message will appear in the program. -
Page 125: The Self Clean Program Is Canceled
Cleaning and care The Self Clean program is canceled Once the power returns after a power failure, Program Canceled Cooling Down If the Self Clean program is canceled will appear in the display. the oven door will remain locked until The door will unlock once the the temperature inside the oven drops temperature in the oven has dropped... -
Page 126: Removing The Door
Cleaning and care Removing the door Do not attempt to take the door off the brackets when it is in the horizontal position, the brackets will spring back against the oven. Do not use the handle to pull the door off the brackets, the handle could break. -
Page 127: Reinstalling The Door
Cleaning and care Reinstalling the door Open the door fully. If the locking clamps are not locked, the door can easily become detached from the brackets and be damaged. You must make sure that the locking clamps are locked again. ... -
Page 128: Removing The Shelf Runners
Cleaning and care Removing the shelf runners Danger of injury! Do not use the oven without the shelf runners correctly inserted. You can remove the shelf runners together with the FlexiClip telescopic runners (if present). If you wish to remove the FlexiClip telescopic runners separately in advance, follow the instructions in "Features –... -
Page 129: Frequently Asked Questions
Frequently asked questions The following faults can be corrected without contacting the Miele Service Department. If in doubt, please contact Miele. Danger of injury! Repairs should only be carried out by a qualified and trained professional in accordance with local and national safety regulations. - Page 130 Turn the oven off and then back on again. Then restart the Self Clean program. If the message appears again, contact Miele Technical Service. appears The door lock for the Self Clean program will not Door not released in the display.
- Page 131 MasterChef Plus has been selected. The steam injection system is faulty. Fault with moisture control - Moisture Plus program not Contact Miele Technical Service. appears in the available Use the Convection Bake program instead of display after selecting Moisture Plus .
- Page 132 Frequently asked questions Problem Possible cause and solution The browning is The wrong temperature or shelf level was selected. uneven. There will always be a slight unevenness. If the unevenness is great, check whether the correct temperature and shelf level were selected. That material or color of the bakeware is not suitable for the oven mode selected.
- Page 133 Frequently asked questions Problem Possible cause and solution There is soiling in the The Self Clean program burns off soiling in the oven over after the Self Clean and leaves it as ash. program. Using a soft sponge, warm water and liquid dish soap remove the ashes.
-
Page 134: Technical Service
In the event of a fault which you cannot For further information, please refer to easily correct yourself, please contact: your warranty booklet. – your Miele dealer, or – the Miele Technical Service Department. See back cover for contact details. -
Page 135: Copyright And Licenses
You will need to enter the specific product name. Miele will provide the source code for all components of software licensed under the GNU General Public License and comparable Open Source licenses. For source code requests, please email info@miele.com. - Page 139 Technical Service. U.S.A. Canada Miele, Inc. Importer Miele Limited National Headquarters 9 Independence Way Headquarters and Miele Centre Princeton, NJ 08540 161 Four Valley Drive Phone: 800-843-7231 Vaughan, ON L4K 4V8 609-419-9898 www.miele.ca 609-419-4298...
- Page 140 HR1954; HR1955; HR1956 en–US, CA M.-Nr. 09 898 081 / 00...