Miele HR 1124 Operating Instrucitons
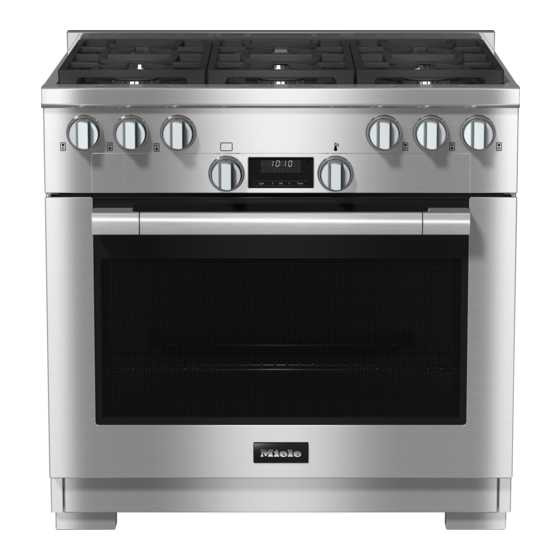
30" 36" 48" dual fuel range (gas cooktop)
Hide thumbs
Also See for HR 1124:
- Operating instructions manual (136 pages) ,
- Installation instructions manual (128 pages) ,
- Installation instructions manual (124 pages)

Related Manuals for Miele HR 1124


Summary of Contents for Miele HR 1124
-
Page 1: Operating Instructions
Operating Instructions 30", 36", 48" Dual Fuel Range (Gas Cooktop) To prevent accidents and damage to the range, you must read all instructions supplied before installing or using the appliance. en-US M.-Nr. 09 898 140... -
Page 2: Important Safety Instructions
IMPORTANT SAFETY INSTRUCTIONS WARNING Children and adults can tip over the range if has not been secured. This may lead to fatal injuries. This range must be secured and connected using the anti-tip device according to the installation instructions. ... - Page 3 IMPORTANT SAFETY INSTRUCTIONS WARNING: If the information in this manual is not followed exactly, a fire or explosion may result causing property damage, personal injury, or death. – Do not use or store gasoline or other flammable liquids or vapors in the vicinity of this or any other appliance.
-
Page 4: Table Of Contents
Contents IMPORTANT SAFETY INSTRUCTIONS..............2 IMPORTANT SAFETY INSTRUCTIONS..............6 Guide to the range ....................16 HR 1124 ......................... 16 Cooktop ......................16 Controls ......................17 HR 1134 ......................... 18 Cooktop ......................18 Controls ......................19 HR 1135 ......................... 20 Cooktop ......................20 Controls ...................... - Page 5 Contents Features ........................ 39 Model numbers ..................... 39 Data plate ......................39 Items included with this range ................39 Cooktop safety feature ..................39 Automatic re-ignition..................39 Before using for the first time................40 Cleaning the cooktop for the first time ..............40 "Burning in"...
-
Page 6: Important Safety Instructions
They contain important notes on installation, safety, use and maintenance. Miele cannot be held liable for damage occurring as a result of non-compliance with these instructions. Keep these instructions in a safe place and pass them on to any... - Page 7 IMPORTANT SAFETY INSTRUCTIONS This cooktop is intended for domestic use and use in other similar environments. This cooktop is not intended for outdoor use. The cooktop is intended for domestic use only to prepare food and keep it warm. Any other use may be dangerous. ...
- Page 8 IMPORTANT SAFETY INSTRUCTIONS Children As with any appliance, close supervision is necessary when used by children. Do not leave children unattended: Children should not be alone or unsupervised in the area where the oven is installed. Do not allow them to sit or stand on the appliance.
- Page 9 Technical safety Installation, repair and maintenance work should be performed by a Miele authorized service technician in accordance with national and local safety regulations and the provided installation instructions. Contact Miele’s Technical Service Department for examination, repair or adjustment. Repairs and other work by unauthorized persons could be dangerous and may void the warranty.
- Page 10 Do not open the casing of the cooktop under any circumstances. Any repairs not performed by a Miele authorized service technician will void the warranty. Defective components should be replaced by Miele original parts only.
- Page 11 IMPORTANT SAFETY INSTRUCTIONS If the range is installed behind a cabinet door, do not close the door while the appliance is in operation. Heat and moisture can build up behind the closed door and cause damage to the range and to the surrounding cabinets and flooring.
- Page 12 IMPORTANT SAFETY INSTRUCTIONS Proper use Do not leave the cooktop unattended when cooking on high power. Spilled food will begin to smoke and cause grease splatter, which can ignite on the cooktop. Oil and fat can catch fire if overheated. Never leave the appliance unattended when cooking with oil and fat.
- Page 13 IMPORTANT SAFETY INSTRUCTIONS The cooktop gets hot when in use and remains hot for some time after being turned off. Do not touch the appliance if there is a possibility that it could still be hot. You can burn yourself on a hot cooktop. When cooking on the appliance, protect your hands by using heat-resistant pot holders or oven mitts.
- Page 14 IMPORTANT SAFETY INSTRUCTIONS Remove all grease splatters and other flammable (food) residues on the cooktop. They are a fire hazard. Install the burner grates in an upright position to avoid scratching the cooktop. Do not use roasting dishes, pans, or grilling stones that are large enough to cover several burners.
-
Page 15: Cleaning And Care
IMPORTANT SAFETY INSTRUCTIONS The grates, burner cap, bottom parts of the burner, and any other parts located near the burner flame, can still be very hot after cooking and cause burns. Do not touch these components when using the cooktop. ... -
Page 16: Guide To The Range
Guide to the range HR 1124 Cooktop a Burner knob for rear left burner e Power burners b Burner knob for front left burner f Dishwasher-safe grates c Burner knob for front right burner g SImmer burner d Burner knob for rear right burner... -
Page 17: Controls
Guide to the range Controls a Burner knob for rear left burner d Burner knob for rear right burner b Burner knob for front left burner e Oven controls c Burner knob for front right burner... -
Page 18: Cooktop
Guide to the range HR 1134 Cooktop a Burner knob for rear left burner f Burner knob for rear right burner b Burner knob for front left burner g Power burners c Burner knob for front center burner h SImmer burner d Burner knob for rear center burner i Dishwasher-safe grates e Burner knob for front right burner... -
Page 19: Controls
Guide to the range Controls a Burner knob for rear left burner e Burner knob for front right burner b Burner knob for front left burner f Burner knob for rear right burner c Burner knob for front center burner g Oven controls d Burner knob for rear center burner... -
Page 20: Cooktop
Guide to the range HR 1135 Cooktop a Burner knob for rear left burner f Power burners b Burner knob for front left burner g Thermostatically controlled ceramic burners c Grill control knob h Dishwasher-safe grill grate d Burner knob for front right burner i Dishwasher-safe grates e Burner knob for rear right burner j SImmer burner... -
Page 21: Controls
Guide to the range Controls a Burner knob for rear left burner d Burner knob for front right burner b Burner knob for front left burner e Burner knob for rear right burner c Grill control knob f Oven controls... -
Page 22: Cooktop
Guide to the range HR 1136 Cooktop a Burner knob for rear left burner g Griddle plate b Burner knob for front left burner h Thermostatically controlled ceramic burners c Control knob for griddle plate i Dishwasher-safe stainless steel d Burner knob for front right burner grease drip tray e Burner knob for rear right burner j Dishwasher-safe grates... -
Page 23: Controls
Guide to the range Controls a Burner knob for rear left burner d Burner knob for front right burner b Burner knob for front left burner e Burner knob for rear right burner c Control knob for griddle plate f Oven controls... -
Page 24: Cooktop
Guide to the range HR 1924 Cooktop a Backlit burner control knob for rear e Power burners left burner f Dishwasher-safe grates b Backlit burner control knob for front g SImmer burner left burner c Backlit burner control knob for front right burner d Backlit burner control knob for rear right burner... -
Page 25: Controls
Guide to the range Controls a Backlit burner control knob for rear d Backlit burner control knob for rear left burner right burner b Backlit burner control knob for front e Oven controls left burner c Backlit burner control knob for front right burner... -
Page 26: Cooktop
Guide to the range HR 1934 Cooktop a Backlit burner control knob for rear f Backlit burner control knob for rear left burner right burner b Backlit burner control knob for front g Power burners left burner h SImmer burner c Backlit burner control knob for front i Dishwasher-safe grates center burner... -
Page 27: Controls
Guide to the range Controls a Backlit burner control knob for rear e Backlit burner control knob for front left burner right burner b Backlit burner control knob for front f Backlit burner control knob for rear left burner right burner c Backlit burner control knob for front g Oven controls center burner... -
Page 28: Cooktop
Guide to the range HR 1935 Cooktop a Backlit burner control knob for rear f Power burners left burner g Thermostatically controlled ceramic b Backlit burner control knob for front burners left burner h Dishwasher-safe grill grate c Backlit control knob for the grill i Dishwasher-safe grates d Backlit burner control knob for front j SImmer burner... -
Page 29: Controls
Guide to the range Controls a Backlit burner control knob for rear d Backlit burner control knob for front left burner right burner b Backlit burner control knob for front e Backlit burner control knob for rear left burner right burner c Backlit control knob for the grill f Oven controls... -
Page 30: Cooktop
Guide to the range HR 1936 Cooktop a Backlit burner control knob for rear g Griddle plate left burner h Thermostatically controlled ceramic b Backlit burner control knob for front burners left burner i Dishwasher-safe stainless steel c Backlit burner control knob for grease drip tray griddle plate j Dishwasher-safe grates... -
Page 31: Controls
Guide to the range Controls a Backlit burner control knob for rear d Backlit burner control knob for front left burner right burner b Backlit burner control knob for front e Backlit burner control knob for rear left burner right burner c Backlit burner control knob for f Oven controls griddle plate... -
Page 32: Cooktop
Guide to the range HR 1954 Cooktop a Backlit burner control knob for rear g Backlit burner control knob for front left burner right burner b Backlit burner control knob for front h Backlit burner control knob for rear left burner right burner c Backlit burner control knob for rear i Power burners... -
Page 33: Controls
Guide to the range Controls a Backlit burner control knob for rear g Backlit burner control knob for front left burner right burner b Backlit burner control knob for front h Backlit burner control knob for rear left burner right burner c Backlit burner control knob for rear i Oven controls left center burner... -
Page 34: Cooktop
Guide to the range HR 1955 Cooktop a Backlit burner control knob for rear g Backlit burner control knob for rear left burner right burner b Backlit burner control knob for front h Power burners left burner i SImmer burner c Backlit control knob for the grill j Thermostatically controlled ceramic d Backlit burner control knob for front... -
Page 35: Controls
Guide to the range Controls a Backlit burner control knob for rear f Backlit burner control knob for front left burner right burner b Backlit burner control knob for front g Backlit burner control knob for rear left burner right burner c Backlit control knob for the grill h Oven controls d Backlit burner control knob for front... -
Page 36: Cooktop
Guide to the range HR 1956 Cooktop a Backlit burner control knob for rear h Power burners left burner i SImmer burner b Backlit burner control knob for front j Griddle plate left burner k Thermostatically controlled ceramic c Backlit burner control knob for burners griddle plate l Dishwasher-safe stainless steel... -
Page 37: Controls
Guide to the range Controls a Backlit burner control knob for rear f Backlit burner control knob for front left burner right burner b Backlit burner control knob for front g Backlit burner control knob for rear left burner right burner c Backlit burner control knob for h Oven controls griddle plate... -
Page 38: Control Panel
Control panel Burner knob With the burner knob, you can ignite the burner and regulate the flame. The burners can be variably adjusted between the lowest and highest settings. Depending on the model, the range will be equipped with Backlit burner control knobs. -
Page 39: Features
– Warming Drawer load) for your range. – An anti-tip device, including screws for fastening the range Have this information available when contacting Miele Technical Service. – Various accessories Cooktop safety feature Automatic re-ignition Your gas cooktop is equipped with an automatic re-ignition function. -
Page 40: Before Using For The First Time
Before using for the first time Cleaning the cooktop for the "Burning in" the griddle plate first time You must "burn in" the griddle plate Remove any protective foil and before cooking food on it the first stickers. time. This process prevents food from sticking and protects the surface from ... -
Page 41: Operating The Cooktop
Operating the cooktop Switching on during a power Fire hazard! outage Do not leave the appliance unattended while cooking! If there has been a power failure, the automatic re-ignition feature will Turning on not work properly. Operate the cooktop only under Do not turn the control knob supervision. -
Page 42: Turning Off
Operating the cooktop Because the edges of the flame are much hotter than its center, the flame tips should stay beneath the bottom of the cookware. Flame tips which extend beyond the sides of the cookware emit unnecessary heat into the room and can also damage cookware handles, which increases the risk of injury. - Page 43 Operating the cooktop Standard/power burner Knob label Description Gas supply is off: Burner off High Strongest flame setting: Maximum power of upper and lower flame rings Simmer Weakest flame setting: Upper flame ring off Minimum power of lower flame ring Grill: Flat burner According to the model, the range has a grill.
-
Page 44: Cookware
Cookware – Select cookware that fits the size of – Position the cookware on the burner the burner: grate so that it cannot tip. There is Large diameter = large burner always a possibility of a slight tilt, Small diameter = small burner despite the proper position. -
Page 45: Energy Saving Tips
Energy saving tips – Whenever possible, keep pots and pans covered while cooking. Doing so will prevent unnecessary heat loss. – Wide, shallow cookware heats up faster and is therefore preferable to tall, narrow cookware. – Cook with as little water as possible. –... -
Page 46: Operating The Grill
Operating the grill The grill has a ceramic burner that Grilling tips transfers intense heat to food, searing the outside to seal the juices. Full Fire hazard! flexibility, depending on the food, from Do not leave the appliance "Low" to "High" as power settings. unattended while cooking! Turning on the grill –... -
Page 47: Operation Of The Griddle
Operation of the griddle The griddle is thermostatically Settings controlled to maintain a consistent Settings Food temperature. To prevent food from sticking, it is necessary to "season" the Simmering Sauce griddle prior to use (see "Before using for the first time"). Full flexibility, Holding food depending on the food, from "Low", Medium... -
Page 48: Tips For Frying
Operation of the griddle Tips for frying Before each use, wipe the griddle with a damp cloth to remove dust or other residue. – Pre-heat the griddle plate thoroughly for 8 -10 minutes at the power level that you are going to be using for cooking. -
Page 49: Cleaning And Care
Cleaning and care Always clean the cooktop after each Burn hazard! use. Allow it to cool down before The burners must be turned off and cleaning. allowed to cool completely. To avoid damaging the surfaces of your appliance, do not use: ... -
Page 50: Gas Cooktop
Cleaning and care Gas cooktop Burner control knobs with stainless steel finish The surfaces of the burner The burner control knobs may components and grates will slightly become discolored if they are not lose their luster over time. This is cleaned regularly. -
Page 51: Cleaning The Grill Grate
Remove any soiling and water with a sponge. You can clean stubborn soiling off the griddle plate with the rough side of a dish sponge and a few drops of Miele ceramic and stainless steel cleaner (see "Optional accessories"). Remove the grease catch pan and... -
Page 52: Frequently Asked Questions
Risk of injury! Improperly performed installation, maintenance or repair work can pose a serious danger to users of the appliance. Installation, maintenance and repairs may only be carried out by Miele authorized technicians. Do not attempt to open the cooktop casing yourself. - Page 53 Frequently asked questions Problem Possible cause and solution The ignitor does not The fuse in the building's wiring system was tripped. function properly. If necessary, contact a qualified electrician or Customer Service for assistance. There is food debris stuck between the ignitor and the burner cap.
-
Page 54: Technical Service
In the event of a fault which you cannot For further information, please refer to easily correct yourself, please contact: your warranty booklet. – your Miele dealer, or – the Miele Technical Service Department. See back cover for contact details. - Page 55 Technical Service. U.S.A. Canada Miele, Inc. Importer Miele Limited National Headquarters 9 Independence Way Headquarters and Miele Centre Princeton, NJ 08540 161 Four Valley Drive Phone: 800-843-7231 Vaughan, ON L4K 4V8 609-419-9898 www.miele.ca 609-419-4298...
- Page 56 All Gas: HR1124; HR1134; HR1135; HR1136; Dual Fuel: HR1924; HR1934; HR1935; HR1936; HR1954; HR1955; HR1956 en-US M.-Nr. 09 898 140 / 00...