Table of Contents
Advertisement
Quick Links
Advertisement
Table of Contents

Related Manuals for Insportline 5547 Sprynkl


Summary of Contents for Insportline 5547 Sprynkl
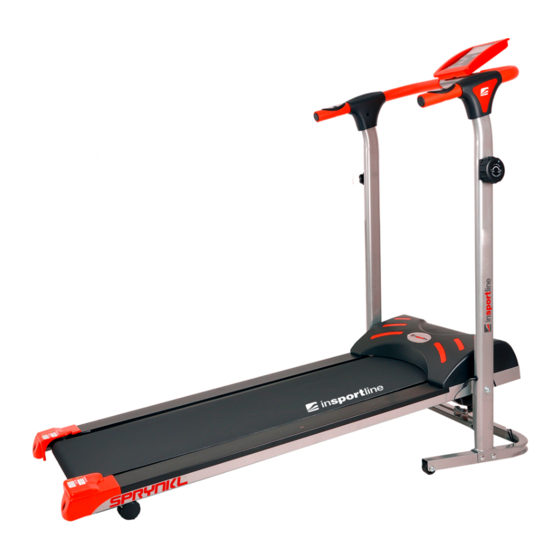
- Page 1 USER MANUAL - EN IN 5547 Magnetic Treadmill inSPORTline Sprynkl...
-
Page 2: Important Safety Information
IMPORTANT ! Please read all instructions carefully before using this product. Retain this manual for future reference. IMPORTANT SAFETY INFORMATION WARNING: TO REDUCE THE RISK OF SERIOUS INJURY, READ THE FOLLOWING IMPORTANT PRECAUTIONS BEFORE USING THE TREADMILL. 1. Before starting to exercise, read the manual carefully and also always keep this manual with you. 2. -
Page 3: Explode View
EXPLODE-VIEW... - Page 4 PART LIST OF EXPLODE-VIEW PART Q’TY Bolt M8X50 Washer ID8.2*OD16.2 Arc Washer ID8.2*ID22.2 Screw M6X10 Washer φ 6.2 Bolt M8X50 Big Washer ID8.2*ID22.2 Bolt M8X45 Screw M4*15 Knob M8*60 Screw M5*10 Nut M8 Wrench S13 Wrench S6 Wrench S5 Main Frame Rear Roller Plastic Washer Steel end...
- Page 5 Side Rail Nut M8 Plastic End Cap Bolt M8x45 Handle pulse wire 1set Plastic End Cap Screw M6*25 Nut M6 Base of The Magnet Nut M8 Bolt M8x40 Plastic Wheel Base frame cushion Bottom Frame Right Side Handle Post Tension Screw M5X15 27R-R&L Cover Of Handle...
- Page 6 Front Axle Front Roller Screw M3 Sensor Control Handle Bar Grip Handle Bar Grip Hand pulse connector Screw M4*20 Washer φ 5.2...
-
Page 7: Assembly Information
ASSEMBLY INFORMATION PART Q’TY PART Q’TY Handle Bar Main frame Bottom frame Computer Right side handle post Left side handle post 27R-R&L Cover of handle Plastic Cover... - Page 8 28L-L&R Cover of handle ASSEMBLY 30 MIN NOTICE Read this manual before assembly. • Recognize the spare parts first. • Check the hardware. • Ensure that you have the right tool. • Prepare an area to assemble. • Follow the instruction accordingly. •...
- Page 9 PART LIST OF ASSEMBLY...
- Page 10 ASSEMBLY 1. STEP:...
- Page 11 2. STEP:...
- Page 12 3. STEP: Before you assemble the tension cable, please make sure that it is at the level 8. THE ASSEMBLY OF MAGNETIC TENSION ADJUSTING SET IS AS THE FOLLOWING STEPS: A. Insert C through A. (Note: G through under the Main Frame)
- Page 13 B. Pull G downward in order to make A be near B, C. Revolve D as the drawing direction in order to tighten these two parts well.
- Page 14 4. STEP:...
- Page 15 5. STEP:...
- Page 16 6. STEP:...
- Page 17 7. STEP:...
- Page 18 8. STEP:...
- Page 19 You’d better check if all the parts are well fastened or not before using.
- Page 20 STORAGE Please loosen knob (NO. J) completely before folding the treadmill. Then lift the Main frame (NO.1) to the upright position and use knob (J) to fasten it tightly to prevent any accident in advance. TREADBELT ADJUSTING If the following situation is happened on the tread belt, it will make some noise on the machine. So if the tread belt is not in the center position, too tight or too loose, please use the tool to adjust it .
- Page 21 TENSION ADJUSTING The tension power has a great influence on the effect of the exercise, such as the consumption of the calories. The exerciser can set the desired tension power according to the photo as below: (1) When revolving the bolt No.16 in the a-direction , the tension power will be less. (2) When revolving the bolt No.16 in the b-direction , the tension power will be more.
-
Page 22: Maintenance
MAINTENANCE TREADMILL LUBRICATION To reduce the friction of the walking belt and minimize wear, lubricant may be applied directly onto the wooden board and underside of the Tread belt. Lift one side of the belt and touch the top surface of the Tread board. If the surface is wet no lubrication is required .If the surface is dry, lift one side of the belt edge first and at the same time spray or apply lubricant to the board. -
Page 23: Exercise Computer
EXERCISE COMPUTER BUTTONS MODE Press "Mode" button to preset TIME, DISTANCE, CALORIES and PULSE. Press "Mode" button for selection, or enter after setting up. To set up the value of TIME, DISTANCE, CALORIES and PULSE. You can hold the button to increase the value faster. (The monitor has to be in stop condition.) The user may press "RESET"... - Page 24 After you hold two hands to the handgrip sensors, the monitor will display your current PULSE heart rate figures. You may set target figure before training. Once your heart rate is exceed to the target, the monitor will alarm to remind you. TEMPERATURE Displays current room temperature from 0℃...
-
Page 25: Exercise Tips
start to count down from "00:60". Pulse signal will be blinking according to user's pulse. When count down to "0", it will show F1~F6. (2) LCD display as follows: (RECOVERY start condition & end condition) (3) If the count down action to 00:00 is not completed and there is no pulse signal. The count down action have to be done and shown F6. - Page 26 Sit with your right leg extend. Rest the sole of your left foot against your right inner thigh. Stretch toward your toe as far as possible. Hold for 15 counts. Relax and then repeat with left leg extend. Head Roll Rotate your head to the right for one count, feeling the stretch up the left side of your neck.
- Page 27 Side Stretch Open your arms to the side and continue lifting them until they are over your head, Reach your right arm as far upward toward the ceiling as you can for one count, Feel the stretch up your right side, Repeat this action with your left arm.
Need help?
Do you have a question about the 5547 Sprynkl and is the answer not in the manual?
Questions and answers