Table of Contents
Advertisement
Quick Links
Advertisement
Table of Contents

Related Manuals for Insportline Sprynkl IN 5547


Summary of Contents for Insportline Sprynkl IN 5547
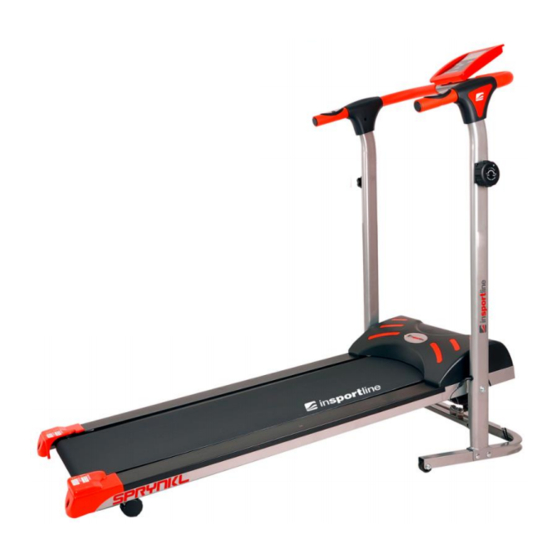
- Page 1 USER MANUAL – EN IN 5547 Magnetic treadmill inSPORTline Sprynkl...
-
Page 2: Table Of Contents
CONTENTS SAFETY INSTRUCTIONS ........................3 EXPLODED DIAGRAM ........................... 4 PARTS LIST ............................5 ASSEMBLY MATERIAL .......................... 7 ASSEMBLY ............................. 8 Step 1 ..............................8 Step 2 ..............................9 Step 3 ..............................11 Step 4 ..............................12 Step 5 ..............................13 Step 6 .............................. -
Page 3: Safety Instructions
SAFETY INSTRUCTIONS • Move naturally during exercise. Do not look at your feet. Only one person can use the product at the same time. • Assembly the product according to the manual. For adults only. • Keep away from kids and pets. Do not leave kids and pets near the device unattended. Only for adult use. -
Page 4: Exploded Diagram
EXPLODED DIAGRAM... -
Page 5: Parts List
PARTS LIST NAME AND SPECIFICATION Bolt M8X50 Washer ID8.2*OD16.2 Arc Washer ID8.2*ID22.2 Screw M6X10 Washer φ 6.2 Bolt M8X50 Big Washer ID8.2*ID22.2 Bolt M8X45 Screw M4*15 Knob M8*60 Screw M5*10 Nut M8 Wrench S13 Wrench S6 Wrench S5 Main Frame Rear Roller Plastic Washer Steel end... - Page 6 Nut M8 Bolt M8x40 Plastic Wheel Base frame cushion Bottom Frame Right Handlebar Post Tension Screw M5X15 27R-R&L Handle cover 28L- L&R Handle cover Handle Bar Console Sensor Wire Connector 1set Screw M5*25 Left Handlebar Post Spring Wooden Deck Running Belt End Cap Plastic Cover Front Axle...
-
Page 7: Assembly Material
ASSEMBLY MATERIAL SPECIFICATION M8*50 ID8,2*OD16,2 ID8,2*OD22,2 M6*10 Ø6,2 M8*50 ID8,2*OD16,2 M8*45 M4*15 M8*60 M5*10... -
Page 8: Assembly
ASSEMBLY • Read this manual before assembly. • Check the hardware. • Ensure that you have the right tools. • Prepare an area to assemble. • Follow the instruction accordingly. • Do not use force for assembly. • Periodically tighten the treadmill. •... -
Page 9: Step 2
Connect right handlebar post (24) and left handlebar post (33) to bottom frame (23) with bolt (A), washer (B) and nut (L). Step 2 Assembly material Pic. Name M8*50 ID8,2*OD16,2... - Page 10 Connect right handlebar post (24) and left handlebar post (33) to main frame (1) with bolt (F) a big washer (G).
-
Page 11: Step 3
Step 3 Attach load regulator and tension cable. Before setting the tensioning cable, set the load regulator to resistance 8. Secure the tension cable 1. Push the cable C through A. Lead G under the frame. 2. Pull G down, that A is closer to B. Push F into B. -
Page 12: Step 4
3. For securing A and B tighten the D. Step 4 Assembly material Pic. Name M6*10 Ø6,2 Connect sensor wire control (31) and sensor control (42). After that connect plastic cover (38) to main frame (1) with washer (E) and screw (D). -
Page 13: Step 5
Step 5 Assembly material Pic. Name ID8,2*OD22,2 M8*45 Connect handle bar (29) to right handlebar post (24) a left handle bar post (33) with arc washer (C) and bolt (H). -
Page 14: Step 6
Step 6 Assembly material Pic. Name M5*10 Connect sensor wire connector (31) to (31) and then sensor wire connector (31) to handle pulse wire (14). Then connect console (30) to handlebar (29) and secure with screws (K). -
Page 15: Step 7
Step 7 Assembly material Pic. Name M4*15 Connect left handle cover (28L-L, 28L-R) to left handle post (33) and right handle cover (27R-L, 27R- L) to right handlebar post (24) with screws (I). -
Page 16: Step 8
Step 8 Assembly material Pic. Name M8*60 WARNING: Before use, make sure that the treadmill is properly assembled and tightly fasten. -
Page 17: Storage
STORAGE Remove the pin J and lift frame. Secure the frame in horizontal position with pin J. BELT ADJUSTMENT Wrong adjusted belt reduces the lifespan of the treadmill. Wrong adjusted belt is noisy. The belt may be poorly centered, lose or tighten. Use Allen key. •... -
Page 18: Magnetic Braking System
WARNING: Do not apply oil outside of the board. Remove the excess lubricant immediately. • During everyday use lubricate 1x per month. During cold weather check the oil more often, oil can dry faster. • Always use silicon oil inSPORTline. -
Page 19: Control Panel
CONTROL PANEL BUTTONS MODE Press "Mode" button to preset TIME, DISTANCE, CALORIES and PULSE. Press "Mode" button for selection or enter after setting up. To set up the value of TIME, DISTANCE, CALORIES and PULSE. You can hold the button to increase the value faster. (The monitor has to be in stop condition.) RESET The user may press "RESET"... - Page 20 CALORIE Accumulates calories consumption during training from 0 to maximum 9999 calories. (This data is a rough guide for comparison of different exercise sessions which cannot be used in medical treatment.) PULSE After you hold two hands to the handgrip sensors, the monitor will display your current heart rate figures.
-
Page 21: Exercise Instructions
(3) If the countdown action to 00:00 is not completed and there is no pulse signal. The countdown action must be done and shown F6. (4) If you press the RECOVERY button prior to count down to 00:00, it will be ending the function and there will be no display at all. -
Page 22: The Cool Down Phase
Calves and Achilles tendon Lean against a wall with your left leg in front of the right one and your arms forward. Stretch out your right leg and keep your left foot on the floor. Bend your left leg and lean forwards by moving your right hip in the direction of the wall. - Page 23 Warranty Conditions Warranty Period The Seller provides the Buyer a 24 months Warranty for Goods Quality, unless otherwise specified in the Certificate of Warranty, Invoice, Bill of Delivery or other documents related to the Goods. The legal warranty period provided to the Consumer is not affected. By the Warranty for Goods Quality, the Seller guarantees that the delivered Goods shall be, for a certain period of time, suitable for regular or contracted use, and that the Goods shall maintain its regular or contracted features.
- Page 24 VAT ID: CZ26847264 Phone: +420 556 300 970 E-mail: eshop@insportline.cz reklamace@insportline.cz servis@insportline.cz Web: www.insportline.cz INSPORTLINE s.r.o. Headquarters, Warranty & Service centre: Elektricna 6471, 911 01 Trencin, Slovakia CRN: 36311723 VAT ID: SK2020177082 Phone: +421(0)326 526 701 E-mail: objednavky@insportline.sk reklamacie@insportline.sk servis@insportline.sk Web: www.insportline.sk...
Need help?
Do you have a question about the Sprynkl IN 5547 and is the answer not in the manual?
Questions and answers