Advertisement
Table of Contents
- 1 Important Safety Instructions
- 2 Table of Contents
- 3 Components
- 4 Installing the Battery
- 5 Turning Bobi ON/OFF
- 6 Working Modes
- 7 Charging Station
- 8 Charging Bobi
- 9 Mop
- 10 Remote Control
- 11 Automatic Cleaning Schedule
- 12 Maintenance
- 13 Troubleshooting
- 14 Check-Up Test
- Download this manual
See also:
Owner's Manual
Advertisement
Table of Contents

Related Manuals for bObsweep bObi


Summary of Contents for bObsweep bObi
- Page 1 Owner’s Manual...
-
Page 2: Important Safety Instructions
Do not let bObi pick up anything that is burning or smoking, such as cigarettes, matches, or hot ashes. Do not use bObi to pick up flammable or combustible liquids such as gasoline, nor use it in areas where they may be present. -
Page 3: Table Of Contents
Contents at a glance Contents at a glance ........................ iii Components ..........................1 Installing the Battery ......................... 3 Turning bObi ON/OFF ......................3 Working Modes ........................5 Charging Station ........................6 Charging bObi ......................... 8 Mop ............................11 Remote Control ........................12 Automatic Cleaning Schedule .................... -
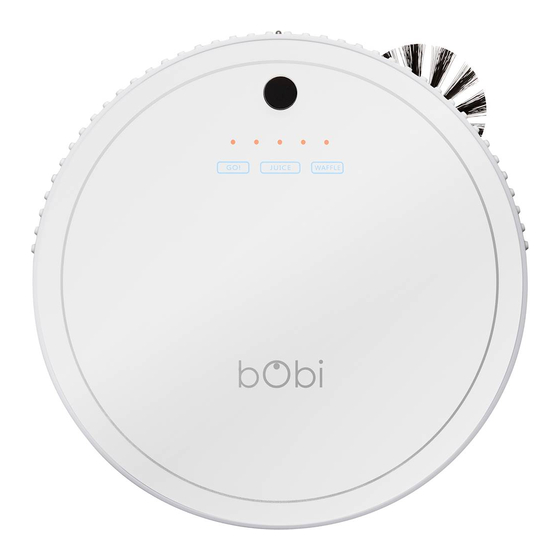
Page 4: Components
Components What comes in bObi’s box? 1- bObi 5- Mop Extension 9- Charging Adapter 2- Charging Station 6- Mop Cloths (x2) 10-Cleaning Brush 3- Remote Control 7- Side Brush (x2) 11-Battery 4- Owner’s Manual 8- Filters (include HEPA) 12- Syncing Tool... - Page 5 T o p V i e w B o t t o m V i e w...
-
Page 6: Installing The Battery
Installing the Battery When bObi first arrives, her battery is not installed. To install bObi’s battery, follow these simple steps: · Place bObi on a flat surface and set the power switch to OFF. · Using the provided Phillips screwdriver, remove the screws on the battery cover. -
Page 7: Turning Bobi On/Off
ON, she enters standby mode, which uses a small amount of battery. When in stand-by mode, bObi beeps every few minutes to remind you to charge her or to turn her OFF. Remember to turn the power switch OFF when you are not using bObi to conserve her battery life. -
Page 8: Working Modes
There are three touch buttons on top of bObi: Juice, Waffle, and Go! These buttons will not work while bObi is on the charging station. You can use your remote control to start bObi or manually move her from her charging station, then press the buttons on top of bObi while she is on the floor. -
Page 9: Charging Station
F o l l o w t h e s t e p s b e l l o w t o s e t u p b O b i ' s c h a r g i n g s t a t i o n Position bObi's charging station on a hard flat surface against a wall. - Page 10 S y n c b O b i w i t h t h e C h a r g i n g S t a t i o n If bObi can’t find her charging station, the station and bObi are out of sync and you need to sync up their coding.
-
Page 11: Charging Bobi
Charging bObi bObi is powered by a rechargeable battery. She will perform best if she juices up for 12 hours prior to her first cleaning mission. M a n u a l c h a r g i n g u s i n g t h e c h a r g i n g s t a t i o n 1. - Page 12 M a n u a l c h a r g i n g u s i n g t h e a d a p t e r While bObi is OFF, plug her charging adapter directly into her side. The power inlet is next to bObi’s "ON/OFF"...
- Page 13 When bObi detects the charging station, she moves her way towards it, docks, and begins to charge. You will know bObi is fully charged when the middle LED light on her cover stops blinking and turns solid.
-
Page 14: Mop
F o l l o w t h e s e s t e p s t o a t t a c h a n d d e t a c h t h e m o p e x t e n s i o n To attach: 1. Turn bObi upside down and line up the flat side of the attachment with the two clear plastic holders found next to the main brush. -
Page 15: Remote Control
The remote control is your most useful tool when communicating with bObi. It allows you to schedule bObi to clean your home automatically or direct her to work in any of her modes. It also allows you to alter and control bObi’s movement as she is cleaning. Each time you select an action on the remote, bObi will chirp once before performing the designated function. - Page 16 2. Press and hold the OK button on the remote. 3. While holding down the OK button, turn the Power switch on bObi's side to ON. 4. bObi will chirp several times to indicate that the remote has been synchronized.
- Page 17 C h o o s i n g b O b i ’ s C l e a n i n g S p e e d w i t h t h e R e m o t e bObi’s default setting is fast mode, which maximizes the area she covers while cleaning.
-
Page 18: Automatic Cleaning Schedule
Automatic Cleaning Schedule bObi can be programmed to start working at a specific time of the day on as many days of the week as you want. Use the remote to program bObi’s cleaning schedule. Here is how: W e e k d a y s The numbers 1 to 7 on top of the screen represent days of the week. - Page 19 S e t t i n g t h e C u r r e n t T i m e a n d W e e k d a y To set the current time on bObi’s remote, follow these steps: 1.
- Page 20 9. If bObi is meant to work at the same time every day, just press the ALL/NONE button after setting her cleaning time schedule while the day of the week frame is flashing. All...
- Page 21 Remember, pressing ALL/NONE then SCH TIME when bObi has a preset schedule turns off cleaning on all days. ⌘ bObi will clean on the scheduled time even if her bin or brushes require cleaning. Remember to check bObi's bin and brushes after every cleaning. ⌘...
-
Page 22: Maintenance
Maintenance bObi works independently to clean your house, but needs a small amount of your time to keep in top shape. We recommend checking her dustbin and all of her brushes after each cleaning. D u s t b i n One of bObi’s best features is her washable dustbin. - Page 23 For a quick clean, use the cleaning brush to remove the remaining dirt and dust from the dustbin (4). Turn the dustbin around (HEPA filter on top), hold the dustbin with both hands, and press down on the two colored clips on the sides of the dustbin to release the filter cover (5).
- Page 24 (12) To reinstall the dustbin, simply put the dustbin back into bObi. Make sure the side that encloses the filter is on the bottom of bObi and push the bin forward until it clicks and locks properly. If bObi’s dustbin is not fully engaged, her motor may not make proper contact with the battery’s electrodes.
- Page 25 4. Use the cleaning tool, paper towels, and a can of compressed air to fully remove dust, dirt, and hair from the brushes as well as the brush holders inside of bObi. 5. If there is anything wrapped around the bristles or brush ends (hair, strings, etc.), use scissors to cut it and then use the cleaning tool and paper towel to remove it.
- Page 26 S i d e B r u s h bObi uses her side brush to clean corners and along walls. Dirt and dust trapped around the brush can deteriorate its ability to move freely and reduce bObi’s efficiency. To clean the side brush: 1.
- Page 27 U V L i g h t bObi’s sterilizing UV light is located on her underbelly. The UV light is automatically turned ON when bObi starts cleaning. Toggle the UV light on or off by pressing the UV button on the remote.
-
Page 28: Troubleshooting
Troubleshooting If bObi encounters a problem, an Error Code will appear on the remote control to notify you of the issue. Below is a list of errors and their corresponding solution(s). Error What to check What to do Code E001 Floor Detection Sensors Wipe the 4 floor detection sensors on bObi’s underside. -
Page 29: Check-Up Test
Check-up Test If you notice that bObi is not working in the same way as usual or repeatedly runs into a certain error, you may want to perform a checkup test to find out what is causing the issue. bObi’s remote can be used to test all of her sensors and electronic parts in the span of a few minutes. - Page 30 Remove bObi’s side brush before testing her floor sensors. bObi’s floor detection sensors are the first item tested when bObi is put into test mode. In this test mode, numbers 1-6 located on top of the remote represent bObi's 4 infrared floor detection sensors and the two floor detection sensors located in bObi’s left and right...
- Page 31 With bObi on the floor, numbers 1, 2, 3, and 4 should be underlined to show that bObi’s floor detection sensors are working (20). (20) If you lift bObi up, the lines under numbers 1,2,3,4 will disappear and new ones will show up underneath the numbers 5 and 6.
- Page 32 (mv). Under normal circumstances this number ranges between 1400 and 1600 (23). If the number on the screen shows as 0000, it means bObi’s battery is not working or has a loose connection. Open the battery compartment and check the battery.
- Page 33 Use a piece of paper, a roll of paper towels, or a white flat surface to imitate a wall in front of bObi (24). Drag it from the left side of the bumper around to the right side until you reach the power switch. Numbers 1 to 5 on the remote will become underlined one by one as you do this.
- Page 34 T e s t i n g b O b i ’ s L e f t a n d R i g h t W h e e l s , B r u s h e s , a n d V a c u u m F a n Turn bObi upside down and lay her on a flat surface. From test mode 0200, press RIGHT on the remote to enter test mode 0300.
- Page 35 T e s t i n g b O b i ’ s C h a r g i n g S t a t i o n The final part of the checkup tests bObi’s ability to charge. To begin this test, press RIGHT on the remote so that bObi enters test mode 0400.
Need help?
Do you have a question about the bObi and is the answer not in the manual?
Questions and answers