Advertisement
Quick Links
Advertisement

Subscribe to Our Youtube Channel
Related Manuals for bObsweep Standard


Summary of Contents for bObsweep Standard
- Page 2 How to employ your intelligent floor cleaner...
- Page 3 To see Bob at his best, please read the Quick Start Guide and this manual thoroughly. Welcome to the bObsweep family and happy cleaning! Since the following instructions cover both the bObsweep Standard and the bObsweep PetHair models, some generalizations are used. The characteristics and appearance of your bObsweep may differ slightly from some explanations and pic- tures in this manual.
-
Page 4: Contents At A Glance
Contents at a Glance Important Safety Instructions What comes in bObsweep’s box? bObsweep’s Anatomy Get bObsweep Ready to Clean Auto-Cleaning and Scheduling Maintaining bObsweep Storing bObsweep Replacing bObsweep’s Battery Replacing the Remote’s Batteries Troubleshooting bObsweep bObsweep’s Home Checkup Guide Warranty Information bObsweep’s Cleaning Behavior... -
Page 5: Important Safety Instructions
Basic safety precautions should always be followed, including the following: - Read ALL instructions before using. - To protect against electrical shock, do not immerse any part of bObsweep into water or other liquid. The mopping attachment is an exception. The cloth can be dampened with water before its placement on the mopping attachment. - Page 6 - Do not let Bob pick up toxic materials (chlorine bleach, ammonia, drain cleaner, etc.). - Do not let bObsweep pick up anything that is burning or smoking, such as ciga- rettes, matches, or hot ashes. Do not use Bob to pick up flammable or combustible liquids such as gasoline, nor use it in areas where they may be present.
- Page 7 What comes in bObsweep’s box? bObsweep, your intelligent floor cleaner bObsweep’s charging station Blo main brush Charging adapter Remote control Screwdriver 2 side brushes...
- Page 8 Cleaning tool (to clean Bob) Extra screws & Blindfold stickers Mop attachment 2 micro-fiber cloths for mopping Filter refill Owner’s manual, quick start guide Bumper stickers...
-
Page 9: Bob's Anatomy
Bob’s anatomy Top view Head sensor (IR receiver) Cover buttons Display... - Page 10 Bottom view Charging plates UV lamp Front wheel Side brush holder Battery lid Main brush Main brush motor Brush holder Wheels On/Off switch Charging inlet (on Bob’s side) Dustbin...
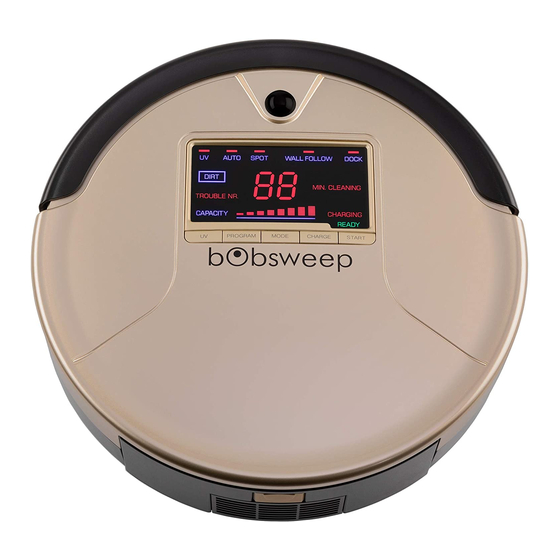
- Page 11 Charging station Remote bObsweep PetHair’s display bObsweep Standard’s display...
- Page 12 PetHair’s cover buttons MODE Cleaning mode PROGRAM Cleaning program UV lamp DOCKING Auto-charge START Start bObsweep Standard’s cover buttons Cleaning mode Cleaning program UV lamp Start...
- Page 13 Get bObsweep Ready for Cleaning...
-
Page 14: Charging Station
Charging Station Place the charging station on a hard, flat surface (not soft carpet). Place it next to a wall and leave up to 1 inches of space between the back of the charging station and the wall. Make sure there is no obstacle or uneven ground within 2-3 meters (6-9 ft.) of the front, and half a meter (1.5 ft.) to the sides of the station (figure 1). -
Page 15: Charging Bob
You will know bObsweep is charging when you see the battery bars flashing on the cover screen. Using the adapter: Plug bObsweep directly using his adapter. His power inlet is on the side of his body above the ‘On/Off’ button. -
Page 16: Charging Time
36 that means Bob has been charging for 360 minutes (6 hours). The counter restarts at 100. Even if bObsweep is fully charged, you will still see red bars blinking on his digital display screen. On bObsweep PetHair the word ‘ready’ appears on the screen as soon as the battery is full. - Page 17 Cover Buttons bObsweep PetHair bObsweep Standard MODE Cleaning mode Cleaning mode PROGRAM Cleaning program Cleaning program UV lamp UV lamp DOCKING Auto-charge Start START Start Clean an entire floor, a medium, or a small room: To use Bob’s cover buttons to clean an entire floor, a medium, or a small room: - Press MODE ( ).
- Page 18 ). bObsweep will start looking for his charging station. Switch the UV light On/Off: - The UV light is turned ‘On’ by default every time you switch bObsweep on. - Press UV ( ) to turn the UV light Off or back On.
-
Page 19: Remote Control
Remote Control The remote control works at an average distance of 10 feet. It has to be pointed directly at bObsweep with no obstacle blocking the signal. bObsweep’s remote has the following buttons: Power Auto Spot Wall/Corners Charge Speed Navigation Arrows... - Page 20 Power - Puts Bob in standby mode.To put bObsweep in standby mode, the power switch on his side must be set to ‘On’. To fully power off, use the On/Off button located on bObsweep’s side. Auto - Activates bObsweep’s default cleaning mode.
- Page 21 Bob’s mopping feature To install Bob’s mopping extension, hold it with its tails facing down. Place it be- tween the wheels and press it down gently. You will hear a ‘click’. Attach the mop cloth to the holder. Once the mop is installed, Bob will mop, sweep, and vacuum simultaneously (figure 2).
- Page 22 Auto-Cleaning and Scheduling...
- Page 23 A look at the Charging Station There are 5 buttons on Bob’s charging station: On/Off Time/Clock OK/Auto Resume Schedule/Program Select/Adjust These buttons are used to program Bob’s daily cleaning schedule.
- Page 24 8AM is the default time. When turning the charging station ‘On’ for the first time or after it has been unplugged, it shows the default time. To set the current time & day on bObsweep’s charging station, follow these steps: - To set current time’s hour digits, press Time/Clock once. The digits for the hour will blink.
- Page 25 Scheduling Cleaning After setting the current time and day on Bob’s station, you can program Bob’s daily cleaning schedule: - To set the desired hour digits, press Schedule/Program once. The digits for the hour blink. Use Adjust (+) to select the desired hour and press OK to save. - To select the desired minute digits, press Program twice, until the digits for minutes blink.
- Page 26 5 minutes as this will erase its memory and put it back to default mode. If for any reason bObsweep’s battery level falls below 8% he will stop and chirp to inform you of his location. Please take Bob and place him on his charging station.
- Page 27 Maintenance...
- Page 28 Dustbin - Gently push the button on the dustbin to eject it. - Open the vent to empty the bin. - You may wipe the dustbin or use the cleaning tool to brush it. - Put the dustbin back when done and make sure it is properly inserted. - Never wash the dustbin nor fill it with water or any other fluid.
- Page 29 Filters Three filters are located inside the dustbin’s ceiling in order to capture fine particles and allergens and prevent their escape from the dustbin. - To remove the filters, first eject the dustbin, then hold the middle of the filter’s frame and pull it towards you.
- Page 30 Bob. Cleaning the Main Brush If you see hair, yarn, debris, or dirt on bObsweep’s main brush, use a pair of scissors and the cleaning tool to clean it. Use the cleaning tool to clean the brush from end to end and to remove hair or dust collected around the ends of the brush.
- Page 31 Sensors Cleaning Bob’s sensors Dirt and dust on the bottom and side sensors can reduce bObsweep’s performance. Regular cleaning of the sensors ensures that Bob keeps working at his best. Use a soft cloth or a cotton swab slightly moistened with cold water or alcohol to wipe bObsweep’s surface, around and underneath his belly, especially on the bumper...
- Page 32 Dirt sensors For a more efficient cleaning, bObsweep is equipped with dirt detecting sensors. If Bob reaches a spot with a lot of dirt or debris while cleaning, his dirt sensors will activate, the “DIRTY” sign on the screen will turn to ON, and Bob will increase the...
- Page 33 Storing bObsweep bObsweep should not be left unused with his power switched ON for more than one week. If you are not using bObsweep for an extended period of time, switch him OFF. Then, unplug the charging station, remove Bob’s battery, and store everything in a dry place at room temperature.
- Page 34 Troubleshooting bObsweep...
- Page 35 Likely cause(s) for Bob’s trouble/error codes When bObsweep faces an uncomfortable situation, he will try to notify you of the issue. If Bob ever stops in the middle of his cleaning with the Trouble Nr. or Error sign lit on the screen, read the two digit code (00 to 09) on the screen. Here are the codes, the likely cause for the trouble, and what to do in case of each code.
- Page 36 Trouble/Error Code 01 Error code 01 pertains to an issue with Bob’s right wheel. The issue may simply be a jam in the right wheel, or Bob may have an electronic problem that is keeping his right wheel from moving freely. What to do: Start by checking the right wheel for jamming;...
- Page 37 Bob’s cleaning tool. If the congestion is too stiff and not removable from the outside, open bObsweep and disassemble the front wheel, remove the obstruction, and put it back in place after reassembling.
- Page 38 Start by a visual check of the transparent windows on the front bumper. If they are too dirty for you to see what is behind them, wipe bObsweep’s bumper with a clean, damp cloth. Ensure nothing is jammed under the front bumper; tap slowly and cau- tiously on the bumper and use compressed air to take out the debris.
- Page 39 Take out the dustbin and empty it. Turn the dustbin around and check the two metal connections on the bottom of it; wipe them clean. Look into the bObsweep and clean the metal contact points where the dustbin is inserted in.
- Page 40 Checkup Guide...
- Page 41 Put Bob in Checkup Mode Make sure Bob is switched ‘Off’ using the power switch on his side. Hold down the first button on bObsweep’s cover from left and switch him ‘On’ (while holding the button down). bObsweep will turn on making a short “doo-doo-doo” sound and the screen will show a word or a number sign.
- Page 42 Bob’s bumper. On bObsweep PetHair, the 5 indicators along the top of the display will light up, as you move your imitation wall around the bumper.
- Page 43 Test the touch and bumper sensors To move on to this test, press the first left button on Bob twice (UV on Bob PetHair, Mode on Bob Standard). The screen will go blank. Now you may test Bob’s touch/ bumper sensors.
- Page 44 Bob Standard). Wheels drive forward. Flip Bob over, and you should see the UV lamp light up. Press the Mode (UV sign on Bob Standard) once more. Wheels drive backwards, and the UV lamp turns Off. If everything responds properly, Bob’s internal parts are working correctly. Contact...
-
Page 45: Support And Warranty
Support and Warranty... -
Page 46: Warranty Information
Warranty information A bObsweep purchased from an authorized seller and used anywhere in the world includes a one (1) year Limited warranty on parts (except consumable parts) and labor. This includes a 6-month battery warranty. The warranty does not cover con- sumable parts (brushes, filters, mop). - Page 47 Most of the time, bObsweep can be left on one of the Auto-cleaning modes without supervision. The three AUTO modes set Bob’s movements in different patterns that best match the size and layout of his working area. Plus, he detects dirtier areas that need extra attention as he crosses them, and gives them more attention.
- Page 48 While in most homes bObsweep will fit like a glove, in some homes, the environment may be a bit challenging to him. Bob is designed to fit well with rooms and furniture of most shapes and sizes, but certain settings may confuse him momentarily. Bob might find a way into small spaces or get trapped under some of your furniture, but he is good at finding a way out in time.
- Page 49 Bob’s brush is wide and has long bristles that are in constant contact with the sur- face he is cleaning. While this is an asset for deep cleaning on most surfaces, on some carpets this causes Bob to stop due to excessive friction. If you see “Error 2”...
- Page 50 2. How long should Bob’s battery last? The exact time depends on the type of the surface bObsweep is cleaning as well as the age of the battery. Generally, the smoother the surface (hardwood or tile for ex- ample), the longer the battery will last. When fully charged, a brand new Bob usually cleans between 45 to 90 minutes.
- Page 51 Press the power button on the remote to put bObsweep in standby mode or turn him off completely using the side power button. You will have to switch this button ON the next time you want Bob to clean.
- Page 52 8. Bob is having trouble finding his charging station. Where is the best place to put the station? For Bob to find his charging station, he needs to face it directly. bObsweep will find his station more easily if it is placed near the perimeter of the room with plenty of space in front, so that he may detect the station from afar.
- Page 53 Full Go button located to the left side of the charge-up station’s screen to disable this function. If this is not the case, the next thing to check is bObsweep’s cleaning schedule. Make sure you have set the correct time on the charging station. It is a 24 hour clock, so you will need to enter 1:00 if it is 1 AM and 13:00 if it is 1 PM.
- Page 54 Canada and the United States. Or, 1-888-549-8847 email us at support@bobsweep.com. Our goal is to get back to you within a day. To order parts, or for Bob’s how-to videos, repair videos, troubleshooting videos, and to connect with your extended bObsweep family members and fellow Bob...
- Page 55 bObsweep...
Need help?
Do you have a question about the Standard and is the answer not in the manual?
Questions and answers