Table of Contents
Advertisement
Quick Links
W AR N IN G
Im p r o p er in s ta llatio n ,
a d ju stm e n t, alte ratio n , se r vic e o r
m a in te n a n c e c a n c a u s e in ju r y o r
p ro p e rt y d a m a g e .
R e a d th e in s ta llatio n ,
o p e r atio n a n d m a in te n a n c e
in str u ctio n s th o ro u g h ly b e fo r e
in stallin g o r s e r vic in g th is
e q u ip m e n t.
D AN G E R
F a ilu re to fo llow th e s e
in s tr u c t io n s c o u ld re s u lt in a
fir e o r e x p lo s io n th a t c o u ld
c a u s e p r o p e rty d a m a g e ,
p e r s o n a l in ju r y o r d e ath .
D AN G E R
D O N O T u s e g a s g rill f o r in d o o r
c o o k in g o r h e a tin g . T O X I C
fu m e s c a n a c c u m u l ate a n d
c a u s e a s p h yx ia tio n . D O N O T
u s e in o r o n b o a ts o r
r ec re a tio n a l ve h ic le s.
P R O P 6 5 W A R N IN G
C h e m ic a ls k n o w n to th e state o f
C a lifo r n ia to c a u s e c a n c e r, b irth
d e f e c ts o r o t h e r r e p ro d u c ti ve
h a rm ar e c re ate d b y th e
c o m b u s tio n o f p ro p a n
WARNING
FOR YOUR SAFETY :
For Outdoor Use Only
(outside any enclosure)
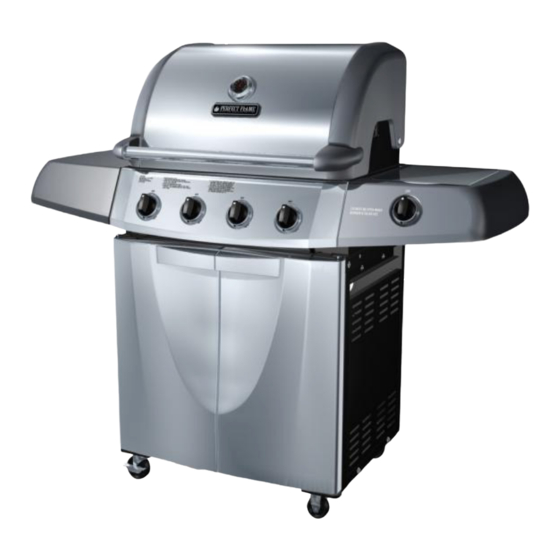
S L G 2 0 07 B N
O w ner's M anu a l
4 -B u rn e r N a tu ra l G a s G rill
e.
SAVE THESE INSTRUCTIONS FOR FUTURE
REFERENCE. IF YOU ARE ASSEMBLING THIS
UNIT FOR SOMEONE ELSE, GIVE THIS
MANUAL TO HIM OR HER TO SAVE FOR
FUTURE REFERENCE.
FOR CUSTOMER SERVICE, EMAIL TO
SERVICE@BBQTEK.COM OR
CALL 1-888- 571- 6888 (TOLL-FREE),
6 A.M. – 5 P.M.(PST), MONDAY-FRIDAY.
0
IT E M # 64876
.
Advertisement
Table of Contents

Related Manuals for Perfect Flame SLG2007BN


Summary of Contents for Perfect Flame SLG2007BN
- Page 1 IT E M # 64876 4 -B u rn e r N a tu ra l G a s G rill W AR N IN G Im p r o p er in s ta llatio n , a d ju stm e n t, alte ratio n , se r vic e o r m a in te n a n c e c a n c a u s e in ju r y o r p ro p e rt y d a m a g e .
-
Page 2: Grill Operation
Grill Operation 1-2-3 Before Grilling, Step 1 Keep your grill a safe distance away from your property.* Step 2 Always Perform a Leak Test. * Step 3 Keep children away from the grill. During Grilling, (To avoid tripping safety valves, please follow these instructions caref lly!) Step 1 First open lid and turn gas tank on slowly. -
Page 3: Table Of Contents
T a b le o f C o n te n ts For Your Safety....................3 Illustrated Parts List ..................5 Hardware List.....................6 Assembly Instructions..................7 Operating Your Grill..................14 Natural gas connection........14 Checking for Leaks...........15 Lighting Your Grill..........15 Excess flow safety valve reset procedure..17 Care and Maintenance..................18 Award-Winning Barbecue Recipes..............19 Troubleshooting....................20... -
Page 4: For Your Safety
For Your Safety Dear Value d C u stom er, C ongratula tio ns on your new barbecue grill p urchase ! Y ou’ve m ade th e righ t choice . In this m a nual, you w ill find assem bly in structio ns, sug g estion s for g rillin g a nd help ful hin ts, as w ell as guideline s for the safe o pera tion, proper care an d use o f your grill. - Page 5 S a fe L o c a tio n s F o r U s e O f T h is O u td o o r G rill D A N G E R Ne ver use this outdoor grill inside an y building, garage, sh ed or breeze w a y, or inside an y boat, trailer or recreational vehicle, to prevent a possible fire and to prevent the possibility of carbon m onoxide poisoning or asph yxiation.
-
Page 6: Illustrated Parts List
Illustrated Parts List 1. Left side panel………….…1pc 2. Right side panel ………….1pc 3. Bottom panel assembly …1pc 4. Back panel………….….. 1pc 5. Front top beam………….. 1pc 6. Main doors………..…….2pcs 7. Heat insulation plate…….1pc 8. Grill body assembly……...1pc 9. Left side shelf..……...…..1pc 10. -
Page 7: Hardware List
Hardware List M4x12 mm Bolt M6x15mm Bolt 6pcs M6x20mm Bolt 4pcs Small 6pcs M6x45mm Bolt M4 Nut 4pcs 4pcs Screwdriver Spring Washer 10pcs 14pcs Large Washer Hardware listed above is not scaled to exact size. (A screwdriver is required on assembly and is included for your convenience). S L G 2 0 07 B N O w ner’s M anu a l... -
Page 8: Assembly Instructions
Assembly Instructions R e m o ve a ll conte nts from the carton pa ck ag ing. M a ke su re a ll parts are pre sent b efore attem ptin g asse m b ly. O nc e the grill is fu lly a sse m bled, go b a ck and check to m ake certain all the bolt s are tigh ten . - Page 9 Ste p 3 a) Place the front top beam (5) in front of the cart assembly. b) Align the holes on the left inside of the cart assembly with holes on the front top beam. c) Insert one M6 bolt (A), one spring washer (D) and one larger washer (E) into each hole.
- Page 10 S tep 5 a) Slide the heat insulation plate (7) into the back of the cart assembly. b) Align the hole on the cart with pre-drilled holes on gas insulation plate. c) Screw one M6 bolt (A) and one large washer (E) into each pre-drilled holes.
- Page 11 S te p 7 a) Loosen the four side panel bolts (pre-attached) on the right side of the body assembly a nd allow 1/4 of the bolt’s length to extend from the body assembly. b) Align the large holes of the left side shelf (9) with the bolts extended from the body assembly.
- Page 12 S te p 9 a) Open the side burner lid and place the side burner assembly (11) on the right side shelf. Make certain the venturi tube is connected properly with valve. b) Align the holes on the side burner assembly with the holes on the right side shelf.
- Page 13 S te p 1 1 a) Place the four heat plates (12) inside the grill upon the burners. b) Place the two cooking gates (13) inside the grill upon the heating shields. c) Insert the four feet of the warming grates-body (14) into the holes on top of grill body.
- Page 14 S te p 1 3 a) Connect the natural gas hose with the side burner valve b y screwing the nut o n end of the hose Fully Assembled View L eft Sid e R ig ht S id e S L G 2 0 07 B N O w ner’s M anu a l...
-
Page 15: Operating Your Grill
O p e ra tin g Y o u r G rill Your natural gas grill has been designed to operate on natural gas only, at a pressure of seven inches water column (7” W.C.). Check with your gas utility for local gas pressure, because in some areas natural gas pressure varies. Also, check with your gas company or with local building codes for instructions to install gas supply line or call a licensed and qualified installer. -
Page 16: Checking For Leaks
D A N G E R To prevent fire or explosion hazard when testing for a leak: Always perform the “leak test“ on page 17 before lighting the grill and each time the natural gas hose is connected for use. Do not smoke or allow other sources of ignition in the area while conducting a leak test. - Page 17 B u rn er in s ta lla tio n an d ad ju stm en t P r e c a u tio n s A fter lig hting , ob serve the burner fla m e. M a ke sure all b urne r ports are lit. If the bu rner flam e go es ou t d urin g operation , im m e diately turn the ga s “O F F”.
-
Page 18: Excess Flow Safety Valve Reset Procedure
B u rn er in s ta lla tio n an d ad ju stm en t 1. End edge face upside for 1. R elease the screw on venturi tube. 1. O verlap 20 m m betw een install the burner venturi tube and nozzle w hen 2. -
Page 19: Care And Maintenance
C a re a n d M a in te n a n c e IMPORTANT Always allow to completely cool off before covering your grill to prevent corrosion from condensation. C au tio n : All cle an ing a nd m aintenan ce should be d one w hen th e grill is coo l, w ith th e fu el supply turne d o ff at th e co ntrol dial an d the na tural g as ho se discon nected . -
Page 20: Award-Winning Barbecue Recipes
Award-Winning Barbecue Recipes N e ve r-fa il B a rb e c u e S a u c e H a rd c o re G rille d T ro u t In g re d ie n ts : In g re d ie n ts : F in ely chop ped on ion L e m on or lim e juice... -
Page 21: Troubleshooting
Tro u b le s ho otin g P r o b lem P o s sib le C a u s e P re ve n tio n /C u re B u rn er w ill n o t lig ht u sing kn o b s o r W ire s/o r electro de co ve re d w ith C lea n w ire a nd /o r electro d e w ith ign ite r. - Page 22 F la m e b le w o u t. H ig h o r g u stin g w in d s. Turn front o f g rill to fa c e w in d or in cre a se fla m e h eig ht. Lo w o n n atural g as.
-
Page 23: Warranty Program
Warranty Program P ro o f o f p urc h a s e is re qu ire d to a c ce ss th is w a rran ty p ro gram , w h ich is in effe ct fro m the d ate o f p ur ch a se . Ina b ility to pro vide pro of of p urcha se or a fter th e w arra nt y h a s e xp ire d, cu stom er s w ill b e su b je ct to p arts, sh ip p in g an d h an d lin g fe es.
Need help?
Do you have a question about the SLG2007BN and is the answer not in the manual?
Questions and answers