Advertisement
WARNING
To reduce the risk of fire, burn hazard or
other injury, read the Care and Use
Manual carefully and completely before
using your grill.
Example only: SERIAL # ________ MFG. DATE ________ PURCHASE DATE: _________
Questions, problems, missing parts? Before returning to your retailer, call our customer
service department at 1-877-323-5263, 8 a.m. - 6 p.m., PST, Monday - Friday, 8 a.m. – 12 p.m.
Saturday.
STAINLESS STEEL LP GAS GRILL
GRIL AU GAZ PL EN ACIER
INOXYDABLE (page 29)
PARRILLA A GAS PL DE ACERO
INOXIDABLE (página 57)
WARNING
FOR OUTDOOR USE ONLY
WARNING
This grill is not intended to be
installed in or on recreational
vehicles and/or boats.
ITEM / ARTICLE / ARTICULO # 271573
MODEL / MODÈLE / MODELO # 720-0522
®
H20Y07P-4
Advertisement
Table of Contents

Related Manuals for Perfect Flame 720-0522


Summary of Contents for Perfect Flame 720-0522
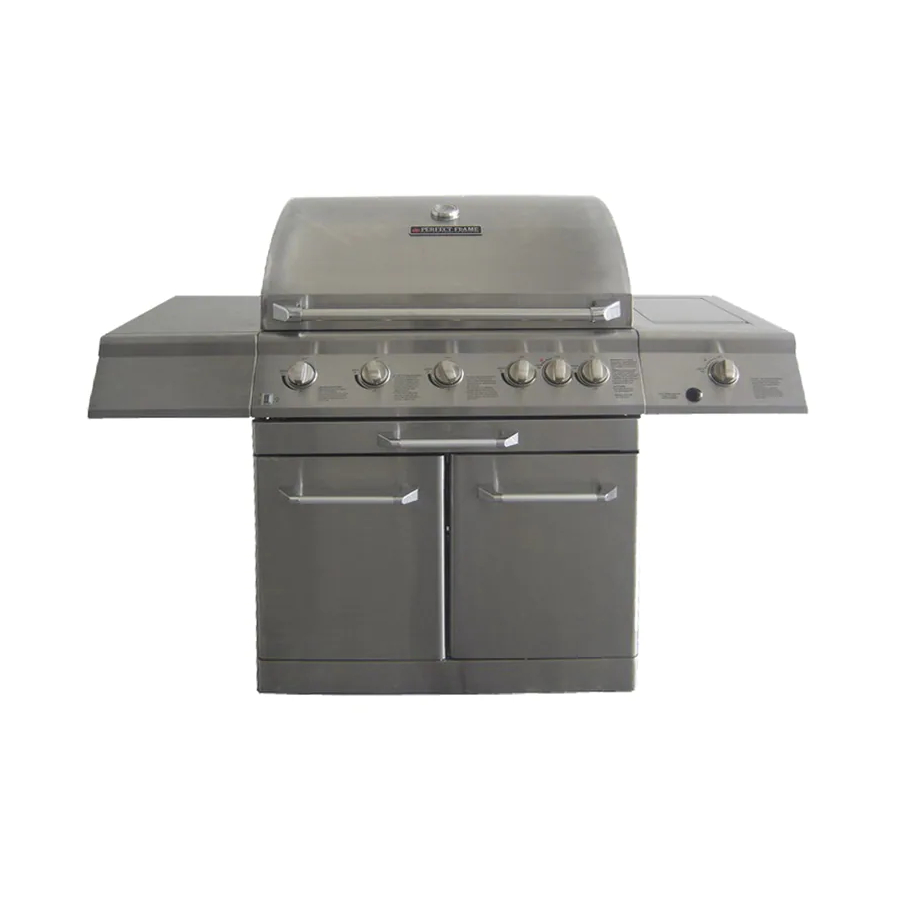
- Page 1 ITEM / ARTICLE / ARTICULO # 271573 STAINLESS STEEL LP GAS GRILL GRIL AU GAZ PL EN ACIER INOXYDABLE (page 29) PARRILLA A GAS PL DE ACERO INOXIDABLE (página 57) MODEL / MODÈLE / MODELO # 720-0522 WARNING WARNING To reduce the risk of fire, burn hazard or FOR OUTDOOR USE ONLY other injury, read the Care and Use ®...
-
Page 2: Table Of Contents
TABLE OF CONTENTS Safety Information….…………………………………………………..………………...……..….3 Package Contents List………………………………………………………………………..……..7 Preparation……………….…………………. ……………………….…………….………………..8 Assembly Instructions…………………………………………………………….…..……..………8 Installation Instructions……………………………………………………………..…….……...15 Operation Instructions…….…………………………………………………….…..…..……….…17 Care and Maintenance……………………………………………………………………………..22 Troubleshooting…………………………………………………………………..……….………..24 Warranty………………………………….…………………………………………..………..…….25 Replacement Parts List………………….…...……………………………………..…….……….26 WARNING WARNING If you smell gas: 1. Do not store or use gasoline or other 1. Shut off gas to the appliance. flammable vapors and liquids in the vicinity 2. -
Page 3: Safety Information
SAFETY INFORMATION Please read and understand this entire manual before attempting to assemble, operate or install the product. If you have any questions regarding the product please call customer service at 1-877-323-5263, 8 a.m. - 6 p.m., PST, Monday - Friday, 8 a.m. - Page 4 WARNING Do not use the grill if the odor of gas is present. Contact customer service at 1-877-323-5263. CAUTION 1. The grill head is heavy and will require two or more people to lift and position onto grill cart. 2. Before cleaning, make sure the gas supply and control knobs are in the “OFF” position and the burners have cooled.
- Page 5 WARNING Electrical Grounding Instructions for Rotisserie Motor – This appliance (rotisserie motor) is equipped with a plug and should be plugged directly into a properly grounded receptacle. When installed, must be electrically grounded in accordance with local codes or in the absence of local codes, with the National Electrical Code, ANSI/NFPA 70 or the Canadian Electrical Code, CSA C22.1.
- Page 6 • Use a covered hand when opening the grill lid. Never lean over an open grill. • When lighting a burner, always pay close attention to what you are doing. Make certain you are aware of which burner you are lighting so that your body and clothing remain clear of open flames.
-
Page 7: Package Contents List
PLACEMENT OF THE GRILL WARNING Do not install this unit into combustible enclosures. There should be a minimum clearance of 24 inches from all sides to combustible materials. Outdoor cooking appliances should not be used under overhead combustible construction. When determining a suitable location take into account concerns such as exposure to wind, proximity to traffic paths, and keeping gas supply lines as short as possible. -
Page 8: Preparation
HARDWARE CONTENTS Pack Description Quantity 5/32-in. x 10-mm Truss Head Screw 24 pcs. 5/32-in. Locking Washer 24 pcs. 1/4-in. x 15-mm Truss Head Screw 45 pcs. 1/4-in. Locking Washer 45 pcs. 5/32-in. x 15-mm Ladder Bolt 1 pc. Lighting Rod 1 pc. - Page 9 Fig. 2 2. Side Panel Assembly Loosen, but do not remove, the six 1/4-in. x 15-mm truss head screws on the bottom panel (A) as shown in fig. 2. Insert the screw and locking washer into the keyhole slot located on the bottom of the left side panel (B). Position the left side panel flush with the rear of the bottom panel and tighten the screws.
- Page 10 Fig. 5 4. Transformer Box Assembly Align the holes of the transformer box (A) with the holes on the back panel (B). Attach the transformer (A) to the back panel (B) using six 5/32-in. x 10-mm truss head screws from pack A and six 5/32-in.
- Page 11 Fig. 8 7. Door Assembly Insert hinge pin on bottom panel into hole located on bottom of door (A). Insert door hinge bracket into the cart frame (B) and align with the hole in the top of the door. Attach the door hinge brackets to the cart frame with four 5/32-in.
- Page 12 Fig. 11 Attach the firebox assembly (A) to the grill cart (B) using four 1/4-in. x 15-mm truss head screws from pack C and four 1/4- in. locking washers from pack D as shown in fig. 11. Fig. 12 10. Utility Drawer Handle Assembly Attach the utility drawer handle (A) to the utility drawer using four 5/32-in.
- Page 13 Fig. 14 12. Searing Side Burner and Side Shelf Assembly Attach the left side shelf (A) to the grill cart (B) using Four 1/4-in. x 15mm truss head screws from pack C and Four 1/4- in. 1/4’’Locking Washer from pack D, screw left side panel using one 5/32-in.
- Page 14 Fig. 17 15. Battery Installation Unscrew the ignition button housing (A); insert the battery from pack G into the housing with the positive terminal (+) facing outward (B). Replace the ignition button housing after the battery has been installed as shown in fig. 17. Fig.
-
Page 15: Installation Instructions
Fig. 20 18. Liquid Propane Hook-Up Attach the regulator (A) to the propane cylinder (B) by turning the regulator handle clockwise as shown in fig. 20. If the outdoor cooking appliance is not in use, the gas must be turned “OFF” at the Liquid Propane cylinder. Check all gas supply fittings for leaks before each use. - Page 16 Remove the plastic valve cover from the Liquid Propane cylinder. Make sure the grill gas hoses do not contact the grease pan or grill firebox when the Liquid Propane cylinder is placed into the cart. CONNECTING THE LIQUID PROPANE CYLINDER Your grill is equipped with gas supply orifices for use with only Liquid Propane gas.
-
Page 17: Operation Instructions
3. Apply the soap solution to all gas fittings. Soap bubbles will appear where a leak is present. 4. If a leak is present, immediately turn the gas supply “OFF” and tighten leaky fittings. 5. Turn the gas back “ON” and recheck. 6. - Page 18 Food cooked for a long time or basted with a sugar-based marinade may need a lower heat setting near the end of its cooking time. To begin: 1. Make sure the grill has been leak tested and is properly placed. 2.
- Page 19 blue and stable with no yellow tips, excessive noise or lifting. Yellow flames indicate insufficient air. Noisy flames or flames that lift away from the burner indicate too much air (See the “Flame Characteristics” section on page 23). TO LIGHT THE ROTISSERIE BURNER 1.
- Page 20 Fig. 22 Searing Side Burner 1. If you have already attempted to light the searing side burner with the igniter, allow 5 minutes for any accumulated gas to dissipate. 2. Insert a match into the lighting rod (A) as shown in fig.22. Ignite the match and insert through the cooking grids (B) to the burner.
- Page 21 4. Remove the light bulb housing. 5. Remove the glass cover from the light bulb housing. 6. Use a flathead screwdriver to loosen the two screws locking the bulb in place. Pull out the light bulb and replace with a new bulb.
-
Page 22: Care And Maintenance
WARNING To ensure continued protection against electric shock: 1. Connect to properly grounded outlets only. 2. Do not expose to rain. 3. Keep extension cord connections dry and off the ground. Bulb Specification Bulb Type: Halogen Wattage: 10 watts per bulb Voltage: 12 volts Please contact customer service at 1-800-323-5263 for assistance on bulb replacement information. - Page 23 To remove the main burners for cleaning: 1. Locate the burner screw at the rear of the firebox. 2. Remove the screw and lift the burner out of the firebox. To clean the grill burners: 1. Clean the exterior of the burner with a wire brush. Use a metal scraper for stubborn stains or debris. 2.
-
Page 24: Troubleshooting
TROUBLESHOOTING WARNING Spiders and insects can nest inside the burners of the grill and disrupt gas flow. This very dangerous condition could cause a fire behind the valve panel, thereby damaging the grill and making it unsafe for operation. Inspect the grill at least twice a year. When to Look for Spiders You should inspect the burners at least twice a year or immediately after any of the following conditions occur:... -
Page 25: Warranty
WARRANTY Nexgrill Industries, Inc., warrants to the original consumer-purchaser of each Perfect Flame Outdoor Gas Grill that when subject to normal residential use, it is free from defects in workmanship and materials for the periods specified below. This warranty excludes grills used in rental or commercial applications. -
Page 26: Replacement Parts List
REPLACEMENT PARTS LIST For replacement parts, call our customer service department at 1-877-323-5263, 8 a.m. – 6 p.m., PST, Monday – Friday and 8 a.m. – 12 p.m. PST, Saturday. REF# DESCRIPTION REF# DESCRIPTION Main Lid Screw Cover Side Panel, Left Main Lid Screw Swivel Caster Temperature Gauge... - Page 27 REF# DESCRIPTION REF# DESCRIPTION Side burner bowl assembly frame 1 Igniter Wire Cover Grease Tray Main Burner Side Burner cooking grid Flame Tamer Side Burner Lid Cooking Grid with hole Side Burner Lid Hinge Rod Warming Rack Top Side Panel W/Bracket, Right 1 Gas Tank Hook Clamp Main Burner bowl assembly Tank heat shield...
- Page 28 Printed in China...
Need help?
Do you have a question about the 720-0522 and is the answer not in the manual?
Questions and answers