Table of Contents
Advertisement
WARNING
Improper installation, adjustment,
alteration, service or maintenance
can cause injury or property
damage.
Read the installation, operation
and maintenance instructions
thoroughly before installing or
servicing this equipment.
DANGER
Failure to follow these
instructions could result in fire
or explosion that could cause
property damage, personal
injury or death.
DANGER
DO NOT use gas grill for indoor
cooking or heating. TOXIC fumes
can accumulate and cause
asphyxiation. DO NOT use in or
on boats or recreational vehicles.
PROP 65 WARNING
Chemicals known to the state of
California to cause cancer, birth
defects or other reproductive
harm are created by the
combustion of liquid propane
gas
.
WARNING
FOR YOUR SAFETY:
For Outdoor Use Only.
(outside any enclosure)
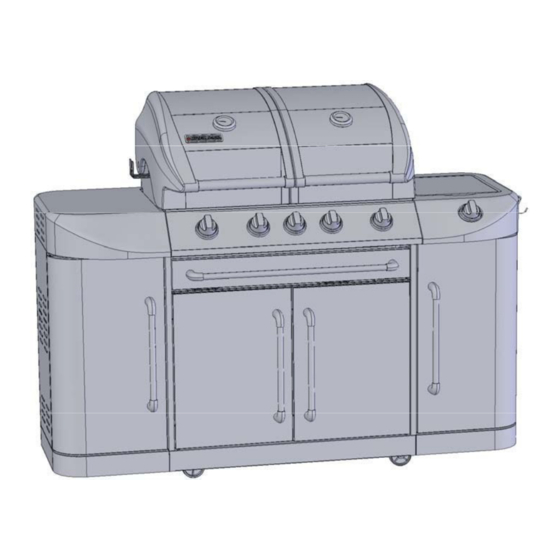
GSC3318
Owner's Manual
4-Burner LP Gas Grill
SAVE THESE INSTRUCTIONS FOR FUTURE
REFERENCE. IF YOU ARE ASSEMBLING THIS UNIT
FOR SOMEONE ELSE, GIVE THIS MANUAL TO HIM
OR HER TO SAVE FOR FUTURE REFERENCE.
FOR CUSTOMER SERVICE, EMAIL TO
SERVICE@PYROMAGICBBQ.COM
CALL 1-877-885-8227 (TOLL-FREE),
6 A.M. – 5 P.M.(PST),MONDAY-FRIDAY.
ITEM # 25586
OR
Printed in China
Advertisement
Table of Contents

Related Manuals for Perfect Flame GSC3318


Summary of Contents for Perfect Flame GSC3318
- Page 1 FOR SOMEONE ELSE, GIVE THIS MANUAL TO HIM FOR YOUR SAFETY: OR HER TO SAVE FOR FUTURE REFERENCE. FOR CUSTOMER SERVICE, EMAIL TO For Outdoor Use Only. SERVICE@PYROMAGICBBQ.COM (outside any enclosure) CALL 1-877-885-8227 (TOLL-FREE), 6 A.M. – 5 P.M.(PST),MONDAY-FRIDAY. Printed in China GSC3318 Owner’s Manual...
-
Page 2: Grill Operation
Always read and understand the WARNINGS and INSTRUCTIONS that are contained in this manual before attempting to use this gas barbecue grill, to prevent possible bodily injury or property damage. Always keep this manual in or near the grill, for convenient future reference. GSC3318 Owner’s Manual... -
Page 3: Table Of Contents
Assembly Instructions ..................7 Operating Your Grill ..................16 Propane tank Connection ........17 Checking for Leaks ..........17 Lighting Your Grill ..........17 Excess flow safety valve reset procedure ……..19 Care and Maintenance ........20 Award-Winning Barbecue Recipes ..............21 Troubleshooting ....................22 Warranty Program ....................24 GSC3318 Owner’s Manual... -
Page 4: For Your Safety
3. Clean and inspect the hose before each use. If there is evidence of abrasion, wear, cuts or leaks, the hose must be replaced prior to operation. The replacement hose assembly should be in accordance with the manufacturer’s specifications. 4. Move gas hoses as far away as possible from hot surfaces and dripping hot grease. GSC3318 Owner’s Manual... - Page 5 Step 3 Ensure that the valve nozzle is pointing straight and completely inserted into the venture tube. GENERAL INFORMATION 1. A propane gas cylinder is required for operation. 2. This gas grill is NOT intended for commercial use. GSC3318 Owner’s Manual...
-
Page 6: Illustrated Parts List
8. Left Side Shelf---------1pc 9. Left Storage -------------1pc 10. Back Window--------1pc 11. Heat plate---------------4pcs 12. Cooking Grid--------4pcs 13. Warming Rack-------2pcs 14. Tank Supporrt------------1pc 15. Rotisserie Motor 16. Tank Clip-------------1pc Support -------------1pc 17. Grease Cup----------2pcs 18. Cup Support-------2pcs GSC3318 Owner’s Manual... -
Page 7: Hardware List
Spring Washers 10pcs M4 x10 mm Bolts 2pcs M6 Washers 26pcs M6 Nuts 2pcs Side Knob Seat Side Burner Knob Screwdriver Hardware listed above is not scaled to exact size (A screwdriver is included for your convenience.) GSC3318 Owner’s Manual... -
Page 8: Assembly Instructions
Insert the pin on the bottom of the right door (3-1) into the hole at the bottom of the cart assembly. Insert the pin on top of the right door in the cart front beam. Repeat the same procedure for the left door (3-2). GSC3318 Owner’s Manual... - Page 9 (E) into each pre-drilled hole. Tighten by hand until secure. Repeat the same procedure for the left storage assembly with left side shelf (8). Tighten by hand until secure. Go back and tighten with the screwdriver provided. GSC3318 Owner’s Manual...
- Page 10 Screw a M6x16mm bolt (B) with a spring washer (D) and M6 washer (E) into the pre-drilled hole. Tighten by hand until secure. GSC3318 Owner’s Manual...
- Page 11 Screw a M6x16mm bolt (B) with a spring washer (D) and M6 washer (E) into each pre-drilled hole. Tighten by hand until secure. GSC3318 Owner’s Manual...
- Page 12 Screw a M6x16mm bolt (B) with a spring washer (D) and M6 washer (E) into the pre-drilled hole. Tighten by hand until secure. Go back and tighten the bolts (include from step 8 & 9) with the screwdriver provided. GSC3318 Owner’s Manual...
- Page 13 (H) with the holes on the side shelf and side burner valve. Screw a M4x10mm bolt (C) into each pre-drilled hole. Tighten the bolts with the screwdriver provided. Insert the side burner knob (G) into knob shaft on valve. GSC3318 Owner’s Manual...
- Page 14 Step 14 Slide the grease pan (18) into the back of the cart assembly. Hook two cup supports (18) into the grooves beneath the grease pan. Place two grease cups (17) on the cup supports GSC3318 Owner’s Manual...
- Page 15 Insert a M6x16mm bolts (B) through each hole. Attach a M6 washer (E), a spring washer (D) and a M6 nut (F) to the ends each bolt. Tighten by the screw driver provided. GSC3318 Owner’s Manual...
- Page 16 Insert the tank clip (18) into the holes on tank support. Place the gas tank on tank seat. Clip the gas tank by the tank clip. Screw the regulator into tank valve. Make certain the regulator is connected securely. GSC3318 Owner’s Manual...
-
Page 17: Operating Your Grill
Never store or use gasoline or other volatile substance in the vicinity of this grill. Never store a spare propane cylinder in the vicinity of this grill, or in the vicinity of another potential heat source. Never fill the propane cylinder beyond 80% full. Warning: No Spare Gas Store GSC3318 Owner’s Manual... -
Page 18: Propane Tank Connection
If the burner does not light, return the valve knob to the “OFF” position immediately. Wait five minutes for the gas to clear and repeat the procedure. After burner is lit, repeat the procedure with any other burner desired. Adjust valve knob(s) to desired cooking temperature. GSC3318 Owner’s Manual... - Page 19 FIG. B FIG. C Poor combustion: Wavy, yellow Normal: Soft blue flames with yellow tips Out of adjustment: Noisy hard blue flames- too little air. between I inch - 2 inches high. flames – too much air. GSC3318 Owner’s Manual...
-
Page 20: Excess Flow Safety Valve Reset Procedure
12. After the first front burner is lit, turn on the other control knob(s) to the HIGH position. **If you have more than two burners, ONLY turn them on ONE AT A TIME. 13. When all front burners are lit, close the BBQ lid 14. Wait for 10-15 minutes, the temperature should reach 400 – 450 F° GSC3318 Owner’s Manual... -
Page 21: Care And Maintenance
Inspect burner for damage (cracks or holes). If damage is found, replace with a new burner. Reinstall burner. Check to ensure the gas valve orifices are correctly positioned, pointing straight into burner inlet (venturi). Also, check position of spark electrode. GSC3318 Owner’s Manual... -
Page 22: Award-Winning Barbecue Recipes
Combine all ingredients and marinate steak for 7-8 vary according to the vegetables chosen. hours. Remove meat from marinade and grill over very high heat to desired doneness. Heat leftover marinade to a boil and pour over grilled steak to serve. GSC3318 Owner’s Manual... -
Page 23: Troubleshooting
Spider webs or insect nest in Clean venturi. venturi Food residue, grease or seasoning Clean burner. salt on burner. Poor alignment of valve to burner Assure burner venturi is properly venturi. engaged with valve GSC3318 Owner’s Manual... - Page 24 If flames are blue and noisy – close flap at the end of the venturi tubes in 1/8” increments until flames are correct. *Propane Models must be open a minimum of 1/8” *Natural Gas Models must be open a minimum of 1/16” GSC3318 Owner’s Manual...
-
Page 25: Warranty Program
If you have any questions related to the product or warranty, please visit our website at www.pyromagicbbq.com or call our customer service center at 1-877-885-8227, 6:00 AM to 5:00 PM (PST), Monday through Friday. Manufactured by: Lucas Innovation Inc. Xiekeng District, QingXi Town, Dong Guan, Guang Dong, China Printed in China GSC3318 Owner’s Manual... -
Page 27: Assembly Instruction
Assembly Instruction * The rotisserie can be operated with one or two grill(s). Please follow the instructions carefully to avoid burns or damage to the rotisserie. Step 1 Insert front shaft (2) into handle (1) as shown. Step 2 Slide balance block (4) onto front shaft (2) b e t w e e n clampers (3). - Page 28 Step 4 Screw end shaft (6) onto middle shaft (5). Important! Step 4-1 For Single Grill Operation: Remove Handle. Screw end shaft (6) directly onto front shaft (2). Place middle shaft (5) in storage area. Step 5 Slide the two forks (8 and 9) on the shat assembly sharp edges facing inward to each other.
- Page 29 Step 7 Secure end shaft (6) end of r ot isse r ie shaft assembly into motor (10). (For single grill operation, remove handle.) Step 8 Slide the motor (10) onto the pre-assembled motor support. Position the roller (7) s o t h a t t h e g r o o v e s i t s o n t h e e d g e o f t h e g r i l l p a n e l a s s h o w n a n d t i g h t e n s e t s c r e w ( 8 ) t o s e c u r e r o l l e r .
Need help?
Do you have a question about the GSC3318 and is the answer not in the manual?
Questions and answers