Table of Contents
Advertisement
Advertisement
Table of Contents

Related Manuals for Belling FSG54TC


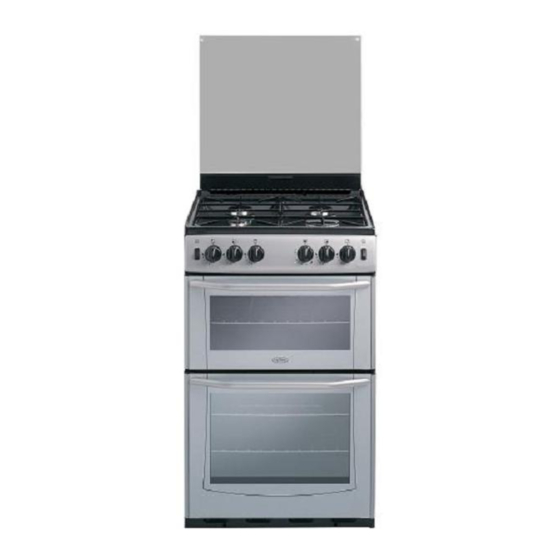
Summary of Contents for Belling FSG54TC
- Page 1 BELLING FSG54TC SERVICE MANUAL...
-
Page 2: Table Of Contents
USER GUIDE AND INSTALLATION HANDBOOK USER GUIDE..................4-32 INSTALLATION INSTRUCTIONS............33-38 WIRING DIAGRAMS................39-39 CUSTOMER CARE................. 41-44 CONTACT DETAILS................45-45 PARTS LIST FSG54TC................. 46-58 REPAIR AND MAINTAINANCE DISASSEMBLY PROCEDURES............59-68 COMPONANT REMOVAL..............69-76 TECHNICAL SPECIFICATIONS............77-77 FAULTFINDING GUIDES..............78-81 THIS MANUAL COVERS THE FOLLOWING MODELS :-... -
Page 3: Product Identification Page
PRODUCT IDENTIFICATION Appliance rating plate location The appliance rating plate is located on the right-hand side of the front frame and also on the rear service panel YEAR MONTH NUMBER OF PRODUCTION FOR THE MONTH PRODUCT IDENTIFICATION CODE It is important that during all service calls the model and serial numbers are recorded on all paper work. - Page 4 Belling Freestanding Gas AU 082748601 20.10.2010...
- Page 5 CONTENTS Introduction Before Using Safety Using the Hob Using the Grill Using the Ovens Programmer/clock Cleaning Installation Technical Customer Care Please keep this handbook for future reference, or for anyone else who may use the appliance.
- Page 6 OUR WARRANTY Should you need it ..Inside the paperwork which has come with this appliance, there is a leaflet and card explaining the terms of our extended warranty and guarantee. In order to apply for our five year guarantee, simply fill in the details on the card and post it off, this will register your appliance.
- Page 7 BEFORE USING THE PRODUCT • Make sure that you have removed all packaging and wrapping. Some of the items inside this appliance may have additional wrapping. • It is advised that you turn the ovens and/or grill on for a short while. This will burn off any residues left from manufacturing.
- Page 8 SAFETY Caution: This appliance is for cooking purposes only. It must not be used for other purposes, for example room heating. GENERAL WARNING! - Accesible parts may become hot during use. To avoid burns, young children should be kept away from the appliance.
- Page 9 SAFETY OVEN/GRILL Always take care when removing food from the oven as the area around the cavity may be hot. Always use oven gloves when handling any utensils that have been in the oven as they will be hot. ...
- Page 10 SAFETY GAS HOB Always ensure that pan bases are dry and flat before using them on the hob. Always position pans over the centre of the heat zone, and turn the handles to a safe position so they cannot be knocked or grabbed.
- Page 11 SAFETY Fire Safety Advice If you have an electrical fire in the kitchen: Most kitchen fires occur when 1) Pull the plug out, or switch off the people are distracted or leave things power at the fuse box - this may be unattended, so remember: enough to stop the fire immediately If you’re called away from the cooker - by...
- Page 12 USING THE HOB - GAS • Use pans which are large enough to • Hold the control knob in for 15 avoid overflows onto the ceramic glass seconds then release. If the burner hob surface. fails to light within this time, release the control knob and wait one minute •...
- Page 13 The Fold Down Lid Caution: Glass lids may shatter when heated. Turn off all the burners before shutting the lid. When opening and closing the lid, use the cooler outer sides of the lid glass. The lid must be opened fully, so there is no danger of it closing while the hob is being used.
- Page 14 USING THE GRILL USING THE GRILL - GAS Place the handle over the edge of the Caution: Accessible parts may be hot when the grill is used. grill pan, at the narrow side edges. Place the handle over the edge of the Caution: Accessible parts may Young children should be kept Slide the handle to the centre, and...
- Page 15 USING THE GRILL - GAS Aluminium foil Using aluminium foil to cover the grill pan, or putting items wrapped in foil under the grill creates a fire hazard. Using the grill Push the grill pan towards the back of the shelf, to position it under the grill.
- Page 16 USING THE GRILL - ELECTRIC (IN A GAS PRODUCT) Caution: Accessible parts may be hot when the grill is used - young children should be kept away. Open the top oven/grill door. Push in and turn the top oven/grill control knob clock- wise to the ‘FULL ON’...
- Page 17 USING THE GRILL USING THE GRILL USING THE GRILL - ELECTRIC (IN A GAS PRODUCT) Detachable grill pan handle Using the grill Detachable grill pan handle Using the grill Detachable grill pan handle Using the grill Push the grill pan towards the back of grid Push the grill pan towards the back of the Push the grill pan towards the back of...
- Page 18 USING THE TOP OVEN - GAS Using the top oven Preheating Ignition Always preheat the top oven for 15 min- utes. However, if the main oven is being Push in and turn the top oven control used at the same time, then preheating knob anticlockwise to the ‘FULL ON’...
- Page 19 USING THE TOP OVEN - GAS Oven furniture Slow cooking Baking tray and roasting tins Make sure that frozen foods are thor- oughly THAWED before cooking. For best cooked results and even brown- ing, the maximum size baking trays and Do not slow cook joints of meat or poultry roasting tins that should be used are as weighing more than 2¼kg / 4½lb.
- Page 20 USING THE TOP OVEN - GAS Top oven baking guide Dish Recommended Suggested Approxiamte temperatue shelf cooking time position (preheated oven) Scones top - middle 10 - 15 mins Meringues bottom 2 - 3 hours Cakes Small cakes middle 15 - 25 mins Whisked sponge middle 20 - 30 mins...
-
Page 21: Traditional Fruit Cakes
USING THE TOP OVEN - GAS Traditional fruit cakes Roast turkey It should be remembered that ovens can Roasting turkey involves cooking two vary over time, therefore cooking times different types of meat - the delicate light can vary, making it difficult to be precise breast meat, which must not be allowed when baking fruit cakes. - Page 22 USING THE TOP OVEN - GAS Roasting guide Notes: The times given in the roasting guide • When cooking stuffed meat or poultry are only approximate, because the size calculate the cooking time from the and age of the bird will influence cooking total weight of the meat plus the times as will the shape of a joint and the stuffing.
-
Page 23: Oven Furniture
USING THE MAIN OVEN - GAS Using the main oven These zones of heat can be useful as dif- ferent dishes requiring different tempera- Ignition tures can be cooked at the same time, Push in and turn the main oven control when more than one shelf is used. - Page 24 USING THE MAIN OVEN - GAS For roasting joints of meat or poultry, and for pot roasts preheat the oven to 215° and cook for 30 minutes, then adjust the oven control to the “S” slow setting for the remainder of the cooking time. Slow cooking times will be about three times as long as conventional cooking times.
- Page 25 USING THE MAIN OVEN - GAS Traditional fruit cakes Roast turkey It should be remembered that ovens can Roasting turkey involves cooking two vary over time, therefore cooking times different types of meat - the delicate light can vary, making it difficult to be precise breast meat, which must not be allowed when baking fruit cakes.
- Page 26 USING THE MAIN OVEN - GAS Notes: Roasting guide • When cooking stuffed meat or poultry The times given in the roasting guide calculate the cooking time from the are only approximate, because the size total weight of the meat plus the and age of the bird will influence cooking stuffing.
- Page 27 Programmer / Clock (if fitted) Programmer / Clock (if fitted) Programmer / Clock (if fitted) button after the tone has sounded Programmer / Clock USING THE PROGRAMMER/CLOCK - GAS (if fitted) Programmer / Clock (if fitted) Programmer / Clock (if fitted) will automatically select that tone.
- Page 28 USING THE PROGRAMMER/CLOCK - GAS (if fitted) Semi-automatic cooking This clock function can be used when you have started cooking a meal or a dish in the oven and want to set the time for the oven to switch off. Press and release the function button twice.
- Page 29 USING THE MINUTE MINDER (if fitted) Setting the minute minder 1. Press and release the plus button to change the display from clock to minute minder - the bell symbol will light. 2. Use the plus and minus buttons to set the length of time before the alarm tone will sound.
- Page 30 CLEANING GENERAL • Baby oil can be used to restore stainless steel finishes - but only use • It is important to clean the product a few drops. Don’t use cooking oils regularly as a build up of fat can as they can contain salts, which will affect its performance or damage it damage the metal.
- Page 31 CLEANING REMOVING OVEN PARTS FOR Shelf Runners CLEANING • Shelf runners can be removed to Inner Door Glass enable you to clean them thoroughly. Make sure they are cool to touch and • The inner door glass panel can be then grasp the runners and slide out removed for cleaning but it must be of their hanging holes.
- Page 32 CLEANING GAS HOB Burner caps and heads • The slots in the burner head where the flames burn should be cleared of depos- its. • Clean with a nylon brush, rinse and then dry thoroughly. There may be brown coloured markings on your burners; these are carbon deposits or fat stains and can be removed using a soap filled pad.
- Page 33 INSTALLATION INSTRUCTIONS - GAS PRODUCTS Ventilation Requirements Before you start: Please read the instructions. Planning your installation will Ventilation must be as specified by save you time and effort. AS 5601 Installation code. The room Prior to installation, ensure that the local conatining the appliance should have an distribution conditions (nature of the gas air supply.
-
Page 34: Installation Instructions
Installation Instructions INSTALLATION INSTRUCTIONS - GAS PRODUCTS InstallatIon InstructIons Whilst every care is taken to eliminate No shelf or overhang or cooker hood should be closer than a minimum of burrs and raw edges from this product, Clearances Windows and permanent vents should 650mm, but check with cooker hood please take care when handling - we Whilst every care is taken to eliminate... -
Page 35: Stability Bracket
INSTALLATION INSTRUCTIONS - GAS PRODUCTS Installation Instructions Installation Instructions Levelling Your Cooker A stability bracket can be fitted as Levelling Your Cooker A stability bracket can be fitted as Levelling Your Cooker A stability bracket can be fitted as follows: follows: Place a spirit level on a baking sheet follows:... - Page 36 the electricity supply Installation Instructions INSTALLATION INSTRUCTIONS - GAS PRODUCTS tion models only) InstallatIon InstructIons As the colours of the wires in the This appliance must be Connect to the electricity supply mains lead for the appliance may (mains ignition models only) Connect to the electricity supply - Gas As the colours of the wires in the connect to the electricity supply...
- Page 37 Ensure that all pipe work is of the INSTALLATION INSTRUCTIONS - GAS PRODUCTS correct rating for both size and temperature. Connect to the gas supply Means of isolation shall be provided Natural Gas - Flexible connections Means of isolation shall be provided at at the shut off point by either an the shut off point by either an approved should comply with BS 669.
- Page 38 INSTALLATION INSTRUCTIONS - GAS PRODUCTS Ovens - Open the oven door. Turn the control to the FULL ON position and press the ignition switch, or hold a lighted match or taper to the burner. Hold the control knob in for 15 seconds. Do not hold the control knob in for longer that 15 seconds.
-
Page 40: Technical Data
TECHNICAL DATA Injectors used (hotplate) Size Natural LP gas Type of gas: Please see data badge your for specified gas type. Small Never attempt to convert an appliance - unless the data badge states that you Medium can. Burner Aeration: Fixed Large Pressure setting: Natural Gas - 1.0 kPa... - Page 41 TECHNICAL DATA Data - Oven and Grill Products Fuel Type Hotplate Nominal Rate Burner / Element Natural Gas Hob - small 3.2MJ/h Hob - medium x 2 6.5MJ/h Hob - large 10.2MJ/h Grill 8.6MJ/h Main oven 9.0MJ/h Total heat input 44.0MJ/h •...
-
Page 42: Customer Care
CUSTOMER CARE FAQs Whenever you can, cook wet foods at higher temperatures. What parts of the appliance can be washed in a dishwasher? Don’t leave food in the oven to cool down. • Any enamelled parts such as the grillpan can be cleaned in a •... - Page 43 CUSTOMER CARE CHANGING LIGHT BULBS (where fitted) Warning: There is a risk of electric shock, so always make sure you have turned off and unplugged your appliance before starting. Always allow the product to cool down before you change a bulb. Not all appliances have the same number and type of bulbs.
-
Page 44: Product Description
CUSTOMER CARE COOKSHOP To order or enquire about any of these products, please call the Spares Sales team. Product Description Product Code Quantity Where Used Rectangular carbon filters 082612620 Hoods Round carbon filters 082611571 Hoods Ceramic hob scraper kit 082606781 All ceramic glass hobs including induction Ceramic hob cleaner and... - Page 45 CONTACT US Calling for a service If you should experience any problems with your cooker please contact your retailer or place of purchase. Important note: Service work is to be conducted by authorised persons only. It is also adviseable that your cooker is checked regularly and maintained in good condition. An annual maintenance is recommended.
- Page 47 FACIA FREESTANDING ALTERNATIVE METAL FASCIA ONLY THE PARTS ON THIS DRAWING ARE REPRESENTATIVE ONLY AND MAY VARY VISUALLY. THIS DRAWING IS GENERIC AND PARTS SHOWN MAY NOT BE ON ALL MODELS.
- Page 49 EV_OVEN_TOP_G THE PARTS ON THIS DRAWING ARE REPRESENTATIVE ONLY AND MAY VARY VISUALLY. THIS DRAWING IS GENERIC AND PARTS SHOWN MAY NOT BE ON ALL MODELS.
- Page 50 FURNITURE TOP OVEN ALTERNATIVE SHELF GUIDES - KEY NUMBER FOR OPPOSITE HAND 420 THE PARTS ON THIS DRAWING ARE REPRESENTATIVE ONLY AND MAY VARY VISUALLY. THIS DRAWING IS GENERIC AND PARTS SHOWN MAY NOT BE ON ALL MODELS.
- Page 51 EV TOP DOOR GLASS ALTERNATIVE HANDLE DESIGN TOP DOOR LOWER DOOR THE PARTS ON THIS DRAWING ARE REPRESENTATIVE ONLY AND MAY VARY VISUALLY. THIS DRAWING IS GENERIC AND PARTS SHOWN MAY NOT BE ON ALL MODELS.
- Page 52 EV_OVEN_MAIN_G SCALE 0.666 THE PARTS ON THIS DRAWING ARE REPRESENTATIVE ONLY AND MAY VARY VISUALLY. THIS DRAWING IS GENERIC AND PARTS SHOWN MAY NOT BE ON ALL MODELS.
- Page 53 FURNITURE MAIN OVEN ALTERNATIVE SHELF GUIDES- KEY NUMBER FOR OPPOSITE HAND 421 THE PARTS ON THIS DRAWING ARE REPRESENTATIVE ONLY AND MAY VARY VISUALLY. THIS DRAWING IS GENERIC AND PARTS SHOWN MAY NOT BE ON ALL MODELS.
- Page 55 0585 PRESCOT, MERSEYSIDE, L35 2XW PART NAME: SIDE PANELS APPLIANCE NAME: BEL FSE 60 DO DRG N°: 073107500 ISSUE MODIFICATION NAME DATE DRAWN: PRM 18-08-09...
- Page 56 PARTS LIST FOR SKU 444440850 Part Order Part Part Description End Date Group Status HINGE BRKT ASS SBS 82922400 LH(RIVETTD) HINGE BRKT ASS SBS 82922401 RH(RIVETTD) 82377806 Burner grill(new venturi)32024 BURNERBOWL aux (injector 82519304 0.82) 82519406 BURNERBOWL s/rapid (inj 1.18) 82519506 BURNERBOWL rapid (inj 1.42) 83072600 BURNERCAP aux blk glo 82957800 BURNERCAP aux (serie3)blk gls...
- Page 57 82748601 HANDBOOK be FSG au 82283705 HANDLE grill pan 1041 562979208 HANDLE door 55 be552 laq 82905900 HINGE drop down door (Zan) 82905903 HINGE drop down door (zan) 602996004 HOTPLATE 55 gas lid fsd be blk 83111700 GENERATOR ignition 82837802 INJECTOR grill ng 1.40 82547603 INJECTOR oven 1.44mm 82049500 BURNER oven 17020 81883501 KNOB control rs2 gas Blk KB...
- Page 58 82964505 TAP aux 0.32 bp lh set 52-54A 82548819 TAP ng grill 82964604 TAP semi 0.39 bp rh set 52-54A 82964606 TAP rapid 0.45 bp rh set 65-70 82469800 THERMOCOUPLE with leads 82821300 THERMOCOUPLE 1500mm 83007500 THERMOCOUPLE 82583419 THERMOSTAT fsg 60 au 82518800 WIRE TRIVET grill pan 1130 82575600 WASHER door handle 19mm dia 83007600 THERMOCOUPLE wire...
- Page 59 BELLING FSG54TC REPAIR MAINTAINANCE PROCEDURES...
- Page 60 IMPORTANT BEFORE CARRYING OUT ANY SERVICING WORK ALWAYS DISCONNECT FROM THE ELECTRICAL SUPPLY...
- Page 61 1) REMOVING THE MAIN OVEN DOOR OPEN THE DOOR FULLY RELEASE THE 2 CLIPS AND PUSH FULLY BACK INTO POSITION SHOWN CLOSE DOOR TO REST POSITION AND LIFT TO REMOVE DOOR AND HINGE WHEN REPLACING ENSURE THAT HINGES ARE FULLY ENGAGED IN THE HINGE BUSH 2) REMOVING THE TOP OVEN DOOR OPEN THE DOOR FULLY...
- Page 62 REMOVING THE HINGE FROM THE DOOR REMOVE THE 2 SCREWS AS INDICATED PULL THE HINGE OUT OF THE DOOR EXTRUSION...
- Page 63 3) LID REMOVAL WITH LID IN THE UPRIGHT POSITION REMOVE 2 SIDE PLATES BY LOOSENING THE 2 SCREWS REMOVE THE 2 LID SPRINGS BY RELEASING THE SPRINGS FROM THE LOWER HOLES REMOVE THE 2 LID CLIPS AND CAREFULLY LIFT THE LID AWAY FROM THE HOBTOP ENSURE THAT THE LID IS SUPPORTED AT ALL TIMES...
- Page 64 RAPID BURNER 9.5MJ/HR AUX BURNER 3.2MJ/HR GRILL TAP MAIN OVEN T/STAT SEMI-RAPID 6.5MJ/HR SEMI-RAPID 6.5MJ/HR...
- Page 65 5) REMOVAL OF SIDE PANELS REMOVE 2X SCREWS AT REAR OF APPLIANCE REMOVE 2X SCREWS FROM FRONT OF APPLIANCE REMOVE SIDE PANEL...
- Page 66 6) REMOVAL OF FACIA PANEL REMOVE ALL CONTROL KNOBS REMOVE 2 X HOLDING SCREWS SITUATED BEHIND THE OUTER- MOST CONTROL KNOBS AND REMOVE THE FACIA PANEL TO REMOVE FULLY DISCONNECT THE WIRING TO THE LIGHT AND IGNITION SWITCH 7) REMOVING THE REAR SERVICE PANEL REMOVE BOTH FLUE TUBES FROM REAR REMOVE SECURING SCREWS...
- Page 67 8) GAINING ACCESS UNDERNEATH HOTPLATE THE HOB TOP CAN BE REMOVED WITHOUT REMOVING THE LID USING THE FOLLOWING PROCEDURE REMOVE THE 2 SCREWS HOLDING THE HOTPLATE REPEAT FOR L/H SIDE...
- Page 68 THE HOTPLATE MAY NOW BE LIFTED TO GAIN ACCESS TO THE GAS TAPS/THERMOSTATS/ ELECTRODES ETC TAKE CARE TO ENSURE THAT THE HOB TOP IS SUPPORTED AT ALL TIMES WHEN WORKING UNDERNEATH WHEN REFITTING ALWAYS EN- SURE THAT THE BURNERBOWLS PROTRUDE THROUGH THE HOLES IN THE HOB TOP FULLY...
- Page 69 REPLACEMENT OF COMPONANTS A) ELECTRODES FOLLOW 8 AND REMOVE THE HOB TOP REMOVE ELCTRODE CLIP BY SQEEZING TOGETHER AND PULLING TO REMOVE REMOVE ELECTRODE FROM BURNER BOWL AND IGNITION LEAD FROM IGNITIION GENERA- ON REPLACING ALWAYS ENSURE THAT THE RUBBER WASHER IS B) HOB THERMOCOUPLES FOLLOW STEP 8 AND REMOVE THE HOB TOP...
- Page 70 C) COOLING FAN FOLLOW STEP 8 AND REMOVE THE HOB TOP REMOVE THE 4 SECURING SCREWS AND REMOVE THE FAN AND FAN GUARD DISCONNECT THE WIRES WHEN RE-FITTING ALWAYS REFIT THE FAN GUARD...
- Page 71 D) GAS TAPS FOLLOW STEP 8 (PAGE 9) LIFT HOB TOP FOLLOW STEP 6 REMOVE THE FACIA PANEL PULL FORWARD INNER FACIA PANEL TO GAIN ACCESS TO THE 2 X TAP SECURING SCREWS UNDO BUNDY TUBE CONNECTION AND REMOVE DISCONNECT THERMOCOUPLE REMOVE 2 GAS TAP SECURING SCREWS AND REMOVE THE TAP WHEN REPLACING TAP ALWAYS...
- Page 72 E) MAIN OVEN THERMOSTAT FOLLOW STEP 8 REMOVE HOB TOP DISCONNECT BUNDY TUBE NUT AND THERMOCOUPLE REMOVE 2 T/STAT SECURING SCREWS AND REMOVE THE T/STAT FROM GAS RAIL DISCONNECT THE T/STAT PHIAL FROM INSIDE THE OVEN CAVITY (R/H SIDE OF CAVITY IN BOTH OVENS AND PULL THROUGH TO REMOVE T/STAT FULLY WHEN REPLACING ALWAYS ENSURE...
- Page 73 REMOVE THE SECURING NUT FOR THE GRILL THERMOCOUPLE AND REMOVE THE THERMOCOUPLE FROM IT’S BRACKET DISCONNECT THE IGNITION LEAD FROM THE GRILL ELECTRODE REMOVE THE 3 SECURING SCREWS FROM THE BURNER SECURING PLATE AND LIFT AWAY PULL THE BURNER DOWN AND PULL OUT OF THE AERATION SLEEVE GRILL BURNER REMOVED...
- Page 74 H) DOOR SEAL THE DOOR SEAL IS REMOVED BY JUST PULLING IT IS SECURED IN THE GAP BETWEEN THE CAVITY AND FRONFRAME AND REQUIRES NO OTHER FIXING TO REFIT PUSH IN ALWAYS ENSURE THAT DOOR SEAL LIP IS FACING THECORRECT WAY...
- Page 75 I) MAIN OVEN BURNER LOOSEN HIDDEN SCREW IN BURNER SHIELD ( AS INDICATED ) AND SLIDE AWAY TO REMOVE THE BURNER REMOVE THE SECURING NUT IN THE MIDDLE OF THE BURNER PULL THE BURNER FROM THE BURNER HOUSING THE ELCTRODE CAN NOW BE REMOVED FROM THE BURNER WITH THE BURNER SHIELD RE- MOVED THE THERMOCOUPLE CAN...
- Page 76 J) MAIN OVEN LIGHT FITTING FOLLOW STEP 7 ) REMOVING REAR SERVICE PANEL REMOVE GLASS LAMP COVER BY UNSCREWING FROM INSIDE THE CAVITY REMOVE THE EARTH LEAD RELEASE 4 XCLIPS HOLDING LIGHT FITTING IN PLACE REMOVE BY PULLING LIGHT FITTING K) IGNITION GENERATOR REMOVE 2 X EARTHING SCREWS RELEASE IGNITION GENERATOR...
-
Page 77: Technical Specifications
TECHNICAL SPECIFICATIONS NOMINAL RESISTANCES AT 20oC COOLING FAN 1.31kΩ OVERHEAT CUT-OUTS MAIN 120oC FAN RUN-ON 60oC... -
Page 78: Faultfinding Guides
BELLING FSG54TC COOKER FAULTFINDING GUIDES... - Page 79 Gas freestanding Main oven not working Customer reports main oven not working – Hotplate – top oven or grill OK. Is the clock set to manual? Advise customer on setting the timer Can the customer Does ignition start? smell gas in the oven? Replace micro switch Replace Spark Can the customer...
- Page 80 Top oven not working Customer reports top oven not working Does the grill work? Possible gas supply problem if whole appliance affected customer to have supply checked – if just top oven / Can the customer Does oven ignition grill replace top oven t/stat smell gas in the oven? spark? Replace micro switch...
- Page 81 Oven with FSD won’t maintain temperature Oven will not regulate temperature When the oven is lit does the flame increase to full rate Send engineer with FSD or Burner Does the customer have assy the inner door glass fitted? Have customer re-fit inner door glass Ask customer to check for visual...
Need help?
Do you have a question about the FSG54TC and is the answer not in the manual?
Questions and answers