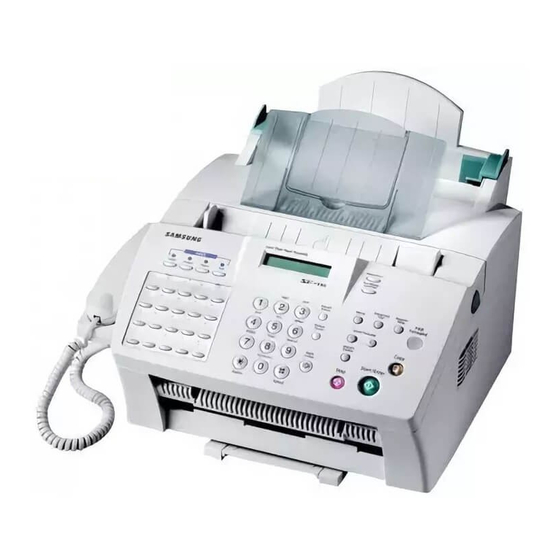
Samsung SF-530 Series User Manual
Laser facsimile
Hide thumbs
Also See for SF-530 Series:
- User manual (168 pages) ,
- Service manual (141 pages) ,
- Product manual (12 pages)

Related Manuals for Samsung SF-530 Series


Summary of Contents for Samsung SF-530 Series
- Page 1 Visit us at http://www.samsungelectronics.com/mfp Home http://www.samsungelectronics.com/fax P/N. JC68-00648A Rev.3.00...
- Page 2 Trademarks • SmarThru 2, MailBox, Image Manager, Scan Manager, Copy Manager, Image Viewer, AnyPage are trademarks of Samsung Electronics. • Windows, Windows 95, Windows 98, Windows Me, Windows NT and Windows 2000 are trademarks of Microsoft corporation. • Other names and trademarks mentioned in this manual are trademarks of their...
-
Page 3: Table Of Contents
Testing the Machine –––––––––––––––––––––––––––––– 1.21 Using Save Modes –––––––––––––––––––––––––––––––– 1.22 Installing Samsung Software (SF-531P only) Samsung SmarThru About Samsung SmarThru Software ––––––––––––––––– 2.1 Installing Software System Requirements –––––––––––––––––––––––––––––– 2.3 Installing the Samsung Software –––––––––––––––––––– 2.4 Configuring the Fax Gate on Your PC ––––––––––––––––– 2.6 Configuring the Internet Gate on Your PC ––––––––––––... - Page 4 Stand-alone Fax Setting Up Stand-alone Fax System Setting Volume –––––––––––––––––––––––––––––––––– 3.1 Setting Alert Tones ––––––––––––––––––––––––––––––– 3.2 Setting User-Selectable System Options –––––––––––––– 3.2 Sending a Fax Preparing Documents for Faxing or Copying ––––––––––– 3.7 Setting Document Resolution and Contrast –––––––––––– 3.8 Loading Documents –––––––––––––––––––––––––––––––...
- Page 5 Contents (continued) Stand-alone Fax (continued) Additional Functions Sending a Recall (Flash or R) ––––––––––––––––––––––– 3.35 Monitoring a Dual Job Status ––––––––––––––––––––––– 3.35 Forwarding Received Faxes –––––––––––––––––––––––– 3.36 Toll Save Fax –––––––––––––––––––––––––––––––––––– 3.37 Printing Reports ––––––––––––––––––––––––––––––––– 3.38 Group Dialling ––––––––––– 3.40 (for Multi-Address Transmission) Printing (SF-531P only)
- Page 6 Refer to the SmarThru User’s Guide for information on: • Scanning a document • Copying a document • Working with a scanned image • Recognizing a scanned image as text • How to use additional features using the Samsung SmarThru 2 program...
-
Page 7: Laser Safety Statement
Environmental and Safety Consideration Laser Safety Statement The printer is certified in the U.S. to conform to the requirements of DHHS 21 CFR, chapter 1 Subchapter J for Class I(1) laser products, and elsewhere is certified as a Class I laser product conforming to the requirements of IEC 825. -
Page 8: Power Saver
Ozone Safety During normal operation, the Samsung SF-530 Series produces ozone. the ozone produced does not present a hazard to the operator. However, it is advisable that the machine be operated in a well ventilated area. If you need additional information about ozone, please request your nearest Samsung dealer. -
Page 9: Approvals And Certifications
D D e e c c l l a a r r a a t t i i o o n n o o f f C C o o n n f f o o r r m m i i t t y y ( ( E E u u r r o o p p e e a a n n C C o o u u n n t t r r i i e e s s ) ) Approvals and Certifications The CE marking applied to this product symbolises Samsung Electronics Co., Ltd. Declaration of Conformity with the following... - Page 10 The product has been tested against TBR21 and/or TBR 38. To assist in the use and application of terminal equipment which complies with this standard, the European Telecommunication Standards Institute (ETSI) has issued an advisory document (EG 201 121) which contains notes and additional requirements to ensure network compatibility of TBR21 terminals.
- Page 11 Congratulations on the purchase of your SF-530 series product! This chapter provides information on the following topics: Introduction N Welcome! N Contents N Identifying Parts Setting Up Your Machine N Choosing a Location N Preparing Your Machine for Use...
-
Page 12: Getting Started
Introduction Welcome! Thank you for purchasing the Samsung SF-530 series, a powerful business tool with the capabilities of a full range of office equipment. With the Samsung SF-530 series, you can: Use the Samsung SF-530 series as a full-featured stand- alone fax machine to send and receive faxes. - Page 13 Internet service provider and properly configured the Internet gate when you install the Samsung software) • Image Viewer — Working with documents or images, you can view the image in a variety of graphical formats.
-
Page 14: Contents
Contents Here’s what comes with the SF-530 series. Toner cartridge Document output support SF-530 series machine Document input support Handset cradle Handset Telephone line cord USB cable Power cord (for SF-531P only) SF-530 series SmarThru software CD-ROM One-touch label User’s Guide User’s Guide... -
Page 15: Identifying Parts
Identifying Parts Before setting up your machine, make sure you identify the following parts related to the scanner and paper print paths. Identifying Scanner Path Parts Items to be faxed, copied, or scanned use the scanner path which consists of the following parts: Document input support Supports original documents. - Page 16 Identifying Printer Path Parts Paper for printing, receiving faxes and copying follow the printer path. This path consists of the following parts: Paper input support Support the print media Paper guides Aligns paper. Automatic paper input tray Holds paper. Manual paper input tray (For SF-531P only) Paper output tray Use to feed paper one...
- Page 17 Identifying Front Panel Features Look for the following keys and features on the front panel. These features are used to fax documents, make copies, and adjust settings. LCD Display Displays messages and menu settings. Toner Turns Toner Save mode on or off. Power Turns Power Save mode on or off.
- Page 18 Rcv. Mode/Contrast When a document is loaded, choose the contrast characteristic of copied or transmitted documents. When a document is not loaded, choose the receive mode to use. The selected mode is displayed in Standby mode. Resolution Choose the resolution of documents. Setup Use to set up various system options.
- Page 19 Identifying Connecting Parts and Others Power cord connector Telephone line jack USB cable jack Extension telephone jack (SF-531P only) Parallel cable connector (SF-531P only) Cover Cover release buttons (right and left) Getting Started...
-
Page 20: Setting Up Your Machine
• In a dusty or dirty environment. Preparing Your Machine for Use When you take the SF-530 series out the box, note that it has been packaged to protect it during shipping. Before you use the machine, make certain that you check for the following items: •... -
Page 21: Attaching The Supports
Insert one end first, then the other end by squeezing this leg inward to make the tray easy to insert. Note: The SF-530 series is shipped with the paper output tray already installed. Extend the tray to use. Fold out the extender if necessary. - Page 22 Handset and Handset Cradle 1. Plug the end of the coiled cord of the handset into the jack on the left side of your machine. 2. Hold the cradle using your hand as shown. 3. Attach the handset cradle to the main body. Insert the two tabs of the cradle into the slots on the left side of the machine as shown, and while pressing part A on the bottom of the cradle, push the cradle toward the machine until it clicks into place.
-
Page 23: Connecting To The Phone Line
Connecting to the Phone Line For proper operation, the SF-530 series must be connected to the wall jack. Once you have decided which wall jack you will be using, check a box below and follow the instructions. - Page 24 To Connect to a Wall Jack that has Only One Phone Line 1. Plug the included telephone cord into the jack on the back of the unit marked the word LINE. To a standard phone wall jack 2. If a telephone cord is plugged into the wall jack, unplug the cord and set it aside.
-
Page 25: Connecting To The Computer (Sf-531P Only)
Connecting to the Computer (SF-531P only) Your machine has a parallel and a USB interface port which allow use with a Windows PC. Connecting to the Computer Using the Parallel interface 1. Plug the supplied parallel printer cable into the connector on the back of your machine. -
Page 26: Plugging In The Power
Plug one end of the cord into the back of the machine and the other end into a standard AC power outlet. The SF-530 series will turn on and the display will show ‘SYSTEM INITIAL’. If there is no paper loaded, the displays will shows ‘NO PAPER.’... - Page 27 2. Remove a stack of paper from its packaging. Tap the stack on a flat surface to even it up. 3. Insert the paper with the print side facing you. Place the print side facing you. 4. Adjust the paper guides to the width of the print media. Slide the guides until they lightly touch the stack of print media.
- Page 28 Paper Type and Size Satisfactory print and receive quality can be obtained with many types of plain paper. Since the quality of plain paper varies widely, test the print quality before buying large quantities of paper. Your machine uses a variety of papers including: •...
-
Page 29: Installing The Toner Cartridge
Installing the Toner Cartridge 1. Pulling the cover release buttons found on both sides of the machine toward you, open the cover. 2. Unpack the cartridge from its plastic bag, and then remove the paper rolled the cartridge. 3. Shake the cartridge from side to side 5 or 6 times to redistribute the toner evenly inside the cartridge. - Page 30 4. Find the cartridge slots inside the machine, one on each side. 5. Grasp the handle at the front of the cartridge and slide it down between the cartridge slots, and push it firmly. 6. Close the cover. Make sure that the cover is securely closed. 1.19 Getting Started...
-
Page 31: Setting The Date And Time
(Standby mode). The date and time are printed on all transmitted faxes. When you install the SF-530 series for the first time, or when the product is without power for about 15 seconds, the display prompts you to reset the date and time. -
Page 32: Setting Your Fax Number And Name
Setting Your Fax Number and Name Your fax number and name can be printed at the top of each page transmitted. 1. Press Setup on the front panel. The display shows the first setup menu; FAX NUMBER/NAME. 2. Press Start/Enter to access the Fax Number/Name menu. The display shows ‘FAX NUMBER.’... -
Page 33: Using Save Modes
Using Save Modes There is four saving mode buttons on the front panel of the SF-530 series. Using these buttons, you can save toner and power consumption, paper for printing, and toll for the fax call. SAVE Toner Power Paper Toll Toner Save Mode Toner Save mode allows the machine to use less toner on each page. - Page 34 Paper Save Mode With Paper Save mode on, you can save paper by reducing the data and printing two pages on one sheet of paper when copying or printing received document. Press Paper on the front panel to turn this mode on or off. •...
- Page 35 This chapter provides information on installing the supplied Samsung software. You MUST install the Samsung software to use your machine as a printer and scanner. The topics included in this chapter are: Samsung SmarThru N About Samsung SmarThru Software...
-
Page 36: Installing Samsung Software
Samsung SmarThru About Samsung SmarThru Software You must to install the SmarThru CD-ROM after you have setup your machine and connected it to your computer. The SmarThru CD-ROM includes the following: • MFP Driver • USB Driver • SmarThru Software •... - Page 37 OCR Software (AnyPage Lite) OCR (Optical Character Recognition) is the software that has the ability to recognize most character formats, so that a scanned document can be read and edited on your word processor. Installing Samsung Software...
-
Page 38: Installing Software
• Required software: Internet Explorer 4.01 or 5.0 • User rights: Administrative rights should be set for installation on Windows NT and Windows 2000. Note: Windows 95 versions prior to OSR2 are not recommended due to compatibility with OLE/COM libraries. Installing Samsung Software... -
Page 39: Installing The Samsung Software
If the opening window does not appear, click Start, and then Run. Type X:Setup.exe, replacing “X” with the letter of your drive, and click OK. 2. When the opening screen appears, click on SF-530 Series, then the language you want to use. 3. Click Install the Samsung Software on your PC. - Page 40 If you select the Custom installation, you may choose the options you want to install. SmarThru software to scan and edit images and work with electronic documents. AnyPage Lite software to enable OCR. MFP driver to print and scan. Installing Samsung Software...
-
Page 41: Configuring The Fax Gate On Your Pc
Configuring the Fax Gate on Your PC 1. After installing the SmarThru software, Windows will automatically restart. When you see the Samsung SF-530 Series Program folder, close it by clicking x on the right-top of the window. Installing Samsung Software... - Page 42 PC faxes. Then, click Next. Note: The SmarThru FAX feature is available only if there is a FAX modem installed in your PC. Press "Cancel" if there is no FAX modem installed in your PC. Installing Samsung Software...
- Page 43 5. When you are finished, click Finish. Note: To edit the advanced properties of Fax service or to add other modems, choose SmarThru Configuration from the Tools menu when you run the Samsung SmarThru2. For details, refer to the SmarThru User’s Guide. Installing Samsung Software...
-
Page 44: Configuring The Internet Gate On Your Pc
If you are connected to the Internet over a LAN (i.e. in an office network environment), select Connection to Internet over LAN, and skip to Step 4. If you use dial-up for Internet connection, select Use Dial-Up for Internet Connection, and proceed to the next step. Installing Samsung Software... - Page 45 Internet connection on the SmarThru system, then click OK. If no connection is available, you cannot use the system Dial-Up in the Samsung SmarThru system. To modify the Dial-Up connection properties, click Dialing Properties. Note: For details on the Dial-Up Configuration using the Windows Dial-Up Networking setup wizard, please refer to your Windows documentation.
- Page 46 Internet service provider. 5. Enter the addresses of your incoming and outgoing mail servers. Choose the incoming mail server type, then click Next. Your Internet service provider must provide you this information. 2.11 Installing Samsung Software...
- Page 47 8. Click Finish to enable Internet e-mail service. Note: If you wish, you can enable or reconfigure the Internet connection later. Open the Samsung SmarThru2, and select SmarThru Configuration from the Tools menu. For details, refer to the SmarThru User’s Guide.
-
Page 48: Using Your Machine With A Usb Cable
Using Your Machine with a USB Cable If you have a USB (Universal Serial Bus) port enabled on your computer, you can connect your SF-530 series to the USB chain of devices. Installing MFP Driver To operate your printer with Windows PC, you must install the MFP driver. - Page 49 3. The Add New Hardware Wizard dialogue box appears. Click Next. 4. Check Search for the best driver for your device and click Next. 5. Check CD-ROM drive and click Browse, then choose x:\Driver\USB (where x is the drive letter for the CD-ROM drive). 2.14 Installing Samsung Software...
- Page 50 2. Select the Samsung SF-530 series printer icon in the Printers folder. 3. Select Properties from the File menu. 4. Click the Details tab. Select SSUSB: (SF-530 Series) in the Print to the following port box. Click OK. The setup is now completed.
-
Page 51: Making Installation Diskettes
Run. Type X:Setup, replacing “X” with the letter of your drive, and click OK). 2. When the opening screen appears, lick on SF-530 Series, then the language you want to use 3. Click Make your own Diskette set of software. -
Page 52: Installing Software From Diskettes
2. From the Start menu, select Run. 3. Type A:\setup.exe in the Open box and click OK. (if your floppy drive is not A, substitute the correct letter.) 4. Follow the on-screen instructions to complete the installation. 2.17 Installing Samsung Software... -
Page 53: Uninstalling Samsung Software
Un-installing the MFP Driver 1. Start Windows if not already started. 2. From the Start menu, select Programs, then select Samsung SF-530 Series, then select Uninstall. 3. When your computer confirms your selection, click Yes. The printer driver and all its components are removed from your computer. - Page 54 1. Start Windows if not already started. 2. From the Start menu, select Programs. 3. Select Samsung SmarThru, then select SmarThru 2 Uninstall. 4. When your computer asks you to confirm your selection, click Yes. The Select Backup Options dialogue box appears.
- Page 55 SmarThru software and all components will be removed. 7. When un-installing is done, click OK. The message box recommends restarting your computer. 8. Click OK. Shut down and restart your computer to complete the un-installation process and save your changes. 2.20 Installing Samsung Software...
- Page 56 Start menu, then type X:SETUP, replacing “X” with the letter of your drive and click OK. 2. When the opening window appears, lick on SF-530 Series, then the language you want to use. 3. Click Uninstall the Samsung software on your PC.
- Page 57 This chapter explains how to send and receive faxes from the front panel of the SF-530 series. This chapter also demonstrates how to use the advanced fax features and change the settings on the fax system. This chapter provides information on the following topics:...
-
Page 58: Stand-Alone Fax
Setting up Stand- alone Fax System Setting Volume Ringer Volume You can adjust the volume of the ringer to your desired volume. 1. Press ➛ or ❿ in Standby mode. The display shows the current ringer volume setting. RINGER VOL.[3] 2. -
Page 59: Setting Alert Tones
Setting Alert Tones You can choose an alarm tone to sound when an error occurs (ALARM VOLUME) or when any key is pressed (KEY VOLUME). 1. Press Setup on front panel. The display shows the first setup menu; FAX NUMBER/NAME. 2. - Page 60 6. When setting is done, press Start/Enter to save the setting. You can exit from setup mode at any time by pressing Stop. The machine returns to Standby mode without saving the setting you have already changed. Selectable Options These instructions assume you have followed the steps on page 3.2 under ‘Setting an Option’...
- Page 61 • AUTO REDUCTION — When receiving a document as long or longer than the paper loaded in your machine, the machine can reduce the data in the document to fit into your recording paper size. Original Received data Turn this feature on to reduce an incoming page that may need to be divided into two pages with only a few lines on the second page.
- Page 62 Notes: • This feature needs the number reported by the remote fax to be an exact match to a one-touch or speed dial number in the SF-530 Series. If you have a problem receiving faxes, turn this feature off. Stand-alone Fax...
- Page 63 • DRPD MODE — “Distinctive Ring” is a telephone company service which enables a user to use a single telephone line to answer several different telephone numbers. The particular number someone uses to call you on is identified by different ringing patterns, which consist of various combinations of long and short ringing sounds.
-
Page 64: Sending A Fax
Sending a Fax Preparing Documents for Faxing or Copying To fax or copy documents that are printed on standard letter or A4 size paper, follow these guidelines. • Do not attempt to feed the following types of documents into the machine: - wrinkled, curled, or folded paper - chemically processed paper (pressure-sensitive paper, carbon-coated paper, etc.) -
Page 65: Setting Document Resolution And Contrast
Setting Document Resolution and Contrast We recommend sending documents printed using a typewriter, felt tip pen, black ink, or laserwriter. The paper should be white or very light, and of normal weight – not cardboard. Blue lines on a ruled pad do not fax well. To send normal documents, there is no need to adjust the resolution and the contrast. -
Page 66: Loading Documents
Loading Documents 1. Load your document face down with the top edge first going into the document feeder. 2. Adjust the document guides for the width of the document. 3. Slide the sheet down into the document feeder until it is in the feed area. -
Page 67: Sending A Fax Automatically
Sending a Fax Automatically 1. After loading a document, enter the number of the remote fax using the keypad. One-touch or speed dialling is also available if you have already stored the number into a one-touch or speed dial number. For information on storing and using numbers in the memory, see page 3.19. -
Page 68: Sending A Fax After Talking
Last Number Redialling Press Redial/Pause with a document loaded in the feeder, the machine begins to send. The redial memory in your machine retains the last 10 numbers called. To search through the redial memory, do as follows: 1. Press and hold Redial/Pause for about 2 seconds. 2. -
Page 69: Voice Request
Voice Request If you are sending or receiving a document and need to speak to the other person during the same phone call, use Voice Request to alert the person at the remote site. You can also respond to a Voice Request made by the person at the remote end. -
Page 70: Receiving A Fax
Receiving a Fax About Reception Modes Your machine has four reception modes: • In FAX mode, the machine answers an incoming call and immediately goes into receive mode. • In AUTO mode, the machine answers an incoming call expecting to receive a fax. -
Page 71: Loading Paper For Receiving Faxes
After you have finished printing, reload the original paper. Receiving Automatically in FAX Mode The SF-530 series is preset to FAX mode at the factory. If you have changed the fax mode, take the following steps to receive faxes automatically: 1. -
Page 72: Receiving In Auto Mode
Receiving in AUTO Mode 1. Press and hold down Rcv.Mode/Contrast on the front panel repeatedly until the display shows ‘AUTO’. 2. When you get a call, the machine answers it. If a fax is being sent, the machine goes into reception mode. If the machine does not detect a fax signal, it will continue ringing to tell you it is a phone call. -
Page 73: Receiving Manually In Tel Mode
Receiving Manually in TEL Mode You can answer calls using the handset, and start the machine to receive a fax. 1. Press and hold down Rcv.Mode/Contrast repeatedly until the display shows ‘TEL.’ 2. When the telephone rings, pick up the handset and answer it. 3. -
Page 74: Making A Copy
Making a Copy Copying Overview The resolution is automatically set to S.FINE while the copy feature is in use. However, the contrast can be changed to produce optimal copy quality for a particular document containing faint markings, dark image, photographs, or other halftone images. •... -
Page 75: Using Advanced Copy Features
Using Advanced Copy Features You can adjust the quantity, size, and print order for copying. Take the following steps: 1. Load your document face down with the top edge first going into the document feeder. If necessary, press Rcv. Mode/Contrast to change the contrast. -
Page 76: Automatic Dialling
Automatic Dialling How To Enter a Name Using the Number Keys As you perform various tasks, you will need to enter names and numbers. For example, when you set up your machine, you have to enter your name (or your company’s name) and telephone number. When you store a one-touch dial or speed dial, you also enter the telephone numbers and names. - Page 77 For example, to enter an ‘R’, press 7 (labelled PRQS). Each time you press 7, the display shows a different letter–first ‘P’, then ‘Q’, ‘R’, ‘S’, and finally ‘7.’ The letter appears on the display as shown below. NAME:R 2. When the letter you want appears on the display, press another number key labelled with the next letter you want.
-
Page 78: One-Touch Dialling
Editing Name If you make a mistake while entering a number or name, move the cursor under the incorrect digit by ➛¤or ❿. Then, press the correct number to change, or press Search/Delete to delete the number. Inserting a Pause While Entering a Number Some telephone systems require an access code (9, for example) and listen for a second dial tone before dialling an outside number. - Page 79 3. The display asks you to enter a name. For information on how to enter names, see page 3.19. Or, if you do not want to assign a name, skip this step. 4. Press Start/Enter when the name appears correctly or without entering a name.
-
Page 80: Speed Dialling
Using Address Label A One-touch label sheet is included with your machine. As you store numbers in one-touch dial buttons, make a note of the numbers on the label to remind you which number is stored in each position. 1. Remove the clear cover and label. - Page 81 5. Press Start/Enter when the name appears correctly or simply without entering a name. The display asks you to select another location. 6. To store more speed dial numbers, repeat steps 2 through 5. To return to Standby mode, press Stop. Editing a Number for Speed Dialling 1.
-
Page 82: Using The Phonebook On Your Computer (Sf-531P Only)
Samsung Software.” 1. Start your Windows. 2. Click the Start menu, and select Programs from the Start menu. 3. Select Samsung SF-530 Series on the Programs menu, and select Remote Control Panel. 4. The Remote Control Panel dialogue box appears. - Page 83 5. If necessary, press Read to get the numbers currently stored in your SF-531P machine. The one-touch or speed dial numbers will be uploaded and displayed in the Remote Control Panel dialogue box. 6. Select the desired Phonebook number in the Phonebook list and click Edit.
-
Page 84: Searching For A Number In The Memory
Searching for a Number in the Memory There are two ways to search for a number in the memory. You can either scan from A to Z sequentially, or you can search using the first letter of the name associated with the number. Searching Sequentially through the Memory 1. -
Page 85: Advanced Fax
Advanced Fax Broadcasting This feature will allow documents to be sent to multiple locations. After sending, the documents are erased from the memory. 1. Load your document face down with the top edge first going into the document feeder. And adjust the resolution and contrast, if necessary. For details, see page 3.8. -
Page 86: Delayed Fax
Delayed Fax The SF-530 series can be set to send a fax at a future time. 1. Load your document face down with the top edge first going into the document feeder. And adjust Resolution and Contrast, if necessary. - Page 87 6. If you want to send to more than one location, repeat steps 4 and Note: You cannot use Group dial numbers for another fax number. To send to one location or when you complete the last fax number setting, press Start/Enter. 7.
-
Page 88: Priority Fax
Priority Fax When the priority fax is enabled, a high priority document can be transmitted ahead of reserved operations. The document is scanned into the memory, then transmitted when the current operation is concluded. In addition, a priority transmission will interrupt a broadcast operation between stations (i.e., when transmission to station A ends, before transmission to station B begins) or between redial attempts. -
Page 89: Polling
Polling What is Polling? Polling is used when one fax machine requests another to send a document. This is useful when the person with the original document is not in the office. The person to receive the document calls the machine holding the original and requests that the document be sent. - Page 90 7. Press ➛ or ❿ to highlight YES or NO, then press Start/Enter. If you want to store the document in the bulletin board memory, select YES. More than one remote station can poll that document from your machine. If not, the document will be automatically erased after being polled by a remote machine.
-
Page 91: Adding Documents To A Scheduled Operation
Adding Documents To a Scheduled Operation You can add documents to the delayed transmission previously reserved in memory. 1. Load the document face down, and adjust Resolution, or Contrast, if necessary. For details, see page 3.8. 2. Press Advanced FAX on the front panel. The display shows the first menu;... -
Page 92: Stand-Alone Fax
Additional Functions Sending a Recall (R or Flash) Some special phone services require a switch-hook signal for proper operation. For example, if you have call-waiting, you can put a call on hold and take a second call on the same line by pressing Recall(R or Flash)/Status. -
Page 93: Forwarding Received Faxes
Forwarding Received Faxes You can forward all faxes which you receive during the specified period to a specified remote station. This can be useful when you are out of your work station and want to receive your faxes through another station. Setting Time and Destination for Forwarding Faxes To forward the received fax, you must define the remote fax machine where the fax is to be sent and the start time and end time of a period... -
Page 94: Toll Save Fax
Toll Save Fax The Toll Save Fax feature will save your toll by storing the document in memory and sending it at the specified time during the toll save time slot, which is a period of time when your toll for the telephone call is reduced. -
Page 95: Printing Reports
6. The machine returns to Standby mode and the display alternates between messages to remind that you are in Standby mode and that a Toll Save fax is scheduled. The scanned document will be sent at the time which you have defined. - Page 96 Sending Confirmation Shows the fax number, the number of pages, elapsed time of the operation, the communication mode, and the communication results. You can print the this confirmation report in one of the following ways according to your setting in System Setup(see page 3.3): •...
-
Page 97: Group Dialling (For Multi-Address Transmission)
Group Dialling (for Multi-Address Transmission) Multiple one-touch and speed dial numbers can be registered as a group. By using the group number, you can send a document to multiple parties in a single operation. The machine will dial the remote numbers in stored sequence. - Page 98 5. The display asks you to press a one-touch button or to enter a 2-digit speed dial number that you wish to include in the group. 6. Press a one-touch button where the fax number you wish to include in the group is stored.
- Page 99 Editing Group Dial Numbers You can edit one-touch or speed dial numbers stored for group dialling. 1. Press Setup on the control panel. The display shows the first menu; FAX NAME/NUMBER. 2. Press ➛¤or ❿ until you find ‘GROUP DIAL SETUP’, then press Start/Enter.
- Page 100 Memo...
- Page 101 chapter Read this chapter to learn how to select and load print media and how to use the print settings. The topics included in this chapter are: Print Media N Selecting Print Media N Using the Automatic Paper Input Tray N Using the Manual Paper Input Tray N Specialty Paper Guidelines Printing...
-
Page 102: Printing (Sf-531P Only)
Get the Right Paper Your Samsung SF-530 series is designed to work well on most common office paper types and with quality 25% cotton bond paper. Because your printer uses toner to produce an image, paper that accepts toner produces the best results. - Page 103 Paper that Might Not Work • Highly textured stock, such as linen, may not print evenly because the toner can bleed. • Extremely smooth, shiny, or coated papers not specifically designed for laser printers can jam the printer and repel toner. •...
-
Page 104: Using The Automatic Paper Input Tray
Using the Automatic Paper Input Tray You can stack paper or transparencies in the automatic paper tray to feed automatically. The automatic tray can hold a maximum of 150 sheets of plain paper. The maximum capacity may be reduced depending on the thickness. - Page 105 • For transparencies: - Hold the transparencies by the edges and avoid touching the print side. - Fan the stack of transparencies to prevent feeding failures. Be careful not to scratch or leave fingerprints on the print sides. 3. Load the print material into the paper tray. Load only as much paper as will fit beneath the lip protruding from the paper-length adjuster.
-
Page 106: Using The Manual Paper Input Tray
4. Slide both paper adjusters to fit against the paper’s edges. Ensure the paper line flat in the tray. Print Side Up Most papers prints better on one side than on the other. This is especially true for coated or specially treated paper. The print side is usually indicated on the paper package. - Page 107 Notes: • Make sure that you select the Manual for Paper Source and the correct paper size and type from your software application before starting your print job. See page 4.10. • When you use the manual paper tray, the paper must loaded in the automatic paper tray.
- Page 108 • Load a sheet of the label with the adhesive backing facing away from you. • Load a sheet of the card stock with print side up, short edge first. 2. In your computer, start printing of the document. the display on the front panel displays ‘PC PRINTING...’...
-
Page 109: Specialty Paper Guidelines
Specialty Paper Guidelines • Read all instructions that come with special paper for important information regarding how to achieve the highest print quality. • It is recommended to feed one sheet at a time for special paper types. • For transparency film, follow these guidelines: - Let printed sheets of film dry completely before storing. -
Page 110: Printing
Printing Printing a Document The following procedure describes the steps required for printing from various Windows applications. The exact steps for printing a document may vary depending on the application program. Refer to your software application’s documentation for the exact printing procedure. 1. - Page 111 4. The dialogue box allows you to access all information necessary for using your printer. If necessary, click the Paper tab to display the settings shown below. The Paper tab contains the options for setting the basic paper handling. The Paper Orientation option allows you to select the direction in which information is printed on a page.
- Page 112 5. If you want to change the setting for print quality, click the Graphic tab. The Toner Save Mode option The Resolution option allows allows the printer to use less you to select the print toner on each page. resolution. The higher the •...
-
Page 113: Cancelling A Print Job
Printers folder as follows: 1. Click the Windows Start button. 2. Select Settings, then Printers to open the Printers window. 3. Select the Samsung SF-530 Series. 4. Click the right mouse button and select Properties to open the properties window. -
Page 114: Printing Help
Printing Help Samsung SF-530 series printer has the help screen that can be activated from the Help button in the printer properties dialogue box. These help screens give detailed information about the printer features provided by the SF-530 series printer driver. -
Page 115: Printing Several Pages Per Sheet
Printing Several Pages Per Sheet Your printer is equipped with an option that prints several pages on one sheet of paper by reducing the size of each page and organizing them in rows and columns. 1. Load letter or A4 paper into the paper input tray. 2. -
Page 116: Scaling Your Document
Scaling Your Document This printer feature allows you to scale your print job on a page. 1. When you change the print settings from your software application, access the printer properties. See page 4.9 to access the printer properties. 2. Click the Output tab, and select Scale Printing in the Type drop down list under the Output Mode section. -
Page 117: Fitting Your Document To A Selected Paper Size
Fitting Your Document To a Selected Paper Size This printer feature allows you to scale your print job to any selected paper size regardless of the digital document size. This can be useful when you want to check fine details on a small document. 1. -
Page 118: Printing Posters
Printing Posters This feature allows you to print a single-page document onto up to 16 sheets of paper which can be pasted together to form one poster-size document. 1. To change the print settings from your software application, access the printer properties. See page 4.9 to access the printer properties. From the Paper tab, select the paper orientation, source and size. -
Page 119: Printing Watermarks
4. You may specify an overlap in millimeter or inch to make it easier to reconstruct the resulting poster. 5 mm 5 mm œ œ ¤ ¤ ¤ ¤ œ œ ¤ ¤ ¤ ¤ œ œ ¤ ¤ ¤ ¤ œ... - Page 120 To create or edit a watermark 1. When you change the print settings from your software application, access the printer properties. See page 4.9 to access the printer properties. 2. Click the Watermark tab, and enter the desired text message in the Text field.
-
Page 121: Using Page Overlays
4. If you have created a new or edited an existing watermark, the Add and Update button is enabled. To add a new watermark to the list, click Add. 5. If you want to edit, select the desired watermark from the list, edit, then click Update. - Page 122 Creating a New Page Overlay To use a page overlay, you must create a new page overlay containing your logo or image. 1. Create or open a document containing a text or image you want to use for page overlay. Position the items exactly as you wish them to appear when printed as an overlay.
- Page 123 5. Click OK. You will see the name in the Overlay List box. 6. Click OK or Yes until you complete the creation. The file is not printed out. Instead it will be stored on your computer HDD disk. Note: The overlay document size must be the same as documents you will print with the overlay.
- Page 124 After you select the file, click OK. The file is now shown in the Overlay List box and is available for printing. Select the overlay from the Overlay List box. 5. If necessary, click the Query Page Overlay check box. If this box is checked, a message box will appear each time you submit a document for printing, asking you to confirm your wish to print an overlay on your document.
-
Page 125: Printing In A Network Environment
Windows 9x, Me, NT 4.0 or 2000 network printer connection. Note: You need to install the Samsung SF-530 Series printer driver on each computer that will print documents to the printer. Setting Up Host Computer 1. - Page 126 6. Double-click your printer icon. 7. From the Printers menu, select Properties. 8. Press the Details tab, select the printer port, then click OK. Printing a Document Print your document following the procedures described in page 4.9. 4.25 Printing...
- Page 127 chapter This chapter provides suggestions for high-quality and economical operating and information for maintaining the toner cartridge and the machine. The topics included in this chapter are: N Guidelines for Maintenance N Clearing Memory N Cleaning the OPC Drum N Adjusting Shading N Setting the Machine to be checked by Phone N Sending Toner Low Information to the Service Company N Cleaning the Machine...
-
Page 128: Maintenance
Guidelines for Maintenance For optimal performance of the SF-530 series, follow these guidelines: • Place the machine on a stable surface. • Do not install your machine near devices that contain magnets or generate magnetic fields, such as speakers. • Keep your machine clean. Dust accumulation can prevent the unit from operating properly. -
Page 129: Cleaning The Opc Drum
Cleaning the OPC Drum If you are getting streaks or spots on your print, you may clean the OPC drum. 1. Make sure that the paper is loaded in the automatic input tray. 2. Press Setup on the control panel. The display shows the first setup menu;... -
Page 130: Setting The Machine To Be Checked By Phone
Setting the Machine to be Checked by Phone The Remote Test feature allows your machine to be checked out by a service company at a remote place by phone. 1. Press Setup on the control panel. The display shows the first setup menu; FAX NUMBER/NAME. 2. -
Page 131: Cleaning The Machine
Cleaning the Machine To maintain print quality, follow the cleaning procedures below every time the toner cartridge is replaced or whenever print quality problems occur. As much as possible, keep your machine free from dust and debris. Note: • Do not use ammonia-based sprays or volatile solvents such as thinner to clean the machine, as these can damage the machine’s surface. - Page 132 Cleaning the Document Scanner To keep your machine working properly, occasionally clean the white roller, ADF rubber, and the scanning glass. Note: Do not turn the power off to clean the scanner, as documents stored in the memory will be lost. 1.
- Page 133 4. Clean the ADF rubber piece. 5. Carefully wipe the scanning glass with a soft, dry cloth. If the glass is very dirty, first wipe it with a slightly dampened cloth, then with a dry cloth. Be very careful not to scratch the glass surface. 6.
-
Page 134: Managing The Toner Cartridge
Managing the Toner Cartridge Expected Cartridge Life The life of your toner cartridge depends on the amount of toner used in each print job. For instance, when you print a typical business letter with about 5% page coverage, you can expect a toner cartridge life of approximately 2,500 pages (1,000 pages only for the toner cartridge shipped with your machine). - Page 135 Take the following steps to replace the toner cartridge: 1. Pulling the cover release buttons toward you, open the cover. 2. Remove the old toner cartridge. Follow the instructions printed on the cartridge box to recycle the used cartridge. 3. Unpack a new toner cartridge from its plastic bag, and then remove the paper rolled the cartridge.
- Page 136 4. Shake the cartridge from side to side 5 or 6 times to distribute the toner evenly inside the cartridge. 5. Find the cartridge slots inside the machine, one on each side. Grasp the handle and slide the cartridge down between the cartridge slots until it drops into place.
-
Page 137: Automatic Document Feeder Rubber Pad Replacement
Automatic Document Feeder Rubber Pad Replacement You can purchase the ADF rubber from an authorized service center 1. Open the Control Panel Cover. 2. Insert a small flat blade screwdriver under the right and left sides of the ADF Holder. ADF Rubber ADF Holder 3. - Page 138 chapter This chapter gives helpful information for what to do if you encounter a operating error. It provides information on the following topics: N Clearing Paper Jams N LCD Error Messages N Fax Problems N General Printing Problems (SF-531P only) N Print Quality Problems...
-
Page 139: Troubleshooting
Clearing Paper Jams Document Jams While Sending a Fax If a document jams while you are sending it, ‘DOCUMENT JAM’ appears on the display. Do not pull the document out of the slot. If you do this, it could harm your machine. 1. - Page 140 Paper Jams While the Machine is Printing By carefully selecting the paper type and loading them properly, you should be able to avoid most paper jams. If paper jams occur, an error message appears on the display. Follow the steps below to clear the jam. To avoid tearing the paper, pull the jammed paper out gently and slowly.
- Page 141 IF JAMMED INSIDE THE MACHINE 1. Pulling the cover release buttons toward you, open the cover. 2. Remove the toner cartridge. 3. Remove the jammed paper by carefully pulling it out of the machine. 4. Check that there is no other paper inside the machine. 5.
- Page 142 Tips for Avoiding Paper Jams By carefully selecting print materials and loading them properly, you should be able to avoid most paper jams. If jams do occur, follow the steps outlined in “Clearing Paper Jams” starting on page 6.1. If jams occur frequently, make sure that you are following these preventative tips: •...
-
Page 143: Lcd Error Messages
LCD Error Messages Display Meaning Solution The loaded document has jammed Clear the document jam. DOCUMENT JAM in the feeder. Press down on the cover until The front cover is not securely DOOR OPEN it clicks in place. latched. Unplug the power code and There occurs a problem in the plug it back in. - Page 144 Display Solution Meaning The recording paper has run Load the recording paper. NO PAPER out. The printer part in your unit Please wait until it cools down. has overheated. If you cannot solve the problem, OVER HEAT please call for service. Recording paper has jammed in Press Stop and clear the jam.
-
Page 145: Fax Problems
Fax Problems Symptom Cause and Solution • Unplug the power cord and plug it in again. The machine is not working, there is no display and the • Check that your socket is active. buttons are not working. • Check that the phone line is connected properly. No dial tone. - Page 146 Symptom Cause and Solution • The fax machine you are polling may be using a poll You cannot poll another code. machine. • The machine sending you the fax may be faulty. The incoming fax has blank • The fax machine sending you a fax may have a dirty scan spaces or you received a glass.
-
Page 147: General Printing Problems (Sf-531P Only)
General Printing Problems (SF-531P only) Problem Possible Cause and Remedy Your machine does not • A paper jam has occurred. Remove the jammed paper. print. See page 6.1. • The toner cartridge is not installed properly. Remove and reinsert the toner cartridge. •... - Page 148 Problem Possible Cause and Remedy • The page layout is too complex. Simplify the page layout Half of the page is blank. and remove any unnecessary graphics from the document if possible. • The page orientation setting may be incorrect. Change the page orientation in the Printer Properties dialogue box.
-
Page 149: Print Quality Problems
Print Quality Problems Possible Cause and Remedy Problem If a vertical white streak or faded area appears on the page: Light or faded print • The toner supply is low. You may be able to temporarily extend the toner cartridge life. See “Redistributing the AaBbCc AaBbCc Toner”... - Page 150 Possible Cause and Remedy Problem If faded areas, generally rounded, occur randomly on the Dropouts page: • A single sheet of paper may be defective. Try reprinting AaBbCc AaBbCc AaBbCc AaBbCc the job. AaBbCc AaBbCc • The moisture content of the paper is uneven or the paper AaBbCc AaBbCc AaBbCc...
- Page 151 AaBbCc AaBbCc AaBbCc Possible Cause and Remedy Problem AaBbCc AaBbCc If marks repeatedly appear on the printed side of the page at Vertical repetitive defects even intervals: • The toner cartridge may be damaged. Print a cleaning AaBbCc sheet several times by cleaning the OPC drum (see page AaBbCc 5.2).
- Page 152 AaBbCc AaBbCc Possible Cause and Remedy Problem AaBbCc AaBbCc • Check the paper type and quality. See “Paper Type and AaBbCc Page skew AaBbCc Size” for faxing on page 1.17 and “Selecting Print Media” AaBbCc for PC printing on page 4.1. •...
- Page 153 AaBbCc AaBbCc AaBbCc AaBbCc Possible Cause and Remedy Problem • Clean the inside of the printer. Loose toner • Check the paper type and quality. See “Paper Type and Size” for faxing on page 1.17 and “Selecting Print Media” for PC printing on page 4.1. •...
- Page 154 N Connecting Other Devices to the Phone Line N Specifications General Printer Scanner Copy N Safety Information...
-
Page 155: Appendix
You can connect other devices to the same phone line as the SF-530 series product. Deciding What to Connect You have connected the SF-530 series to the wall jack. Generally, there are three other devices that can be connected to the same phone line: • a telephone •... - Page 156 Situation 2 You connected the SF-530 series to a wall jack with a phone line for fax and voice calls (a shared line). Connect any other devices you have to this phone line. To connect the other devices you have to the same wall jack as the product, go to Appendix “Connecting Other Devices, Overview”...
- Page 157 Connect other device in the order indicated. Note: • The SF-530 series product the device connected to the wall jack. If it isn’t, it cannot answer incoming fax calls. • As the drawing indicates, always plug the LINE jack into one device and the EXT.
-
Page 158: Specifications
Resolution 600 x 600 dpi Effective Printing Width 202 mm Manual Feed Rear to Front Windows 95/98/Me, Windows NT/2000 Samsung PrinThru Emulation Copy Item Specification and Description Resolution SF-530: 200 x 200 dpi, SF-531P: 300 x 300 dpi BW Contrast Control... - Page 159 Scanner Item Specification and Description Scan Method Contact Image Sensor (CIS) Scan Width Max. 216 mm, Effective: 210 mm Scan Resolution-Optical SF-530: 200 x 200 dpi, SF-531P: 300 x 300 dpi SF-530: 9 sec/page, SF-531P: 6 sec/page Scan(Copy) Speed Feeding Method Sheet-fed Max 20 sheets ADF Capacity...
-
Page 160: Safety Information
Safety Information Important Precautions and Safety Information When using this fax machine, these basic safety precautions should always be followed to reduce risk of fire, electric shock, and injury to persons: 1. Read and understand all instructions. 2. Use common sense whenever operating electrical appliances. 3. - Page 161 Part 15 of the FCC rules establishes guidelines limiting the amount of radio-frequency energy which may be produced by electronic equipment. Tests have proven that your Samsung FAX machine meets or exceeds these guidelines, and is classified a “Class B Digital Device” for operation in a residential environment.
- Page 162 In the event your SAMSUNG fax machine appears to cause interference to other electronic equipment, it can often be easily remedied. First determine if the source of interference really is your FAX machine. To do this, turn its power off and on while observing the equipment experiencing the interference.
- Page 163 Regulations Subpart E of Part 68. You should also know that: • Your Samsung FAX machine is not designed to be connected to a digital PBX system. • If you intend to use a computer modem or fax modem on the same phone line as your FAX machine, you may experience transmission and reception problems with all the equipment.
- Page 164 Replacing the fitted plug (for UK Only) Important The mains lead for this machine is fitted with a standard (BS 1363) 13 amp plug and has a 13 amp fuse. When you change or examine the fuse, you must re-fit the correct 13 amp fuse. You then need to replace the fuse cover.
-
Page 165: Index
Index adding documents 3.34 date and time, setting 1.20 address label, using 3.23 delayed transmission 3.29 adjusting shading diskette, alert tone, setting making 2.16 automatic dial installing software 2.17 one-touch dial 3.21 document contrast, setting speed dial 3.23 document feeder, loading using remote control panel 3.25 document resolution, setting... - Page 166 2.17 in the manual input tray toner cartridge 1.18 selecting 1.17, 4.1 introduction setting 3.3, 4.10 SF-530 series 1.1 paper jam, clear SmarThru software 2.1 document inside the machine output area paper input tray tips avoiding paper jams load, document paper orientation, setting 4.10...
- Page 167 setting (continued) alert tones date and time 1.20 priority transmission 3.31 fax number and name 1.21 problem, solving resolution and contrast error messages volume stand-alone fax system general printing specifications paper jam speed dialing 3.23 print quality 6.11 storing group dial 3.40 one-touch 3.21...