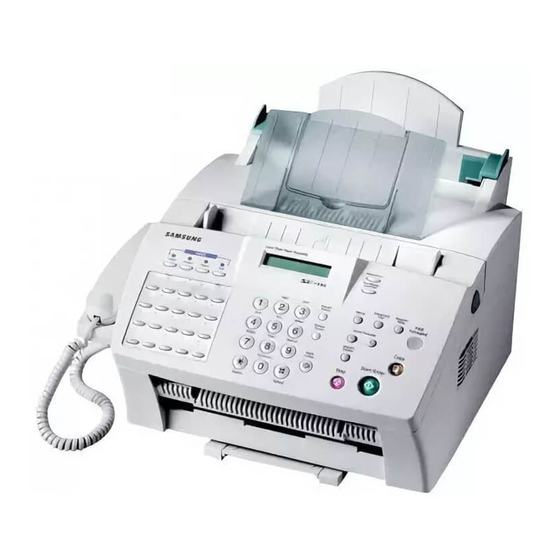
Samsung SF-530 series User Manual
Laser facsimile
office master
Hide thumbs
Also See for SF-530 series:
- User manual (168 pages) ,
- Service manual (141 pages) ,
- Product manual (12 pages)
Table of Contents
Advertisement
Quick Links
Advertisement
Table of Contents

Related Manuals for Samsung SF-530 series


Summary of Contents for Samsung SF-530 series
- Page 2 Trademarks • SmarThru 2, MailBox, Image Manger, Scan Manager, Copy Manager, Image Viewer, AnyPage are trademarks of Samsung Electronics. • Acrobat Reader is a trademark of Adobe Systems Inc. • Windows, Windows 95, Windows 98, Windows Me, Windows NT and Windows 2000 are trademarks of Microsoft corporation.
-
Page 3: Table Of Contents
Testing the Machine (SF-530 only) ––––––––––––––––– 1.23 Using Save Modes –––––––––––––––––––––––––––––––– 1.24 Installing Samsung Software (SF-531P only) Samsung SmarThru About Samsung SmarThru Software ––––––––––––––––– 2.1 Installing Software System Requirements –––––––––––––––––––––––––––––– 2.3 Installing the Samsung Software –––––––––––––––––––– 2.4 Configuring the Fax Gate on Your PC ––––––––––––––––– 2.6 Configuring the Internet Gate on Your PC ––––––––––––... - Page 4 Stand-alone Fax Setting Up Stand-alone Fax System Setting Volume –––––––––––––––––––––––––––––––––– 3.1 Setting Alert Tones ––––––––––––––––––––––––––––––– 3.2 Setting User-Selectable System Options –––––––––––––– 3.2 Sending a Fax Preparing Documents for Faxing or Copying ––––––––––– 3.7 Setting Document Resolution and Contrast –––––––––––– 3.8 Loading Documents –––––––––––––––––––––––––––––––...
- Page 5 Contents (continued) Stand-alone Fax (continued) Additional Functions Sending Flash ––––––––––––––––––––––––––––––––––– 3.35 Monitoring a Dual Job Status ––––––––––––––––––––––– 3.35 Forwarding Received Faxes –––––––––––––––––––––––– 3.36 Toll Save Fax –––––––––––––––––––––––––––––––––––– 3.37 Printing Reports ––––––––––––––––––––––––––––––––– 3.38 Group Dialling ––––––––––– 3.40 (for Multi-Address Transmission) E-mail Fax (SF-535e only) About the E-mail Fax –––––––––––––––––––––––––––––––...
-
Page 6: Troubleshooting
• Scanning a document • Copying a document • Creating and sending e-mail and PC-fax • Working with a scanned image • Recognizing a scanned image as text • How to use additional features using the Samsung SmarThru 2 program... - Page 7 Environmental and Safety Consideration Laser Safety Statement The printer is certified in the U.S. to conform to the requirements of DHHS 21 CFR, chapter 1 Subchapter J for Class I(1) laser products, and elsewhere is certified as a Class I laser product conforming to the requirements of IEC 825.
- Page 8 Ozone Safety During normal operation, the Samsung SF-530 Series produces ozone. the ozone produced does not present a hazard to the operator. However, it is advisable that the machine be operated in a well ventilated area. If you need additional information about ozone, please request your nearest Samsung dealer.
- Page 9 Canadian Radio Interference Regulations This digital apparatus does not exceed the Class B limits for radio noise emissions from digital apparatus as set out in the interference-causing equipment standard entitled “Digital Apparatus”, ICES-003 of the Industry and Science Canada. Cet appareil numérique respecte les limites de bruits radioélectriques applicables aux appareils numériques de Classe B prescrites dans la norme sur le matériel brouilleur: “Appareils Numériques”, ICES-003 édictée par l’Industrie et Sciences...
-
Page 10: Approvals And Certifications
PSTNs and compatible PBXs of the European countries: In the event of problems, you should contact the Euro QA Lab of Samsung Electronics Co., Ltd. in the first instance. The product has been tested against TBR21 and TBR 38. To assist in the use... - Page 11 Congratulations on the purchase of your SF-530 series product! This chapter provides information on the following topics: Introduction Welcome! Contents Identifying Parts Setting Up Your Machine Choosing a Location Attaching the Supports Connecting Your Machine to the Phone Line...
-
Page 12: Getting Started
Introduction Welcome! Thank you for purchasing the Samsung SF-530 series, a powerful business tool with the capabilities of a full range of office equipment. With the Samsung SF-530 series, you can: Use the Samsung SF-530 series as a full-featured stand- alone fax machine to send and receive faxes. - Page 13 Internet service provider and properly configured the Internet gate when you install the Samsung software) • Image Viewer — Working with documents or images, you can view the image in a variety of graphical formats.
-
Page 14: Contents
Contents Here’s what comes with the SF-530 series. SF-530 series machine Toner cartridge Document output support Document input support Handset Handset cradle Power cord Telephone line cord software CD-ROM Parallel cable (for SF-531P only) (for SF-531P only) SF-530 series SmarThru... -
Page 15: Identifying Parts
Identifying Parts Before setting up your machine, make sure you identify the following parts related to the scanner and paper print paths. Identifying Scanner Path Parts Items to be faxed, copied, or scanned use the scanner path which consists of the following parts: Document input support Supports original documents. - Page 16 Identifying Printer Path Parts Paper for printing, receiving faxes and copying follow the printer path. This path consists of the following parts: Paper input support Support the print media Paper guides Aligns paper. Automatic paper input tray Holds paper. Manual paper input tray (For SF-535e only) Paper output tray Use to feed paper one...
- Page 17 Identifying Front Panel Features Look for the following keys and features on the front panel. These features are used to fax documents, make copies, and adjust settings. For SF-530 LCD Display Displays messages and menu settings. Toner Turns Toner Save mode on or off. Power Laser Plain Paper Facs Turns Power Save mode on or off.
- Page 18 RCV. Mode/Contrast When a document is loaded, choose the contrast characteristic of copied or transmitted documents. When a document is not loaded, choose the receive mode to use. The selected mode is displayed in Standby mode. Resolution Choose the resolution of documents. Setup Use to set up various system options.
-
Page 19: Lcd Display
For SF-535e LCD Display Displays messages and menu settings. Toner Turns Toner Save mode on or off. Power Turns Power Save mode on or off. Also, allows you to set up the Laser MFP & Internet FA Power Save option when held down. Paper SAVE Turns Paper Save mode on or off. - Page 20 RCV. Mode/Contrast When a document is loaded, choose the contrast characteristic of copied or transmitted documents. When a document is not loaded, choose the receive mode to use. The selected mode is displayed in Standby mode. Resolution Choose the resolution of documents. Setup Use to set up various system options.
- Page 21 Identifying Connecting Parts and Others Power cord connector Telephone line jack USB cable jack Extension telephone jack (SF-535e only) Parallel cable connector Cover Cover release buttons (right and left) 1.10 Getting Started...
-
Page 22: Setting Up Your Machine
• In a dusty or dirty environment. Preparing Your Machine for Use When you take the SF-530 series out the box, note that it has been packaged to protect it during shipping. Before you use the machine, make certain that you check for the following items: •... -
Page 23: Attaching The Supports
Insert one end first, then the other end by squeezing this leg inward to make the tray easy to insert. Note: The SF-530 series is shipped with the paper output tray already installed. Extend the tray to use. Fold out the extender if necessary. - Page 24 Handset and Handset Cradle 1. Plug the end of the coiled cord of the handset into the jack on the left side of your machine. 2. Hold the cradle using your hand as shown. 3. Attach the handset cradle to the main body. Insert the two tabs of the cradle into the slots on the left side of the machine as shown, and while pressing part A on the bottom of the cradle, push the cradle toward the machine until it clicks into place.
-
Page 25: Connecting To The Phone Line
Connecting to the Phone Line For proper operation, the SF-530 series must be connected to the wall jack. Once you have decided which wall jack you will be using, check a box below and follow the instructions. - Page 26 To Connect to a Wall Jack that has Only One Phone Line 1. Plug the included telephone cord into the jack on the back of the unit marked the word LINE. To a standard phone wall jack 2. If a telephone cord is plugged into the wall jack, unplug the cord and set it aside.
-
Page 27: Connecting To The Computer (Sf-535E Only)
Connecting to the Computer (SF-535e only) Your machine has a parallel and a USB interface port which allow use with a Windows PC. Connecting to the Computer Using the Parallel interface 1. Plug the supplied parallel printer cable into the connector on the back of your machine. -
Page 28: Plugging In The Power
Plug one end of the cord into the back of the machine and the other end into a standard AC power outlet. The SF-530 series will turn on and the display will show ‘SYSTEM INITIAL’. If there is no paper loaded, the displays will shows ‘NO PAPER.’... - Page 29 2. Remove a stack of paper from its packaging. Tap the stack on a flat surface to even it up. 3. Insert the paper with the print side facing you. Place the print side facing you. 4. Adjust the paper guides to the width of the print media. Slide the guides until they lightly touch the stack of print media.
- Page 30 Paper Type and Size Satisfactory print and receive quality can be obtained with many types of plain paper. Since the quality of plain paper varies widely, test the print quality before buying large quantities of paper. Your machine uses a variety of papers including: •...
-
Page 31: Installing The Toner Cartridge
Installing the Toner Cartridge 1. Pulling the cover release buttons found on both sides of the machine toward you, open the cover. 2. Unpack the cartridge from its plastic bag, and then remove the paper rolled the cartridge. 3. Shake the cartridge from side to side 5 or 6 times to redistribute the toner evenly inside the cartridge. - Page 32 4. Find the cartridge slots inside the machine, one on each side. 5. Grasp the handle at the front of the cartridge and slide it down between the cartridge slots, and push it firmly. 6. Close the cover. Make sure that the cover is securely closed. 1.21 Getting Started...
-
Page 33: Setting The Date And Time
(Standby mode). The date and time are printed on all transmitted faxes. When you install the SF-530 series for the first time, or when the product is without power for about 15 seconds, the display prompts you to reset the date and time. -
Page 34: Setting Your Fax Number And Name
Setting Your Fax Number and Name Your fax number and name can be printed at the top of each page transmitted. 1. Press Setup on the front panel. The display shows the first setup menu; FAX NUMBER/NAME. 2. Press Start/Enter to access the Fax Number/Name menu. The display shows ‘FAX NUMBER.’... -
Page 35: Using Save Modes
Using Save Modes There is four saving mode buttons on the front panel of the SF-530 series. Using these buttons, you can save toner and power consumption, paper for printing, and toll for the fax call. SAVE Toner Power Paper Toll Toner Save Mode Toner Save mode allows the machine to use less toner on each page. - Page 36 Paper Save Mode With Paper Save mode on, you can save paper by reducing the data and printing two pages on one sheet of paper when copying or printing received document. Press Paper on the front panel to turn this mode on or off. •...
- Page 37 This chapter provides information on installing the supplied Samsung software. You MUST install the Samsung software to use your machine as a printer and scanner. The topics included in this chapter are: Samsung SmarThru About Samsung SmarThru Software Installing Software...
-
Page 38: Installing Samsung Software (Sf-531P Only)
• OCR Software (AnyPage Lite) • Acrobat Reader (Bonus Software) MFP Driver To use the SF-530 series as a printer, scanner, or to send and receive electronic faxes, you MUST install the MFP driver. USB Driver To use the SF-530 series connected to your computer using a USB cable, you MUST install the USB driver and set the USB port. - Page 39 Acrobat Reader This bonus program allows you to view and print Adobe P.D.F files on all major computer platforms. Installing Samsung Software...
-
Page 40: Installing Software
• Required software: Internet Explorer 4.01 or 5.0 • User rights: Administrative rights should be set for installation on Windows NT and Windows 2000. Note: Windows 95 versions prior to OSR2 are not recommended due to compatibility with OLE/COM libraries. Installing Samsung Software... -
Page 41: Installing The Samsung Software
If the opening window does not appear, click Start, and then Run. Type X:Setup.exe, replacing “X” with the letter of your drive, and click OK. 2. When the opening screen appears, click on SF-530 Series, then the language you want to use. 3. Click Install the Samsung Software on your PC. - Page 42 If you select the Custom installation, you may choose the options you want to install. SmarThru software to scan and edit images and work with electronic documents. AnyPage Lite software to enable OCR. MFP driver to print, scan, or to send and receive PC faxes. Installing Samsung Software...
-
Page 43: Configuring The Fax Gate On Your Pc
Configuring the Fax Gate on Your PC 1. After installing the SmarThru software, Windows will automatically restart. When you see the Samsung SF-530 Series Program folder, close it by clicking x on the right-top of the window. Installing Samsung Software... - Page 44 SmarThru system, press Cancel, and go to page 2.9 to configure the Internet gate. 3. Choose SAMSUNG FaxThru Modem from the list. It will be used by SmarThru Fax Gate for sending and/or receiving PC faxes. Then, click Next.
- Page 45 5. When you are finished, click Finish. Note: To edit the advanced properties of Fax service or to add other modems, choose SmarThru Configuration from the Tools menu when you run the Samsung SmarThru2. For details, refer to the SmarThru User’s Guide. Installing Samsung Software...
-
Page 46: Configuring The Internet Gate On Your Pc
If you are connected to the Internet over a LAN (i.e. in an office network environment), select Connection to Internet over LAN, and skip to Step 4. If you use dial-up for Internet connection, select Use Dial-Up for Internet Connection, and proceed to the next step. Installing Samsung Software... - Page 47 Internet connection on the SmarThru system, then click OK. If no connection is available, you cannot use the system Dial-Up in the Samsung SmarThru system. To modify the Dial-Up connection properties, click Dialing Properties. Note: For details on the Dial-Up Configuration using the Windows Dial-Up Networking setup wizard, please refer to your Windows documentation.
- Page 48 Internet service provider. 5. Enter the addresses of your incoming and outgoing mail servers. Choose the incoming mail server type, then click Next. Your Internet service provider must provide you this information. 2.11 Installing Samsung Software...
- Page 49 8. Click Finish to enable Internet e-mail service. Note: If you wish, you can enable or reconfigure the Internet connection later. Open the Samsung SmarThru2, and select SmarThru Configuration from the Tools menu. For details, refer to the SmarThru User’s Guide.
-
Page 50: Using Your Machine With A Usb Cable
1. Make sure that both the printer and computer are turned ON. 2. Plug one end of the USB cable into the USB port on the printer and the other end into the USB port ( ) on the computer. To PC 2.13 Installing Samsung Software... - Page 51 3. The Add New Hardware Wizard dialogue box appears. Click Next. 4. Check Search for the best driver for your device and click Next. 5. Check CD-ROM drive and click Browse, then choose x:\530\Eng \USB (where x is the drive letter for the CD-ROM drive). 2.14 Installing Samsung Software...
- Page 52 2. Select the Samsung SF-530 series printer icon in the Printers folder. 3. Select Properties from the File menu. 4. Click the Details tab. Select SSUSB: (SF-530 Series) in the Print to the following port box. Click OK. The setup is now completed.
-
Page 53: Installing Bonus Software
Run. Type X:Setup, replacing “X” with the letter of your drive, and click OK). 2. When the opening screen appears, lick on SF-530 Series, then the language you want to use 3. Click Make your own Diskette set of software. -
Page 54: Installing Software From Diskettes
2. From the Start menu, select Run. 3. Type A:\setup.exe in the Open box and click OK. (if your floppy drive is not A, substitute the correct letter.) 4. Follow the on-screen instructions to complete the installation. 2.17 Installing Samsung Software... -
Page 55: Uninstalling Samsung Software
Un-installing the MFP Driver 1. Start Windows if not already started. 2. From the Start menu, select Programs, then select Samsung SF- 530 Series, then select Uninstall. 3. When your computer confirms your selection, click Yes. The printer driver and all its components are removed from your computer. - Page 56 1. Start Windows if not already started. 2. From the Start menu, select Programs. 3. Select Samsung SmarThru, then select SmarThru 2 Uninstall. 4. When your computer asks you to confirm your selection, click Yes. The Select Backup Options dialogue box appears.
- Page 57 SmarThru software and all components will be removed. 7. When un-installing is done, click OK. The message box recommends restarting your computer. 8. Click OK. Shut down and restart your computer to complete the un-installation process and save your changes. 2.20 Installing Samsung Software...
- Page 58 Start menu, then type X:SETUP, replacing “X” with the letter of your drive and click OK. 2. When the opening window appears, lick on SF-530 Series, then the language you want to use. 3. Click Uninstall the Samsung software on your PC.