Table of Contents
Advertisement
Advertisement
Table of Contents

Related Manuals for Electrolux Mercury 4U600


Summary of Contents for Electrolux Mercury 4U600
- Page 1 Electric Cookers - Rear Control User Guide and Installation Instructions...
-
Page 2: Conditions Of Use
Rear control electric cookers • do not use the oven door as a shelf. CondItIons of Use this appliance is intended to be used in household and • do not push down on the open oven door. similar applications such as: Hotplates (Generally) •... -
Page 3: Table Of Contents
Installation Controls Understanding the cooker Contents Using the hotplates Understanding the functions Cooking guide for ovens Get to know your oven Handling baking & grilling problems Clocks Cleaning and caring for the cooker Cleaning and caring for the oven Solving problems Warranty the symbols you will see in this booklet have these meanings:... -
Page 4: Installation
Installation This appliance must be installed by an authorised Hard wiring detail person in compliance with Remove terminal cover plate from rear panel local municipal building codes and any of appliance. other relevant statutory regulation. fit wires through hole in cover plate and make connections to terminals. - Page 5 Installation 5mm Clearance min. 596mm 5mm Clearance min. floor mounted Alternative Method 3 Anchors Minimum Step 2: Fixing anti-tilt bracket Position the anti-tilt bracket so that it will fully engage into the slot at the rear of the cooker. the bracket is mounted centrally at the rear of the cooker.
- Page 6 Installation Step 3: Stability bolt Shelves and trays the shelves are designed so that they have maximum travel • fasten the stability bolt bracket to the front frame but cannot be accidentally pulled right out. the trays are with the 2 screws supplied. designed the same way and fit straight into the side racks.
-
Page 7: Controls
Controls Cooking Guide symbols (to help you understand the warning General warnings and advice instructions more easily) • the clock where fitted must be set before your oven will operate. Base Heat • this appliance is not suitable for use by young children (Heat comes from element or infirm persons, without supervision. - Page 8 Controls (cont.) Mercury model 4U600 Hotplate Control Knobs Oven Indicator Lamp • Comes on when you operate • Adjusts temperature of hotplate. Can be rotated in either direction. the oven temperature control knob. Cycles on and off Hotplate Indicator Lamp automatically when you are •...
- Page 9 Apollo model 4U606 and Gemini model 4U604 Oven Indicator Lamp Hotplate Control Knobs • Adjusts temperature of hotplate. • Comes on when you Can be rotated in either direction. operate the oven temperature control Hotplate Indicator Lamp knob. Cycles on and off •...
- Page 10 Controls (cont.) Jupiter model 4U609 Hotplate Control Knobs Oven Indicator Lamp • Adjusts temperature of hotplate. Can be rotated in • Comes on when you operate either direction. the oven temperature control knob. Cycles on and off Hotplate Indicator Lamp automatically when you are •...
- Page 11 Saturn model 4U613 Hotplate Control Knobs Oven Indicator Lamp • Adjusts temperature of hotplate. Can be rotated in • Comes on when you operate either direction. the oven temperature control knob. Cycles on and off Hotplate Indicator Lamp automatically when you are •...
- Page 12 Controls (cont.) PAK model 806 Hotplate Control Knobs Grill Temperature Control Knob • Adjusts temperature of hotplate. Can be rotated in either direction. • sets grilling temperature for separate grill. Can be rotated Hotplate Indicator Lamp in either direction. • Comes on when you turn a hotplate on.
-
Page 13: Understanding The Cooker
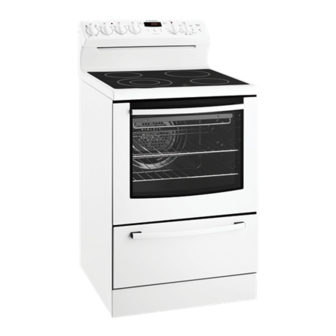
Understanding the cooker some models have a separate grill compartment. on other models the grill element is included in the oven cavity. Hob (Ceramic or Radiant hotplates) Removable Grill Tray (fitted on selected models only) Grill Door (fitted on selected models only) Warming Drawer (fitted on selected models only) Removable Shelf Side Support... -
Page 14: Using The Hotplates
Using the hotplates Hotplate indicator lamp GOOD (recessed base) (undersize) (moist (convex base) (oversize) GOOD Hot surface Warning Light (recessed base) (convex base) (undersize) (oversize) (moisture on hotplate) (no utensil) Radiant Hotplates Cooking Do’s and Don’ts the high-speed radiant coil hotplates heat rapidly •... -
Page 15: Understanding The Functions
Understanding the functions CAUTION: Do not line the bottom of the Thermowave warning oven with foil or place anything on bottom Heat comes from the element surrounding the fan. this fan surface of oven liner as trapped heat will circulates the hot air around the oven cavity so that you can crack or craze oven liner. - Page 16 Understanding the functions (cont) Fan Grilling Grilling (Separate) the “Grill” works by directing radiant heat which comes “Fan grill” offers you the benefits of both “Bake” and traditional “Grill” functions. the grill element turns on and from the powerful upper element onto the food. the grill off to maintain the set temperature while the fan circulates function is suitable for tender cuts of meat, steak, chops, the heated air.
- Page 17 Understanding the functions (cont) Self-Clean Panels (Fitted in Selected Ovens & available as an optional extra) Catalytic self-clean panels are treated with a specially formulated enamel coating. this enamel coating is baked on at over 800 degrees and has a slightly rough surface, which is also porous.
-
Page 18: Cooking Guide For Ovens
Cooking guide for ovens food Bake thermowave Base Heat Grill fan Grill Maxi Grill Rapid Heat Baked Products single trays 3 trays 2 trays scones/small cakes Muffins slices Cakes fruit Cakes egg Recipes Baked Custards Pavlova Meringues Pies & Pastry fish Meats Beef Roast... -
Page 19: Get To Know Your Oven
Get to know your oven Get to know your new oven with this Method: ‘Simple Test Cake’ 1. Butter base and sides of two, 20cm straight-sided round Although we strive for a perfect performing oven, it’s possible or square cake pans. then line the base with grease proof that there will be some variation in colour when baking. -
Page 20: Handling Baking & Grilling Problems
Handling baking & grilling problems PRoBLeM CAUses ReMedIes Uneven cooking: • Incorrect shelf position. - select shelf that puts food in the centre of the oven. • oven tray too large. - experiment with other trays or dishes. • trays not centralised. - Centre trays. -
Page 21: Clocks
Clocks Operating the programmable clock 3 button programmable clock Before operating your appliance for the first time 3 button programmable clock PROGRAM TIMER cook time timer PROGRAM TIMER end time clock cook time timer — MODE end time clock — MODE General features Your 3 button programmable clock has the following features:... -
Page 22: Operating Your
Clocks (cont) Operating your 60 minute ringer timer Setting the cooking duration 2. Press any button to stop the timer from beeping. 1. Check the clock displays the correct time of day. to set the timer, simply turn the knob clockwise to the required number of minutes. -
Page 23: Cleaning And Caring For The Cooker
Cleaning and caring for the cooker IMPoRtAnt: Always make sure that the appliance Ceramic Hotplates warning is turned off before you clean it. 1. Remove all spilt food and fat with the supplied razor blade All surfaces should be kept clean to reduce the risk scraper, while the ceramic glass is still warm but not hot. -
Page 24: Cleaning And Caring For The Oven
Clean the Warming drawer compartment with hot soapy possibility of electric shock. water. When replacing the Light Bulb ensure the replacement is suitable for high temperatures. We recommend using a genuine replacement available from electrolux spare parts. cleaning and caring... -
Page 25: Solving Problems
Solving problems Faults If you need more information, please contact the Customer Care Centre on 1300 363 640 If you have a problem with your oven and/or grill, please: (Australia - Centre is open 8.00am - 5.00pm Monday • Check the points listed below before calling for service. You to friday eastern standard time) may be able to avoid a service call by fixing the problem or 09 573 2384 (new Zealand - Centre is open... - Page 26 Notes notes...
-
Page 27: Warranty
New Zealand. rights and remedies under a law in relation to the Appliances or services 3. During the Warranty Period Electrolux or its ASC will, at no extra charge to which the warranty relates. if your Appliance is readily accessible for service, without special 11. - Page 28 We are part of the electrolux family. share more of our thinking at www.electrolux.com.au © 2012 electrolux Home Products Pty Ltd ABn 51 004 762 341 sMAn_eCooK_oct12 Part number: 0342 001 573 Rev C and eCn 12Q009A...