Table of Contents
Advertisement
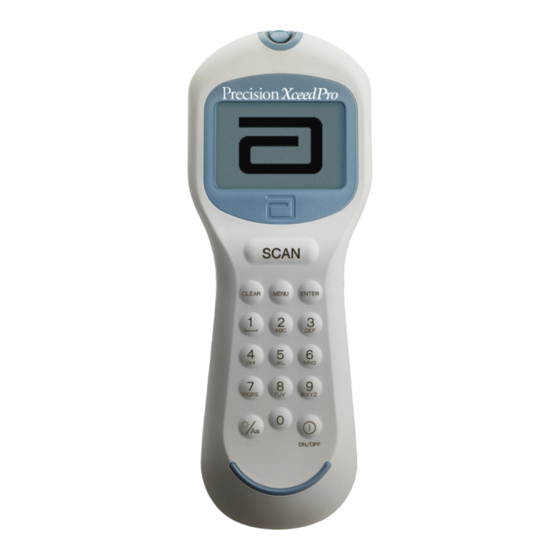
Blood Glucose and β-Ketone Monitoring System
Operator's Manual
Abbott Diabetes Care Inc.
1360 South Loop Road
Alameda, CA 94502 USA
Precision Xceed Pro, TrueID, TrueMeasure, TrueAccess, PrecisionWeb, Precision, MediSense,
Optium and Precision PCx are trademarks of the Abbott Group of Companies in various
jurisdictions. Other trademarks are the property of their respective owners.
This product(s) and/or its use are protected by one or more of the following patents:
US5,509,410; US5,628,890; US5,727,548; US6,129,823; US6,592,745; US6,607,658;
US6,736,957; US6,764,581; US6,939,450; US6,377,894; US6,600,997; US6,773,671;
US5,682,884; USD7,077,328; USD411,989; USD413,537; USD557,422S; US6,591,125;
US7,058,437; EP1,009,850B1; EP1,119,637B8; EP1,023,455B1; and EP1,012,326B1.
Additional patents may be issued and/or pending.
© 2009 Abbott
ART19306 Rev. A 12/09
Advertisement
Table of Contents
Troubleshooting

Related Manuals for Abbott Precision Xceed Pro


Summary of Contents for Abbott Precision Xceed Pro
- Page 1 Alameda, CA 94502 USA Precision Xceed Pro, TrueID, TrueMeasure, TrueAccess, PrecisionWeb, Precision, MediSense, Optium and Precision PCx are trademarks of the Abbott Group of Companies in various jurisdictions. Other trademarks are the property of their respective owners. This product(s) and/or its use are protected by one or more of the following patents: US5,509,410;...
-
Page 2: Table Of Contents
This Operator's Manual provides basic information about the Precision Xceed Pro System. It is organized into three sections. First, the overview in Chapter 1 describes the components of the Precision Xceed Pro System and the physical features of the monitor. - Page 3 Replacing the Port Protector ................................11-2 Battery Life......................................11-2 Replacing the Batteries ..................................11-2 12. Specifications ................................12 Precision Xceed Pro Monitor ................................12-1 Symbols ......................................12-2 Bar Code Types ....................................12-3 Important Safety Instructions ................................ 12-4 Questions? Refer to Page 10-10 for Technical Support Instructions.
-
Page 4: Overview
1. Overview Intended Use TrueID, TrueMeasure and TrueAccess Icons and Warnings Conventions System Components... -
Page 5: Intended Use
Overview Intended Use The Precision Xceed Pro Point of Care System for Blood Glucose and β-Ketone Monitoring is intended for in vitro diagnostic use for the quantitative measurement of glucose (D-glucose) in fresh capillary, venous, arterial and neonatal whole blood samples and of β-Ketone (beta-hydroxybutyrate) in fresh capillary and venous whole blood samples. The system is not for use in diagnosing diabetes mellitus, but is to be used as an aid in monitoring the effectiveness of diabetes control programs. - Page 6 Icons and Warnings Information that is of particular relevance to the reader is called out in gray boxes throughout the manual, with an appropriate icon and warning level. IMPORTANT: Indicates that inconvenience to the operator or danger to the patient may result if the instruction is not followed.
-
Page 7: System Components
At the bottom is the data port for connecting the monitor to a data upload cable or docking station (Chapter 9 provides information on uploading data to a data management system). Each Precision Xceed Pro Monitor is shipped with this Operator’s Manual (on CD Rom), one Port Protector (installed), and two AA Batteries. - Page 8 Do not use the test strip if the foil packet has a puncture or tear in it. There are three types of test strips that may be used for testing with the Precision Xceed Pro system: the light blue Precision Xceed Pro Blood Glucose Test Strip (in blue foil), the green Precision PCx Plus Blood Glucose Test Strip (in gold foil) for testing glucose levels in fresh whole blood, and the purple Precision Xceed Pro Blood β-Ketone Test Strip...
- Page 9 There is no need to prep the monitor prior to using the bag and the bag does not affect any monitor functions. Note that Abbott Isolation Bags are not sterilized.
-
Page 10: Using The Monitor
2. Using the Monitor Bar Code Scanner Data Entry Keypad Audible Indicator Data Port Battery Compartment Port Protector Monitor Identification Menu Tree... -
Page 11: Bar Code Scanner
Using the Monitor Bar Code Scanner The bar code scanner enables you to scan the information into the monitor instead of manually entering the data using the keypad. Scanning the bar code on the test strip foil packet automatically enters the test strip information (calibration, control range, lot number and expiry date). -
Page 12: Audible Indicator
On/Off Press this button to turn the monitor on. Each time the monitor is turned on, the Abbott logo screen will appear in black for a few seconds and then will appear in gray. This provides an opportunity to ensure that all the pixels are working correctly. -
Page 13: Monitor Identification
Each monitor has a unique serial number listed on the back of the device just below the battery compartment. The Precision Xceed Pro Monitor also features an untextured area on the side of the device. This 22 mm wide x 11 mm high (0.875 inch x 0.483 inch) area allows a facility to apply a label with information pertaining to the monitor. -
Page 14: Patient Test
3. Patient Test Operating Guidelines for All Samples Collecting Blood Samples How to Obtain a Capillary Blood Sample How to Obtain a Venous Blood Sample How to Obtain an Arterial Blood Sample How to Obtain a Neonatal Capillary Blood Sample Disposing of Waste Patient Test Procedure - Glucose Patient Test Procedure - β-Ketone... -
Page 15: Operating Guidelines For All Samples
This chapter describes the steps to be taken to test patient blood glucose or β-ketone levels in fresh whole blood using the Precision Xceed Pro System. Inside each box of test strips is a package insert with detailed instructions for use. -
Page 16: How To Obtain A Neonatal Capillary Blood Sample
Collecting Blood Samples How to Obtain a Capillary Blood Sample: • Use only fresh whole blood samples. • Make sure that the sampling site is clean and dry before lancing. • Collect the capillary blood using a lancing device and an appropriate technique. •... -
Page 17: Patient Test Procedure - Glucose
Patient Test Procedure - Glucose Use the following procedure to perform a patient test using the Precision Xceed Pro or Precision PCx Plus Blood Glucose Test Strip. Note: The following section illustrates some common settings. Depending on your institution's specific settings, some screens will display differently or not at all. - Page 18 What You See on the Display What You Do Comments Press 2 to Confirm Patient ID or 1 to ReEnter the ID. Press Clear to re-enter the ID. If numbers Enter the year of birth (e.g. enter "63" for 1963; enter "01" for 2001) then press have been entered, the Clear key will the Enter button.
- Page 19 What You See on the Display What You Do Comments 9. With the contact bars facing up, insert the Prior to inserting the test strip, ensure that the port protector is installed and that it test strip into the test strip port until it stops and Strip Inserted is displayed.
- Page 20 What You See on the Display What You Do Comments Your institution may establish an Action For out-of-range results, refer to your Range. The monitor will display results institution's policy. outside of this range. A comment code may be required for results outside the action range.
-
Page 21: Patient Test Procedure - Β-Ketone
Use the following procedure to perform patient tests with the Precision Xceed Pro Blood β-Ketone Test Strip. The Precision Xceed Pro Monitor recognizes the type of test strip based on the scan of the strip bar code. Note: The following section illustrates some common settings. Depending on your institution's specific settings, some screens will display differently or not at all. -
Page 22: Control Test
4. Control Test Operating Guidelines for Control Solution Testing Control Test Procedure - Glucose Control Test Procedure - β-Ketone... -
Page 23: Control Solution Testing
These quality control features can be set through the data management system. Operating Guidelines for Control Solution Testing Observe the following guidelines to obtain optimal quality control results using the Precision Xceed Pro System: • Use only control solutions approved for use with Precision Xceed Pro and Precision PCx Plus Test Strips to verify the performance of the Precision Xceed Pro Monitor and Test Strips. - Page 24 What You Do Comments 1. Press On/Off to turn on the monitor. The Abbott logo screen will appear in black for a few seconds and then will appear in gray to ensure that the display is functioning properly. Next the software version will briefly appear.
- Page 25 What You See on the Display What You Do Comments 5. Press Scan to scan the test strip bar Scanning the bar code identifies the strip type, calibrates the monitor, ensures the code or manually enter the test strip lot number via the keypad, then press Enter.
- Page 26 What You See on the Display What You Do Comments 9. Wait for the monitor to analyze the The monitor counts down then displays the test result. If an error is detected during sample and display the test result. the assay, the assay is terminated and no result is displayed.
- Page 27 Control Test Procedure - β-Ketone Use the following procedure to perform β-ketone control tests. If β-ketone testing is enabled, the monitor will prompt for the Blood β-Ketone Test Strip. Note: The following section illustrates some representative settings. If the monitor does not display these screens, please refer to Chapter 10, Troubleshooting. What You See on the Display What You Do Comments...
-
Page 28: Data Review
5. Data Review Data Review for Patient by Operator ID Data Review for Patient by Patient ID Data Review for All Patient Data Data Review for Control Data Data Review for Proficiency Data Data Review for Linearity Data... - Page 29 Data Review The Precision Xceed Pro Monitor stores the results of up to 2,500 patient tests, 1,000 control tests, 20 proficiency tests and 2 linearity panels. This data can be retrieved by the following categories: Patient by Operator ID (OperID): This will show test results performed by a particular operator, starting with the most recent test.
- Page 30 What You See on the Display What You Do Comments 4. Press Scan to scan the Operator ID While the Operator ID may be up to 30 bar code or manually enter the digits, not all digits will fit on the display. Operator ID via the keypad, then press The monitor may also be set to truncate Enter.
- Page 31 Data Review for Patient by Operator ID Please refer to the beginning of this Data Review chapter for step-by-step instructions to access the Data Review menu. Note: The following section illustrates some common settings. Depending on your institution's specific settings, some screens will display differently or not at all.
- Page 32 Data Review for Patient by Patient ID Please refer to the beginning of this Data Review chapter for step-by-step instructions to access the Data Review menu. Note: The following section illustrates some common settings. Depending on your institution's specific settings, some screens will display differently or not at all.
- Page 33 Data Review for All Patient Data Please refer to the beginning of this Data Review chapter for step-by-step instructions to access the Data Review menu. Note: The following section illustrates some common settings. Depending on your institution's specific settings, some screens will display differently or not at all. If the monitor does not display the screens shown, please refer to Chapter 10, Troubleshooting.
- Page 34 Data Review for Control Data The monitor stores the last 1,000 control test results. Please refer to the beginning of this Data Review chapter for step-by-step instructions to access the Data Review menu. Note: The following section illustrates some common settings. Depending on your institution's specific settings, some screens will display differently or not at all.
- Page 35 Data Review for Proficiency Data The monitor stores the last 20 proficiency test results. Please refer to the beginning of this Data Review chapter for step-by-step instructions to access the Data Review menu. Note: The following section illustrates some common settings. Depending on your institution's specific settings, some screens will display differently or not at all.
- Page 36 Data Review for Linearity Data The monitor stores the last linearity panel that includes a maximum of 4 replicates for 5 levels (20 tests). Please refer to the beginning of this Data Review chapter for step-by-step instructions to access the Data Review menu. Note: The following section illustrates some common settings.
-
Page 37: Proficiency Test
6. Proficiency Test Proficiency Test - Glucose Proficiency Test - β-Ketone... - Page 38 What You See on the Display What You Do Comments 1. Press the On/Off button to turn on The Abbott logo screen will appear in black the monitor. for a few seconds and then will appear in gray to ensure that the display is functioning properly.
- Page 39 What You See on the Display What You Do Comments 6. Press Scan to scan the test strip bar Scanning the bar code identifies the strip code or manually enter the test strip lot type, calibrates the monitor, ensures the number via the keypad , then press Enter.
- Page 40 What You See on the Display What You Do Comments 9. Bring proficiency survey specimens to When sufficient sample has been applied, the monitor beeps, displays Sample room temperature. Mix each specimen Accepted and automatically starts the test. well according to instructions from the For a detailed description of the test strip survey provider.
- Page 41 Proficiency Test - β-Ketone Please use the following procedures to perform a β-ketone proficiency test. What You See on the Display What You Do Comments 1. Follow steps 1 through 8 in the last Prior to inserting the test strip, ensure that the port protector is installed and that it is clean section on the Glucose Proficiency and dry.
-
Page 42: Linearity Test
7. Linearity Test... -
Page 43: Linearity Test
What You Do Comments 1. Press On/Off to turn on monitor. The Abbott logo screen will appear in black for a few seconds and then will appear in gray to ensure that the display is functioning properly. Next, the software version will briefly appear. - Page 44 What You See on the Display What You Do Comments β- β- 5. Select Glucose or Ketone Linearity Ketone testing is disabled, this screen Panel. will not appear. 6. Scan or manually enter the CVC kit lot LIN stands for Linearity. number via the keypad, then press Enter.
- Page 45 What You See on the Display What You Do Comments 9. Press Scan to scan the test strip bar Scanning the bar code identifies the strip code or manually enter the test strip type, calibrates the monitor, ensures the lot number via the keypad , then press expiry date has not passed, records the strip Enter.
- Page 46 What You See on the Display What You Do Comments 12. Follow the instructions in the CVC kit When sufficient sample has been applied, the monitor beeps, displays Sample package insert. Then apply a drop of the Accepted and automatically starts the test. sample to the target area.
-
Page 47: Review Setup
8. Review Setup Monitor Configuration Review Setup Review Test Setup for All Tests Review Test Setup for Test Type Review Test Setup for Patient Test Review Test Setup for Control Test Review Test Setup for Security System Status... -
Page 48: Monitor Configuration
Review Setup Monitor Configuration The Precision Xceed Pro Monitor configuration settings are enabled via the data management system. These settings can be viewed on the hand-held device, but cannot be changed on it. Settings that are configured through the data... - Page 49 The maximum number of strip lots that can be downloaded to the Precision Xceed Pro Monitor is 36: 18 Glucose and 18 Ketone.
- Page 50 What You Do Comments 1. Press On/Off to turn on the monitor. The Abbott logo screen will appear in black for a few seconds and then will appear in gray to ensure that the display is functioning properly. Next the software version will briefly appear.
-
Page 51: Review Test Setup For All Tests
Review Test Setup for All Tests Note: This section illustrates some representative settings. If the monitor does not display these screens, please refer to Chapter 10, Troubleshooting. What You See on the Display What You Do Comments 1. Press 1 for Test Setup. 2. -
Page 52: Review Test Setup For Test Type
Review Test Setup for Test Type Note: This section illustrates some representative settings. If the monitor does not display these screens, please refer to Chapter 10, Troubleshooting. What You See on the Display What You Do Comments 1. Press 1 for Test Setup. 2. -
Page 53: Review Test Setup For Patient Test
Review Test Setup for Patient Test Note: This section illustrates some representative settings. If the monitor does not display these screens, please refer to Chapter 10, Troubleshooting. What You See on the Display What You Do Comments 1. Press 1 for Test Setup. 2. -
Page 54: Review Test Setup For Control Test
Review Test Setup for Control Test Note: This section illustrates some representative settings. If the monitor does not display these screens, please refer to Chapter 10, Troubleshooting. What You See on the Display What You Do Comments 1. Press 1 for Test Setup. 2. - Page 55 Review Test Setup for Control Test What You See on the Display What You Do Comments 7. Press 1-Next to continue to the Control Test Comment Code If Out-of-Range screen. 8. Press 1-Next to return to the Test Setup menu. Questions? Refer to Page 10-10 for Technical Support Instructions.
-
Page 56: Review Test Setup For Security
Review Test Setup for Security Note: This section illustrates some representative settings. If the monitor does not display these screens, please refer to Chapter 10, Troubleshooting. What You See on the Display What You Do Comments 1. Press 1 for Test Setup. 2. - Page 57 Review Test Setup for Security Note: This section illustrates some representative settings. If the monitor does not display these screens, please refer to Chapter 10, Troubleshooting. What You See on the Display What You Do Comments 7. Press 1-Next to continue to the Security Confirm Patient Data screen.
-
Page 58: System Status
What You Do Comments 1. Press On/Off to turn on the monitor. The Abbott logo screen will appear in black for a few seconds and then will appear in gray to ensure that the display is functioning properly. Next, the software version will briefly appear. - Page 59 What You See on the Display What You Do Comments 6. Press 1-Next to continue to the System Status Time screen. 7. Press 1-Next to continue to the System Status Date screen. 8. Press 1-Next to continue to the System Status Software Version and Serial Number screen .
-
Page 60: Data Upload
9. Data Upload Docking Station Mounting Instructions Enabling Data Upload... - Page 61 The data management system provides a simple and automated way to collect, report and transfer data. To start the upload of data, simply place the Precision Xceed Pro Monitor into the docking station. The monitor will first turn on if it isn't already and then automatically upload data to the data management system.
-
Page 62: Docking Station
Note: Use only the AC adapter supplied by Abbott Diabetes Care. Use of any other adapter may cause serious damage to the docking station and to the Precision Xceed Pro Monitor while it is in the docking station. Mounting Instructions The docking station may be mounted vertically if desired. -
Page 63: Enabling Data Upload
2. Connect the serial cable to the terminal server and to the docking station data transfer port. Alternatively, connect the Data Upload Cable to the terminal server and to the Data Port of the Precision Xceed Pro Monitor. 3. Connect the data networking cable to the terminal server and the network jack. -
Page 64: Troubleshooting
10. Troubleshooting Troubleshooting Patient Test Results Troubleshooting Out-of-Range Control Test Results Troubleshooting Out-of-Range Linearity Test Results Error Messages Technical Support Instructions Returning an Instrument Contacting Abbott for Service... - Page 65 If test results appear higher or lower than expected for reasons not described above, please repeat the test using a new test strip. If the results still appear higher or lower than expected, contact your local Abbott Diabetes Care office or distributor.
-
Page 66: Troubleshooting Out-Of-Range Linearity Test Results
If test results are out of range despite meeting the above criteria, please repeat the test using a new CVC kit and/or test strips. If the results are still out of range, contact your local Abbott Diabetes Care office or distributor. - Page 67 3. If the problem still persists, record the four digit error code and contact Abbott Technical Support. 1. Turn off the monitor. Wait at least 5 The monitor has detected a problem with the barcode scanner that would prevent the seconds for the system to reset.
- Page 68 Note: Check the Precision Xceed Pro display for proper performance before every test. If at any time the display screen becomes difficult to read, discontinue use of monitor and contact your local Abbott Diabetes Care office or distributor.
- Page 69 When a Test is Selected: Symptom/Error Message Explanation How To Respond The Glucose QC Interval Controls Expired Perform the remaining glucose control option is set to Warn or Lockout and tests indicated in the message. one or more control tests is past due. (The menu item 2 –...
- Page 70 During Any Test: Symptom/Error Message Explanation How To Respond 1. Rescan the bar code or manually enter the The bar code just scanned was not accepted. Possible reasons are: ID or lot number. • T he red scanner beam did not pass across 2. Notify the system administrator. The all the bars of the code.
- Page 71 During Any Test: Symptom/Error Message Explanation How To Respond 1. Press 1 to ReEnter the ID using the bar The Operator ID just entered is not on the list of acceptable Operator ID’s defined code scanner or keypad. for this monitor. (The menu item 2 –...
- Page 72 There may be a problem with the test strip. One of several 4-digit error codes may Strip or 2 to Exit. be displayed. These codes provide Abbott 2. If the error occurs again, record the personnel additional information about the 4-digit error code and contact Abbott problem.
- Page 73 Symptom/Error Message Explanation How To Respond When a Control Test is Selected: Press 1 to ReEnter the lot. A control solution lot number has been entered for a different level of control test from the one that the monitor expected to Press 2 to run the level of test that run (in the usual low-to-high sequence).
-
Page 74: Technical Support Instructions
Do not return the Precision Xceed Pro Monitor or any part of the system for repair until you receive authorization from an Abbott representative. -
Page 75: Contacting Abbott For Service
Contacting Abbott for Service Abbott is committed to helping you resolve any problems with the Precision Xceed Pro System. For technical assistance, please contact your local office or distributor listed below. ASIA Thailand Italy Abbott Laboratories Ltd. Abbott S.r.l. Australia and New Zealand... - Page 76 Tel: +800-802-226 Colombia Abbott Laboratorios de Colombia S/A Abbott Diabetes Care Bogotá, Colombia Tel: +01-8000-522268 Mexico Abbott Laboratories de Mexico SA de CV Abbott Diabetes Care Col. Ex-Hacienda Coapa, Mexico Tel: +01-800-711-2208 Peru Abbott Laboratorios de Peru Abbott Diabetes Care...
-
Page 77: Maintenance
11. Maintenance Cleaning the Exterior Surface Replacing the Port Protector Battery Life Replacing the Batteries... - Page 78 Replacing the batteries. Cleaning the Exterior Surface Cleaning the exterior surface of the Precision Xceed Pro Monitor daily is recommended. Follow your facility’s policies and procedures for infection control, which may require more frequent cleaning. IMPORTANT: It is recommended to clean after each patient for infection control.
-
Page 79: Battery Life
5. Insert the new batteries on top of the strap, using the + and - symbols in the battery compartment to position the new batteries with the correct polarity. Refer to Figure 2 below. 6. Align the battery compartment cover with the slots on the Precision Xceed Pro Monitor, then snap the cover into place. -
Page 80: Specifications
12. Specifications Precision Xceed Pro Monitor Symbols Bar Code Types Important Safety Instructions... - Page 81 Power Source: Two standard alkaline AA batteries or nickel-metal hydride (NiMH) rechargeable batteries (not supplied by Abbott Diabetes Care). Battery performance is a function of how often the monitor is used and the duration time that testing is conducted. Alkaline Battery: (2) cells 1.5 Volts, 2.8 Amp Hours typical capacity Rechargeable NiMH batteries (2) cells 1.2 Volts, 1.1 Amp Hours minimum capacity...
-
Page 82: Symbols
Symbols There are special symbols that appear on the Precision Xceed Pro Monitor, Test Strips and Docking Station. The complete list of symbols and explanations are listed below. Please note: Some of the symbols listed below will not appear on your Precision Xceed Pro System due to differences in local regulatory requirements. -
Page 83: Bar Code Types
Do not drink. CE is the mark that indicates that an item has been approved for distribution in the EU. Legal Manufacturer under In Vitro Diagnostic Medical Devices Directive 98/79/EC - Abbott Diabetes Care. Consult instructions for use. Recyclable. For in vitro diagnostic use only. -
Page 84: Important Safety Instructions
RSS: RSS is an abbreviation for Reduced Symbology Set, which produces very small bar codes suitable for labeling electronic components and healthcare devices. There are seven different types of RSS bar codes. RSS can encode at maximum 74 characters. Note: Control characters and non-alphanumeric characters (e.g. $) are displayed as spaces in the Precision Xceed Pro Monitor. - Page 85 Electromagnetic Compatibility - Requirements and Tests First Edition; (CENELEC EN 60601-1-2: 1993) Precision Xceed Pro Monitor – Class II (EQUIPMENT energized from an internal electrical power source). Docking Station – Class II (EQUIPMENT energized from an internal electrical power source).
Need help?
Do you have a question about the Precision Xceed Pro and is the answer not in the manual?
Questions and answers
are the precision xceed pro glucometers waived for multiple users in a clinic setting?
Yes, the Abbott Precision Xceed Pro glucose meters are designed for use in clinical settings where multiple instruments can be managed centrally. They support data upload to a central data management system, allowing integration with Laboratory Information Systems (LIS) or Hospital Information Systems (HIS) for patient records. This suggests they are suitable for multiple users in a clinic.
This answer is automatically generated
Do I need Control strip
No, the Abbott Precision Xceed Pro does not mention requiring a control strip. However, it does require control solutions (Precision, Optium, or MediSense Blood Glucose and β-Ketone Control Solutions) for regular quality control checks.
This answer is automatically generated
Since glucose testing ia a waived test, is linearity and correlation required to be done on precision xeed pro system, if it is what is the suggested material to use
The context does not explicitly state whether linearity and correlation are required for the Abbott Precision Xceed Pro system. However, it does mention a "linearity kit," suggesting that linearity testing may be relevant. The suggested material for testing includes the Precision Xceed Pro Blood Glucose Test Strip (light blue), Precision PCx Plus Blood Glucose Test Strip (green), and Precision Xceed Pro Blood β-Ketone Test Strip (purple). Control solutions are also used for quality control checks.
This answer is automatically generated