Table of Contents
Advertisement
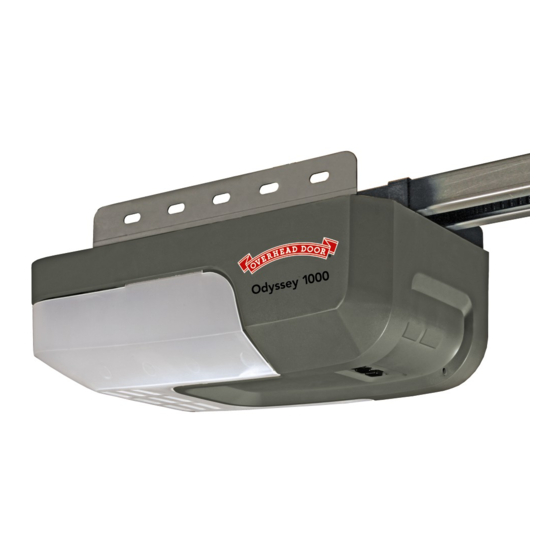
7030/7030H
Odyssey
1000
™
Model 7030/7030H
Chain and Belt Openers
• CodeDodger
remote for
®
the ultimate in safety
• Safe-T-Beam
system must
®
be installed to close door
• Homelink
and Car2U
®
®
compatible
• 2-bulb light system
• Wall console
• Easy programming
For answers and assistance
1.800.929.3667
or visit
www.OverheadDoor.com
WARNING: To reduce the risk of injury to persons or
damage to property – Use this opener only with a
one piece or sectional door.
Installer: Leave this manual with homeowner.
Operation and Maintenance Manual
Save this manual for future reference.
© 2010 Overhead Door Corporation. Overhead Door, the Ribbon logo, CodeDodger and Safe-T-Beam are registered
PN# 37065500753
12/2010
trademarks and Odyssey is a trademark of Overhead Door Corporation. All other trademarks are the property of their rightful owners. Consistent with
R900-885
our policy of continuing product improvements, we reserve the right to change product specifications without notice or obligations.
Homelink is a registered trademark of Johnson Controls Technology Company.
Car2U is a registered trademark of Lear Corporation.
Advertisement
Table of Contents
Troubleshooting

Related Manuals for Overhead door Odyssey 1000 7030H


Summary of Contents for Overhead door Odyssey 1000 7030H
- Page 1 PN# 37065500753 12/2010 trademarks and Odyssey is a trademark of Overhead Door Corporation. All other trademarks are the property of their rightful owners. Consistent with R900-885 our policy of continuing product improvements, we reserve the right to change product specifications without notice or obligations.
-
Page 2: Safety Information
Could result in Death or Serious Installations, repairs and adjustments must be done by Injury a trained door system technician using proper tools and instructions. ©2010 Overhead Door Corporation 12/2010... -
Page 3: Opener Features & Safety Features
(Not available on all models) Select units have motion detection built into the powerhead. Lights automatically turn ON when motion is detected for much safer movement through the garage. Lights will turn OFF after 4 minutes of no motion. ©2010 Overhead Door Corporation 12/2010... -
Page 4: Table Of Contents
Troubleshooting Guide - Operation ............. 24-25 Troubleshooting Guide - Powerhead LEDs ..........25 Reference - Wiring Diagram ................26 Warranty ........................27 OPENER MUST BE INSTALLED WITH THE INCLUDED Safe-T-Beam® SAFETY REVERSE SYSTEM MUST BE WALL CONSOLE. INSTALLED TO CLOSE DOOR. ©2010 Overhead Door Corporation 12/2010... -
Page 5: Important Installation Instructions
6. Locate the wall console: Overhead Door Corporation.) • Within sight of the garage door, 2. Install only on a properly balanced sectional or • At minimum height of 5 feet so small children one piece garage door. -
Page 6: Programming Limits & Force
©2010 Overhead Door Corporation 12/2010... -
Page 7: Open Door Travel Limit
©2010 Overhead Door Corporation 12/2010... - Page 8 ©2010 Overhead Door Corporation 12/2010...
-
Page 9: Contact Reverse Test
©2010 Overhead Door Corporation 12/2010... -
Page 10: Programming Homelink®, Car2U®, Codedodger® 1 Remotes Or Wireless Keypads
©2010 Overhead Door Corporation 12/2010... -
Page 11: Typical Installed Illustrations
REMARQUE: Utilisez la console sur le mur et les capteurs de sécurité fournis avec cet appareil. NE PAS substituer la console du mur ou les capteurs de sécurité. NOTA: Use la consola de pared y los sensores de seguridad proporcionados con esta unidad. NO sustituya la consola de pared ni los sensores de seguridad. ©2010 Overhead Door Corporation 12/2010... -
Page 12: Typical Sectional Door Installation
BRAZO DE LA PUERTA posición con un ángulo mayor. PALPEURS de SAFE-T-BEAM® SENSORES SAFE-T-BEAM® FIG. 3-1 MAX. 6" - MIN. 5" 6 po (15 cm) MAX. - 5 po (12,7 cm) MIN. MAX. 6" - MIN. 5" ©2010 Overhead Door Corporation 12/2010... -
Page 13: Typical One Piece Door Installation
Para reducir el riesgo de lesión a las personas o de daño a los bienes PORTE D’UNE PIÈCE PORTE SECTIONELLE - utilice este abre puertas solamente con una puerta de una pieza o PUERTA DE UNA SOLA PIEZA PUERTA SECCIONAL seccional. ©2010 Overhead Door Corporation 12/2010... -
Page 14: Overview Of Powerhead Controls
30 seconds if there is no key stroke through menus activity. Open Travel button multi-function; moves door, advances through menus LED Colors Round Red Long Red Round Purple Long Purple Round Blue Long Blue ©2010 Overhead Door Corporation 12/2010... -
Page 15: Overview Of Remotes And Options
• Re-orient or relocate the receiver antenna. • Increase the separation between the opener and receiver. • Connect the opener into an outlet on a circuit different from that to which the receiver is connected. • Consult your local dealer. ©2010 Overhead Door Corporation 12/2010... -
Page 16: Programming To Previously Installed Openers
CODEDODGER® 1 setting on your remote to operate that opener. Remotes provided with this unit can operate other CODEDODGER® FEATURES (CodeDodger® 1) models of Overhead Door garage door openers. The default CodeDodger® 2 setting Other models of Overhead Door garage door must be changed to CodeDodger®... -
Page 17: Maintenance & Troubleshooting
7. KEEP DOORS PROPERLY BALANCED. See your garage door Owner’s Manual. An improperly balanced door increases the risk of severe injury or death. Have a trained door system technician make repairs to cables, spring assemblies, and other hardware. SAVE THESE INSTRUCTIONS. ©2010 Overhead Door Corporation 12/2010... -
Page 18: Routine Monthly Maintenance
– Stops before it contacts the 2 x 4 board, it may simply be responding to an improperly set down limit. Return to pages 6-7 and repeat steps 1 through 10 to correct down limit. FIG. 6-2 2 x 4 under center of door opening ©2010 Overhead Door Corporation 12/2010... -
Page 19: Change Light Bulbs
NOTE: The opener will not close the door TO RELEASE or RECONNECT CARRIAGE, automatically unless the Safe-T-Beam® System is PULL DOWN AND LET GO installed and Limits are programmed. FIG. 6-4 Carriage (cut away view) ©2010 Overhead Door Corporation 12/2010... -
Page 20: Wall Console
Wall consoles from other manufacturers may not work with Indicator Light openers of these serial number groups. Overhead Door Series Red indicator light is always ON I wall buttons and Series II wall consoles will not work with openers of this serial number group. -
Page 21: Chain Or Belt Tension Adjustment
Replace remote battery with a CR 2032 coin cell battery. 1. Open the remote case using a washer or coin that fits into the slot at the side of the remote. 2. Replace battery. 3. Align components and snap case closed. ©2010 Overhead Door Corporation 12/2010... -
Page 22: Speed Adjustment Guide
Powerhead LEDs Speed Level Round LED Long LED Default LED display is the current Speed setting LED Speed indicator colors Purple Purple Blue Blue Speed Level LED indicator colors MAXIMUM Purple Purple Blue Blue SLOW ©2010 Overhead Door Corporation 12/2010... -
Page 23: Force Adjustment Guide
Blue Force Level 1 Blue Force Level 2 Blue Blue Force Level 3 Purple Force Level 4 Purple Force Level 5 Purple Purple Force Level 6 Force Level 7 Force Level 8 Force Level 9 ©2010 Overhead Door Corporation 12/2010... -
Page 24: Troubleshooting Guide - Operation
Press and hold the wall console button until door is completely closed. malfunction. • Check for interference from adjacent Safe-T-Beam® units. • Contact Overhead Door Corporation at 1.800.929.3667. Door starts down, • Check Safe-T-Beam® wire connections at powerhead. See page 18. -
Page 25: Powerhead Leds Troubleshooting
Door contact in up or down Remove obstruction travel ON/RED/ FLASHING Door component failure Check door spring, track, rollers, hinges detected and fixtures ON/RED/ DO NOT unplug unit Thermal cutout STEADY Wait until LED clears before operating ©2010 Overhead Door Corporation 12/2010... -
Page 26: Reference - Wiring Diagram
NOIR VERDE NEGRO YELLOW JAUNE AMARILLO ELECTRICAL SHOCK *SOME MODELS DO NOT COME WITH THIS FEATURE CHOC ÉLECTRIQUE QUELQUES MODÈLES NE VIENNENT PAS AVEC CETTE CONFIGURATION CHOQUE ELÉCTRICO ALGUNOS MODELOS NO VIENEN CON ESTA CARACTERÍSTICA ©2010 Overhead Door Corporation 12/2010... -
Page 27: Warranty
FOR, SPECIAL, INDIRECT, COLLATERAL, PUNITIVE, INCIDENTAL OR CONSEQUENTIAL DAMAGES, even if Overhead Door Corporation has been advised of the possibility of such damages. Such excluded damages include, but are not limited to, loss of use, cost of any substitute product, or other similar indirect financial loss. Some states do not allow the exclusion or limitation of incidental or consequential damages, so the above limitation or exclusion may not apply to you.
Need help?
Do you have a question about the Odyssey 1000 7030H and is the answer not in the manual?
Questions and answers
i **** ON THE BOARD OF A 15 UIT CONDO ASOC. TRYING TO PROGRAM MY REMOTES FOR ODDESY 1000 MODEL 7030. WHAT ARE THE 4 A,B,C,D, BUTTONS INSIDE THE REMOTE ABOVE THE BATTERY USED FOR, OR DOES IT MATTERY TO ME?
I have A ODESSEY 1000 AND NEED TO PROGRAM A NEW REMOTE, i CAN NOT FIND THE LEARN BUTTON OR THE DIP SWITCHES. PLEASE HELP ME. THIS UNIT IS AT LEAST 20 YEARS OLD.
If you cannot find the learn button or dip switches on the Overhead Door Odyssey 1000 7030H, follow these general steps to program a new remote:
1. Wait for 30 seconds without pressing any buttons to exit any active menu.
2. Use the Open or Close Travel button on the opener's control panel to navigate through menus if needed.
3. Once in programming mode, follow the steps to program the remote to the powerhead.
If the exact steps are unclear due to missing buttons or switches, refer to the powerhead programming section in the manual for detailed guidance or contact a trained technician.
This answer is automatically generated