Table of Contents
Advertisement
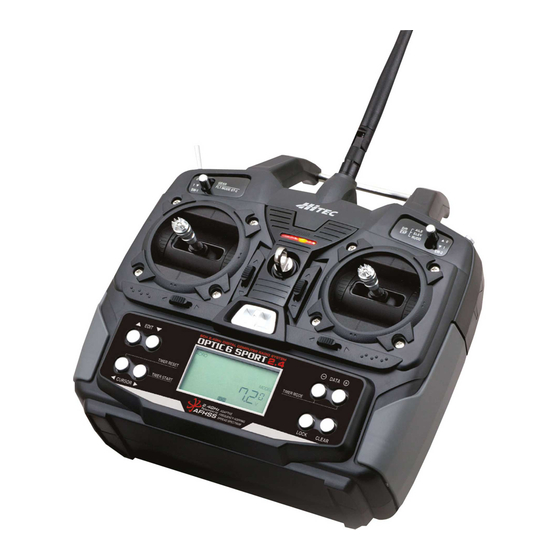
6 Channel FM Computer Aircraft Radio
6 Channel FM Computer Aircraft Radio
6 Channel FM Computer Aircraft Radio
6 Channel FM Computer Aircraft Radio
6 Channel FM Computer Aircraft Radio
6 Channel FM Computer Aircraft Radio
The new OPTIC 6 Sport is the practical economic choice for
a full function 6 channel computer radio with 10 model
memories for your favorite sailplanes, glow and electric
planes, even helicopters. The easy to use OPTIC 6 Sport
offers sophisticated programming beyond any radio in
its price class. With 3 different packages to select from,
there is an OPTIC 6 Sport system that is perfect to
outfit your next project.
!
Three in One
Three in One
Acro
Glider
Heli
INSTRUCTION MANUAL
Advertisement
Table of Contents

Related Manuals for HITEC OPTIC 6 Sport


Summary of Contents for HITEC OPTIC 6 Sport
- Page 1 6 Channel FM Computer Aircraft Radio 6 Channel FM Computer Aircraft Radio The new OPTIC 6 Sport is the practical economic choice for a full function 6 channel computer radio with 10 model memories for your favorite sailplanes, glow and electric planes, even helicopters.
-
Page 2: Table Of Contents
6-Channel programmable RC transmitter. The Optic 6 Sport computer automatically mixes rudder and The Optic 6 Sport is all the radio you need to fly most types of If you are new to Computerized RC Transmitters Optic 6 Sport Heli In-flight Controls... -
Page 3: Vibration And Water
If you are still having trouble, pack up your system in its original shipping materials and send it to the nearest authorized Hitec R/C Service Center. Connectors Be sure to include a note in your package that describes the... -
Page 4: Charge The Batteries
The use of a fast-charger may damage the batteries by There is no sign of recognition on the LCD screen of the Transmitter using system cable. The Optic 6 Sport is the first of Hitec's transmitters to overheating and dramatically reduce their lifetime. -
Page 5: Stick Lever Tension Adjustment / Mode Change
Stick Lever Tension Adjustment / Mode Change Optic 6 Sport Controls and Switch Assignments Mode Change to Mode 1 Configuration TENSION SPRING SPRING LIMIT COPPER RATCHET SW 1 GEAR FLT.MODE ST-3 SW 3 Flight Mode Switch SW 2 Aileron, Elevator, Rudder Dual and Expo Rate Switch... -
Page 6: Joystick Controls
Optic 6 Sport Programming Switches and Buttons Joystick Controls Right-hand joystick SAFETY NOTE: "DATA" buttons "SW-2" switch If you hear the radio suddenly begin to emit a steady beep, it means that the system voltage has dropped down to 6.6 volts. -
Page 7: Receiver-Servo Connection List
"Normal" flight mode one-second increments. Push it again and the countdown stops. condition. Pushing the left hand CURSOR button resets the timer. Optic 6 Sport - Page 12 Optic 6 Sport - Page 13... -
Page 8: Initial Setup Menu Programming For All Aircraft
Main Function menu to Now push the right-hand EDIT button to move to the next menu All models of Hitec receivers have been offered in both configure the servo responses and travels of your particular model. - Page 9 Optic 6 Sport ACRO in-Flight Controls Model Setup Menu Programming for Powered Airplanes (ACRO) Voltage/Timer Display ACRO Functions Map Normal Display Mode End Point Adjust (Servo travel) Press both Edit buttons End Point Adjust [EPA] Dual Rates Exponential Settings Dual Rate Set [D/R]...
-
Page 10: Epa (End Point Adjustment)
L/U by moving the stick to the left. You are about to see how this allows you set the travel directions independently for each stick motion. Optic 6 Sport - Page 18 Optic 6 Sport - Page 19... -
Page 11: D/R (Dual Rate)
(This is true, or course, for all the parameters we are going to establish in this menu set). Optic 6 Sport - Page 20 Optic 6 Sport - Page 21... -
Page 12: S Trm (Sub Trim)
Use the DATA buttons to set the value reduce yawing. The Optic Sport's mixing program also offers an In this screen you can activate the ability of the Optic 6 Sport to of rudder travel to throttle travel-change to a negative value to... -
Page 13: Elvn (Elevon Mix)
This is another built-in mixing program available in the Optic Sport that mixes the rudder and elevator servos for controlling V-tailed aircraft. Similar to elevon programming, the two Optic 6 Sport - Page 24 Optic 6 Sport - Page 25... -
Page 14: A -> R (Aileron-Rudder Mix)
0 %-you generally don't want the flaps going up when you EDIT button to move down to the FLT C screen. push the elevator stick forward. Optic 6 Sport - Page 26 Optic 6 Sport - Page 27... - Page 15 Let's set up two dual-rate and exponential settings in addition to those established with the switch SW-3 in the center, normal This is a sophisticated function of the Optic 6 Sport's (NOR) position. We'll assume that you have already activated...
- Page 16 - Mode 1 Configuration - Flying Field info Trainer or engine Cut - Frequency Control SW 1 Switch - Optic 6 Sport Programming Switches and Buttons Gear FLT.Mode ST-3 - Transmitter Displays and Messages SW 2 Aileron - Initial Setup Menu Programming...
- Page 17 "0" to "1", the motor will come on with full power left-wing aileron follows suit (but in the opposite direction). If you activate the CROW function and/or the Elevator-to-Flap mix, both ailerons will move in unison as Flaperons. Optic 6 Sport - Page 32 Optic 6 Sport - Page 33...
-
Page 18: Camb (Wing Camber)
The middle, normal position (NOR) is "cruise". You can, (which are all assigned to SW-3): of course, reverse the launch and thermal positions to what feels intuitive to you. Optic 6 Sport - Page 34 Optic 6 Sport - Page 35... - Page 19 4. Set your servo end points with the EPA function. Please note: To reference all other Optic 6 Sport programming instructions not specific to the HELI menu refer to the Initial Setup 5. Read through the section on throttle and pitch curves and have a go at setting the NOR curves. Don't worry about Throttle menu on page 13 and the ACRO Model Setup menu starting on page 17.
- Page 20 Throttle Cut Gyro setting [GYRO] SWAH 120 Swash FLT.C Flight condition(NOR, ST1, ST2, ST3) Revolution [RVMX] Throttle Hold [HOLD] Throttle Cut [CUT] Swash plate [SWAH] Flight Conditions FLT.C Optic 6 Sport - Page 38 Optic 6 Sport - Page 39...
-
Page 21: T.cv (Throttle Curve)
Read your gyro manual for a full understanding on Curve Point curve as a basis for the other flight modes used by its installation and setup. advanced heli pilots. Collective Stick High Optic 6 Sport - Page 40 Optic 6 Sport - Page 41... -
Page 22: Gyro (Gyro Gain)
SWAH menu. Put the throttle stick to its idle position. The swash default settings are shown below. Optic 6 Sport - Page 42 Optic 6 Sport - Page 43... -
Page 23: Swah (120 Swash Plate Programming)
SWAH (120 Swash Plate Programming) OPTIC 6 SPORT ACRO DATA SHEET servos to respond properly. Don't worry about the direction 6. If all the servos tilt the swash to the right with right aileron MODEL TYPE : ACRO SFT : N , P they respond, just that they all move the same for collective stick, go to the next step. - Page 24 OPTIC 6 SPORT GLID DATA SHEET OPTIC 6 SPORT HELI DATA SHEET MODEL TYPE : GLID SFT : N , P MODEL TYPE : HELI SFT : N , P MODEL NAME : 0 MODEL NAME : 0 % L/U...
Need help?
Do you have a question about the OPTIC 6 Sport and is the answer not in the manual?
Questions and answers
jak uruchomić funkcję klapy
To activate the flaps function on the HITEC OPTIC 6 Sport transmitter, follow these steps:
1. Turn on the radio and press both edit buttons simultaneously. Channel 1 and the "%" sign after 100 will flash.
2. Scroll through the selections using the up or down edit buttons until you see "FLT.C".
3. Set the 3-position switch (on the left side of the transmitter) to the rearmost position (all the way up). "ST1" will flash at the bottom, and "Inh" (inhibit) will appear. Press both data buttons to turn this switch on.
4. Move the switch to the forward position (all the way down). This is position "ST2". It will also be off initially. Press both data buttons to turn this switch on.
5. The middle position (NOR) is always on, so no activation is needed.
6. Set the ailerons to zero on channel 1 and adjust the flap setting (%) on channel 6.
This process enables the camber mix and allows the 3-position switch to control the flaps.
This answer is automatically generated
jak uruchomić kanał nr 5 klapy