
Related Manuals for HITEC OPTIC 6


Summary of Contents for HITEC OPTIC 6
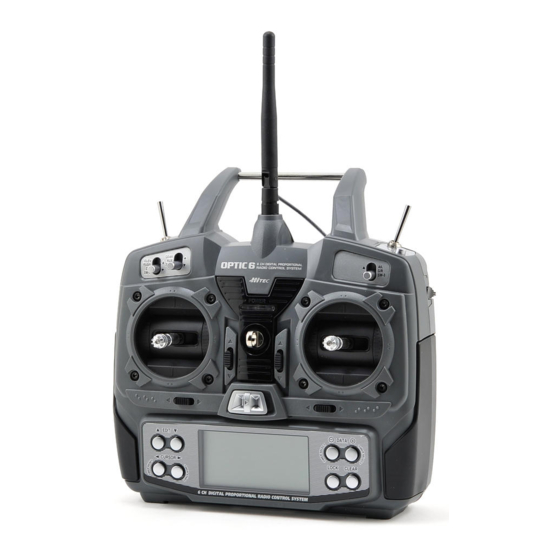
- Page 1 SYSTEM INSTRUCTION MANUAL FM/QPCM Acro / Glider Heli Three in For more information - www.modelflight.com.au...
-
Page 2: Table Of Contents
Table of Contents Airplane Model Function Descriptions Introduction to the Optic System About this manual EPA - End Point Adjust Optic System Options: D/R - Dual Rates Flying Safety EXP - Exponential Airplane Frequencies STRM - Subtrim Settings Radio Installation Notes REV - Servo Reversing T.CUT - Throttle Cut (Engine Kill) Function Notes on Servos... -
Page 3: Introduction To The Optic System
Transmitter and Spectra frequency synthesizer "buddy-box" capability, so that you may connect a second module and overnight wall charger. Hitec transmitter with an optional trainer cord part #58310 for 3. QPCM Version, Item # 158724. Includes four training by an instructor pilot. -
Page 4: Flying Safety
Flying Safety To ensure your own safety and the safety of others, please motor may unexpectedly turn on and cause a severe injury. observe the following precautions: Before starting the engine, fully retract the transmitter antenna, power up the transmitter and receiver, and check to be sure that the servos follow the movement of the sticks. -
Page 5: Airplane Frequencies
Airplane Frequencies The following frequencies and channel numbers may be used for flying aircraft in the U.S. (this information specific to North American versions of the Optic): 72 MHz band Ch.No. Ch.No. Ch.No. Ch.No. 72.010 72.270 72.530 72.790 72.030 72.290 72.550 72.810 72.050... -
Page 6: Connectors
Hitec FM system using the Hitec cord part # 58310. 3. The Hitec cord is specifically marked at one end as the "master" the other end as "student". Plug it accordingly into each transmitter, with power switched off. The trainer jack is To use the trainer cord: on the back of the transmitter. -
Page 7: Other Adjustments
Operating With A Trainer Cord 4. Turn on the instructor's transmitter. DO NOT turn on the student transmitter power. Move the controls on the instructor's transmitter, and verify each control moves the proper direction. Now verify that the student's trims and control travels match the instructor's by using the trainer switch (the momentary Trainer switch on the top left of the transmitter case) and switching back and forth while leaving... -
Page 8: Factory Repair Service
- Your name, address, and telephone number. materials and send it to the nearest authorized Hitec R/C Service Center. Hitec-RCD, Inc. Be sure to include a note in your package that describes the 12115 Paine St. -
Page 9: Transmitter Input Buttons
Transmitter Input Buttons The buttons are used for different things as follows: 1. The Edit buttons allow you to move up and down within the model menus, and move within the regular display. 2. The Cursor Left/Right buttons allow you to select options within a particular function, and control the timer function. -
Page 10: Warning Displays
Transmitter Displays and Messages This screen appears at startup. The model memory number is Pressing the Lock button locks the throttle servo and holds it shown by the small down-arrow. Battery voltage is shown in where you last commanded it. This is a safety feature to be the bottom left, and operating time is on the lower right. -
Page 11: Model Setup Functions
Model Setup Functions This section describes the model setup functions that are used to choose all of the operating features of a particular model memory. These functions are used to select the model memory, the model type (from airplane/glider, and helicopters), set the stopwatch, and other useful functions. -
Page 12: Acgl, Heli - Model Type Select
Model Setup Functions Flashing 6. If you've selected the HELI menu, go to the Swash select menu (see below) and choose the swash type for your model. Destination (Flashing) 7. Press the Up or Down arrow keys to get to another setup menu, or switch power off. -
Page 13: Model Name
7. Press the Right Cursor key to move to the number displays on the right. 3. N represents negative shift and will work with Hitec and 8. Press the +Increase and -Decrease Data keys until you get Futaba . P represents positive shift and will work with to a number that you like. -
Page 14: Modulation - Ppm, Qpcm
If you wish to reset the timer, just press the Left Cursor button. The Modulation function is used to choose what type of receiver you will be using with your Optic system. Hitec has two types of You may then press the Right Cursor button to reset it and receivers, PPM and QPCM. -
Page 15: Rest - Data Reset
Model Setup Functions 4. Press the Up or Down arrow keys to get to another setup and off. (If you're already in the setup menus, you can just menu, or switch power off. press the Up or Down arrow key to get here.) 5. -
Page 16: Simple Transmitter Setup - Aerobatic Airplane (Acgl Menu)
Simple Transmitter Setup - Aerobatic Airplane (ACGL Menu) The following pages will take you step-by-step through the setup process for a sport or aerobatic airplane in the ACGL menu. Going through this complete section will help you learn how to use your system quickly and easily. If you need to set up a helicopter, please refer to the quick setup instructions in the helicopter section. - Page 17 Simple Transmitter Setup - Aerobatic Airplane (ACGL Menu) R for Reversed is chosen when the little triangle is below the 12. Press both Edit keys to get to the regular programming channel number. Move the right-hand stick again and verify menu.
- Page 18 Simple Transmitter Setup - Aerobatic Airplane (ACGL Menu) RIGHT Servo LEFT RIGHT LEFT Pushrod Front View Adjust the clevises on each servo pushrod to get the position of If the rudder moves the wrong direction, move over to Channel each control to be as close as you can to neutral (lined up with 4 by pressing the Cursor Right key.
- Page 19 Simple Transmitter Setup - Aerobatic Airplane (ACGL Menu) 29. For the throttle, we recommend not setting a subtrim at this for elevator and throttle, thus the dual meanings for the time. You will use the trim tab on the transmitter for setting letters).
- Page 20 Simple Transmitter Setup - Aerobatic Airplane (ACGL Menu) 41. To set the FULL throttle position, move the throttle stick all 47. You can use the dual rate function or the exponential the way to the transmitter top and hold it. The letters "R/D" function to reduce the aileron and elevator travel in flight by should appear next to the flashing percent sign.
- Page 21 Simple Transmitter Setup - Aerobatic Airplane (ACGL Menu) 53. Rudder dual rate setting: press the Right Cursor key one 60. Be sure to input a mixing percentage for each side of the time to get the little arrows above or below the numeral 4. elevator stick motion.
-
Page 22: Simple Transmitter Setup - Electric Airplane, 5-Channel Receiver (Acgl Menu)
Simple Transmitter Setup - Aerobatic Airplane (ACGL Menu) up elevator for rudder going both directions. Move the 65. Programmable mixers: now take advantage of your rudder stick to the right and press the Data +Increase until system's advanced custom programming capabilities. You you can see which way the elevator moves;... - Page 23 Simple Transmitter Setup - Electric Airplane, 5-Channel Receiver (ACGL Menu) the left should move downward. Check that the right 5. Press both Edit keys to get to the regular programming aileron moves the correct way! (More planes are crashed menu. The end-point adjust menu (EPA) should appear. due to reversed controls than for any other reason.) Press the Down arrow to get to the aileron differential menu (ADIF).
- Page 24 Simple Transmitter Setup - Electric Airplane, 5-Channel Receiver (ACGL Menu) 16. If the throttle stick operates the speed control the wrong won't run out of subtrim authority. Remove all the arms direction, move over to Channel 3 by pressing the Cursor that are in the way or interfere with your pushrods.
- Page 25 Simple Transmitter Setup - Electric Airplane, 5-Channel Receiver (ACGL Menu) 26. Press one of the Up Down Edit buttons until the CAMB 34. Now, you'll define the mixing percentage. Notice that the window appears, as shown. Activate it using the CLEAR mixer starts with 100% on both sides, which is WAY too button.
-
Page 26: Optic Aircraft Controls And Switch Assignments
Optic Aircraft Controls and Switch Assignments Aux(ch-5:gear) Crow ON/OFF Elevator to Flap Mix Camber mix (Landing mix) Trainer Switch Engine Cut Switch Electric Motor On/Off Elevator / Rudder D/R Aileron Dual Rate Switch FLIP TRIM (ch-6:flap adj) Crow Activate Aileron & Rudder - Elevator Stick Throttle Stick... -
Page 27: Airplane Model Function Descriptions
Airplane Model Function Descriptions EPA - End Point Adjust 4. To set EPA travel for other channels, press the Cursor Right key to select the channel you wish to change. The little The EPA function is used to set (or limit) the travel of each triangle moves and indicates the active channel. -
Page 28: Exp - Exponential
Airplane Model Function Descriptions Setting Exponentials 3. Use the Data +Increase or -Decrease key to choose the amount of dual rate for that switch position. You may set 1. Enter the programming mode by pressing the two Edit Up the travel for both sides of the switch simply by flipping the Down keys (the two keys on the far left) at the same time. -
Page 29: Rev - Servo Reversing
Airplane Model Function Descriptions T.CUT - Throttle Cut (Engine Kill) Function subtrims are large values, the servo's full range of travel may be restricted. The Throttle Cut function provides you an easy way to stop the engine by simply pressing a button with the throttle stick at idle, Setting Subtrims which commands the throttle servo to move a prescribed 1. -
Page 30: Flpt - Flap Travel Function
Airplane Model Function Descriptions 2. Press the CLEAR key to switch between the two possible settings. 3. If you choose the Switch SW-01 control setting, be sure the switch is in the OFF position before you switch on the Aileron Operation airborne system. -
Page 31: Adif - Aileron Differential
Airplane Model Function Descriptions as 0% down, and the ailerons will move up only. 5. If the left (CH6) flaperon moves correctly with aileron stick, This is preferred over reducing the up travel, which reduces go to the next step. Otherwise, change the its travel direction the roll rate. -
Page 32: Camb - Camber Control
Airplane Model Function Descriptions CAMB - Camber Control Setting Up Differential 1. Press one of the Up Down Edit buttons repeatedly to select Your Optic system contains a special mixing function called the ADIF window. To begin with, the function is already "Camber."... -
Page 33: Land - Landing Function
Airplane Model Function Descriptions Setting up Landing function 4. To get to the second aileron travel setting, press the Cursor 1. Use the Edit Up Down arrow keys to select the LAND Right key. The small triangle is now displayed above the numeral 5, indicating the flap channel. -
Page 34: Elvn - Elevon Mixing
Airplane Model Function Descriptions ELVN - Elevon Mixing The Elevon function should be used with delta wings, flying wings, and other tailless aircraft whose layouts combine the aileron and elevator functions, and requires one servo for each elevon. Connect the right elevon to receiver CH1 and the left elevon to CH2. -
Page 35: Vtal - V-Tail Mixing
Airplane Model Function Descriptions VTAL - V-Tail Mixing 5. If the left (CH4) ruddervator moves down with up elevator stick, change the its travel direction by pressing the Cursor V-tail mixing is used with V-tail aircraft so that both elevator Right key (the bottom arrow moves under the 4), the Active/I and rudder functions are combined for the two tail surfaces, nhibit (Clear) key (sets 0%), then press the Data -Decrease... -
Page 36: A->R - Aileron Rudder Mixing
Airplane Model Function Descriptions either the ON indicator or the OFF indicator will be flashing, A->R - Aileron Rudder Mixing depending on the position of the ON-OFF switch that is Aileron-to-rudder mixing is a function that causes the rudder to selected. -
Page 37: Crow - Crow Mixing (Airbrakes)
Airplane Model Function Descriptions drag) occur at "low" slider position (towards the bottom of the transmitter). The selected ON-OFF switch must be ON for ON or OFF depends on Flt. Mode switch Crow to operate. Note: activating CROW automatically turns CH5 setting into a second aileron servo, and CH6 becomes a flap servo commanded by the Right... -
Page 38: Pmx1, Pmx2 - Programmable Mixes 1 And 2
Airplane Model Function Descriptions 5. Now press the Cursor right key one time to get to the Caution: when setting up crow, do not call for too much aileron "up" elevator setting menu (a small arrow will appear over the travel, or you'll lose roll authority, and this occurs at a crucial number 2 in the display). -
Page 39: S/W Sel - Switch Selection For Auxiliary Functions
Airplane Model Function Descriptions Choosing The On-Off Switch For Certain Radio Functions Master Slave 1. Call up the Switch Select screen by repeatedly pressing one of the Edit Up Down keys until the highlighted words S/W SEL appear. The window may appear with any of the following displayed: A->R, E->F, CAMB, CROW, LAND, PMX1, and PMX2. - Page 40 Airplane Model Function Descriptions 7. If the elevator servo plugged into CH5 goes the correct 3. Move the stick to command aileron. In addition to the aileron direction with aileron stick, go to the next step. Otherwise, servo(s), both elevator servos should move. They may move press the Cursor Right key to get to the AIL->CH5 setting in opposite directions (as they should) or the same direction menu, then press the Data +Increase or -Decrease keys to...
-
Page 41: Fail - Failsafe Function
Setting Up the FAILSAFE Function QPCM Operation Note: The OPTIC 6 QPCM is NOT compatible with Hitec's older HPD-07RB PCM receivers and must be used with Hitec's 5. The default position has the failsafe feature inhibited. - Page 42 Aircraft Flight Trimming Chart To test for... Test Procedure Observations Adjustments Check the response of each control 2. Control Fly the model and apply full Change EPA (for high rates), throws deflection of each control in and Dual Rate settings (for - Aileron high-rate: 3 rolls in 4 seconds;...
- Page 43 Aircraft Flight Trimming Chart To test for... Test Procedure Observations Adjustments A. No heading changes 9. Aileron Method 1: fly model toward A. Differential settings OK differential you & pull into a vertical B. Increase differential B. Heading change opposite to roll climb before it reaches you.
-
Page 44: Optic Helicopter (Heli) Programming
Optic Helicopter (HELI) Programming This section describes how to use the Optic helicopter functions (model type HELI). Descriptions of the other functions, such as endpoints, dual rates, expo, etc., are contained in the aircraft (ACGL) section. The HELI menu provides three flight conditions in addition to the normal one (NOR). ST1 may be used for forward flight and mild aerobatics, ST2 may be used for inverted, and ST3 is used for autorotations. -
Page 45: Optic Helicopter Controls And Switch Assignments
Optic Helicopter Controls and Switch Assignments Gyro Switch (ch-5) Idle-up 1 and 2 NOR or Hover Switch Trainer Switch Engine Cut Switch Throttle hold Switch Aileron Dual Elevator / Rudder D/R Rate Switch Hovering Hovering Pitch Volume Throttle Volume Aileron & Rudder - Elevator Stick Throttle Stick... -
Page 46: Helicopter Setup Instructions
Helicopter Setup Instructions The following example shows how the Optic may be programmed for a helicopter model. Your model's settings will be dependent on the setup and linkages. If you're not sure about the settings for your particular model, please ask an experienced pilot for assistance. The helicopter setup procedure presented below uses a WARNING: selecting a different model type will erase the settings in standard helicopter setup, one servo each for ailerons and... - Page 47 Helicopter Setup Instructions 9. Set the stopwatch. Press the Down arrow four times. This Right Aileron: gets you into the Timer menu (TIME). Use the Data Increase swashplate tilted and Decrease keys to select the amount of time you want the towards chopper's LEFT RIGHT...
- Page 48 Helicopter Setup Instructions 16. Collective Pitch. The blade collective pitch angle Your model's instructions may provide suggested values for the blade pitch angles. If not, you may want to start with the (controlled by CH6 on a conventional helicopter) should following: vary from -2°...
-
Page 49: Menu Descriptions - Helicopter
Helicopter Setup Instructions 24. Throttle Hold Setting. Throttle hold (HOLD) commands the - ST2: ON when FLT MODE Switch is AFT. throttle to a preset position near idle and disconnects it - ST3: ON when ELEV RUDD D/R, SW-1 Switch is down. from pitch when activated. -
Page 50: R->T - Rudder Throttle Mixing
Menu Descriptions - Helicopter As these functions are switched on or off, ST3 = HOLD has R->T - Rudder Throttle Mixing highest priority, followed by ST2 and ST1. Regular settings Rudder Throttle (R->T) mixing is used to maintain rotor (NOR) occur when all of the others are off. You can see which speed so that altitude is kept constant when the rudder stick is condition your transmitter is currently in by viewing the display. -
Page 51: Gyro - Gyro Settings
Menu Descriptions - Helicopter Setting Up Throttle Hold GYRO - Gyro settings 1. Press one of the Up Down Edit buttons until the H0LD Gyro settings are used to automatically control the gyro's gain window appears. The default is for the function to be in different flight modes. -
Page 52: Thcv - Throttle Curve
Menu Descriptions - Helicopter Setting Up The Throttle Curve THCV - Throttle Curve The throttle & pitch curves are tied to the position of the 1. Press one of the Up Down Edit buttons until the THCV collective stick, and are specified at five points labeled 1 window appears. -
Page 53: Ptcv - Pitch Curve
Menu Descriptions - Helicopter S/W SEL - PTCV - Pitch Curve Switch Selection For Auxiliary Functions Like the throttle curve described previously, pitch curves are tied to the position of the throttle collective stick, and are Your Optic system allows you customize your radio and choose specified at five points labeled 1 through 5 below. -
Page 54: Rvmx - Revolution Mixing
Menu Descriptions - Helicopter ° SWAH - Swashplate adjust (120 swash only) RVMX - Revolution mixing The swashplate menu is intended only for helicopters whose The revolution mixing function mixes pitch commands into collective pitch is controlled by more than a single servo at a rudder (pitch rudder) in order to suppress the torque time, and is sometimes referred to as CCPM (Collective &... -
Page 55: Hovering Throttle Adjustment Lever (Pilot Control)
Menu Descriptions - Helicopter Hovering Throttle Adjustment Lever (Pilot Control) 4. Call up the swash screen by repeatedly pressing one of the Up Down Edit buttons until the SWAH window appears. The Hovering Throttle lever may be used to adjust the throttle The function is automatically active when you select 120' servo's position around hover without affecting main rotor pitch. -
Page 56: Helicopter Flight Trimming Chart
Helicopter Flight Trimming Chart This procedure assumes helicopter is trimmed for hovering. Trimming must be done in near-calm conditions. Repeat tests several times before making adjustments. If any changes are made, go back over the previous steps and verify, or further adjust as necessary. To test for... -
Page 57: Glossary
GLOSSARY The abbreviations used with the Optic are defined below alphabetically. Related pages are given in parenthesis following the definition. Master channel in mixer (38) ACGL Acrobatic/Glider aircraft menu (15) ADIF Aileron differential. Ailerons move more to one M.SEL Model select menu (11) side than other (31) AILV Differential elevator servos, for 3-D aerobatics (39) -
Page 58: Acgl Model Data Recording Sheet
ACGL Model Data Recording Sheet Make copies before using Model Name ___ ___ ___ ___ -__ __ __ Memory No. 1 . 2 . 3 . 4 . 5 . 6 . 7 . 8 MENU FUNCTION CH 1 CH 2 CH 3 CH 4 CH 5... -
Page 59: Heli Model Data Recording Sheet
HELI Model Data Recording Sheet Make copies before using Model Name ___ ___ ___ ___ -__ __ __ Memory No. 1 . 2 . 3 . 4 . 5 . 6 . 7 . 8 MENU FUNCTION CH 1 CH 2 CH 3 CH 4 CH 5... - Page 60 Futaba is a registered trademark of the Futaba Corporation. Airtronics is a registered trademark of the Sanwa corporation. JR is a registered trademark of the JR corporation. Multiplex is a registered trademark of the Multiplex corporation. Made in the Philippines English manual For more information - www.modelflight.com.au...
Need help?
Do you have a question about the OPTIC 6 and is the answer not in the manual?
Questions and answers