Table of Contents
Advertisement
Quick Links
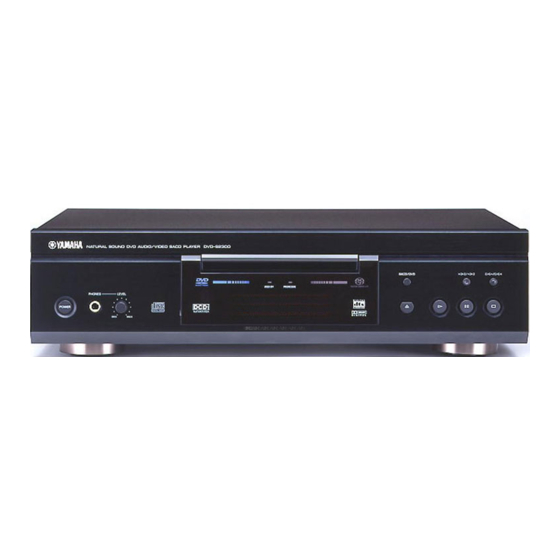
DVD AUDIO/VIDEO SACD PLAYER
DVD-S2300
This manual has been provided for the use of authorized YAMAHA Retailers and their service personnel.
It has been assumed that basic service procedures inherent to the industry, and more specifically YAMAHA Products, are already
known and understood by the users, and have therefore not been restated.
WARNING:
IMPORTANT:
The data provided is believed to be accurate and applicable to the unit(s) indicated on the cover. The research, engineering, and
service departments of YAMAHA are continually striving to improve YAMAHA products. Modifications are, therefore, inevitable
and specifications are subject to change without notice or obligation to retrofit. Should any discrepancy appear to exist, please
contact the distributor's Service Division.
WARNING:
IMPORTANT:
CONTENTS
TO SERVICE PERSONNEL .......................................... 2
LOCALE MANAGEMENT INFORMATION ................... 4
FRONT PANELS ............................................................ 5
REMOTE CONTROL PANELS ...................................... 5
REAR PANELS .............................................................. 6
SPECIFICATIONS .......................................................... 7
INTERNAL VIEW ........................................................... 8
1 0 0 8 2 6
SERVICE MANUAL
IMPORTANT NOTICE
Failure to follow appropriate service and safety procedures when servicing this product may result in personal
injury, destruction of expensive components, and failure of the product to perform as specified. For these reasons,
we advise all YAMAHA product owners that any service required should be performed by an authorized
YAMAHA Retailer or the appointed service representative.
The presentation or sale of this manual to any individual or firm does not constitute authorization, certification or
recognition of any applicable technical capabilities, or establish a principle-agent relationship of any form.
Static discharges can destroy expensive components. Discharge any static electricity your body may have
accumulated by grounding yourself to the ground buss in the unit (heavy gauge black wires connect to this buss).
Turn the unit OFF during disassembly and part replacement. Recheck all work before you apply power to the unit.
DISPLAY DATA ..................................................... 40~41
IC DATA ................................................................. 42~43
PIN CONNECTION DIAGRAM .................................... 44
PRINTED CIRCUIT BOARD .................................. 45~53
BLOCK DIAGRAM ................................................. 54~55
.............. 9~15
SCHEMATIC DIAGRAM ........................................ 56~76
16~17
PARTS LIST ......................................................... 77~104
REMOTE CONTROL .................................................. 105
18~24
25~35
36~39
P.O.Box 1, Hamamatsu, Japan
Advertisement
Table of Contents

Related Manuals for Yamaha DVD-S2300


Summary of Contents for Yamaha DVD-S2300
-
Page 1: Table Of Contents
This manual has been provided for the use of authorized YAMAHA Retailers and their service personnel. It has been assumed that basic service procedures inherent to the industry, and more specifically YAMAHA Products, are already known and understood by the users, and have therefore not been restated. -
Page 2: To Service Personnel
DVD-S2300 TO SERVICE PERSONNEL 1. Critical Components Information AC LEAKAGE Components having special characteristics are marked s WALL EQUIPMENT TESTER OR and must be replaced with parts having specifications equal OUTLET UNDER TEST EQUIVALENT to those originally installed. 2. Leakage Current Measurement (For 120V Models Only) - Page 3 DVD-S2300 Laser Diode Properties Type: Semiconductor laser GaAlAs Wave length: 658 nm (DVD) 790 nm (VCD/CD) Output Power: CLASS IIa 1mW (DVD) CLASS I 1mW (VCD/CD) VARO! : AVATTAESSA JA SUOJALUKITUS OHITETTAESSA OLET ALTTIINA NÄKYMÄTTÖMÄLLE LASER- SÄTEILYLLE. ÄLÄ KATSO SÄTEESEEN.
-
Page 4: Prevention Of Electro Static Discharge
DVD-S2300 PREVENTION OF ELECTRO STATIC DISCHARGE The laser diode in the traverse unit (optical pickup) may be damaged due to static electricity from clothes or the human body. Use caution to prevent electrostatic damage when servicing or handling the laser diode. -
Page 5: Front Panels
DVD-S2300 FRONT PANELS U, J models A, B, G models REMOTE CONTROL PANELS U, J models A, B, G models... -
Page 6: Rear Panels
DVD-S2300 REAR PANELS U model A model B, G models J model... -
Page 7: Specifications
DVD-S2300 SPECIFICATIONS Output Level / SACD/DVD/VIDEO CD/CD-DA (1kHz 0dB) ....2 V ± 0.3 V Signal to Noise Ratio / Manufactured under license from Dolby Laboratories. SACD/DVD/VIDEO CD/CD-DA ......... 115 dB “Dolby”, “Pro Logic” and the double-D symbol are trademarks of Dynamic Range / Dolby Laboratories. -
Page 8: Internal View
DVD-S2300 INTERNAL VIEW 1 MAIN (4) P.C.B. 2 AUDIO (2) P.C.B. 3 MAIN (6) P.C.B. (B, G models only) 4 MAIN (1) P.C.B. 5 AUDIO (1) P.C.B. 6 MAIN (5) P.C.B. 7 MAIN (3) P.C.B. 8 TERMINAL P.C.B. 9 DVD Mechanism 0 DVD Module P.C.B. -
Page 9: Disassembly Procedure
DVD-S2300 DISASSEMBLY PROCEDURE (Remove parts in the order as numbered.) Disconnect the power cable from the AC outlet. 1. Removal of Top Cover a. Remove 4 screws (1) and 3 screws (2). (Fig. 1) b. Remove the top cover rearward while lifting it up. (Fig. 1) 2. - Page 10 DVD-S2300 3. Removal of Tray Lid a. Remove the gear for opening the tray from the DVD- Mechanism and install it onto a screwdriver to make a gear jig. (Fig. 2) b. Insert the gear jig into the tray open/close hole. (Fig. 3) 3.
- Page 11 DVD-S2300 4. Removal of DVD-Mechanism a. Disconnect the connectors CB1 and CB6. (Fig. 5) a. Remove 4 screws (5). (Fig. 5) b. Remove the DVD-Mechanism. (Fig. 5) 5. Removal of Front Panel Unit a. Remove 4 screws (6) and 1 screws (7). (Fig. 6) b.
- Page 12 DVD-S2300 6. Removal of AUDIO P.C.B. a. Disconnect the connectors CB301, CB302, CB303 and CB304. (Fig. 8) b. Remove 4 screws (9). (Fig. 7) c. Remove 2 screws (0) and then remove the AUDIO (1) P.C.B. (Fig. 8) 7. Removal of SACD P.C.B.
- Page 13 DVD-S2300 9. Removal of DVD Module P.C.B. Remove the DVD module P.C.B. with the tip of the 4 support pinched with pliers or the like. (Fig. 10) 10.Removal of MAIN P.C.B. a. Disconnect the connectors CB606, CB608 and CB609. (Fig. 11) b.
- Page 14 DVD-S2300 Checking the SACD P.C.B. • After removing the top cover and inner cover, remove the SACD P.C.B. Set the SACD P.C.B. upright with its right side upward. (Fig. 12) • Replace the cables connected to the SACD P.C.B. with the following extension cables for servicing.
- Page 15 DVD-S2300 Checking the MODULE P.C.B. • With the top cover, inner cover and support/P.C.B. removed, spread cloth over the MAIN P.C.B. and place the AUDIO P.C.B. on it. Set the SACD P.C.B. and MODULE P.C.B. with their right side upward. (Fig. 14) •...
-
Page 16: Optical Pickup Self-Diagnosis And Replacement Procedure
DVD-S2300 OPTICAL PICKUP SELF-DIAGNOSIS AND REPLACEMENT PROCEDURE 1. Self-diagnosis An optical pickup self-diagnosis function and tilt adjustment check function have been included in this unit. When repairing, use the following procedure for effective Self-diagnosis and tilt adjustment. Be sure to use the self-diagnosis function before replacing the optical pickup when "NO DISC"... - Page 17 DVD-S2300...
-
Page 18: Service Mode And Self-Diagnosis Function
DVD-S2300 SERVICE MODE AND SELF-DIAGNOSIS FUNCTION 1. Service Mode a. Turn on the POWER switch. b. Press the SACD/DVD button to set to the DVD mode, and the DVD mode indicator lights up. c. It is possible to use the following service modes, using the buttons on the player and the remote control unit in combination. - Page 19 DVD-S2300 ↑ ↑ ↑ ↑ ↑ ↑↑ ↑ ↑ ↑ ↑ ↑ ↑ ↑...
- Page 20 DVD-S2300 Player mode and Cancellation Item Function Display button combination method CD laser In STOP mode, press CD laser drive current is LDC_028_026 Cancelled ↑ ↑ ↑ drive current " " and " " measured and the result is automatically 5 measurement buttons on the player, displayed together with the initial seconds later.
- Page 21 DVD-S2300 ↑ ↑ ↑ " "...
-
Page 22: Test Mode
DVD-S2300 3. Test Mode • Starting Test Mode a. Turn on the POWER switch. b. Press the SACD/DVD button to set to the SACD mode, and the SACD mode indicator lights up. c. Press the " "+" " buttons on the player and the "PLAY" button on the remote control unit, and the test mode is started. - Page 23 DVD-S2300 4. Service Precautions 4.1. Recovery After the DVD Player is Repaired When the DVD module P.C.B., or a FROM or an EEPROM on the DVD module P.C.B. has been replaced, carry out the recovery disc procedure to optimize the drive.
- Page 24 DVD-S2300 6. Error Code Description of error Supplementary explanation Faulty point 1 Faulty point 2 Faulty point 3 Faulty point 4 L. H error U11 Focus error H01 Tray loading error ( Spindle servo, DSC SP motor, CLV servo error)
-
Page 25: Assembling And Disassembling The Mechanism Unit
DVD-S2300 ASSEMBLING AND DISASSEMBLING THE MECHANISM UNIT 1. Disassembly Procedure... - Page 26 DVD-S2300 2. Terminal P.C.B. 1. Remove the screws. 2. Remove the solder from the motor connections. 3. Remove the connectors. 3. Clamp Plate Unit Spread the stopper with hand to slide the tabs and remove the clamp plate unit.
- Page 27 DVD-S2300 4. Tray Lift the tray. <Precautions in Reassembling the Tray> • Reassemble the tray so that it is in the backmost position. 1. Turn traverse gear until cam gear lever comes to the lever adjusting position at the end of the mechanical chassis unit.
- Page 28 DVD-S2300 a. Place the tray on the unit from rearward. b. Inch the tray frontward until convex phase and concave phase mate. Caution: Make sure to mate convex phase and concave phase properly, so that the gap between turntable and tray...
- Page 29 DVD-S2300 5. Traverse Block 1. Lift the traverse block while spreading the hook of the mechanical chassis unit. 2. Disengage the tabs from the holes of the mechanical chassis unit. <Precautions in Reassembling the Traverse Block> • Take the following precautions when reassembling the traverse block.
- Page 30 DVD-S2300 6. Traverse Gear B, C 1. Disengage the tabs from the traverse gear. 2. Remove the traverse gears B and C. 7. Optical Pickup Unit 1. Remove the screws. 2. Remove the spring holders and the springs. 3. Pull out the drive shaft and guide shaft.
- Page 31 DVD-S2300 7.1 Precautions in Optical Pickup Replacement The optical pickup can be damaged by static electricity from your body. Be sure to take static electricity countermeasures when working around the optical pickup. (Refer to the related page in this Manual about the countermeasures.)
- Page 32 DVD-S2300 7.2 Disassembling the Optical Pickup Unit 1. Remove 2 screws (A) and remove the TRV feed rack. 2. Remove the screw (B) and remove the Terminal FPC. 3. Remove the optical pickup. 7.3Cautions to Be Taken When Replacing the...
- Page 33 DVD-S2300 3. Install the optical pickup unit, spring drive shaft, guide shaft, rubber cushion, and spring holder on the traverse block. At this time, make sure that the optical pickup unit is installed at the rear end of the guide shaft.
- Page 34 DVD-S2300 4. Cut the antistatic flexible sheet for the optical pickup unit.
- Page 35 DVD-S2300 8. Disassembling the Middle Chassis 1. Remove the holder pins. 2. Remove the tab. 3. It lifts while pulling it in the direction of the arrow. 9. Disassembling the Traverse Gear A/FG unit 1. Remove the screw. 2. Remove the traverse gear A.
-
Page 36: Optical Pickup Tilt Adjustment
DVD-S2300 OPTICAL PICKUP TILT ADJUSTMENT / Adjustment point Tangential adjustment screw, Tilt adjustment screw Mode T01 (inner periphery) play, T43 (outer periphery) play Disc DVDT-S15 (AAX07320) or DVDT-S01 Measuring equipment None (Use main unit servicing display.) Adjustment value Adjust to the minimum jitter value. - Page 37 DVD-S2300 9. Adjust tilt adjustment screw 2 so that the jitter value is minimized. 10. Repeat adjusting tilt adjustment screws 1 and 2 alternately until the jitter value is minimized. 3. Important Points 1. Make tangential adjustment first, and then make tilt adjustment.
- Page 38 DVD-S2300 5. Procedure for Screw Lock 1. After adjustment, remove the top cover, tray, clamper base and traverse unit in this sequence. 2. Lay the traverse unit upside down and lock the adjustment screw with screw lock. 3. After locking, reassemble the traverse unit, clamper base, tray and top cover.
- Page 39 DVD-S2300 2. Video Output (Chrominance Signal) Confirmation Screwdriver, 779 mVp-p ± 40mV 200mV/div 10µsec/div Purpose: To maintain video signal output compatibility. 1. Connect the oscilloscope to the S-video output C terminal and terminate at 75 ohms. 2. Confirmation that the Magenta level is 779 mVp-p ± 40...
-
Page 40: Display Data
DVD-S2300 DISPLAY DATA V701: 14-BT-77GN (V9910400) LEAD DETAILS ™ PIN CONNECTION Pin No. Connection Pin No. Connection Note : 1) F1, F2 ..Filament 5) DL ..Datum Line 2) NP ..No pin 6) 1G~14G ..Grid 3) NX .. - Page 41 DVD-S2300 ANODE CONNECTION SACD PROG RNDM AUDIO VIDEO TEXT ARTIST MPEG MULTI GROUP TITLE TRACK CHAP – PAGE – ANGLE – D. MIX – – – – – – – – – – – – – – – – –...
-
Page 42: Ic Data
DVD-S2300 IC DATA IC40: MN102HF60G (SACD P.C.B.) PANEL CPU... - Page 43 DVD-S2300 IC40: MN102HF60G (SACD P.C.B.) PANEL CPU...
-
Page 44: Pin Connection Diagram
DVD-S2300 PIN CONNECTION DIAGRAM • ICs NJM7909FA BA5823FM PQ05RD21 74VHC595SJX PQ018EZ01ZP BA7660FS-E2 PQ09RD11 PQ033EZ01ZP M5290FP SN74LV4053APWR TC74HC4053AF 3: COM 1: OUT 2: IN µPC4570HA AT25010 TC7W53FU K4S161622D-TC80 M51951BHP LMH6643MAX TC7W74F NJM4558M-D TC7WH74FU NJM5532M TC7WU04F NJU7015V TC7WU04FU OPA2134UA/2K5 ON3131 74LCX07MTCX 74VHCT245AMTCX... -
Page 45: Printed Circuit Board
DVD-S2300 PRINTED CIRCUIT BOARD • U, J models • U, J models DVD MODULE P. C. B. (Foil side) DVD MODULE P. C. B. (Component side) MAIN ( 1 ) SACD... - Page 46 DVD-S2300 PRINTED CIRCUIT BOARD • A, B, G models • A, B, G models DVD MODULE P. C. B. (Component side) DVD MODULE P. C. B. (Foil side) MAIN ( 1 ) SACD...
- Page 47 DVD-S2300 PRINTED CIRCUIT BOARD MAIN (2) MAIN (1) SACD P. C. B. (Component side) SACD P. C. B. (Foil side) TERMINAL TRV1 TRV2 INSW1 PIN(CD) T2(CD) FE2(CD) VREF2.2V(CD) T1(CD) LD+(CD) VCC5V TS(DVD) TC(DVD) TD(DVD) TA(DVD) VREF2.2V(DVD) PIN(DVD) GAINH/L F2(DVD) F1(DVD) LD+(DVD) 3.3VHFM...
- Page 48 DVD-S2300 PRINTED CIRCUIT BOARD AUDIO P. C. B. (1) (Component side) MAIN (1) SACD • Semiconductor Location Ref. No. Location D304 D305 DAC_CLK M_MUTE DGND ADACGND PHREF0 D306 DVD_DMR BCKA0 ADACGND DSADML DVD_DML DSADMR D307 ADACGND ZDF_DM DVD_FR DSAL ADACGND...
- Page 49 DVD-S2300 PRINTED CIRCUIT BOARD AUDIO P. C. B. (1) (Foil side) • Semiconductor Location Ref. No. Location D301 D302 D303 D314 D315 D651 D652 IC320 IC321 IC322 IC323 IC326 IC327 IC332 Q307 Q308 AUDIO P. C. B. (2) (Foil side)
- Page 50 DVD-S2300 PRINTED CIRCUIT BOARD MAIN P. C. B. (1) (Component side) (B, G models only) HPIN-L MAIN (6) AUDIO (1) Power Transformer Power Transformer HPIN-R AUDIO (2) AOUT_L MAIN (3) • Semiconductor Location AOUT_R PGND Ref. No. Location PGND D606...
- Page 51 DVD-S2300 PRINTED CIRCUIT BOARD MAIN P. C. B. (1) (Foil side) • Semiconductor Location Ref. No. Location D601 D602 D603 D604 D605 D608 D615 D616 IC502 IC504 IC505 IC506 IC601 IC603 IC607 IC611 IC612 IC613 Q501 Q502 Q503 Q504 Q505...
- Page 52 DVD-S2300 PRINTED CIRCUIT BOARD MAIN P. C. B. (4) (Component side) MAIN P. C. B. (3) (Component side) MAIN P. C. B. (6) (Component side) (B, G models only) AC IN MAIN (1) VOUT YOUT COUT SEL_WIDE SEL_RGB SACD_MUTE BLK_I/O...
- Page 53 DVD-S2300 PRINTED CIRCUIT BOARD MAIN P. C. B. (3) (Foil side) MAIN P. C. B. (6) (Foil side) (B, G models only) • Semiconductor Location Ref. No. Location D901 D902 IC701 IC901 IC902 IC904 Q701 Q702 Q703 Q704 Q901 Q902...
-
Page 54: Block Diagram
DVD-S2300 BLOCK DIAGRAM... - Page 55 BLOCK DIAGRAM DVD-S2300 IC13 IC750 HEAD PHONE PCB_SACD PCB_AUDIO TO LD+_DVD LD POWER 56 69 See page 56 See page 57 CONTROL FGENB POWER IC12 NARF TO LD+_CD LD POWER CONTROL TRV1 31 30 TRV2 AOUT_L IC327 INSW1 BUFFER AOUT_R...
- Page 56 DVD-S2300 SCHEMATIC DIAGRAM (SACD) IC64: 74VHC175MTCX IC41: PST596JNR Quad D-Type Flip-Flop Reset Signal Generator MR CP D3 Page 76 to TERMINAL Page 61 (U, J models) Page 69 (A, B, G models) to DVD MODULE 1.6 1.6 -4.9 -4.7 IC61, 66: TC7SU04F...
- Page 57 SCHEMATIC DIAGRAM (AUDIO) DVD-S2300 IC302, 303, 304, 305 : AD1955ARS Page 59 to MAIN (1) -8.1 -0.9 -0.1 -0.2 IC332, 603 : M51951BHP -0.7 -8.0 System Reset -8.1 -8.0 OUTPUT -0.7 – – -8.1 -8.1 -0.2 -0.2 1.25V -0.7 Page 56 -8.1...
- Page 58 DVD-S2300 SCHEMATIC DIAGRAM (MAIN 1/3) IC502: BH7862FS 6 ch Video Driver Page 57 Page 56 to AUDIO (1) to SACD CTRAP 75ohm COUT MUTE1 MUTE1 TEST TEST 1.5-6M MIXOUT 75ohm MIXFB YTRAP CLAMP CLAMP PYIN 75ohm YOUT PYTRAP 75ohm PYOUT...
- Page 59 SCHEMATIC DIAGRAM (MAIN 2/3) DVD-S2300 IC601 : S-808XXANNP Reset Signal Generator VREF 12.4 12.1 12.3 IC603 : M51951BHP System Reset 11.9 11.4 OUTPUT – – 1.25V IC605, 606: PQ05RD21 IC608: PQ09RD11 Regulator Page 57 to AUDIO (1) IC612 : 74VHC595SJX...
- Page 60 DVD-S2300 SCHEMATIC DIAGRAM (MAIN 3/3) Page 59 to AUDIO (1) -22.3 -18.7 Page 56 -18.7 -18.7 -18.7 to SACD -22.3 -24.3 -24.3 -24.3 -24.3 -24.3 -24.3 -22.5 -22.5 -22.5 -22.4 -24.3 -0.7 -0.8 -18.7 -18.7 -18.7 -18.7 IC701: M66003-0101FP FL Display Driver...
-
Page 61: Schematic Diagram
DVD-S2300 SCHEMATIC DIAGRAM (MODULE P.C.B. (1/8): FEP SECTION) U, J models Page 56 to SACD... - Page 62 DVD-S2300 SCHEMATIC DIAGRAM (MODULE P.C.B. (2/8): SODC + DRV SECTION) U, J models...
- Page 63 DVD-S2300 SCHEMATIC DIAGRAM (MODULE P.C.B. (3/8): AVDEC SECTION) U, J models...
- Page 64 DVD-S2300 SCHEMATIC DIAGRAM (MODULE P.C.B. (4/8): PROGRESSIVE SECTION) U, J models...
- Page 65 DVD-S2300 SCHEMATIC DIAGRAM (MODULE P.C.B. (5/8): VIDEO DAC SECTION) U, J models Page 58 to MAIN (1)
- Page 66 DVD-S2300 SCHEMATIC DIAGRAM (MODULE P.C.B. (6/8): AUDIO DAC SECTION) U, J models Page 58 to MAIN (1)
- Page 67 DVD-S2300 SCHEMATIC DIAGRAM (MODULE P.C.B. (7/8): WM SECTION) U, J models From From From...
- Page 68 DVD-S2300 SCHEMATIC DIAGRAM (MODULE P.C.B. (8/8): CPU SECTION) U, J models...
- Page 69 DVD-S2300 SCHEMATIC DIAGRAM (MODULE P.C.B. (1/7): FEP SECTION) A, B, G models Page 56 to SACD...
- Page 70 DVD-S2300 SCHEMATIC DIAGRAM (MODULE P.C.B. (2/7): SODC SECTION) A, B, G models...
- Page 71 DVD-S2300 SCHEMATIC DIAGRAM (MODULE P.C.B. (3/7): AVDEC SECTION) A, B, G models...
- Page 72 DVD-S2300 SCHEMATIC DIAGRAM (MODULE P.C.B. (4/7): VIDEO DAC SECTION) A, B, G models Page 58 to MAIN (1)
- Page 73 DVD-S2300 SCHEMATIC DIAGRAM (MODULE P.C.B. (5/7): AUDIO DAC SECTION) A, B, G models Page 58 to MAIN (1)
- Page 74 DVD-S2300 SCHEMATIC DIAGRAM (MODULE P.C.B. (6/7): WM SECTION) A, B, G models...
- Page 75 DVD-S2300 SCHEMATIC DIAGRAM (MODULE P.C.B. (7/7): CPU SECTION) A, B, G models...
- Page 76 DVD-S2300 SCHEMATIC DIAGRAM (TERMINAL P.C.B.) Page 56 to SACD...
-
Page 77: Parts List
DVD-S2300 PARTS LIST ELECTRICAL PARTS WARNING Components having special characteristics are marked s and must be replaced with parts having specifications equal to those originally installed. ABBREVIATIONS IN THIS LIST ARE AS FOLLOWS: C.A.EL.CHP : CHIP ALUMI.ELECTROLYTIC CAP L.EMIT : LIGHT EMITTING MODULE C.CE... - Page 78 DVD-S2300 P.C.B. SACD New Parts Note) Those parts marked with “#” are not included in the P.C.B. ass’y.
- Page 79 DVD-S2300 P.C.B. SACD New Parts Note) Those parts marked with “#” are not included in the P.C.B. ass’y.
- Page 80 DVD-S2300 P.C.B. SACD New Parts Note) Those parts marked with “#” are not included in the P.C.B. ass’y.
- Page 81 DVD-S2300 P.C.B. SACD New Parts Note) Those parts marked with “#” are not included in the P.C.B. ass’y.
- Page 82 DVD-S2300 P.C.B. SACD New Parts Note) Those parts marked with “#” are not included in the P.C.B. ass’y.
- Page 83 DVD-S2300 P.C.B. SACD New Parts Note) Those parts marked with “#” are not included in the P.C.B. ass’y.
- Page 84 DVD-S2300 P.C.B. SACD & P.C.B. AUDIO New Parts Note) Those parts marked with “#” are not included in the P.C.B. ass’y.
- Page 85 DVD-S2300 P.C.B. AUDIO New Parts Note) Those parts marked with “#” are not included in the P.C.B. ass’y.
- Page 86 DVD-S2300 P.C.B. AUDIO New Parts Note) Those parts marked with “#” are not included in the P.C.B. ass’y.
- Page 87 DVD-S2300 P.C.B. AUDIO New Parts Note) Those parts marked with “#” are not included in the P.C.B. ass’y.
- Page 88 DVD-S2300 P.C.B. AUDIO New Parts Note) Those parts marked with “#” are not included in the P.C.B. ass’y.
- Page 89 DVD-S2300 P.C.B. AUDIO New Parts Note) Those parts marked with “#” are not included in the P.C.B. ass’y.
- Page 90 DVD-S2300 P.C.B. AUDIO & P.C.B. MAIN New Parts Note) Those parts marked with “#” are not included in the P.C.B. ass’y.
- Page 91 DVD-S2300 P.C.B. MAIN New Parts Note) Those parts marked with “#” are not included in the P.C.B. ass’y.
- Page 92 DVD-S2300 P.C.B. MAIN New Parts Note) Those parts marked with “#” are not included in the P.C.B. ass’y.
- Page 93 DVD-S2300 P.C.B. MAIN New Parts Note) Those parts marked with “#” are not included in the P.C.B. ass’y.
- Page 94 DVD-S2300 P.C.B. MAIN New Parts Note) Those parts marked with “#” are not included in the P.C.B. ass’y.
- Page 95 DVD-S2300 P.C.B. MAIN New Parts Note) Those parts marked with “#” are not included in the P.C.B. ass’y.
- Page 96 DVD-S2300 P.C.B. MAIN & DVD MODULE New Parts Note) Those parts marked with “#” are not included in the P.C.B. ass’y.
- Page 97 DVD-S2300 P.C.B. DVD MODULE New Parts Note) Those parts marked with “#” are not included in the P.C.B. ass’y.
- Page 98 DVD-S2300 P.C.B. DVD MODULE New Parts Note) Those parts marked with “#” are not included in the P.C.B. ass’y.
- Page 99 DVD-S2300 P.C.B. DVD MODULE New Parts Note) Those parts marked with “#” are not included in the P.C.B. ass’y.
- Page 100 DVD-S2300 Chip Resistors New Parts Note) Those parts marked with “#” are not included in the P.C.B. ass’y.
- Page 101 DVD-S2300 Chip Resistors New Parts Note) Those parts marked with “#” are not included in the P.C.B. ass’y.
- Page 102 DVD-S2300 EXPLODED VIEW MECHANICAL PARTS 1-23 1-26 5 (5) 1-26 5-L700 1-15 5 (3) 1-26 1-26 1-26 1-14 1-13 1-26 1-12 1-25 A, B models U, G, J models 1-26 6-11 1-17 1-14 B, G models 1-24 1-19 1-20 1-11...
- Page 103 DVD-S2300 New Parts New Parts Note) Those parts marked with “#” are not included in the P.C.B. ass’y. Note) Those parts marked with “#” are not included in the P.C.B. ass’y.
- Page 104 DVD-S2300 DVD-MECHANISM EXPLODED VIEW DVD-MECHANISM PARTS New Parts Note) Those parts marked with “#” are not included in the P.C.B. ass’y.
-
Page 105: Remote Control
DVD-S2300 REMOTE CONTROL • Schematic Diagram • Custom Code (HEX): 7C • Data Code Key No. Function Data Code (HEX) SACD/DVD LED1 PLAY MODE SUBTITLE TOP MENU 47µF KI/06 KI/05 KI/07 KI/04 2.2Ω KI/03 ON SCREEN S1/LED KI/02 STOP a KI/01 180Ω... - Page 106 DVD-S2300...