
Related Manuals for Yamaha DVD-S2300


Summary of Contents for Yamaha DVD-S2300
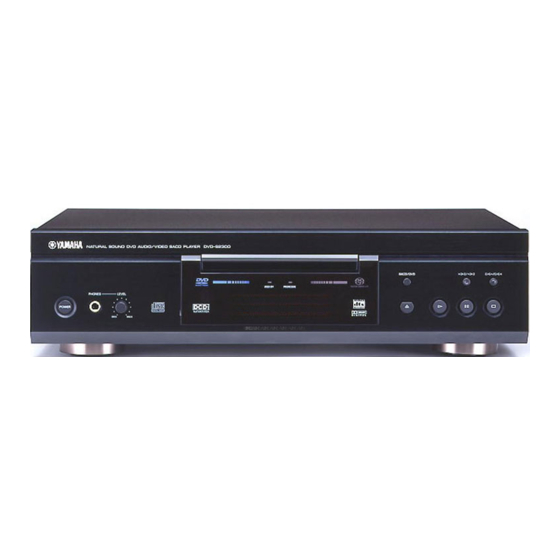
- Page 1 DVD-S2300 DVD AUDIO/VIDEO SACD PLAYER LECTEUR DE DVD AUDIO/VIDEO SACD DIGITAL VIDEO OWNER’S MANUAL MODE D’EMPLOI...
-
Page 2: Important Safety Instructions
IMPORTANT SAFETY INSTRUCTIONS CAUTION RISK OF ELECTRIC SHOCK DO NOT OPEN CAUTION: TO REDUCE THE RISK OF ELECTRIC SHOCK, DO NOT REMOVE COVER (OR BACK). NO USER-SERVICEABLE PARTS INSIDE. REFER SERVICING TO QUALIFIED SERVICE PERSONNEL. • Explanation of Graphical Symbols The lightning flash with arrowhead symbol, within an equilateral triangle, is intended to alert you to the presence of uninsulated “dangerous voltage”... - Page 3 This product, when installed as indicated in the instructions contained in this manual, meets FCC requirements. Modifications not expressly approved by Yamaha may void your authority, granted by the FCC, to use the product. 2. IMPORTANT : When connecting this product to accessories and/or another product use only high quality shielded cables.
- Page 4 fire, damage to this unit, and/or personal injury. YAMAHA will not be held responsible for any damage resulting from use of this unit with a voltage other than as specified.
-
Page 5: Table Of Contents
About this manual • Illustrations in this manual are based on the U.S.A. model unless otherwise indicated. • Paragraphs marked with an y indicator are tips on operating the unit. • The user can perform certain operations using either the remote control or the buttons on the main unit. -
Page 6: Introduction
Built-in high-performance video D/A converter Output connectors support numerous audio and home theater component combinations. Video out: Component output jacks (two channels) (U.S.A. and Australian models) S Video jacks (two channels) RGB SCART jacks (U.K. and European models) Video (Composite) connector (two channels) Audio out: Digital: Coaxial jack (one channel) -
Page 7: Checking The Accessories
CHECKING THE ACCESSORIES Check your package to make sure it contains the following items: Remote control Batteries (x2) (AA, R6, UM-3) INSTALLING BATTERIES IN THE REMOTE CONTROL Insert the batteries in the correct direction by aligning the + and – marks on the batteries with the polarity markings (+ and –) inside the battery compartment. -
Page 8: Controls And Functions
CONTROLS AND FUNCTIONS Front panel / Remote control 1 POWER Turns the power to the unit on and off. 2 Disc tray Load a disc in this tray. 3 v v v v (Front panel), OPEN/CLOSE (Remote control) Press to open or close the disc tray. 4 w w w w Press to start playback. - Page 9 y From left: PLAY MODE Press to switch between random play, program play, and normal playback. REPEAT Press to repeat playback. Press to repeat a section specified by two points. MARKER Press to mark and store location points for future ref- erence.
-
Page 10: Front Panel Display
CONTROLS AND FUNCTIONS Front panel display 1 Disc type indicators The indicator for the type of disc currently being played lights up. SACD: Super audio CD Audio CD DVD AUDIO: DVD-Audio DVD VIDEO: DVD-Video VCD: Video CD MP3: MP3-format CD-R or CD-RW 2 Playback indicator Lights up during playback. -
Page 11: Preparation
Before you make connections, unplug the power cable for the unit and all other components. Do not plug in the power cables until all connections are complete. Types of connectors Connect these audio output jacks to the audio input of an AV amplifier. This jack is reserved for fac- tory use. -
Page 12: Video Connections
CONNECTIONS Video connections You can connect the unit’s video output to a video monitor, or the video input on an AV amplifier (which in turn is con- nected to a video monitor). Connecting to an AV amplifier enables you to control audio and video using the AV amplifier. You can set up the AV amplifier using this unit’s OSD (on-screen display). -
Page 13: Audio Connections
Audio connections Select connectors that are compatible with your amplifier and appropriate for your requirements. 1 DIGITAL OUT jacks Using AV amplifier’s 6.1 channel decoding (DVD-Video) and surround effects: • Connect the OPTICAL jack to the amplifier’s optical digital input using fiber optic cable (not included) -or- •... -
Page 14: Playing A Disc
Before starting playback Before playing a disc, you must connect the unit’s audio and video output jacks to an AV amplifier or other system component (refer to pages 8 and 9). Note • If you digitally connect the unit to an amplifier that does not feature a DTS decoder, set DTS DIGITAL SURROUND to PCM (factory default) in the Setup/Audio menu. -
Page 15: Selecting A Track
To clear the memory, press a again. The W indicator dis- appears. (When a DVD-Video disc is played, a chapter review screen will appear.) Note • Opening the disc tray cancels the resume function. Chapter review function This function plays the first few seconds of each chapter (from the beginning of the title up to the memorized point) so you can review previous chapters. -
Page 16: Super Audio Cds
PLAYING A DISC Slow DVD-A DVD-V To play a disc slowly, while the picture is still or paused: Press e e or r r on the remote control. -or- Press and hold r/y (or t/e) on the front panel. • To return to normal playback, press w. •... -
Page 17: Miscellaneous Functions
MISCELLANEOUS FUNCTIONS Using disc menus Many discs include menu screens that enable you to con- trol special features, such as skipping to a favorite title or chapter, or selecting an audio language or subtitle lan- guage for a movie. This section provides general instruc- tions on operating these screens. -
Page 18: Dvd-Audio Features
THE “STANDARD DEFINITION” OUTPUT. IF THERE ARE QUESTIONS REGARDING YOUR VIDEO MONITOR COM- PATIBILITY WITH THIS UNIT, PLEASE CONTACT OUR CUSTOMER SERVICE CENTER. This unit is compatible with the complete line of YAMAHA projectors, including the DPX-1, LPX-500, PDM-1 and DPX-1000. DVD-Audio features DVD-A / ENTER GROUP Playing a track in a specific group... -
Page 19: Switching Audio Tracks, Subtitles And Angles
Changing pages DVD-Audio discs can contain information pages that can include photo galleries, artist biographies, lyrics, etc. Press PAGE to turn the page. (The page number will update on the display when you change pages.) Switching audio tracks, subtitles and angles DVD-A DVD-V Some discs are encoded with several audio tracks, multi-... -
Page 20: Program Play
MISCELLANEOUS FUNCTIONS Program play SACD DVD-A Enjoy listening to your favorite tracks in any order. This unit enables you to program sequence for up to 32 tracks from disc. PLAY MODE / ENTER Press a a a a to stop playback. Press PLAY MODE repeatedly to select the program screen. -
Page 21: Random Play
Random play SACD DVD-A In random play mode, the unit plays all tracks on the disc in random order. PLAY MODE Press a a a a to stop playback. Press PLAY MODE repeatedly. The “RNDM” indicator lights up on the front panel display. -
Page 22: Bookmarks
MISCELLANEOUS FUNCTIONS Bookmarks DVD-A DVD-V The Bookmark feature allows you to mark up to five points (locations), enabling you to return quickly to those points. / ENTER Press MARKER. This icon appears on the video monitor. Highlighted Press the cursor buttons (l l l l , h h h h ) to select one of five asterisks. -
Page 23: Repeat A-B
Program repeat SACD DVD-A During program play, press REPEAT. Each time you press REPEAT, the repeat mode changes as follows: TRACK ALL (Entire program) NORMAL PROGRAM PLAY • The selected repeat mode is indicated on the unit’s dis- play and on the monitor (for DVD-Audio, video CD, and audio CD). -
Page 24: On-Screen Menu (Dvd Mode Only)
ON-SCREEN MENU (DVD MODE ONLY) You can control various items using the on-screen menu bar. / ENTER ON SCREEN Operating the menu bar Press ON SCREEN. Each time you press ON SCREEN, the on-screen bar changes as follows: Disc Info bar Digital 1 ENG 3/2.1 ch 1 : 46 : 50... -
Page 25: Disc Info Bar
Disc Info bar Example: DVD-Video Digital 1 : 46 : 50 1 ENG 3/2.1 ch Title number DVD-V Track number DVD-A Chapter number DVD-V Group number DVD-A Time index (hour:minute:second) DVD-A DVD-V 1 : 46 : 50 You can start playback from a specific point by keying in the elapsed time. -
Page 26: Player Info Bar
ON-SCREEN MENU (DVD MODE ONLY) Player Info bar Play setting Example: DVD-Video – – – 1 2 3 A-B repeat (see page 19) DVD-A DVD-V [ENTER] (start point)^[ENTER] (finish point)^[ENTER] (playback) To cancel [ENTER] Repeat play (see page 18) DVD-V C: Chapter;... -
Page 27: Shuttle Bar
Picture setting Digital picture mode DVD-A DVD-V N: Normal C: Cinema image (suited for movie viewing) U: User mode To change the User mode: 1 Select User mode. 2 Press (l, h) to select an item to change. 3 Press (k, n) to adjust the setting. The following items are displayed when you select “U.”... -
Page 28: Detailed Settings
CHANGING THE DVD MODE SETTINGS The Setup menu enables you to change the factory default settings. Using the Setup menu / ENTER SET UP Press SETUP. The video monitor displays a menu. Press the cursor buttons (l l l l , h h h h ) to select a menu group. -
Page 29: Settings Summary
Settings Summary The following chart shows Menu groups, Items, and Options. Factory default settings are underlined. Menu groups Disc Audio DVD-A DVD-V Select the preferred audio track language. Subtitle DVD-A Select the preferred subtitle language. Menus DVD-A DVD-V Select the preferred disc menu language. Ratings DVD-V Set a ratings level to limit DVD-Video playback. - Page 30 CHANGING THE DVD MODE SETTINGS Menu groups Video Still Mode Specify the type of picture shown in pause mode. First select “Automatic.” If still pictures jitter, select “Field.” If visual details are still not clear, select “Frame.” Black Level Control (U.S.A.
-
Page 31: Language Selection And Language Code List
Menu groups Display On-Screen Menu Language Select the preferred language for the Setup menu and on- screen messages. On-Screen Messages Select whether or not to show on-screen messages. Others DVD-Video Mode Some DVD-Audio discs contain DVD-Video content that can be played only by a DVD-Video player. Demo A demonstration of the unit’s on-screen displays starts when you select “On”. -
Page 32: Ratings
CHANGING THE DVD MODE SETTINGS Ratings DVD-V The ratings level can be set from 0 through 8. (The lower the number, the greater the restriction.) / ENTER Changing the ratings level (from Level 8) The unit may be set so that it will not play DVD videos unsuitable for children. -
Page 33: Speaker Settings
Speaker settings DVD-A Set the parameters for 6CH DISCRETE output to suit the speaker system. / ENTER If you select “Multi-channel” from the Setup menu, set parameters a, b, and c (page 29 and page 30) according to the speaker system. Setting panel Main (L) Center... - Page 34 CHANGING THE DVD MODE SETTINGS b b b b Delay time (This parameter is effective on only center/rear channels of DVD-Video discs recorded in Dolby Digital format.) To obtain maximum effect from a Dolby Digital 5.1 chan- nel source, all speakers (except the subwoofer) should be located the same distance from the listening position.
-
Page 35: Changing The Sacd Mode Settings
CHANGING THE SACD MODE SETTINGS This unit features independent playback circuits for DVD mode and SACD mode. DVD mode settings are not valid in SACD mode. You must complete a separate group of settings dedicated to SACD mode. Speaker settings To play multi-channel Super Audio CD data effectively, set the speaker parameters in SACD mode to suit your speakers and components. -
Page 36: Adjusting The Brightness Of The Display
CHANGING THE SACD MODE SETTINGS Press ENTER. The unit displays “TEST TONE.” Press ENTER. Two seconds of test tone are output from each speaker in the following order. TEST LEFT CENTER (left main) (center) TEST L. SURROUND (left rear) Press ENTER to stop the test tone, press the cursor button l l l l or h h h h to select a speaker to adjust, then press ENTER again. -
Page 37: Appendix
Refer to the chart below if the unit does not function properly. If the problem is not listed below, or if the instructions fail to help, turn off the power to the unit, disconnect the power cable, and contact the nearest authorized YAMAHA dealer or service center. -
Page 38: Sacd Mode
TROUBLESHOOTING Problem No picture (U.S.A. model) If you play a PAL system DVD-Audio, the mes- sage “This disc is PAL system. The output is sound only” may appear on the monitor. No picture is available because the disc uses an incompatible type of video signal. -
Page 39: Glossary
A result of extensive research, YAMAHA CINEMA DSP utilizes YAMAHA original sound field technology to com- bine three systems—Dolby Pro Logic, Dolby Digital and DTS—to create a theater-quality visual and audio experi-... -
Page 40: Notes On Handling Discs
SILENT CINEMA YAMAHA has developed a natural, realistic sound effect DSP algorithm for headphones. Parameters for headphones have been set for each sound field so that you can enjoy accurate representations of all sound fields. -
Page 41: Specifications
AUDIO SECTION • Frequency Response DVD Audio (192 kHz sampling) ... 2 Hz to 88 kHz DVD (96 kHz sampling)... 2 Hz to 44 kHz DVD (48 kHz sampling)... 2 Hz to 22 kHz CD, Video CD... 2 Hz to 20 kHz •... - Page 42 YAMAHA ELECTRONIQUE FRANCE S.A. RUE AMBROISE CROIZAT BP70 CROISSY-BEAUBOURG 77312 MARNE-LA-VALLEE CEDEX02, FRANCE YAMAHA ELECTRONICS (UK) LTD. YAMAHA HOUSE, 200 RICKMANSWORTH ROAD WATFORD, HERTS WD1 7JS, ENGLAND YAMAHA SCANDINAVIA A.B. J A WETTERGRENS GATA 1, BOX 30053, 400 43 VÄSTRA FRÖLUNDA, SWEDEN YAMAHA CORPORATION YAMAHA MUSIC AUSTRALIA PTY, LTD.