
Related Manuals for Jack LaLanne's POWER JUICER E-1188-1


Summary of Contents for Jack LaLanne's POWER JUICER E-1188-1
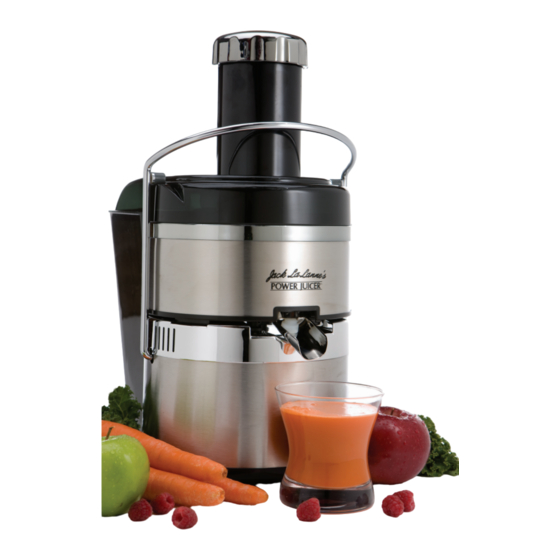
- Page 1 Operating Manual Do Not Operate The POWER JUICER Before Reading This Entire Manual. Warranty information inside. FOR HOUSEHOLD USE ONLY Model No. E-1188-1...
-
Page 2: Table Of Contents
TABLE OF CONTENTS Important Safeguards ....3-4 Safety Features ..... 4 Parts List. -
Page 3: Important Safeguards
IMPORTANT SAFEGUARDS READ THESE SAFEGUARDS CAREFULLY BEFORE USING THIS PRODUCT! When using electrical appliances, basic safety precautions should always be followed including the following: • Read all instructions. • NOT FOR USE BY CHILDREN! Keep out of the reach of children to avoid injury. This appliance is not a toy. -
Page 4: Safety Features
• The juicer will not run if the unit is not properly assembled. The motor has a built-in safety feature that will not allow the power to turn on unless the Locking Bar is locked in place. • Do not use outdoors. •... -
Page 5: Parts List
PARTS LIST Chute Pusher Lid/Pulp Guard (Pulp Guard) Filter/Blade Pulp Collector Receptacle Juice Spout Cleaning Brush Base Locking Bar Power Cord Illuminated Power Switch... -
Page 6: Disassembly
DISASSEMBLY IMPORTANT: Before disassembling the unit make sure you turn the power OFF and unplug the Power Cord from the electrical outlet. STEP 1: Remove Pusher from the Chute. Pusher Chute STEP 2: Lower the Locking Bar into the disengaged position as shown. Locking STEP 3: Lid/Pulp... - Page 7 DISASSEMBLY (Cont.) STEP 4: Remove Filter/Blade. Filter/Blade STEP 5: Make sure Juice Spout is in the upward position to avoid leakage. Remove Receptacle from Base. Juice Spout Receptacle Base Note: Do not remove screws from blade. The filter and the blade are one piece.
-
Page 8: Assembly
ASSEMBLY STEP 1: Base Place Base on a dry, flat surface with Locking Bar in the disengaged Locking position. Locking Bar should be to the left of the machine with the Power Switch facing you, as shown. Front of Machine Power Switch STEP 2: Place Receptacle on the Base,... - Page 9 ASSEMBLY (Cont.) STEP 4: Lid/Pulp Place lid with built-in pulp guard on Guard top of receptacle, making certain it is securely aligned with the pulp guard facing in the opposite direction of Receptacle Pulp juice spout. Lock lid into place by Collector lifting locking bar up until it clicks Locking...
-
Page 10: Assembly
ASSEMBLY (Cont.) STEP 6A: When juicing, make sure Juice Spout is in the downward position. If the DOWNWARD Juice Spout is left in the upward POSITION position the juice will not flow from the spout. It will stay in the Receptacle and will overflow from the sides. -
Page 11: Step-By-Step Guide To Juicing
STEP-BY-STEP GUIDE TO JUICING In order to assure that your juicing experience will be a pleasant one, we have included this “Step-by-Step Guide to Juicing”. Juicing is a quick and satisfying way to get the vitamins, nutrients, and minerals from fresh fruits and vegetables… a few minutes well spent for a lifetime of good health benefits! 5 Simple Steps to Get Started Before You Begin... -
Page 12: Helpful Tips
Helpful Tips Clean Up Wash all components before initial use. For fast and easy cleanup, rinse components under warm water, or place in dishwasher immediately after juicing. Pulp Collector: For quicker and easier cleanup, you can insert a plastic bag inside Pulp Collector to discard after juicing or simply rinse out Pulp Collector or place in dishwasher. - Page 13 Helpful Tips The Juice Spout Make sure to lower the Juice Spout. The Juicer comes packed with the Spout in the upward (closed) position. If you forget to lower the Spout, juice will back up in the Receptacle and will overflow from the sides. This back up could also cause the motor to seize.
- Page 14 Helpful Tips Carrots Carrots can be a bit challenging to juice due to their dense nature. Never over stuff the Chute. Always leave some “wiggle room” to avoid jamming the Chute. Once carrots have been inserted, replace the Pusher into the Chute. Apply gentle pressure.
- Page 15 Helpful Tips Berries and Small Fruits Juicing berries may seem a bit challenging at first, but once you get the hang of it you will love the great flavors they add to your juice. Not to mention the health benefits they have to offer. When juicing berries (except cranberries) you will need to add something that contains a larger volume of juice such as an apple or orange.
-
Page 16: Fruits And Vegetables
Fruits and Vegetables: Ideal for Juicing Apples Grapes Peaches (harder) Asparagus Guava Pears (harder) Brussels Sprouts Honeydew Melon Peppers Cabbages Horseradish Pineapple Cantaloupe Jicama Pomegranate Seeds Celery Kiwi Potatoes Cherries (pitted) Kohlrabi Pumpkin Clementines Lemon Radicchio Cranberries Lettuces Radishes Cucumber Lime Squashes Fennel... -
Page 17: Cleaning The Juice Spout
Fruits and Vegetables: Containing a Large Juice Content Apples Grapefruits Peppers Cantaloupe Grapes Pineapple Celery Honeydew Melon Tangerines Clementines Lemon Tomatoes Cranberries Lime Watermelon Cucumber Oranges DO NOT JUICE Some fruits and vegetables cannot be juiced due to their inability to produce juice. -
Page 18: Cleaning Your Juicer
CLEANING YOUR JUICER We have made juicer clean up as easy as possible. All of the components, with exception of the motor Base, can be put in your home dishwasher TOP RACK ONLY. Place components in the top rack (only) as temperatures near the bottom drying element may vary with manufacturer. -
Page 19: Troubleshooting
TROUBLESHOOTING Problem Possible Reasons and Solution The motor does not • Check if unit is plugged in. run after being • Check if Locking Bar is locked in place properly. switched on. • Check if all parts are assembled properly. •... -
Page 20: Common Questions And Answers
Common Questions about the Jack LaLanne Power Juicer This summary briefly answers common questions. Read operating manual before use. Why won’t the power turn on? First, make certain the Juicer’s Power Cord is plugged into a working 110-volt electrical outlet, then check that the switch is in the “ON” position. Then, check that all parts are assembled properly. - Page 21 Carrots can be a bit challenging to juice due to their dense nature. Never over- stuff the Chute, always leave some “wiggle room” to avoid jamming the Chute. Once carrots have been inserted, replace the Pusher into the Chute and apply gentle pressure.
-
Page 22: Warranty
Limited Lifetime Warranty The manufacturer warrants that your Jack LaLanne Power Juicer is free of defects in materials and workmanship and will, at its option, repair or replace any defective juicer that is returned. The Jack LaLanne Power Juicer motor is warranted for the lifetime of the original purchaser, and all other parts and components are warranted for 60 days from the original date of purchase. -
Page 23: Replacement Kit Order Form
Credit Card #_____________________________ q MT-1000 q E-1188 q E-1188-1 q Check q Money Order (NJ, PA, CT residents add sales tax. CA, NV and q Replacement Filter/Blade NY add applicable rate.) U.S. - Page 24 Power Juicer Ultimate. This product has been manufactured to the highest standards. Should you have any problem our friendly customer service staff is here to help you. 973-287-5150 © 2013 Tristar Products, Inc. All rights reserved. Distributed By: Tristar Products, Inc.
Need help?
Do you have a question about the POWER JUICER E-1188-1 and is the answer not in the manual?
Questions and answers
How do I remove the filter and blade from this juicer? There are no holes and crescent tool for this model.
The filter and blade in Jack LaLanne's Power Juicer E-1188-1 are a single piece and are not meant to be separated. To remove them, first disassemble the machine by removing the receptacle from the base. Then, lift the filter/blade out of the receptacle by rotating it slightly to allow it to settle out of alignment.
This answer is automatically generated