Table of Contents
Advertisement
Advertisement
Table of Contents

Related Manuals for Exerpeutic Folding Upright Bike


Summary of Contents for Exerpeutic Folding Upright Bike
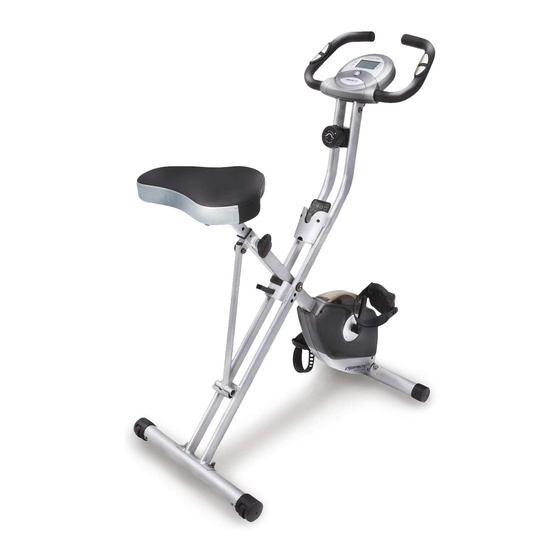
- Page 1 Folding Upright Bike with Pulse OWNER’S Item #1200 MANUAL...
-
Page 2: Table Of Contents
TABLE OF CONTENTS SERVICE ------------------------------------------------------------------------ 2 IMPORTANT LABELS -------------------------------------------------------- 3 PRODUCT SAFETY ---------------------------------------------------------- 4 PART DRAWING -------------------------------------------------------------- 5 PART LIST ---------------------------------------------------------------------- 6 HARDWARE PACKING LIST & TOOLS --------------------------------- 8 ASSEMBLY --------------------------------------------------------------------- 9 COMPUTER --------------------------------------------------------------------- 13 STORAGE ----------------------------------------------------------------------- 14 ADJUSTMENTS --------------------------------------------------------------- 15 TROUBLE SHOOTING &... -
Page 3: Service
SERVICE IMPORTANT: FOR NORTH AMERICA ONLY To request product service and order replacement parts, please call our customer service department at: 1-866-924-1688 Monday through Friday, 8:00 AM-5:00 PM Pacific Standard Time, service@paradigmhw.com or email us at: Please visit our website at www.paradigmhw.com. Please have the following information ready when requesting for service: Your name Phone number... -
Page 4: Important Labels
IMPORTANT LABELS... -
Page 5: Product Safety
PRODUCT SAFETY Basic precautions should always be followed, including the following safety instructions when using this equipment: Read all instructions before using this equipment. Read all the instructions in this manual and do warm up exercises before using this equipment. Before exercise, in order to avoid injuring the muscle, warm-up exercise of every position of the body is necessary. -
Page 6: Part Drawing
PART DRAWING... -
Page 7: Part List
PART LIST Description Qty No. Description 001 Rear Frame 1 029 Hexagon Nut Cap M8 002 Front Frame 1 030 Curve Washer Ø8.2xØ22.2 003 Rear Stabilizer Ø50x1.5tx550L 1 031 Front Stabilizer Ø50x1.5tx450L 004 Handlebar Ø25 1 032 C-ring Ø10 005 Seat Post 1 033 Flat Washer Ø8.2xØ16.8 006 Seat Cushion 1 034 Nylon Nut M8... - Page 8 PART LIST Description Qty No. Description 057 Axle Ø15.8x94.5L 1 072 Belt 230J3 058 Hexagon Socket Bolt M8x15 5 073 Hexagon Socket Bolt M6x12 059 Rubber Cushion 1 074 Spring Washer Ø6.2 060 Washer Ø8.2x Ø25x2.0t 2 075 Screw M5x15 061 Screw M6x10 6 076 Hexagon Socket Bolt M8x40L 062 Holder...
-
Page 9: Hardware Packing List & Tools
HARDWARE PACKING LIST & TOOLS (14) Seat Height (29) Hexagon Nut Cap M8 (22) Safety Pin Adjustment Knob M16 4 PCS Ø10x110L 1 PC 1 PC (30) Curve Washer (33) Flat Washer (58) Hexagon Socket Bolt Ø8.2xØ22.2 Ø8.2xØ16.8 M8x15 4 PCS 3 PCS 3 PCS (74) Spring Washer Ø6.2... -
Page 10: Assembly
ASSEMBLY Tool: Wrench 13-15 Step 1 Stand up the base of the machine by separating the Rear and Front Frames (1, 2). Pull the Rear and Front Frames (1, 2) apart from each other. Align pin holes for inserting the Ø10x110L Safety Pin (22) then insert the Ø10x110L Safety Pin (22) into the holes on the Rear and Front Frames (1, 2) to lock the frames in place. - Page 11 ASSEMBLY Tool: Wrench 13-15 Step 2 The Cranks, Pedals, Pedal Shafts and Pedal Straps are marked “R” for Right and “L” for Left. Insert the pedal shaft of Left Pedal (7) into threaded hole in the Left Crank (23). Turn the pedal shaft by hand in the counter-clockwise direction until snug. Note: DO NOT turn the pedal shaft in the clockwise direction, doing so will strip the threads.
- Page 12 ASSEMBLY Tool: Allen Wrench with Phillips Screwdriver Step 3 Align bolt holes on underside of Seat Cushion (6) with holes on top of Seat Post (5), then attach with three Ø8.2xØ16.8 Flat Washers (33) and three M8x15 Hexagon Socket Bolts (58). Tighten bolts with the Allen Wrench with Phillips Screwdriver provided.
- Page 13 ASSEMBLY Tool: Allen Wrench with Phillips Screwdriver Step 4 Connect the Sensor Wire (15) from the Rear Frame (1) to the wire that comes from the Computer (9). Attach the Handlebar (4) into the Rear Frame (1) with four M6x12 Hexagon Socket Bolts (73) and four Ø6.2 Spring Washers (74).
-
Page 14: Computer
COMPUTER SPECIFICATIONS: TIME --------------------------------------- 0:00-99:59 MIN: SEC SPEED ------------------------------------ 0.0-999.9 ML/H DISTANCE ------------------------------- 0.0-999.9 ML CALORIE --------------------------------- 0.0-999.9 KCAL ODOMETER ----------------------------- 0.0-999.9 ML PULSE ------------------------------------ 40-240 BEATS/MIN COMPUTER FUNTIONS: AUTO ON/OFF: If you leave the computer idle for 4 minutes, the power will shut off automatically. -
Page 15: Storage
STORAGE For your convenience, the bike can be folded up and placed in a storage area. Remove the Safety Pin (22) from the bike. Push the Rear and Front Frames (1, 2) together until they meet. Align pin holes for inserting the Safety Pin (22) then insert the removed Safety Pin (22) into the holes on the Rear and Front Frames (1, 2) to lock the frames in place. -
Page 16: Adjustments
ADJUSTMENTS Adjusting the Tension Control Knob To increase the load, turn the tension control knob in a clockwise direction. To decrease the load, turn the tension control knob in a counterclockwise direction. Tension Control Knob Adjusting the Seat Height Turn the seat height adjustment knob in a counterclockwise direction until the seat post can be slid up or down and then slide the seat post up or down direction to the suitable... -
Page 17: Trouble Shooting & Maintenance
TROUBLE SHOOTING & MAINTENCE TROUBLE SHOOTING PROBLEM: There is no display on the computer console. SOLUTION: Remove the computer console and verify the wire that comes from the computer console are properly connected to the wires that come from the rear frame. -
Page 18: Warm Up
WARM UP Quadriceps Stretch With one hand against a wall for balance, reach behind you and pull your right foot up. Bring your heel as close to your buttocks as possible. Hold for 15 counts and repeat with left foot up. Inner Thigh Stretch Sit with the soles of your feet together with your knees pointing outward. -
Page 19: Warranty
WARRANTY Paradigm Health & Wellness, Inc. warrants to the original purchaser that this product is free from defects in material and workmanship when used for the purpose intended, under the conditions that it has been installed and operated in according to Paradigm’s Owner’s Manual. Paradigm’s obligation under this warranty is limited to replacing free of charge, any parts which may prove to be defective under normal home use. -
Page 20: Fax Form
FAX FORM PARADIGM PARTS REQUEST FAX FORM Please fax this form to (1-626-810-2166) OR YOU CAN EMAIL CUSTOMER SERVICE REQUESTS TO service@paradigmhw.com NAME: _______________________________________________________ ADDRESS: ____________________________________________________ CITY ______________ STATE ______________ ZIP ___________________ TELEPHONE: (Day) _____________________________________________ (Night) ____________________________________________ (Email Address) ____________________________________ SERIAL#: __________________________________________ MODEL#: __________________________________________ PURCHASE DATE: ______________________________________________...
Need help?
Do you have a question about the Folding Upright Bike and is the answer not in the manual?
Questions and answers
Do the pedals need to be oiled? They are not moving smoothly and tension is fully decreased.
Do my hands have to be on the silver buttons on the handle bars?
I need a replacement seat
You can request a replacement seat for the Exerpeutic Folding Upright Bike by contacting the customer service department of Paradigm Health & Wellness. You can reach them at 1-866-924-1688 (Monday through Friday, 8:00 AM-5:00 PM PST) or via email at service@paradigmhw.com. Be sure to have your model number, serial number, part number, and proof of purchase ready when requesting service.
This answer is automatically generated
I lost the cover for the battery for the display. Where could i order a replacement?
I need to replace the right pedal. The ball bearings have damaged and it crunches as a pedal.
To replace the right pedal on an Exerpeutic Folding Upright Bike:
1. Insert the Right Pedal straight into the threaded hole in the Right Crank.
2. Turn the pedal shaft by hand in a CLOCKWISE direction until snug.
3. Use a 13–15mm Wrench to tighten the Right Pedal until the shaft protrudes.
4. Attach the removed Right Pedal Nut to the protruding shaft in a COUNTER-CLOCKWISE direction.
5. Use both the 13–15mm Wrench and a 19mm Wrench to simultaneously tighten the Right Pedal and the Right Pedal Nut.
Only tighten in the specified directions.
This answer is automatically generated
replaced batteries no longer able to pair
The Exerpeutic Folding Upright Bike may not function properly after replacing the batteries due to the following reasons:
1. The batteries may not be correctly positioned, or the battery springs may not be in proper contact with the batteries.
2. The batteries may be dead or faulty. Replacing them with new ones may resolve the issue.
3. If the display is illegible or only partially legible, removing the batteries and waiting 15 seconds before reinstalling them may help.
4. The wire connections between the computer console and the rear frame may not be properly connected. Checking and securing these connections can resolve the issue.
This answer is automatically generated
can you buy the computer for this bike?
When I pedal it seemed losing tension. I checked the tension setting it seemed ok. The tension cable was hooked up properly. There is still tension when pedaling. What could be the problem?
I just was given the model 4102 and have two questions. What type of batteries are needed when replacing them and how many are needed? Can you pedal backwards without causing any damage?
Computer Display not working properly.
To fix the computer display issue on the Exerpeutic Folding Upright Bike, follow these steps:
1. Remove the computer console and check that the wire connections between the computer console and the rear frame are properly connected.
2. Ensure the batteries are correctly positioned and that the battery springs are in proper contact with the batteries.
3. If the issue persists, replace the batteries with new ones.
These steps should restore the display functionality.
This answer is automatically generated