VeriFone VX670 User Manual
Hide thumbs
Also See for Verifone VX670:
- Installation manual (62 pages) ,
- User manual (37 pages) ,
- Brochure (2 pages)
Table of Contents
Advertisement
Advertisement
Table of Contents

Related Manuals for VeriFone Verifone VX670


Summary of Contents for VeriFone Verifone VX670
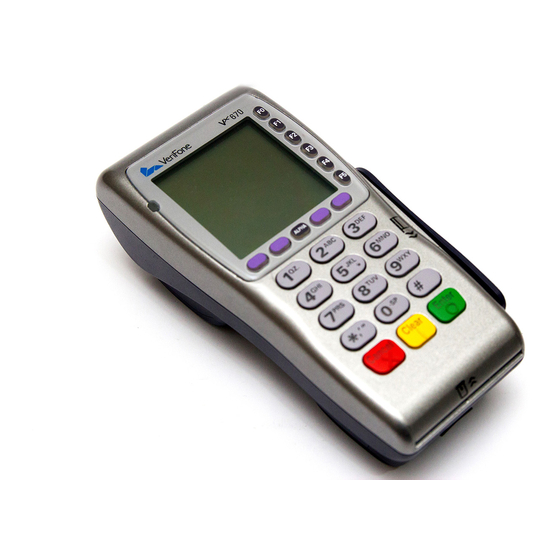
- Page 1 USER GUIDE Payment terminal Verifone VX670...
- Page 2 USER GUIDE Payment terminal Verifone VX670...
-
Page 3: Table Of Contents
TABLE OF CONTENTS: 1. GETTING STARTED 4. DOWNLOADS 1.1 Important ..................4 4.1 How to download software ............22 1.2 The structure of the payment terminal ..........5 4.2 How to download the parameters ..........22 1.3 How to connect the cords .............. 6 4.3 How to download the certificate ............23 1.4 How to connect the charging dock .......... -
Page 4: Getting Started
1. GETTING STARTED 1. GETTING STARTED 1.1 Important 1.2 The structure of the payment terminal NOTE: IF THESE INSTRUCTIONS ARE NOT FOLLOWED AND THE PAYMENT TERMINAL IS THEREFORE DAMAGED, THE WARRANTY DOES NOT APPLY. • Protect the power cord and transformer from dust, moisture and other contaminants. If they are damaged, they must not be used. -
Page 5: How To Connect The Cords
1. GETTING STARTED 1. GETTING STARTED 1.3 How to connect the cords Place the payment terminal onto the charging dock. 1. Plug the adapter to the power cord and the power cord to the transformer and put the plug in a socket. Connect the adapter to the slot on the left at the bottom of the terminal. -
Page 6: Sim Card
To remove the battery, press the button on the battery. This releases the battery. For data transfer, the VX670 payment terminal uses a GPRS connection in Sonera’s mobile network. The SIM card in the payment terminal is ready for use. Note: If you suspect or have noticed there is something wrong with the SIM card, please contact Sonera Customer Service. -
Page 7: Day-To-Day Use
2. DAY-TO-DAY USE 2. DAY-TO-DAY USE 2.1.2 Keypad 2.1.1 How to replace the paper roll 1. Pull the release latch upwards to unlock the cover of the paper compartment. 2. Open the cover. 3. Remove the old paper roll from the paper compartment. 4. -
Page 8: How To Make Transactions
2. DAY-TO-DAY USE 2. DAY-TO-DAY USE 2.2 HOW TO MAKE TRANSACTIONS 2.2.4 How to void a transaction 2.2.1 Chip transactions Note: You can void only transactions that are in the payment terminal’s memory. 1. ENTER AMOUNT: Enter the amount in euros, including cents, and press Enter. 2. -
Page 9: How To Make A Copy Of The Receipt
2. DAY-TO-DAY USE 2. DAY-TO-DAY USE 2.2.6 How to make a copy of the receipt 2.3 REPORTS AND BANK CONNECTION 2.3.1 How to print a batch report 1. Press MENU F1. 2. Select PRINT COPY. 3. RECEIPT NUMBER: The payment terminal shows the number of the previous re- When you print a batch report from the payment terminal, the terminal does not trans- ceipt. -
Page 10: Bank Connection
2. DAY-TO-DAY USE 2. DAY-TO-DAY USE 2.3.3 Bank connection 2.3.5 Report items and what they mean An example of a batch report and the items printed on it. The payment terminal establishes a connection to the bank automatically, if a batch transmission time has been specified in the settings. -
Page 11: Verification Codes
2. DAY-TO-DAY USE 2. DAY-TO-DAY USE 2.4 VERIFICATION CODES 200-299 Rejected, confiscate card Not accepted If a transaction is rejected by the verification centre, a code indicating the reason of Card has expired rejection is printed on the receipt. Transactions can be rejected based on a notification Suspected card forgery received from a bank or credit card company. -
Page 12: Settings
3. SETTINGS 3. SETTINGS 3.1 PAYMENT TERMINAL SETTINGS 3.4 CASHIER NUMBER The settings are described in greater detail below. The section concerned is specified If you have more than one payment terminal, it is important to distinguish between in brackets. the different terminals based on their cashier number. -
Page 13: Downloads
4. DOWNLOADS 4. DOWNLOADS 4.1 HOW TO DOWNLOAD SOFTWARE 4.3 How to download the certificate Note: Software may be downloaded only at the equipment manu- Note: The equipment manufacturer has already downloaded the facturer’s request. certificate onto the terminal. When software is being downloaded, the payment terminal must be in place and recharging. -
Page 14: Special Versions
5. SPECIAL VERSIONS 5. SPECIAL VERSIONS 5.1 CASH RECEIPT 5.3 EXTRA AMOUNT The cash receipt function is used when the customer pays in cash and you want to The Extra amount function can be used for example in restaurants, if you want to give make a receipt with the payment terminal. -
Page 15: Mandatory Authorization
5. SPECIAL VERSIONS 5. SPECIAL VERSIONS 5.5 MANDATORY AUTHORIZATION 5.8 MULTICASHIER VER If mandatory verification is in use, the payment terminal verifies all transactions The multicashier function can be used for example in restaurants when it is necessary automatically irrespective of the amount or card. to distinguish between sales by different waiters. -
Page 16: Other Versions
The application can no longer be found on the pay- 7. REMOVE CARD: Remove the card from the reader. Make sure the card is in the ment terminal. Contact Sonera Customer Service. reader slot during the entire transaction, or the operation will be aborted. -
Page 17: Messages On The Receipt
BATCH SENDING ERROR = The payment terminal is unable to establish a connection. See section 7.3 for instructions. If Sonera’s technical corporate customer service asks you to send the device to a re- pair shop, do as follows: CHECK THE CONNECTIONS AND TRY AGAIN = The payment terminal is unable to establish a connection. -
Page 18: Technical Details
12 numeric keys with alphabet, 10 function keys and 6 selection keys Fault reports (select 2) Ports: RS-232 and USB-capability Connections: GPRS About Sonera Payment Terminal Service www.sonera.fi/maksupaate Printer: Thermal graphic, 18 lps, paper roll width 57 mm, diametre 40 mm Security:... - Page 20 Sonera Corporate Customer Service 0200 18818 (mobile phone charge / local network charge) Sonera Technical Customer Service 0206 90801 (dial 2)
Need help?
Do you have a question about the Verifone VX670 and is the answer not in the manual?
Questions and answers