Table of Contents
Advertisement
Advertisement
Table of Contents

Subscribe to Our Youtube Channel
Related Manuals for Hotpoint BU82 BU72 BU71


Summary of Contents for Hotpoint BU82 BU72 BU71
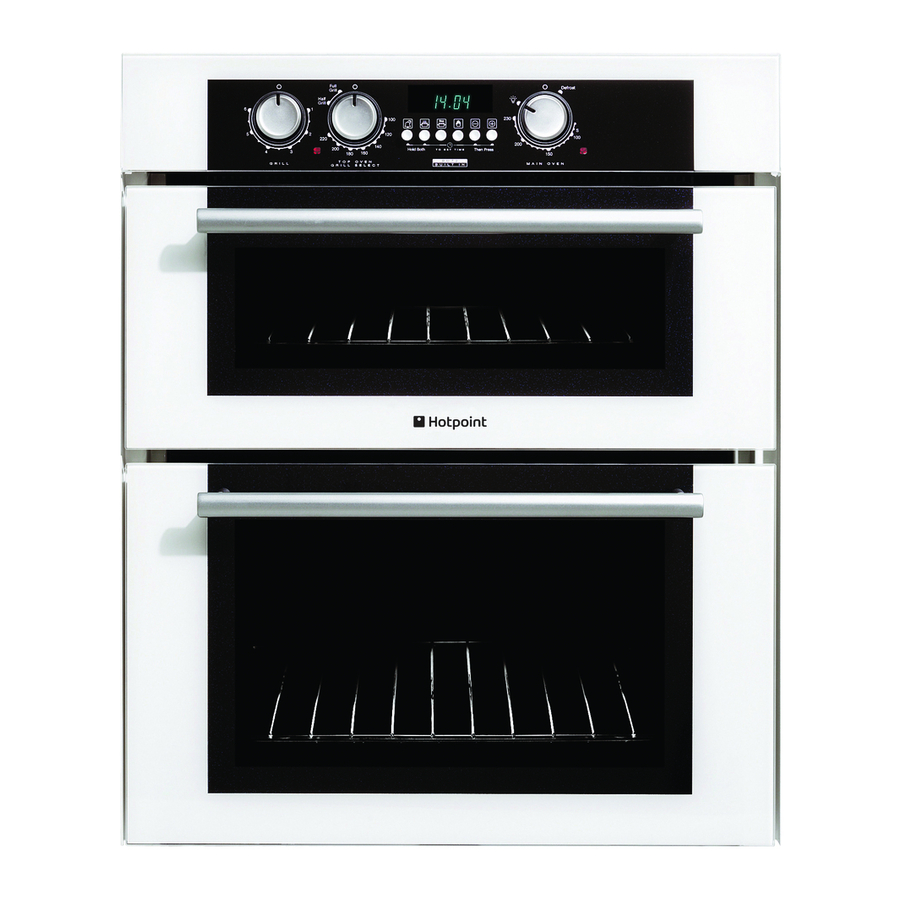
- Page 1 Instructions BU82 BU72 BU71...
-
Page 2: Table Of Contents
CONTENTS Introduction For Your Safety – Always For Your Safety – Never Features Controls Oven Timer Operation Know Your Timer Electronic Clock & Automatic Oven Timer Operation Using The Top Oven for Grilling Grill Pan and Handle Using The Top Oven for Solarplus Grilling Guide To Grilling Using the Top Oven as a Convection Oven Using the Main Oven as a Fan Oven... -
Page 3: Introduction
INTRODUCTION Your new cooker is guaranteed* and will give lasting service. This guarantee is only applicable if the appliance has been installed in accordance with the installation instructions detailed in this booklet. The cooker is designed specifically for domestic use and responsibility will not be accepted for use in any other installation. -
Page 4: Safety Advice
FOR YOUR SAFETY When used properly your appliance is completely safe but as with any electrical product there are certain precautions that must be observed. PLEASE READ THE PRECAUTIONS BELOW BEFORE USING YOUR APPLIANCE. Always Always make sure you remove all packaging and literature from inside the oven and grill compartments before switching on for the first time. -
Page 5: For Your Safety - Never
FOR YOUR SAFETY Never Never leave children unsupervised where a cooking appliance is installed as all cooking surfaces will be hot during and after use. Never allow anyone to sit or stand on any part of the appliance. Never store items above the appliance that children may attempt to reach. Never remove the oven shelves whilst the oven is hot. -
Page 6: Features
FEATURES GRILL SETTING CONTROL GRILL ELEMENT STAY CLEAN LINER TOP OVEN DOOR OVEN FAN STAY CLEAN LINER MEAT PAN INNER DOOR GLASS TOP OVEN TEMPERATURE & GRILL SELECTION CONTROL CLOCK & OVEN TIMER RATING PLATE – Record the Model No. and the Serial No. on KEY CONTACTS, back page. -
Page 7: Controls
CONTROLS GRILL SETTING CONTROL TOP OVEN TEMPERATURE AND GRILL SELECTION CONTROL CONTROL MARKINGS Control Knob Grill Setting Control Top Oven Temperature & Grill Selection Control Main Oven Temperature & Cooling Fan: A gentle flow of air will be blown below the control panel when any selector switch is used. -
Page 8: Oven Timer Operation
OVEN TIMER OPERATION Note: Timer must be set to ‘Time of Day’ and ‘Manual’ before the ovens can be used. AUTOMATIC COOKING The Top Oven and Main Oven can be controlled by the automatic timer. When the timer control has been set for one oven, it is possible to use the other oven only during the same automatic cooking programme. -
Page 9: Know Your Timer
KNOW YOUR TIMER CLOCKFACE The timer incorporates a 24 hour clock. Ensure the correct time of day is always set, before using your cooker. SYMBOLS A ‘bell’ symbol will light up when you select a Minute Minder Period and will remain lit for the period set. -
Page 10: Electronic Clock & Automatic Oven Timer Operation
ELECTRONIC CLOCK & AUTOMATIC OVEN TIMER OPERATION SETTING THE TIME OF DAY Step 1 Make sure all oven controls are turned Off. Step 2 Check the electricity supply to the cooker is turned on. Step 3 When switched on the display will show 0.00 and the Auto symbol, Step 4 Press &... - Page 11 ELECTRONIC CLOCK & AUTOMATIC OVEN TIMER OPERATION AUTO COOKING PROGRAMMES There are two Auto Cooking programmes that can be selected using your timer:– (a) To set the timer to switch the oven(s) On and Off Automatically (b) To set timer to switch on immediately and OFF automatically after a set cook period. a) TO SET THE TIMER TO SWITCH THE OVEN(S) ON AND OFF AUTOMATICALLY This allows you to cook at a specified time for a chosen period before the oven switches off Automatically.
- Page 12 ELECTRONIC CLOCK & AUTOMATIC OVEN TIMER OPERATION Note 1 When cooking automatically the Cook Period can be checked at any time by simply pressing the Cook Period button. Note 2 When cooking automatically the End Time can be checked at any time by simply pressing the End Time button.
- Page 13 ELECTRONIC CLOCK & AUTOMATIC OVEN TIMER OPERATION TO CANCEL AN AUTO COOKING PROGRAMME BEFORE THE COOK PERIOD HAS FINISHED. Step 1 Turn the oven control(s) to the OFF position. Step 2 Press the Manual button to return the oven(s) to “Manual” operation. Note 1 When cooking automatically the Cook Period can be checked at any time by simply pressing the Cook Period button.
-
Page 14: Using The Top Oven For Grilling
USING THE TOP OVEN FOR GRILLING Top Oven Shelf Positioning for Grilling The shelf can be inserted in two different ways for grilling. The grilling chart will indicate the correct orientation. Orientation A Orientation B Note There should always be at least 25mm (1 inch) between the top of the food and the grill element. -
Page 15: Grill Pan And Handle
GRILL PAN & HANDLE The grill pan handle is detachable from the pan, to facilitate cleaning and storage. The grill pan handle can be fixed as follows: Step 1 Step 1 Remove screw & washers from the grill pan bracket (a). Step 2 Tilt the handle over the recess (b). -
Page 16: Using The Top Oven For Solarplus Grilling
USING THE TOP OVEN FOR SOLARPLUS GRILLING Your cooker is not fitted with a conventional grill. We have developed a Solarplus high speed grill which is designed to reduce your grilling times. It is quicker because it takes less time to warm up from cold. Conventional grills require 5 minutes pre-heat before food is placed beneath them, but for normal grilling the Solarplus grill can be used directly from cold without any pre-heat. -
Page 17: Operation When Using The Top Oven For Grilling
OPERATION WHEN USING THE TOP OVEN FOR GRILLING GRILL SETTING CONTROL TOP OVEN TEMPERATURE AND GRILL SELECTION CONTROL Step 1 Ensure oven timer is set to manual. Place the shelf in the correct position (see Grilling Guide). Place the food/grill pan on the shelf, positioned centrally under the grill element. Leave the top oven door fully open. -
Page 19: Using The Top Oven As Aconvection Oven
USING THE TOP OVEN AS A CONVECTION OVEN The top oven should be used to cook small quantities of food. The oven is designed so that the grill element operates at a reduced heat output, this is combined with a heating element situated underneath the floor of the oven. -
Page 20: Operation When Using The Top Oven Asa Convection Oven
OPERATION WHEN USING THE TOP OVEN AS A CONVECTION OVEN TOP OVEN TEMPERATURE & GRILL SELECTION CONTROL Step 1 Check that the timer is in manual. Step 2 Place the shelf in the correct position (see Oven Temperature Charts). Step 3 Select the required cooking temperature (100–220 (see Top Oven Temperature Charts). -
Page 21: Using The Main Oven For Fan Cooking
USING THE MAIN OVEN FOR FAN COOKING Since a circulaire fan oven heats up more quickly and generally cooks food at a lower temperature than a conventional oven, pre-heating is often unnecessary. For guides on “pre-heating” , “cooking temperatures” and “cooking times” see “Oven Temperature Charts”... -
Page 22: Using The Main Oven For Other Functions
USING THE MAIN OVEN FOR OTHER FUNCTIONS FAN ONLY SETTING Only DEFROSTING FROZEN MEAT & POULTRY Joints of meat and whole birds should be defrosted slowly, preferably in a refrigerator (allowing 5-6 hours per lb.) or at room temperature (allowing 2-3 hours per lb.). Frozen meat or poultry must be completely defrosted before cooking in the oven. -
Page 23: Operation
USING THE MAIN OVEN FOR OTHER FUNCTIONS ‘S’ SLOW COOK SETTING This is used for slow cooking, keeping food warm and warming plates for short periods. Extra care should be taken when warming bone china, as it may be damaged in a hot oven. -
Page 24: Temperature Conversion Scale
TEMPERATURE CONVERSION SCALE Mark Main Conventional Oven – – Main Oven... -
Page 27: Oven Temperature Charts
COOKING RESULTS NOT SATISFACTORY GRILL Uneven cooking front to back Fat splattering BAKING GENERAL Uneven rising of cakes Sinking of cakes Over/undercooking TOP OVEN BAKING Uneven cooking front to back Uneven rising Overcooking Food is taking too long to cook Ensure that the grill pan is positioned centrally below the grill element. -
Page 28: Care & Cleaning
CARE AND CLEANING Warning: Before cleaning, please ensure that the electricity supply to the appliance is switched off and the appliance is fully cold. 1. “STAYCLEAN” OVEN LINERS TOP OVEN SIDE LINERS MAIN OVEN SIDE LINERS AND REAR PANEL (a) How "Stayclean" works. The surfaces of the "Stayclean"... -
Page 29: Care And Cleaning
CARE AND CLEANING 2. CLEANING GRILL, TOP OVEN AND MAIN OVEN OVEN SHELVES MAIN OVEN BASE (a) Base & Rear of Top Oven and Base of Main Oven. Wipe out the oven with a damp soapy cloth. For more stubborn stains on the base of the oven use a well soaped fine steel wool soap pad. -
Page 30: Oven Doors
CARE AND CLEANING 3. OVEN DOORS CONTROL PANEL TRIMS 4. REPLACEMENT OF THE OVEN LAMP TOP OVEN LAMP MAIN OVEN LAMP 5. HOW TO CLEAN THE LAMP LENS TOP OVEN LAMP MAIN OVEN LAMP (a) Control Panel Regularly wipe with a clean, damp cloth and polish with a clean, dry cloth. - Page 31 CARE AND CLEANING TO CLEAN THE INSIDE OF OUTER AND INNER GLASS PANELS Warning: Always switch your appliance OFF at the mains supply and allow to cool before cleaning. Fig. 1 Fig. 2 TWO SCREWS/ WASHERS DOOR FIXING Fig. 3 DOOR RUBBER INNER...
-
Page 32: Installation
INSTALLATION ELECTRICAL REQUIREMENTS For your own safety, we recommend that your cooker is installed by a competent person such as one who is registered with NICEIC (National Inspection Council for Electrical Installation Contracting). The cooker should be installed in accordance with the latest edition of the IEE Regulations. Warning: This appliance must be earthed. -
Page 33: Final Installation
INSTALLATION 1. GENERAL The appliance is designed to be mounted on a floor between two adjacent cabinets. The cabinets must be securely fixed to the wall and the cooker securely fixed to the cabinets. This cooker must not be used free standing. Note;... - Page 34 INSTALLATION 597mm min 720mm min 565mm 150mm min 170mm max A minimum distance of 25mm should be maintained between the front face of the cabinet side and the front face of the plinth.
-
Page 35: Top View
INSTALLATION Wall Fixing Bracket Cooker 1mm min Cabinet Doors Top View Double pole control switch Hob Cable 2.5mm Cable size to suit heat resistant cable current rating of BS 6141 Table 15 appliance/s Connector Cable... -
Page 36: Something Wrong
SOMETHING WRONG? Before calling a Service Engineer, please check through the following lists. Problem Nothing works. Display shows 0.00 AUTO. Main & Top Ovens do not work, but the Grill works. Top Ovens and Grill do not work, but the Main Oven works. Grill does not work. - Page 37 Disposal of your product To minimise the risk of injury to children please dispose of your product carefully and safely. Remove all doors and lids. Remove the mains cable (where fitted) by cutting off flush with the appliance and always ensure that no plug is left in a condition where it could be connected to the electricity supply.
-
Page 40: Key Contacts
Monday to Sunday, 8am to 8pm www.hotpointservice.co.uk Republic of Ireland: 1850 502 200 Genuine Parts and Accessories UK: 08709 077 077 Monday to Friday, 8.30am to 5pm Saturday, 8.30am to 12noon www.hotpointservice.co.uk Republic of Ireland: (01) 842 6836 www.hotpoint.co.uk 05/2005 Part no. 195044175.02...
Need help?
Do you have a question about the BU82 BU72 BU71 and is the answer not in the manual?
Questions and answers