
Related Manuals for Whirlpool Duet Sport WED8300SW


Summary of Contents for Whirlpool Duet Sport WED8300SW
- Page 1 CONSUMER SERVICES TECHNICAL L-79 EDUCATION GROUP PRESENTS ELECTRONIC GAS & ELECTRIC DRYERS MODELS: WED8300SW, WED8500SR WGD8300SW, WGD8500SR JOB AID Part No. 8178559...
- Page 2 Successfully return the dryer to its proper operational status. WHIRLPOOL CORPORATION assumes no responsibility for any repairs made on our products by anyone other than Authorized Service Technicians. Copyright © 2006, Whirlpool Corporation, Benton Harbor, MI 49022 - ii -...
-
Page 3: Table Of Contents
TABLE OF CONTENTS Page GENERAL ............. . 1-1 Dryer Safety . - Page 4 Page DIAGNOSTICS & TROUBLESHOOTING ........6-1 Diagnostic Guide .
-
Page 5: General
GENERAL DRYER SAFETY Your safety and the safety of others is very important. We have provided many important safety messages in this Job Aid and on the appliance. Always read and obey all safety messages. This is the safety alert symbol. This symbol alerts you to potential hazards that can kill or hurt you and others. -
Page 6: Model & Serial Number Designations
E = Electric G = Gas PRODUCT D = Dryer SERIES 5 = Whirlpool Leap 6 = Oasis 7 = 24˝ Front Load 8 = Mid Line Front Load 9 = Duet Front Load PRICE POINT LEVELS (1 - 9) -
Page 7: Model & Serial Number Label And Tech Sheet Locations
MODEL & SERIAL NUMBER LABEL AND TECH SHEET LOCATIONS The Model & Serial Number Label and Tech Sheet locations are shown below. Model & Serial Number Label Tech Sheet (Behind Lower Access Panel) -
Page 8: Specifications
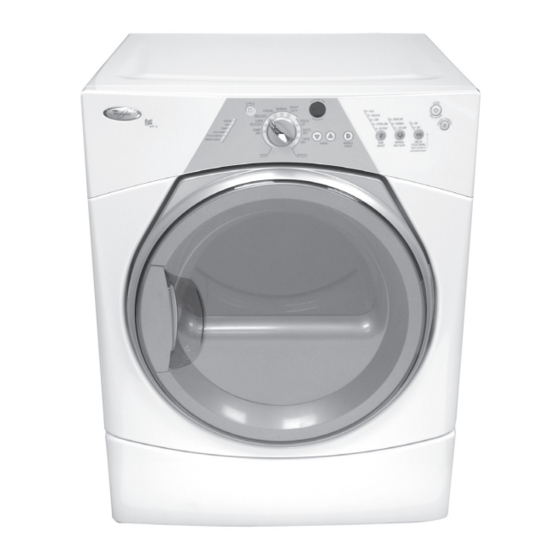
SPECIFICATIONS Model Number WED8300SW WED8500SR WGD8300SW WGD8500SR Model Description Matching Dryer For Matching Dryer For Front Load Washer Front Load Washer Color White with Gray White with Sterling Accents Bright Accents Capacity (Cu.Ft. IEC) Venting 4 way 4 way Reversible Door Lint Screen Location Front Front... -
Page 9: Installation Information
INSTALLATION INFORMATION INSTALLATION INSTRUCTIONS TOOLS AND PARTS Parts Supplied Remove parts packages from dryer drum. Gather the required tools and parts before Check that all parts are included. starting installation. Read and follow the safe- ty instructions provided with any tools listed •... -
Page 10: Location Requirements
OPTIONS LOCATION REQUIREMENTS Pedestal Are you placing the dryer on a pedestal? You have the option of purchasing pedestals of different heights separately for this dryer. You may select a 10˝ (25.4 cm) pedestal or a 15.5˝ (39.4 cm) pedestal with a shelf and bin dividers. -
Page 11: Dryer Dimensions
The dryer must not be installed or stored in an • Additional spacing should be considered area where it will be exposed to water and/or for ease of installation and servicing. weather. • Additional clearances might be required for Check code requirements. Some codes limit, wall, door and floor moldings. - Page 12 Recessed or closet installation - Dryer on Recommended installation spacing for pedestal recessed or closet installation with stacked washer and dryer 14" max.* The dimensions shown are for the recom- (35.6 cm) mended spacing 15" min.* (38.1 cm) 48 in. (310 cm 3"* (7.6 cm) 1"...
-
Page 13: Electrical Requirements
ELECTRICAL REQUIREMENTS • If local codes do not permit the connection of a neutral ground wire to the neutral wire, Electric Models Only see “Optional 3-wire connection” section. It is your responsibility • This dryer is manufactured ready to install •... - Page 14 If your outlet looks like this: GROUNDING INSTRUCTIONS • For a grounded, cord-connected dryer: This dryer must be grounded. In the event of malfunction or breakdown, grounding 4-wire receptacle (14-30R) will reduce the risk of electric shock by Then choose a 4-wire power supply cord with providing a path of least resistance for ring or spade terminals and UL listed strain electric current.
-
Page 15: Electrical Connection
ELECTRICAL CONNECTION DIRECT WIRE Electric Models Only POWER SUPPLY CORD Fire Hazard Use 10 gauge solid copper wire. Use a UL listed strain relief. Fire Hazard Disconnect power before making Use a new UL listed 30 amp power electrical connections. supply cord. - Page 16 • Put power supply cord through the strain • Put direct wire cable through the strain re- relief. Be sure that the wire insulation on lief. The strain relief should have a tight fit the power supply cord is inside the strain with the dryer cabinet and be in a horizontal relief.
- Page 17 4-wire connection: Power supply cord 3. Connect ground wire (green or bare) of power supply cord to external ground con- IMPORTANT: A 4-wire connection is required ductor screw. Tighten screw. for mobile homes and where local codes do not permit the use of 3-wire connections. A.
- Page 18 4-wire connection: Direct wire IMPORTANT: A 4-wire connection is required for mobile homes and where local codes do not permit the use of 3-wire connections. Direct wire cable must have 5 ft (1.52 m) of extra length so dryer can be moved if need- Strip 5˝...
- Page 19 4. Place the hooked ends of the other direct 1. Loosen or remove center silver-colored wire cable wires under the outer terminal terminal block screw. block screws (hooks facing right). Squeeze 2. Connect neutral wire (white or center wire) hooked ends together. Tighten screws. of power supply cord to the center, silver- colored terminal screw of the terminal block.
- Page 20 3-wire connection: Direct wire 3. Place the hooked ends of the other direct wire cable wires under the outer terminal Use where local codes permit connecting block screws (hooks facing right). Squeeze cabinet-ground conductor to neutral wire. hooked ends together. Tighten screws. Direct wire cable must have 5 ft (1.52 m) of ex- tra length so dryer can be moved if needed.
-
Page 21: Gas Models Only
3. Connect the other wires to outer terminal GROUNDING INSTRUCTIONS block screws. Tighten screws. • For a grounded, cord-connected dryer: This dryer must be grounded. In the event of malfunction or breakdown, grounding will reduce the risk of electric shock by provid- ing a path of least resistance for electric current.This dryer is equipped with a cord 4. - Page 22 Gas Type In Canada: Natural gas: An individual manual shutoff valve must be This dryer is equipped for use with Natural installed in accordance with the B149.1, gas. It is design-certified by CSA International Natural Gas and Propane Installation for LP (propane or butane) gases with appro- Code.
-
Page 23: Venting Requirements
Option 2 (Alternate method) Dryer gas pipe Approved aluminum or copper tubing: • The gas pipe that comes out through the rear of your dryer has a 3/8˝ male pipe • Lengths under 20 ft (6.1 m) can use 3/8˝ thread. - Page 24 Recommended hood styles are shown here. 4" (10.2 cm) heavy metal exhaust vent DURASAFE vent products can be pur- ™ chased from your dealer or by calling Whirlpool Parts and Accessories. 4" Rigid metal vent (10.2 cm) 4" • For best drying performance, rigid metal (10.2 cm)
-
Page 25: Plan Vent System
• Do not use an exhaust hood with a mag- netic latch. Improper venting can cause moisture and lint to collect indoors, which may result in: • Moisture damage to woodwork, furni- Fire Hazard ture, paint, wallpaper, carpets, etc. • Housecleaning problems and health Cover unused exhaust holes with the problems. -
Page 26: Install Vent System
NOTE: The following kits for close clearance NOTE: Do not use vent runs longer than alternate installations are available for pur- those specified in the Vent system chart. chase. Exhaust systems longer than those speci- fied will: • Over-the-top Installation: •... -
Page 27: Install Leveling Legs
INSTALL LEVELING LEGS For mobile home use Gas dryers must be securely fastened to the floor at the time of installation. Excessive Weight Hazard Use two or more people to move and install dryer. Failure to do so can result in back or other injury. -
Page 28: Connect Vent
CONNECT VENT A combination of pipe fittings must be used to connect the dryer to the existing gas line. 1. Using a 4˝ (10.2 cm) clamp, connect vent Shown is a recommended connection. Your to exhaust outlet in dryer. If connecting to connection may be different, according to the existing vent, make sure the vent is clean. - Page 29 Remove the door assembly 6. Turn inner ring 180° and lock tabs into place. 1. Remove the 4 screws that hold the door hinge on the front panel of the dryer. Reverse hinge 1. Use a small flat-blade screwdriver to re- move 2 plug strips from the inner door.
-
Page 30: Complete Installation
4. Reinstall plug strips on opposite side of Reinstall the door the inner door. 1. Reattach door to dryer front panel with the 5. Check for fingerprints on the glass. Clean 4 screws. glass if necessary. 6. Place the inner door assembly inside the outer door assembly. - Page 31 7. Remove any protective film on the console For Gas Models Only and any tape remaining on the dryer. 12. Select a Timed Dry heated cycle, and start 8. Read “Dryer Use” in the Dryer User In- the dryer. Do not select the Air Only modi- structions.
- Page 32 — NOTES — 2-24...
-
Page 33: Product Operation
PRODUCT OPERATION DRYER USE STARTING THE DRYER Explosion Hazard Fire Hazard Keep flammable materials and vapors, No washer can completely remove oil. such as gasoline, away from dryer. Do not dry anything that has ever had Do not dry anything that has ever had any type of oil on it (including cooking anything flammable on it (even after oils). - Page 34 Follow these basic steps to start your dryer. NOTE: Dryness level selections can be made Please refer to specific sections of this manual only while using Auto Cycles. Selecting More for more detailed information. Dry, Normal or Less Dry automatically adjusts the sensed time needed.
-
Page 35: Lock Controls
7. Press and hold START for approximately 1 time when your dryer is automatically sensing second until dryer starts. Be sure the door the dryness level of your load. If a Manual Cycle is closed. is running, the display shows the exact number of minutes remaining in the cycle. -
Page 36: Status Lights
STATUS LIGHTS WRINKLE SHIELD Feature ™ The WRINKLE SHIELD feature light illumi- ™ You may follow the progress of your dryer with nates when this option is selected. This indicator the drying Status indicator lights. stays on with the Cycle Complete light. Indicator lights Other indicator lights on the control panel show when Cycle, Temp Adjust, and End of Cycle... - Page 37 MANUAL CYCLES Delicate Use this cycle to get Low heat for drying syn- Use Manual Cycles to select a specific amount thetic fabrics, washable knit fabrics and no-iron of drying time and a drying temperature. When finishes. a Manual Cycle is selected, the ESTIMATED TIME REMAINING display shows the actual Super Delicate time remaining in your cycle.
-
Page 38: Additional Features
ADDITIONAL FEATURES When using Air Only • Check that coverings are securely WRINKLE SHIELD Feature ™ stitched. The WRINKLE SHIELD feature helps smooth ™ • Shake and fluff pillows by hand periodically out wrinkles that form when you cannot unload during the cycle. -
Page 39: Drying Rack Option
NOTE: If you do not press Start within 5 minutes 2. Place drying rack inside dryer drum, posi- of selecting the cycle, the dryer automatically tioning the back wire on the ledge of the shuts off. inner dryer back panel. Push down on front edge of drying rack to secure over the lint Changing Modifiers and Options after screen. - Page 40 This chart shows examples of items that can Rack Dry Setting Temp. Time* be rack dried and the suggested cycle, tem- Wool Sweaters Timed perature setting and drying time. Actual drying Block to shape and lay flat on time will depend on the amount of moisture the rack.
-
Page 41: Dryer Care
DRYER CARE CLEANING THE DRYER LOCATION IMPORTANT: • Do not run the dryer with the lint screen loose, Keep dryer area clear and free from items that damaged, blocked, or missing. Doing so can would obstruct the flow of combustion and ventilation air. -
Page 42: Cleaning The Dryer Interior
CLEANING THE DRYER INTERIOR 2. Close shutoff valve in gas supply line. 3. Clean lint screen. See “Cleaning the Lint To clean dryer drum Screen.” 1. Make a paste with powdered laundry de- tergent and very warm water. Moving care For power supply cord-connected dryers: 2. -
Page 43: Troubleshooting
TROUBLESHOOTING DRYER OPERATION Unusual sounds • Has the dryer had a period of non-use? Dryer will not run If the dryer hasn’t been used for a while, • Has a household fuse blown, or has a there may be a thumping sound during the circuit breaker tripped? first few minutes of operation. - Page 44 DRYER RESULTS Clothes are not drying satisfactorily, drying times are too long, or load is too hot • Is the lint screen clogged with lint? Lint screen should be cleaned before each load. Explosion Hazard Keep flammable materials and vapors, such as gasoline, away from dryer.
- Page 45 Lint on load Loads are wrinkled • Is the lint screen clogged? • Was the load removed from dryer at the end of the cycle? Clean lint screen. Check for air movement. • Was the dryer overloaded? Stains on load or drum Dry smaller loads that can tumble freely.
- Page 46 — NOTES — 3-14...
-
Page 47: Component Access
COMPONENT ACCESS ™ This section instructs you on how to service each component inside the Duet Sport Electronic Gas & Electric Dryers. The components and their locations are shown below. COMPONENT LOCATIONS Machine Control Drum Light Electronics Assembly Console Electronics Console Assembly Rear Drum Rollers... -
Page 48: Removing The Console And The Console Electronics Assembly
REMOVING THE CONSOLE AND THE CONSOLE ELECTRONICS ASSEMBLY To remove the console: a) Release the locking tab, and discon- nect the console electronics board connector from the machine control electronics at P5. Machine Control Electrical Shock Hazard Electronics Disconnect power before servicing. Replace all parts and panels before operating. - Page 49 To remove the console electronics as- sembly: a) Pull the selector knob off the switch shaft. b) Press the seven console locking tabs, Remove and unsnap the console electronics Selector Knob assembly, then lift the assembly from the console and remove it. Console Electronics Assembly Console Locking Tabs...
-
Page 50: Removing The Machine Control Electronics
REMOVING THE MACHINE CONTROL ELECTRONICS Remove the front machine control elec- tronics (MCE) bracket screw. Electrical Shock Hazard Disconnect power before servicing. Replace all parts and panels before MCE Bracket Screw operating. Remove the screw from the MCE, un- Failure to do so can result in death or hook the tabs from the bracket, and re- electrical shock. -
Page 51: Removing The Door Switch
REMOVING THE DOOR SWITCH Disconnect the wires from the door switch terminals. Blue (N.O.) Electrical Shock Hazard Brown (N.C.) Disconnect power before servicing. White (COM) Replace all parts and panels before operating. Failure to do so can result in death or electrical shock. -
Page 52: Removing The Moisture Sensor
REMOVING THE MOISTURE SENSOR From inside the drum, remove the three screws from the outlet grille. Outlet Grille Screw Screw Electrical Shock Hazard Disconnect power before servicing. Replace all parts and panels before operating. Moisture Sensor Screw Failure to do so can result in death or Pull the moisture sensor away from the electrical shock. -
Page 53: Removing The Drum Light Socket
REMOVING THE DRUM LIGHT SOCKET Remove the bulb from the light socket. Remove the screw from the drum light holder and pull the holder forward so you can access the wires. Light Holder Screw Electrical Shock Hazard Disconnect power before servicing. Replace all parts and panels before operating. -
Page 54: Removing The Front Panel
REMOVING THE FRONT PANEL Toe Panel Screws Electrical Shock Hazard Remove the two screws from the bottom Disconnect power before servicing. of the front panel. Replace all parts and panels before operating. Failure to do so can result in death or electrical shock. -
Page 55: Removing The Thermal Fuse & Exhaust Thermistor
REMOVING THE THERMAL FUSE & EXHAUST THERMISTOR Disconnect the two wire connectors from the thermal fuse or exhaust thermistor terminals. Remove the screw(s) from the thermal fuse or exhaust thermistor and remove the component from the blower housing. Exhaust Thermistor Thermal Fuse 2 RD-WH Wires Electrical Shock Hazard... -
Page 56: Removing The Belt & Drum, And Rollers
REMOVING THE BELT & DRUM, AND ROLLERS Front Panel Top Screws w/ Keyhole Slots Electrical Shock Hazard Disconnect power before servicing. Replace all parts and panels before Bottom Screws operating. Failure to do so can result in death or electrical shock. Moisture Sensor Connector Unplug dryer or disconnect power. - Page 57 b) Slide the belt off the front of the drum To remove a roller: and remove it. NOTE: There are two rollers on the front panel and two on the rear panel, as shown below. Remove Belt Front Rollers Rear Rollers a) Pry the sides of the triangular ring out of the groove in the roller shaft with a small screwdriver.
-
Page 58: Removing The Drive Motor And Belt Switch
REMOVING THE DRIVE MOTOR AND BELT SWITCH 7/8˝ Wrench Electrical Shock Hazard Disconnect power before servicing. Replace all parts and panels before operating. Failure to do so can result in death or Ratchet w/ electrical shock. 1/2˝ Drive Unplug dryer or disconnect power. Blower Wheel Turn off gas supply to dryer. - Page 59 d) Lift the locking tabs on the top and To remove the belt switch: bottom of the motor harness plug and a) Remove the drive motor from the dryer disconnect the plug from the motor (see step 5). terminals. b) Unhook the end of the spring from the e) Remove the two mounting screws from idler pulley arm.
-
Page 60: Removing The Ignitor, Flame Sensor, High-Limit Thermostat
REMOVING THE IGNITOR, FLAME SENSOR, HIGH-LIMIT THERMOSTAT, AND THERMAL CUTOFF (GAS MODELS ONLY) Electrical Shock Hazard Ignitor Bracket Disconnect power before servicing. Screw Replace all parts and panels before operating. Failure to do so can result in death or electrical shock. Ignitor Connector Unplug dryer or disconnect power. - Page 61 To remove the flame sensor: To remove the high-limit thermostat or the thermal cutoff: a) Disconnect the two wire connectors from the sensor terminals. a) Disconnect the two wire connectors from the component terminals. b) Remove the flame sensor screw from the burner venturi and remove the b) Remove the two screws from the high- sensor.
-
Page 62: Removing The Gas Burner Assembly Coils
REMOVING THE GAS BURNER ASSEMBLY COILS Coils w/Connectors 3-Wire 2-Wire Electrical Shock Hazard Disconnect power before servicing. Replace all parts and panels before operating. Burner Bracket Support Bracket Screws Screws Failure to do so can result in death or electrical shock. Unplug dryer or disconnect power. -
Page 63: Removing The Heater, High-Limit Thermostat, And Thermal Cutoff
REMOVING THE HEATER, HIGH-LIMIT THERMOSTAT, AND THERMAL CUTOFF (ELECTRIC MODELS ONLY) To remove the heater: a) Remove the two wires from the termi- nal block. b) Remove the hex-head screw from the heater housing, and slide the heater out of the duct. To remove the high-limit thermostat or the thermal cutoff: Electrical Shock Hazard... -
Page 64: Removing The Dryer Door
REMOVING THE DRYER DOOR While supporting the dryer door, remove the four screws from the hinge, and re- move the door. Electrical Shock Hazard Disconnect power before servicing. Replace all parts and panels before operating. Failure to do so can result in death or electrical shock. -
Page 65: Component Testing
COMPONENT TESTING Before testing any of the components, perform • Check all connections before replacing the following checks: components, looking for broken or loose wires, failed terminals, or wires not pressed • Control failure can be the result of corrosion into connectors far enough. -
Page 66: Door Switch
Electrical Shock Hazard Disconnect power before servicing. Replace all parts and panels before operating. Failure to do so can result in death or electrical shock. DOOR SWITCH Open the dryer door. 10. Touch the red ohmmeter test lead to the Refer to page 4-5 for the procedure for ac- blue wire pin in the connector. -
Page 67: Thermal Fuse
Electrical Shock Hazard Disconnect power before servicing. Replace all parts and panels before operating. Failure to do so can result in death or electrical shock. THERMAL FUSE Refer to page 4-9 for the procedure for ac- cessing the thermal fuse. Electric Dryers: The thermal fuse is wired in series with the drive motor. -
Page 68: Exhaust Thermistor
Electrical Shock Hazard Disconnect power before servicing. Replace all parts and panels before operating. Failure to do so can result in death or electrical shock. If F-22 or F-23 does not flash in the dis- EXHAUST THERMISTOR play, the connections to the thermistor are good. -
Page 69: Drive Motor
Electrical Shock Hazard Disconnect power before servicing. Replace all parts and panels before operating. Failure to do so can result in death or electrical shock. DRIVE MOTOR Touch one ohmmeter test lead to the blue motor wire connector, and the other test Refer to page 4-12 for the procedure for ac- lead to connector pin 3 (violet wire). -
Page 70: Flame Sensor
Electrical Shock Hazard Disconnect power before servicing. Replace all parts and panels before operating. Failure to do so can result in death or electrical shock. FLAME SENSOR HIGH-LIMIT THERMOSTAT & THERMAL CUTOFF Refer to page 4-14 for the procedure for ac- cessing the flame sensor. -
Page 71: Burner Ignitor
Electrical Shock Hazard Disconnect power before servicing. Replace all parts and panels before operating. Failure to do so can result in death or electrical shock. BURNER IGNITOR GAS BURNER COILS Refer to page 4-16 for the procedure for ac- Refer to page 4-16 for the procedure for ac- cessing the gas burner assembly. -
Page 72: Thermal Cutoff (Electric Dryers Only)
Electrical Shock Hazard Disconnect power before servicing. Replace all parts and panels before operating. Failure to do so can result in death or electrical shock. THERMAL CUTOFF HEATER (ELECTRIC DRYERS ONLY) (ELECTRIC DRYERS ONLY) Refer to page 4-17 for the procedure for ac- Refer to page 4-17 for the procedure for ac- cessing the thermal cutoff. -
Page 73: Diagnostics & Troubleshooting
DIAGNOSTICS & TROUBLESHOOTING ACTIVATING THE DIAGNOSTIC TEST MODE DIAGNOSTIC GUIDE 1. Be sure the dryer is in standby mode Before servicing, check the following: (plugged in with all indicators off, or with • Make sure there is power at the wall only the Cycle Complete indicator on). -
Page 74: Saved Fault/Active Fault Codes
Diagnostic: Saved Fault Codes Diagnostic: Active Fault Codes If there are saved fault codes, the most recent If there is an active fault code, it will be flashing fault code will alternately show “F-” and “XX” in the display (the cycle indicators do not flash). where XX is the fault code, and all the cycle Review the Display Fault Codes table for the selector indicators flash. - Page 75 Power button controls Status indicators at left This button This button Backlit button Start button Turns off all indicators and exits and the Lock/Unlock Control indicator controls the controls the controls its own turns on dryer right digit left digit indicator diagnostic mode Button controls...
-
Page 76: Display Fault Codes
DISPLAY FAULT CODES The fault codes below would be indicated when attempting to start a drying cycle, or after activating the diagnostic test mode. DISPLAY DESCRIPTION EXPLANATION AND RECOMMENDED PROCEDURE “PF” flashes to indicate that a power failure occurred while the dryer was Power Failure running. -
Page 77: Troubleshooting Guide
TROUBLESHOOTING GUIDE Some tests will require accessing components. See Figure 2 for component locations. PROBLEM POSSIBLE CAUSE / TEST NOTE: Possible Cause/Tests MUST be performed in the sequence shown for each problem. 1. Supply connections. See TEST #1. WON’T POWER UP. (No response when buttons are 2. -
Page 78: Troubleshooting Tests
TROUBLESHOOTING TESTS • When this is found, go to step 5. • If neither of the plug terminals have NOTE: These checks are done with the dryer continuity with the left-most contact of unplugged or disconnected from power. the terminal block, replace the power TEST #1 Supply Connections cord and test the dryer. - Page 79 GAS DRYER 6. In a similar way, check the continuity between the L1 terminal of the plug and 1. Unplug dryer or disconnect power. P9-2 (black wire) on the control board. See 2. Remove the cover plate from the top right Figure 17.
- Page 80 TEST #2 Motor Circuit Test Belt Switch Pulley This test will check the wiring to the motor and the motor itself. The following items are part of this motor system: Electric Part of Motor System Dryer Dryer Harness/connection – Drum –...
- Page 81 6. Using Figure 9, check for the resistance 8. Door Switch problems can be uncovered values of the motor’s Main and Start in the Door Switch Diagnostic Test; how- winding coils as shown below. ever, if this was not done, the following can be done without applying power to the NOTE: Main and Start winding coils must dryer.
- Page 82 If 5–15k Ω are measured, replace the ELECTRIC DRYER: • machine control electronics. 1. Unplug dryer or disconnect power. If the resistance is less than 1k Ω, replace • 2. Remove the toe panel to access the the thermistor. thermal components. See Figure 14. GAS DRYER: 3.
- Page 83 Heat will not shut off: Hold a glass bulb thermometer capable of reading from 90° to 180°F (32° to 82°C) in 1. Unplug dryer or disconnect power. the center of the exhaust outlet. The correct 2. Access the machine control electronics, exhaust temperatures are as follows: and measure the resistance between P14-3 (red-white wire) and P14-6 (red-white wire).
- Page 84 • If the thermistor resistance checks within 3. Use an ohmmeter to determine if a gas valve normal limits, replace the machine control coil has failed. Remove harness plugs. electronics. Measure resistance across terminals. Readings should match those shown in TEST #3b Thermal Fuse Test the following chart.
- Page 85 3. Locate the two metal sensor strips on the • If the ohmmeter does not indicate (infin- face of the lint screen housing. Bridge ity) open circuit, go to step 6. these strips with a wet cloth or finger. • Otherwise, measure the resistance across between pins 1 and 2 of connector P13 on •...
- Page 86 10. If moisture sensor diagnostic test passes, None of the indicators light up: check the thermistor: Perform TEST #3a. 1. See Diagnostic Guide/Before Servicing. • If the problem persists after replacing the 2. Perform Test #1 to verify supply connect- moisture sensor and thermistor, replace ions.
-
Page 87: Removing The Toe Panel
4. If replacing the console electronics and • If the connections are OK, replace the housing assembly failed: wire and door switch assembly and retest. • Unplug dryer or disconnect power. • If wire and door switch assembly have • Replace the machine control electron- been replaced and dryer still does ics. - Page 88 ACCESSING THE MACHINE 2. Remove the screw holding the machine CONTROL ELECTRONICS control electronics assembly to the mount- ing bracket. See Figure 16. 1. After locating the machine control electron- ics, remove the two screws that hold the 3. There are two plastic legs on the front of machine control electronics bracket in place.
-
Page 89: Accessing Console Electronics/Housing Assembly
ACCESSING THE CONSOLE ELECTRONICS AND HOUSING ASSEMBLY 1. Access the machine control electronics (see Accessing the Machine Control Electronics) and disconnect the P5 ribbon cable. Console Electronics and Housing Assembly 2. The console panel must be removed Figure 19. Locate seven locking tabs. to access the console electronics and REMOVING THE BACK PANEL housing assembly. - Page 90 — NOTES — 6-18...
-
Page 91: Wiring Diagrams
WIRING DIAGRAMS ELECTRIC DRYER... -
Page 92: Gas Dryer
GAS DRYER... - Page 93 — NOTES —...
- Page 94 — NOTES —...
-
Page 95: Product Specifications
PRODUCT SPECIFICATIONS WARRANTY INFORMATION SOURCES IN THE UNITED STATES: FOR PRODUCT SPECIFICATIONS AND WARANTY INFORMATION CALL: FOR WHIRLPOOL PRODUCTS: 1-800-253-1301 FOR KITCHENAID PRODUCTS: 1-800-422-1230 FOR ROPER PRODUCTS: 1-800-447-6737 FOR TECHNICAL ASSISTANCE WHILE AT THE CUSTOMER’S HOME CALL: THE TECHNICAL ASSISTANCE LINE: 1-800-253-2870... - Page 96 CORPORATION...
Need help?
Do you have a question about the Duet Sport WED8300SW and is the answer not in the manual?
Questions and answers