Table of Contents
Advertisement
Advertisement
Table of Contents

Subscribe to Our Youtube Channel
Related Manuals for Motion Computing J3500


Summary of Contents for Motion Computing J3500
- Page 1 J3500 Tablet PC User’s Guide...
- Page 2 © 2010 Motion Computing, Inc. All rights reserved. purposes to another user, except as permitted in the End User License Agreement for such product. This document contains information protected by copyright. No part of this document may be Motion Computing, Inc. has made every effort to...
-
Page 3: Table Of Contents
Setting up the J3500........ - Page 4 Chapter 3 Using your Tablet PC ....23 Using Motion Dashboard ............24 Using the Motion utility .
- Page 5 Setting up users and passwords..........52 Setting up Windows user accounts.
- Page 6 Contents...
-
Page 7: Getting Started
J3500. If there are certain things you want to learn about your new Tablet PC, look on the Contents page. -
Page 8: Overview
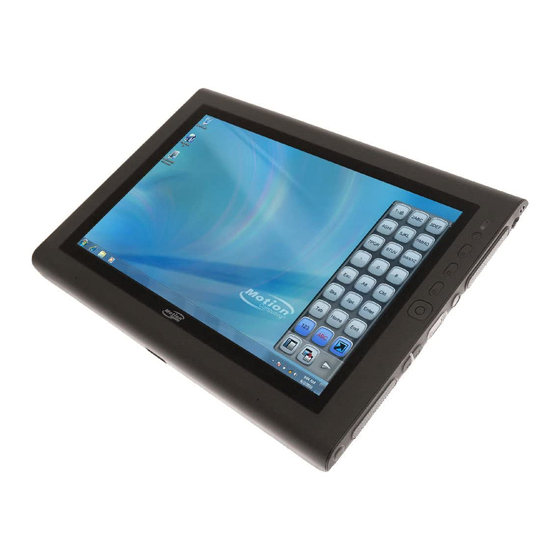
Overview The following illustrations show the buttons, slots, and ports on the Motion J3500 Tablet PC. Front Speakers Microphone Ambient light sensor Camera button QuickNav button Dashboard button Esc button ® Directional Microphones Speakers Listen to music or other audio. - Page 9 Battery release switch (right) indicator lights (left) FlexDock connector Connects to the FlexDock when docked. Remove the cover (cover shown) before attaching the J3500 to the dock. Battery power Show the amount of remaining battery power. indicator lights Battery Powers the Tablet PC when it is not plugged in or docked.
- Page 10 Right Fingerprint Pen tether Power button Battery status Shoulder strap attach point reader attach point light Air vent Pen bay Express card Windows Security Smart card button slot (optional) slot (optional) (Cover removed) Shoulder strap Attach point for the shoulder strap. attach point Air vent Dissipates heat from the Tablet PC.
- Page 11 Left Video port (VGA) USB ports Headphone port Air vent Power adapter port Microphone port Ethernet port Shoulder strap attach point Security slot (Port covers removed) Security slot Connect a security cable to protect the Tablet PC from theft. Air vent Dissipates heat from the Tablet PC.
-
Page 12: Setting Up The J3500
Setting up the J3500 The J3500 is self-contained, so you can start using it immediately. You should connect AC power until the battery is fully charged. Use the following steps to get started: Step 1: Plug in the power adapter •... - Page 13 73. Step 5: Get familiar with your Tablet PC Motion Computing offers free Web-based Quick Start Training that you can use to familiarize yourself with the features of your Tablet PC. If you are new to tablet computing, you can use the training to get started quickly. You can find the training at http://training.motioncomputing.com/products/training_online_resources.asp.
- Page 14 Chapter 1 Getting Started...
-
Page 15: Features
Features The Motion Computing J3500 Tablet PC has the power and features of a notebook computer, while giving you the added mobility and versatility of a tablet computer. Use the information in this chapter to get more familiar with the hardware features of your J3500 Tablet PC, such as buttons, slots, connectors, and wireless adapters. -
Page 16: Pen And Touch
Pen and touch An important difference between traditional PCs and Tablet PCs is that you frequently use the pen or touch screen to interact with the computer instead of a mouse and keyboard. The pen includes a pressure-sensitive tip, a function button and an eraser. The pen contains no batteries and requires no external power. -
Page 17: Front Panel Buttons
Front panel buttons You can use the buttons on the front of the Tablet PC to perform many functions without having to use the pen. The buttons are customizable, so you can modify their functions to suit the way you work. See “Configuring front panel buttons” on page 29. Camera button QuickNav button Dashboard button... -
Page 18: Battery Status Light
Battery status light You can use the indicator light on the right side of the Tablet PC to monitor the status of the battery. The following illustration and table show the battery status light and the various power state descriptions. Battery status light Status Description... -
Page 19: Security
Security The J3500 provides a safe computing environment that enables strong security protection and serves as the foundation for complementary security technologies. The core security features include InsydeH 0™ Extensible Firmware Interface (EFI) BIOS, a built-in fingerprint reader, a universal security lock, the Dashboard Security Center, TPM (Trusted Platform Module), and a Smart Card-ready platform. -
Page 20: Display
See “Connecting headphones, external speakers, or a microphone” on page 37. Speakers The J3500 is equipped with integrated stereo speakers that you can use to listen to music, movies, or other multimedia applications. You can also use the headphones port to connect external speakers or headphones. See “Connecting headphones, external speakers, or a microphone”... -
Page 21: Ambient Light Sensor (Als)
Ambient light sensor (ALS) If you have dynamic brightness selected and are running on battery power, the ambient light sensor measures the surrounding light and adjusts the display brightness and contrast accordingly. This ensures that you have proper settings for all lighting conditions. To enable dynamic brightness, see “Adjusting the display brightness”... -
Page 22: Security Slot
For more information, see “Using Ethernet” on page 31. Docking connector The J3500 has a docking port that you can use to connect the Tablet PC to the FlexDock. When the Tablet PC is docked, the port connections are replicated on the dock. This enables you to connect a monitor, keyboard, mouse, or external drive to the dock and easily dock and undock the Tablet PC. -
Page 23: Express Card Slot (Optional)
To remove the card, pull the card out of the slot and replace the card slot cover. The J3500 includes a cover for the Express card slot. To protect the Express card slot, you should leave the cover in place when you do not have an Express card in the slot. -
Page 24: Mobile Broadband With Gps (Optional)
Mobile broadband with GPS (optional) Your Tablet PC may have an embedded Qualcomm® Gobi2000™ module. The Gobi™ module lets you connect to a variety of mobile broadband networks for sending and receiving data wirelessly. It also includes a global positioning system (GPS) receiver. Mobile broadband By using mobile broadband, you can browse the Internet, send and receive email, connect to your company’s intranet, and use Web-based applications. -
Page 25: Bluetooth Wireless (Optional)
Tablet PC. Battery The J3500 includes two battery bays for high-capacity Lithium-ion batteries. Under normal conditions, you can run the Tablet PC on battery power for about three hours with one battery, and about seven hours with two batteries. You can maximize battery life by optimizing your power plan. -
Page 26: J-Series Flexdock (Optional)
J-Series FlexDock (optional) The J-Series FlexDock provides a docking tray and ports for connecting the J3500 Tablet PC to the following devices: • AC power for charging the J3500 Tablet PC and battery. • USB devices (four ports) • Display •... -
Page 27: J-Series Mobile Keyboard (Optional)
J-Series Mobile Keyboard (optional) The J-Series Mobile Keyboard is a thin-profile, portable, full size keyboard solution for entering data in the J-Series Tablet PC. When in the closed position, the Mobile Keyboard has a thin profile and can be attached to the back of the J-Series Tablet PC for easy transporting. - Page 28 Chapter 2 Features...
-
Page 29: Chapter 3 Using Your Tablet Pc
And unlike PDAs or other handheld devices, the J3500 can run any Windows 7-compatible application. Use the information in this chapter to learn about common tasks such as using the pen to enter text, using Motion Dashboard, using speech recognition, and customizing the Tablet PC to fit the way you work. -
Page 30: Using Motion Dashboard
Using Motion Dashboard Motion Dashboard puts many common tablet-related settings and tasks at your fingertips. For example, you can enable or disable Bluetooth and Wi-Fi, calibrate the digitizer, or check your remaining battery power. To start Motion Dashboard • Press the Dashboard button ( ) on the front of the Tablet PC. -
Page 31: Using The Motion Utility
Using the Motion utility Click the Motion utility icon ( ) in the notification area ( ). You may need to click the up arrow ( ) to view the icon. You can access the following features from the Motion utility icon: Battery Health Selecting this option opens a window that shows information about correct battery conditioning to prolong the life of the battery and shows the current battery charge level. -
Page 32: Using Tablet Pc Input Panel
Store the pen in the pen bay when not in use. To store the pen in the pen bay, insert it into the bay and press it until it clicks. To remove the pen, press it again. If you have the pen tether attached, ensure that you have released the pen before you pull it out using the tether. -
Page 33: Configuring Pen Options
Configuring pen options You can use pen options to enable or disable the pen function button and the pen eraser. To configure pen options 1. Open Motion Dashboard to the Pen & Tablet panel (page 24). 2. Tap the Pen & Input Devices button. 3. -
Page 34: Enabling And Disabling Touch
Note: If the Tablet PC does not respond when you tap or touch with your finger, try using more area of your fingertip to tap and touch. To enable the touch pointer 1. Open Motion Dashboard to the Pen & Tablet panel (page 24). 2. -
Page 35: Configuring Front Panel Buttons
Configuring front panel buttons As you become more familiar with your Tablet PC, you may want to customize the buttons on the front panel. You can configure the buttons to start your favorite program, run a command, or enter a key combination. Camera Motion QuickNav Dashboard... -
Page 36: Using Motion Quicknav
Using Motion QuickNav Motion QuickNav provides multiple QWERTY keyboard lay-outs and numeric pads for quickly entering text, numbers, and symbols into documents and applications. It also lets you quickly take a picture using the camera, record or play back a voice note, and acquire a GPS location. -
Page 37: Using Usb
You can also access QuickNav features from some of the front panel buttons. The following table shows the hardware buttons and which QuickNav features they launch. Primary Secondary (Press) (Press and hold) Take a picture. Open My Pictures. Open QuickNav. Start a voice note. -
Page 38: Using The Camera (Optional)
Using the camera (optional) You can use the built-in camera to take pictures. For more information about the camera, see “Camera (optional)” on page 12. To use the camera 1. Open Motion QuickNav. (See “Using Motion QuickNav” on page 30.) 2. -
Page 39: Using The Smart Card Reader (Optional)
Camera tips • Hold the camera steady and allow it to focus. • If your pen is tethered, ensure that the tether is not in front of the camera lens. • Ensure you have adequate lighting. • You can use the Pictures window to take and review multiple pictures. Use the slider bar at the bottom of the Pictures window to switch among active pictures. -
Page 40: Using The Express Card Reader (Optional)
To remove the card, pull the card out of the slot and replace the card slot cover. The J3500 includes a cover for the Express card slot. To protect the Express card slot, you should leave the cover in place when you do not have an Express card in the slot. -
Page 41: Rotating The Display
Rotating the display You can easily change the screen orientation to fit your current task. You may want to use the portrait orientation for filling out forms or reading an e-book. At other times, you may want a landscape orientation for Web browsing or sketching. To rotate the display 1. -
Page 42: Using The Built-In Microphones
5. For Display Scheme, select one of the following: • Mirror Display. Duplicates the Tablet PC display on the external monitor or projector. The same desktop is visible on both displays. The external monitor must use the same display resolution as the Tablet PC. Document Document External monitor... -
Page 43: Connecting Headphones, External Speakers, Or A Microphone
Connecting headphones, external speakers, or a microphone You can connect headphones or external speakers to the headphones port using a 3.5 mm plug. When speakers or headphones are connected, the internal speakers are disabled. You can connect an external microphone or headset to the microphone port using a 3.5 mm plug. -
Page 44: Using Dictation And Voice Commands
Train your computer to recognize your speech Use this procedure to improve your computer’s ability to understand your voice. To train your computer to recognize your speech 1. In Control Panel, tap the Ease of Access category, then tap Speech Recognition. 2. -
Page 45: Using Power Plans
Using power plans The J3500 includes a comprehensive suite of power management functions. By using power plans, you can maximize system performance, save energy, or get the most from a single charge. Selecting a power plan Use this procedure to choose among the Balanced, Power saver, or High performance power plans. -
Page 46: Changing Power Plan Settings
Changing power plan settings You can edit the particular settings of an existing power plan. To create your own power plan, see “Creating a power plan” on page 40. To change power plan settings 1. Open Motion Dashboard to the Power panel (page 24). 2. -
Page 47: Using Hibernate
If a second battery is not installed, a non-functioning battery bay cartridge is provided to occupy the second battery bay. For more information, go to the Motion Computing accessories page at www.motioncomputing.com/accessories. - Page 48 You can also place the pointer over the battery icon in the notification area. The battery icon provides a graphical representation of the remaining battery power. It shows both cumulative and individual power readings for the batteries installed. You can also check the remaining battery power from the battery itself. To check the battery status using the gauge on the battery •...
-
Page 49: Charging The Battery
Charging the battery When the Tablet PC is connected to AC power, the battery automatically charges until it reaches full charge, even if the Tablet PC is being used. The battery status light on the Tablet PC will blink amber when the battery is installed and AC power is applied to the Tablet PC. If two batteries are installed and the Tablet PC is on, the charging sequence is staggered to ensure that both batteries are being fully charged at nearly the same time. -
Page 50: Removing And Replacing The Battery
Removing and replacing the battery You can remove the battery to check the remaining power, or to replace it with a fully charged battery. To remove the battery 1. Ensure that the Tablet PC is plugged in to AC power or turned off. 2. -
Page 51: Hot-Swapping The Battery
To determine which battery needs to be replaced, see “Checking battery power” on page 41. Important: Use only Motion Computing J-Series batteries with the J-Series Tablet PC. Battery maintenance To maximize the performance of the batteries, deplete each battery’s charge level to less than 10% every 30 days. -
Page 52: Inserting Or Removing A Sim Card
Inserting or removing a SIM card Use the following procedure to insert or remove a SIM card. To insert or remove a SIM card 1. Shut down the Tablet PC. 2. Remove the right battery or battery bay cartridge. Slide the battery release switch until the battery is partially ejected, and then pull the battery out of the battery bay. -
Page 53: Using Motion Omnipass And The Fingerprint Reader
Using Motion OmniPass and the fingerprint reader Motion OmniPass offers a secure and convenient system for managing your passwords and providing confidentiality for your sensitive data through file encryption. To start Motion OmniPass Do one of the following: – Click Start > All Programs > Motion OmniPass > OmniPass Control Center. –... - Page 54 3. In the Choose Finger window, tap on the finger you want to enroll, then tap Next or Practice. Practice allows you to do a trial run of the fingerprint capture. 4. Place the selected finger over the fingerprint reader and slowly drag your finger across the sensor in a downward motion or in an upward motion.
-
Page 55: Using Password Replacement
You can also capture a second fingerprint later. From the OmniPass Control Center, tap Run User Management Wizard, then tap Modify a user’s device enrollment. 6. Select your user preferences and tap Next. On the Backup User Profile screen, tap Backup Now. -
Page 56: Using The Password Wizard
Note: For some applications, you may have to use the password wizard to register passwords. See “Using the password wizard” on page 50. 4. Enter the following information: • Friendly Name. A descriptive name to identify the password box. • Automatically enter. -
Page 57: Using Windows Security Center
Using Windows Security Center Windows Security Center provides a central location for you to manage your computer’s security settings and learn more about improving security. If a problem is detected (such as an out-of-date antivirus application), the Security Center sends you an alert and provides recommendations for how to remedy the situation. -
Page 58: Setting Up Users And Passwords
To set a BIOS password 1. Start the Tablet PC. 2. When the Motion Computing splash screen appears, press the Dashboard button ( When access is enabled, you will hear an alert sound. If you miss the splash screen, restart the computer and try again. -
Page 59: Setting Up A Hard Disk Drive (Hdd) Password
To set up a hard disk drive password 1. Start the Tablet PC. 2. When the Motion Computing splash screen appears, press the Dashboard button ( When access is enabled, you will hear an alert sound. If you miss the splash screen, restart the computer and try again. -
Page 60: Setting Up A Wi-Fi Connection
Setting up a Wi-Fi connection Use this procedure to create a Wi-Fi connection. To set up a Wi-Fi connection 1. Open the Motion Dashboard to the Wireless panel (page 24). 2. Ensure that Enable Internal 802.11 Wireless is selected. 3. Tap the Properties button. 4. -
Page 61: Using The Gps Receiver
Tablet PC. To download and install the Connection Manager 1. Go to the Motion Computing Support web page at http://www.motioncomputing.com/support/WWANconmgr/gobi/ 2. Follow the instructions on downloading and installing the Connection Manager. -
Page 62: Enabling Or Disabling Bluetooth
Enabling or disabling Bluetooth Before you can set up a Bluetooth device, you must enable the Bluetooth adapter on the Tablet PC. After you enable Bluetooth, the Bluetooth icon ( ) appears in the notification area. You can tap on this icon to get shortcuts to the Bluetooth Settings window, the Bluetooth File Transfer Wizard, and the Add New Connection Wizard. -
Page 63: Finding Additional Software
If the Tablet PC still cannot detect the Bluetooth device, contact the device manufacturer for assistance. Bluetooth wireless tips Motion Computing and its Bluetooth partners have worked to ensure a positive experience with this technology, and to ensure Bluetooth interoperability. In doing so, we have found the following issues: •... - Page 64 Chapter 3 Using your Tablet PC...
-
Page 65: Chapter 4 Care And Maintenance
Care and Maintenance Proper care and maintenance will keep your Tablet PC working and in good condition for a long time. For general information about care of the Tablet PC and its components and accessories, see the Safety and Regulatory Guide included with your Tablet PC. This chapter describes the care and maintenance procedures for your Tablet PC. -
Page 66: Standard Display
Tablet PC. • Avoid exposing the display to direct sunlight for long periods of time. Cleaning solutions Motion Computing maintains a list of tested cleaning solutions and chemical disinfectants on the Motion Computing web site at www.motioncomputing.com/choose/spec_clean_j3500.htm WARNING: Do not use any corrosive or abrasive cleaners to clean or disinfect the Tablet PC. -
Page 67: Cleaning The Fingerprint Reader
Cleaning the fingerprint reader Under normal circumstances, you should clean the fingerprint reader once a month, or whenever necessary. To clean the fingerprint reader 1. Shut down the Tablet PC, unplug it, and remove the battery. 2. Lightly spray a cotton swab with household window cleaner. 3. -
Page 68: Ordering New Pens
Ordering new pens To order pens, go to the Motion Computing accessories page at https:// store.motioncomputing.com/. Traveling with your Tablet PC Use the following tips when you travel with your Tablet PC: • Remove all accessories and cables. Remember to pack those you will need while traveling, including at least one pen. -
Page 69: Creating A Backup Archive
DANGER: Do not transport Li-ion batteries in checked baggage. The baggage hold can get very hot, which can overheat the Li-ion battery and result in an explosion. You can take up to two spare batteries in carry-on luggage, in addition to the one in your Tablet PC. Transporting batteries in checked baggage or transporting more than two spare batteries is a violation of federal transportation regulations. -
Page 70: Restoring Data
Restoring data If you experience a problem, you can use the Windows Recovery Environment to repair your Windows 7 files, or you can restore your computer to the state it was in when it left the factory. If a serious problem occurs and Windows 7 will not start, the Windows Recovery Environment Repair will automatically start. -
Page 71: Using Windows 7 To Restore Individual Files
To restore the original factory image 1. Start or restart the computer. 2. After the initial BIOS screen, press and hold the F8 key. 3. On the Advanced Boot Options screen, select Repair your computer and press the Enter key. 4. - Page 72 Chapter 4 Care and Maintenance...
-
Page 73: Appendix A Troubleshooting And Support
Troubleshooting and Support Motion Computing Tablet PCs are thoroughly tested for performance and quality, but occasionally problems still occur. If you do not find the information you are looking for in this section, go to the Motion Computing support page at www.motioncomputing.com/... - Page 74 The display goes black while the Tablet PC is still turned on • The computer might have turned off the display to save power. To restore the display, touch the screen with the pen or press a button. • The computer might have gone into Sleep mode. In Sleep mode, the power status light flashes blue.
- Page 75 The display is too dim • The brightness may be set too low. Use Motion Dashboard to increase the brightness. See “Adjusting the display brightness” on page 34. The display is unreadable or distorted • The screen resolution and color quality may be set incorrectly. Use Windows Display Properties to reset the display settings.
-
Page 76: Ports And Connectors
The eraser does not work • The eraser may not be enabled. You can use the Pen and Input Devices window to enable the eraser. Open Help and Support and search for “Pen and Input Devices “. The eraser works on ink only, not text. The buttons on the Tablet PC do not do what I expect them to do •... - Page 77 (such as a USB or Bluetooth device), the integrated audio may stop working. If this happens, reinstall the audio drivers. After you install these, if you still have problems recording, contact Motion Computing Technical Support. System I forgot my BIOS password and cannot access my computer •...
-
Page 78: Frequently Asked Questions
Frequently asked questions How can I make the battery charge last longer? • For maximum conservation, you can use the Power saver power plan. See “Selecting a power plan” on page 39. • Use the Dynamic brightness display setting. This automatically controls the display brightness to conserve power. -
Page 79: Specifications
Service and support If you need help with your Motion Computing J3500 Tablet PC, go to the Motion Computing Support and Services page at www.motioncomputing.com/support. This page will provide you links to all the information you need about Motion products, technical support, customer services and professional services. - Page 80 Appendix A Troubleshooting and Support...
-
Page 81: Index
Index Numerics buttons about 11 10/100/1000 Base-T Ethernet configuring 29 about 16 functions 11, 31 using 31 802.11a/g/n about 17 enabling 53 calibrating for touch 7 setting up 54 calibrating the digitizer 7 using 53 calibrating the pen 7 camera 2, 11 lens 3 light 3 AC adapter... - Page 82 Dashboard button Express card slot 4, 17, 34 about 2, 11 extended display 36 configuring 29 external display dictation mode 37 connecting 16 digitizer pen using 35 about 10, 25 calibrating 7 directional pad 2, 11 FAA wireless air travel requirement 62 disabling features overview 9 the eraser 27...
- Page 83 Internet Options 51 OmniPass about 13, 47 starting 47 keyboard 26 on-screen keyboard 26 ordering replacement pens 62 overview landscape mode 35 hardware 9 ports and connectors 2 about 14 care and cleaning 60 View Anywhere 14 password replacement Li-ion battery 19 about 49 liquid crystal display See LCD using 50...
- Page 84 procedure 64 touch gestures 27 touch mode 28 touch pointer 28 TPM 13 Secure Attention Sequence traveling with your tablet PC 62 about 4 troubleshooting security audio 70 features 13 battery 68 using 13 display 68 security slot 5, 16 input 69 service 73 network 70...
- Page 85 Windows Security Center about 51 warranty 73 using 51 Wi-Fi wireless about 17 802.11a/g/n 17 enabling 53 Bluetooth 19 setting up 54 wireless networking 17, 19 using 53 writing pad 26 Windows Firewall 51 Windows Security button 4 Index...
- Page 86 Index...
Need help?
Do you have a question about the J3500 and is the answer not in the manual?
Questions and answers