Table of Contents
Advertisement
Product Documentation
The documentation for this product includes the manuals listed below. Please be sure to read all
instructions thoroughly to get the most from your Nikon scanner.
User's Manual (this manual)
This manual provides instructions for setting up and using your scanner.
Nikon Scan 3 Reference Manual (on CD)
This electronic manual provides complete operating instructions for the software that makes your
scanner run, Nikon Scan 3. It is available on the reference CD provided with your scanner, where it can
be viewed using Adobe Acrobat Reader 4.0 (available on the reference CD) or later. Installation and
viewing instructions are included in the User's Manual.
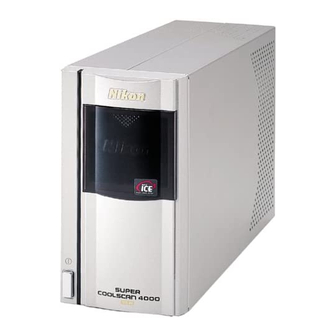
User's Manual
En
i
i
Advertisement
Table of Contents
Troubleshooting

Related Manuals for Nikon Super CoolScan 4000 ED


Summary of Contents for Nikon Super CoolScan 4000 ED
- Page 1 This electronic manual provides complete operating instructions for the software that makes your scanner run, Nikon Scan 3. It is available on the reference CD provided with your scanner, where it can be viewed using Adobe Acrobat Reader 4.0 (available on the reference CD) or later. Installation and...
- Page 2 • Nikon reserves the right to change the specifications of the hardware and software described in these manuals at any time and without prior notice. • Nikon will not be held liable for any damages to film, film rolls, or APS film cartridges resulting from the use of this product.
- Page 3 ROC, and Digital GEM, which are technologies of Applied Science Fiction, Inc. Radius, ColorMatch, and PressView are registered trademarks of miro displays, inc. All other trade names mentioned in this manual or the other documentation provided with your Nikon product are trademarks or registered trademarks of their respective holders.
-
Page 4: For Your Safety
• The interior of the scanner contains areas of high voltage. Removing the scanner’s cover could result in fire or electric shock. Contact your dealer or Nikon service office for inspection or repair. • Do not modify. Modification could result in fire or electric shock. - Page 5 • In the event that the insulation is damaged and the wires become exposed, contact your retailer or Nikon service office for information on repair or replacement. Continued use could result in fire or electric shock.
- Page 6 CAUTIONS Do not handle the equipment when your hands are wet Failure to observe this precaution could result in electric shock. Keep equipment out of reach of children Failure to observe this precaution could result in injury. Install the scanner only as directed in this manual Failure to observe this precaution could block the scanner’s vents and cause the power source to overheat, possibly resulting in fire.
-
Page 7: Table Of Contents
Step 5: Install the IEEE 1394 Update for Windows 98 SE (4000 ED Only) Updating the Windows 98 Second Edition IEEE 1394 Drivers ......... 15 Step 6: View the Nikon Scan 3 Reference Manual Installing Adobe Acrobat Reader ..................... 16 Step 7: Install Nikon Scan 3 Installing the Driver Software for Your Scanner .............. - Page 8 Reference Troubleshooting: What to Do When the Scanner Does Not Function as Expected ....68 What to Do When the Scanner Will Not Scan ................... 68 Troubleshooting for the SA-21 ....................... 71 When Film Jams in the SA-21 ............................. 71 Scanning Short, Long, or Damaged Film Strips ....................
-
Page 9: Overview: About This Manual
Overview About This Manual Thank you for your purchase of a Nikon 4000 ED (SUPER COOLSCAN 4000 ED) or COOLSCAN IV ED film scanner. This manual provides information on safety precautions, scanner setup, and operation for 4000 ED and COOLSCAN IV ED film scanners. Please read these instructions before using your scanner, and keep this manual where all those who use the device will read it. - Page 10 To make it easier to find the information you need, the following symbols and conventions are used: This icon marks cautions, information that you should read before using your Nikon scanner to prevent damage to the device. This icon marks notes, information that you should read before using your Nikon scanner.
-
Page 11: Getting The Most From Your Scanner
Getting the Most from Your Scanner About This Chapter The information in this chapter will help ensure that you always get the best possible results when using your scanner. Be sure to read this section before using your Nikon product. - Page 12 Keep the Adapter Slot Closed In order to ensure that your scanner always produces the best possible results, remove the adapter and close the adapter slot cover when the scanner is not in use. Never remove an adapter from the scanner without first ejecting the film and checking that the status LED on the front of the scanner is glowing steadily.
- Page 13 Protect Your Film The Digital ICE photo retouch function built into your Nikon scanner can be used to eliminate the effects of dust, scratches, and surface defects on your film. To ensure the best possible results and to prevent damage to slides or film, however, be sure to protect your film from dust, fingerprints, and condensation as described below.
- Page 14 Using Your Scanner with Other Devices (4000 ED Only) When using the 4000 ED (SUPER COOLSCAN 4000 ED) with other devices connected to the same bus, observe the precaution below. When using the 4000 ED with other IEEE 1394/Firewire devices, do not: •...
-
Page 15: Setup Guide
Setup Guide About This Chapter This chapter takes you step-by-step through the process of setting up your scanner and making your first scans. - Page 16 Nikon scanner. If desired, installa- tion can be performed at a later date (Macintosh users will need to copy the Nikon Scan 3 plug-in into the Photoshop Step 6—View the Nikon Scan 3 Reference plug-ins folder manually). Manual ( 16–17)
- Page 17 Step 8—Connect the Power Cable Step 9—Connect the Interface Cable Windows Macintosh CHECK! Is the Nikon Scan 3 CD in the CD-ROM drive? Insert the Nikon Scan 3 CD into the CD-ROM drive Step 10—Turn the Scanner On Windows Windows...
-
Page 18: Step 1: Get To Know Your Scanner
Adapter slot This is where you put adapters for different types of film. Don’t put anything in this slot except an approved Nikon film adapter. Sliding cover Slide the cover down before inserting a film adapter. To protect your scanner from dust and other foreign objects, be sure to close the cover when no adapter is in place. - Page 19 4000 ED/COOLSCAN IV ED Front View 4000 ED COOLSCAN IV ED Rear View...
- Page 20 SA-21 strip-film adapter (1) This adapter can be used to scan single or multiple selected frames in film strips two to six frames in length. The frames to be scanned can be previewed and se- lected using Nikon Scan.
- Page 21 This envelope contains user registration cards, and other important documents. Reference CD (1) This CD contains a reference manual for the Nikon Scan driver software, together with installers for Adobe Acrobat Reader, the software used to view the manual. Nikon Scan 3 CD-ROM (1) This CD contains driver software for your Nikon scan- ner.
-
Page 22: Step 2: Choose A Location
Step 2: Choose a Location Installing the Scanner Before connecting the power and interface cables, choose a flat, stable location for your scanner close to the computer and to a suitable power outlet. Do not install your scanner where: • it would be exposed to direct or reflected sunlight •... -
Page 23: Installing An Ieee 1394/Firewire Interface
IEEE 1394 or Firewire port that has been tested and approved by Nikon for use with the 4000 ED, you will need to purchase and install one of the IEEE 1394/Firewire PCMCIA cards recommended by Nikon before you can use your scan- ner. -
Page 24: Step 6: View The Nikon Scan 3 Reference Manual
Your Nikon scanner is controlled using Nikon Scan driver software, which must be installed before you can use your scanner. The operating manual for Nikon Scan may be found on the reference CD provided with your scanner, where it is stored in Adobe Acrobat Portable Document Format (pdf). To view the manual, you will require Adobe Acrobat Reader 4.0 or later. - Page 25 Macintosh Windows Once installation is complete, you will be able to view the Nikon Scan Reference Manual by double- clicking the INDEX.pdf icon in the root directory of the reference CD and choosing a language from the menu that appears.
-
Page 26: Step 7: Install Nikon Scan 3
Installing the Driver Software for Your Scanner Before using your Nikon Scanner, you will need to install Nikon Scan 3 driver software, which acts as an interface between the scanner and your computer. To install Nikon Scan, follow the steps below. - Page 27 Choosing the correct color-space profile is very important if the scanner is to be used in a professional setting, for example as a part of a production workflow. The Nikon Scan 3 Reference Manual contains information about the color management system used in Nikon Scan. Please take time to study the explanations and advice provided.
- Page 28 Nikon Scan to the specified location. Depending on where you purchased your scanner, the Nikon Scan 3 CD will contain installers for from one to four language versions of Nikon Scan: English (EN), French (FR), German (DE), and Spanish (ES).
- Page 29 Choosing the correct color-space profile is very important if the scanner is to be used in a professional setting, for example as a part of a production workflow. The Nikon Scan 3 Reference Manual contains information about the color management system used in Nikon Scan. Please take time to study the explanations and advice provided.
-
Page 30: Step 8: Connect The Power Cable
Step 8: Connect the Power Cable Connecting the Scanner to a Power Source Before connecting the power cables, be sure the scanner is off. Attach the female end of the power cable to the AC connector on the rear of the scanner and insert the male end into a general-purpose (AC 100–240 V, 50/60 Hz) household outlet. -
Page 31: Step 9: Connect The Interface Cable
Step 9: Connect the Interface Cable Connecting the Scanner to a Computer With the scanner off, connect one end of the interface cable to the scanner’s interface connector, then connect the other end to your computer’s IEEE 1394/Firewire connector (4000 ED) or USB port (COOLSCAN IV ED). -
Page 32: Step 10: Turn The Scanner On
Getting Ready to Install the Scanner Driver Before turning the scanner on for the first time, confirm that the Nikon Scan 3 CD is in your computer’s CD-ROM drive. Press the power switch to turn the scanner on. When the scanner is turned on, the status LED will blink for a few seconds while the scanner initializes and then glow steadily. -
Page 33: Step 11: Register The Scanner With Windows
A dialog will be displayed asking where you want Windows to search for a driver. Be sure that the Nikon Scan 3 CD is inserted in the CD- ROM drive. If the CD is not in the CD-ROM drive, insert the disk while holding down the shift key to prevent the Nikon Scan installer from starting automatically. - Page 34 11-6 After confirming that “D:\INF\LS4000\Win98SE” is displayed in the text box under Specify a location (for “D” substitute the drive letter of the CD-ROM drive containing the Nikon Scan 3 CD), click Next. 11-7 The dialog shown at right will be displayed. Click Next.
- Page 35 Be sure that the Nikon Scan 3 CD is inserted in the CD-ROM drive. If the CD is not in the CD-ROM drive, insert the disk while holding down the shift key to prevent the Nikon Scan installer from starting auto- matically.
- Page 36 11-6 The dialog shown at right may be displayed; click Yes to restart your computer. After completing device registration, check that the Windows de- vice drivers are installed and functioning normally. Pg. For more information on: 39 Confirming That the Device Driver Is Correctly Installed (Windows Me)
- Page 37 A dialog will be displayed asking whether you want to search for a driver or select one from a list. Be sure that the Nikon Scan 3 CD is inserted in the CD-ROM drive. If the CD is not in the CD-ROM drive, insert the disk while holding down the shift key to prevent the Nikon Scan installer from starting automatically.
- Page 38 11-7 In the Locate File dialog, select the CD-ROM drive containing the Nikon Scan 3 CD (Nkscan) from the Look in pop-up menu and double-click the INF folder. Open the Win2000 folder under the LS4000 folder and click Open. This will return you to the dialog shown in Step 11-6;...
- Page 39 11-10 The dialog shown at right will be displayed while Windows registers the scanner. 11-11 A dialog will be displayed announcing that registration is complete. Click Finish. 11-12 The dialog shown at right may be displayed; click Yes to restart your computer.
- Page 40 A dialog will be displayed asking where you want Windows to search for a driver. Be sure that the Nikon Scan 3 CD is inserted in the CD- ROM drive. If the CD is not in the CD-ROM drive, insert the disk while holding down the shift key to prevent the Nikon Scan installer from starting automatically.
- Page 41 After confirming that “D:\INF\LS40” is displayed in the text box un- der Specify a location (for “D” substitute the drive letter of the CD-ROM drive containing the Nikon Scan 3 CD), click Next. 11-7 The dialog shown at right will be displayed. Click Next.
- Page 42 Be sure that the Nikon Scan 3 CD is inserted in the CD-ROM drive. If the CD is not in the CD-ROM drive, insert the disk while holding down the shift key to prevent the Nikon Scan installer from starting auto- matically.
- Page 43 A dialog will be displayed asking whether you want to search for a driver or select one from a list. Be sure that the Nikon Scan 3 CD is inserted in the CD-ROM drive. If the CD is not in the CD-ROM drive, insert the disk while holding down the shift key to prevent the Nikon Scan installer from starting automatically.
- Page 44 11-6 The dialog shown at right will be displayed once Windows has lo- cated the information it needs to register the scanner. Click Next. 11-7 The dialog shown at right will be displayed. Click Yes. 11-8 The dialog shown at right will be displayed while Windows registers the scanner.
- Page 45 If a message Your Nikon Scanner should be listed as an im- such as, “The drivers for this device are not aging device. If an “Imaging Device” item ap- installed”...
- Page 46 1–3 of “Confirming That the Device Driver Is installer from starting automatically, insert the Correctly Installed (Windows 98SE). ” Nikon Scan 3 CD into a CD-ROM drive. Se- lect Specify a location in the dialog below If your scanner is listed under “Unknown de- and click Browse.
- Page 47 If a message Your Nikon Scanner should be listed as an im- such as, “The drivers for this device are not aging device. If an “Imaging Device” item ap- installed”...
- Page 48 With the shift key held down to pre- Driver Is Correctly Installed (Windows Me). ” vent the installer from starting automatically, insert the Nikon Scan 3 CD into a CD-ROM If your scanner is listed under “Unknown de- drive (if the Welcome dialog appears when the vices”...
- Page 49 “This device is not working properly” appears, proceed to “Updating the Device Driver (Windows 2000).” Your Nikon Scanner should be listed as an im- aging device. If an “Imaging devices” item ap- pears, click the “+” mark next to the item to...
- Page 50 Open the Driver tab and click Update Driver…. Inser t the Nikon Scan 3 CD in a CD-ROM drive (if the Welcome dialog appears when the CD is inserted in the drive, click Exit and pro- ceed with driver installation).
-
Page 51: Step 12: Make A Scan
Nikon Scan can be used to scan images into third-party host applications such as Adobe Photoshop, or it can be used as a “stand-alone” application for scanning images and saving them to disk. To start Nikon Scan from another application, select Nikon Scan from the application’s list of “acquire” or “import”... - Page 52 Macintosh Open the folder to which you installed Nikon Scan (the default location is in the path Nikon Software : Nikon Scan 3 on the start-up disk) and double-click the Nikon Scan icon. 12-2 After confirming that the status LED is glowing steadily, open the sliding cover on the front of the scanner and slide a film adapter into the adapter slot as shown below, with the film slot towards the front of the scanner.
- Page 53 (see right). If your computer is off or Nikon Scan is not running, you can also eject the film by turning the scanner off and then on again and waiting for the film to be ejected automatically (be sure the status LED on the front of the scanner is glowing steadily before turning the scanner off).
-
Page 54: Ma-20 (S)
MA-20 (S) The MA-20 (S) can be used to scan mounted slides one at a time. Insert the slides with the emulsion surface face down (i.e., with the shiny surface face up) and the short side of the aperture facing the scanner. - Page 55 12-4 Choose the type of film to be scanned from the Nikon Scan media-type menu. 12-5 Choose a color model from the color-model menu. Calibrated RGB is the best choice in most cir- cumstances. The Grayscale option is for use when...
- Page 56 12-6 (SA-21 only) If you are using the SA-21 strip-film adapter, you can choose the frames to be scanned from the thumb- nail drawer. Click the thumbnail drawer tab to open the thumbnail drawer. SA-21 Thumbnail drawer tab By default, frames are identified by number only. To view a small preview image (thumbnail) for each frame, click the button.
- Page 57 If the thumbnail drawer is too small to display all the frames at once, you can enlarge the drawer by dragging its lower right corner or use the scroll slider to view frames that do not fit it in the drawer. Scroll slider Drag here to enlarge thumbnail area The frame to be scanned can be selected by clicking the associated frame number or thumbnail.
- Page 58 12-7 Click the Preview button to create a preview of the image to be scanned. You can also create a preview by double-clicking the desired frame in the thumbnail drawer. The preview will be displayed in the preview area.
- Page 59 12-8 Steps 12-9 through 12-13 involve the “Tool Chest. ” The Tool Chest, new to Nikon Scan 3, is a set of tool palettes, each containing an information display or controls for a specific task. If the Tool Chest is not...
- Page 60 12-9 If necessary, you can rotate or flip the preview image. Click the triangle at the top left corner of the Layout Tools palette in the Tool Chest to display the Layout Tools palette. Click The image in the preview area can be rotated and flipped using the following four buttons: Rotate the image ninety degrees to the right Rotate the image ninety degrees to the left Flip the image horizontally...
- Page 61 12-10 If desired, you can process the image digitally to remove dust and scratches or to reduce the effects of fading and film grain. Open the Digital ICE Cubed palette by clicking the triangle at its top left corner. Click To remove dust and scratches from the image, check Enable Digital ICE and select Normal or Fine from Digital ICE menu.
- Page 62 12-11 Choose the area to be scanned by dragging the mouse over the image in the preview area. Selected area (“crop”) Drag the mouse The size of the crop can be changed by dragging its boundaries. To change the position of the crop, place the cursor inside the selected area and drag it to a new location.
- Page 63 The Crop palette contains three options for determining output size: Keep this crop, Keep this output size, and Keep this file size. Output size text boxes Output units menu File size text box Scale slider Resolution text box Output resolution menu •...
- Page 64 12-13 If desired, color, contrast, sharpness, and image quality can be adjusted using the following tool palettes: Curves The Curves palette makes it possible to adjust color balance and contrast in specific portions of the tone range. For example, you can selectively enhance detail in dark portions of the image (shadow), brighten mid-tones, or bring out details in highlights.
- Page 65 The image produced when you click the Scan button to open the image in the host application will be the same as the image in the Processed tab. When using Nikon Scan as a stand-alone application, you can use the Ctrl-T (Windows) or (Macintosh) keyboard shortcut to switch between the Processed and Natural tabs.
- Page 66 12-14 To scan the image, click the Scan button. The scanned image will be opened in an independent image window, where it can be saved to disk. Macintosh Windows...
- Page 67 Open TWAIN Source from the File menu (Windows) or selecting the scanner from the devices listed in the Tools sub-menu under the Nikon Scan menu. If you are using Nikon Scan as a TWAIN source or acquire plug-in for a third-party application such as Adobe Photoshop, you can re-open the scan window by selecting Nikon Scan from the application’s list of...
- Page 68 Once you have finished scanning, exit Nikon Scan by selecting Exit (Windows) or Quit (Macintosh) from the File menu (if you are using Nikon Scan as a TWAIN source or acquire plug-in for another application, close the scan window by clicking the close box) and follow the steps below to turn the scanner off.
-
Page 69: Nikon Scan Quick Reference
Nikon Scan Quick Reference About This Chapter This chapter provides a quick guide to the centerpiece of the Nikon Scan interface, the scan window. For more complete information on installing and using Nikon Scan, see the Nikon Scan 3 Reference... - Page 70 The Scan Window: An Overview Control area (A) Thumbnail drawer tab (F) Tool chest (H) Contains the most frequently used Click to select frames to be scanned Contains tools for: scanning and preview controls. from multi-frame film • setting the image orientation and choosing the portion of the im- Information panel (B) Preview area (G)
-
Page 71: The Control Area
• Prefs: click to open the prefer- the capacities of your image editing ences dialog software and whether the image is • Help: click to open the Nikon destined for output on a commer- Scan help file cial four-color printing press or dis- •... -
Page 72: The Information Panel
The Information Panel Orientation Dimensions/File Size Image Enhancement Shows the orientation of the pre- Gives the height and width of the Indicates whether Digital ICE view image relative to the original, current crop in pixels, and the size analog gain are in effect. Remem- reflecting any flips or rotations that of the file that will result if the crop ber to use Digital ICE... -
Page 73: The Tool Chest
One of three color editing tools Use the color balance tools to make Like the Curves tool, the LCH edi- offered by Nikon Scan, the curves adjustments to brightness, contrast, tor can be used to adjust bright- tool is useful when adjusting con-... -
Page 74: The Scan Progress Window
The Tool Chest (continued) Unsharp Mask Digital ICE Cubed Analog Gain Unsharp mask increases the sharp- Three tools are available: Using analog gain, you can adjust ness of the image by making edges • Digital ICE: reduces the effects colors by directly altering the ex- more distinct, either over the en- of dust and scratches posure value for each of the col-... -
Page 75: Reference
• Troubleshooting, including what to do if your scanner will not scan, re-installing the scanner drivers, and troubleshooting for the SA-21 • Caring for your scanner • Optional accessories available for the 4000 ED (SUPER COOLSCAN 4000 ED) and COOLSCAN IV ED • Scanner specifications... -
Page 76: Troubleshooting: What To Do When The Scanner Does Not Function As Expected
Should you encounter problems with your scanner, refer to the following section and the troubleshoot- ing section in the Nikon Scan 3 Reference Manual before consulting your retailer or Nikon representative. What to Do When the Scanner Will Not Scan... - Page 77 Failure to observe this precaution could re- is poor sult in malfunction. • Settings are improperly adjusted in Nikon Scan Refer to the Nikon Scan 3 Reference Manual for informa- tion on adjusting scanner settings, or try resetting scanner settings to factory defaults.
- Page 78 IEEE 1394 port, check the make and model num- ber of your computer). Updated compatiblity information may also be available on the Nikon support web site for your area. If your IEEE 1394/Firewire board is not compat- ible with Nikon Scan, install the REX-PFW2W IEEE 1394...
-
Page 79: Troubleshooting For The Sa-21
Troubleshooting for the SA-21 When Film Jams in the SA-21 If the film jams in the SA-21 strip-film adapter, Nikon Scan 3 will display an error message, and the scanner’s status LED will flash rapidly (roughly five times a second). - Page 80 If the Film Jams Inside the Adapter If film jams inside the adapter, the following error messge will appear: Follow the steps below to remove the film from the adapter. • After clicking OK to release the adapter’s locking mechanism, wait until the status LED glows steadily and then remove the adapter from the scanner.
- Page 81 • After placing the adapter on a table or other flat, stable surface, press the release button on top of the adapter, open the front panel, and open and remove the upper cover. Release button Upper cover Front panel • If the end of the film strip is not visible, rotate the toothed wheel until the end of the film protrudes from either end of the adapter.
- Page 82 • Release the frame lock lever and open the roller frame. Roller frame Frame lock lever • Pull gently on the film to remove it from the film slot or from the rear of the adapter. Frame lock lever Roller frame •...
-
Page 83: Scanning Short, Long, Or Damaged Film Strips
Scanning Short, Long, or Damaged Film Strips This section details how to scan film that can not be used in the SA-21. Film That Can Not Be Used in the SA-21 Problem Solution Use the FH-3 film holder with the MA-20 (S) slide- mount adapter. - Page 84 Film with the defects listed below requires repair before it can be used in the SA-21. It can be scanned without repair using the FH-3 film holder with the MA-20 (S) slide-mount adapter. Film That Must Be Repaired Before It Can Be Used in the SA-21 Problem Solution There is tape on the ends of the film.
- Page 85 Problem Solution The end of the film is folded. Trim the folded portion from the film, cutting the film straight across and being careful not to cut across the perforations. The end of the film is tapered. Trim the end of film straight across, being careful not to cut across the perforations.
-
Page 86: Using The Fh-3 Film Holder
Using the FH-3 Film Holder Film of one to six frames that can not be scanned in the SA-21 strip-film adapter can be scanned in the MA-20 (S) slide-mount adapter using the FH-3 film holder. MA-20 (S) FH-3 Eject button Eject Button When removing the FH-3 film holder from the adapter, do not use the eject button. - Page 87 • Hold the adapter with the Nikon logo upper- most. Nikon logo • Unlatch the holder snaps and flip the upper holder open. Upper holder...
- Page 88 • Place a strip of film in the lower portion of the Aperture holder, aligning each frame with an aperture in the lower holder. The shiny surface of the film should be uppermost (the emulsion surface lowermost), so that the frame numbers are not reversed.
- Page 89 • Fasten the snap on the FH-3 and fit the upper and lower ends of the holder together. • Slide the holder until the frame to be scanned appears in one of the two apertures in the FH-3. Apertures...
- Page 90 • Insert the FH-3 into the MA-20 (S) slide mount adapter with the aperture to be scanned to- wards the scanner. • To remove the FH-3 from the adapter, wait until the scanner’s status LED glows steadily and then remove the FH-3 by hand. Do not use the eject button on the MA-20 (S).
- Page 91 Scanning Frames in Order The position of the frame scanned is shown in the diagram below. Direction of insertion Frame Frame Frame scanned scanned scanned Frame 1 Frame 2 Frame 3 Frame Frame Frame scanned scanned scanned Frame 4 Frame 5 Frame 6...
-
Page 92: Maintenance: Cleaning, Storage, And Transport
Your scanner is a precision machine. We recommend that you take your scanner and adapters to an authorized Nikon service representative once every one to two years for inspection, and once every three to five years for servicing (a fee is charged for these services). Frequent inspection and servicing are particularly recommended in the case of scanners used in commercial applications. -
Page 93: Cleaning The Scanner
6. After checking that no film remains in the adapters, package the scanner and adapters in the original packing materials. Nikon scanners are certified for use in the country or region of sale. Transportation and use outside the country or region of sale are at the user’s own risk and responsibility. -
Page 94: Caring For Adapters
Caring for Adapters Storing the SA-21 Strip-Film Adapter Remove the SA-21 strip-film adapter from the scanner when not in use. If you will not be using the adapter for an extended period, store it where: • the temperature is between minus twenty and plus sixty degrees Centigrade (–4 F – +140 F) •... - Page 95 Should this occur, you will need to clean the rollers. If the film continues to jam after the rollers have been cleaned, consult with your nearest Nikon service representative.
- Page 96 When rotating the rollers, turn the toothed wheel slowly with the ball of your thumb. Do not use force or attempt to turn the wheel with a screwdriver or other rigid object, as this could deform the wheel. Rollers Toothed wheel Roller frame Work with the adapter and scanner on a table or other flat, stable surface.
-
Page 97: Caring For The Fh-3 Film Holder
Remove dust and dir t from the interior of the adapter with a blower. Clean the feed mechanism thoroughly, changing the angle of the blower to reach all parts of the mechanism. Be sure that dirt and dust do not remain on the adapter’s three sensors. Sensors Caring for the FH-3 Film Holder When cleaning the holder, do not use volatile cleaners such as alcohol or paint thinner. -
Page 98: Optional Accessories: Options Available For Your Scanner
Optional Accessories Options Available for Your Scanner Options Available for the 4000 ED and COOLSCAN IV ED IA-20 (S) Adapter for APS (IX240) Film The IA-20 (S) is used to scan APS (IX240) film. FH-G1 Medical Slide Holder The FH-G1 is used in combination with the MA-20 (S) to scan prepared microscope slides containing samples of pathological tissue. - Page 99 1.5 mm in thickness). The SF-200 (S) comes with an attachment for scanning thick mounts with rounded edges (the attachment utility provided with Nikon Scan is required when installing and removing the attachment; the attachment should not be used when scanning slides with mounts 2 mm or less in thickness, as this could cause slides to jam in the adapter).
-
Page 100: Specifications: Specifications For Your Scanner, Accessories, And Optional Adapters
Specifications Specifications for Your Scanner, Accessories, and Optional Adapters Scanner Specifications SUPER COOLSCAN 4000 ED (LS-4000 ED) Film • 35 mm film: Positive and negative film, both color and mono- chrome, may be used. Film may be scanned in strips of up to six frames (rolls of up to forty... - Page 101 Output Full color (8 or 16 bits per color [RGB]) Focus Autofocus Scanning time Duration of Scanning on processes Preview Scan 38 s – – – 13 s – – 15 s 2 m 10 s – – 40 s 1 m 55 s –...
- Page 102 Focus Autofocus Scanning time • 35 mm film: Approximately 34 s (Tests performed by Nikon at a resolution of 2900 dpi. Does not include data transfer or dis- play time.) • APS (IX240 film): Approximately 26 s (Tests performed by Nikon at a resolution of 2900 dpi.
-
Page 103: Adapter Specifications
Interface USB 1.1 compliant Power supply AC 100–240 V, 50/60 Hz Operating environment • Temperature: +10 – +35 C (+50 – +95 F) • Humidity: 20–60% Dimensions 169 315 mm/3.66˝ 6.65˝ 12.40˝ (W H Weight Approximately 3 kg/6 lb 11.1 oz (accessories not included) Installation Vertical/Horizontal Adapter Specifications... -
Page 104: Specifications For Optional Adapters
Specifications for Optional Adapters Some optional adapters can be used with both the 4000 ED and COOLSCAN IV ED, while others are exclusively for use with the 4000 ED. IA-20 (S) IX240 F (4000 ED and COOLSCAN IV ED) DAPTER Film Developed APS (IX240) film cartridges of 15, 25, and 40 frames Feed Mechanism... -
Page 105: Appendices
Appendices About This Section These appendices are for users of the 4000 ED (SUPER COOLSCAN 4000 ED). Appendix A de- scribes how to install the IEEE 1394/Firewire interface board provided with your scanner. Appendix B provides instructions for installing the IEEE 1394 update for Windows 98 Second Edition included on the Nikon Scan CD. -
Page 106: Appendix A: Installing The Ieee 1394/Firewire Interface Board
1. Installing the board in your computer’s PCI slot 2. Installing the board drivers (Windows only) • Users of Windows 98 Second Edition (SE) will need the Nikon Scan 3 CD, and may also require the Windows 98 Second Edition CD-ROM provided with their computer •... - Page 107 Installing the IEEE 1394/Firewire Interface Board in a PCI Slot After turning the computer off and disconnecting all cables, insert the interface board in one of the computer’s PCI slots as shown below. For information on the location of the PCI slots and on installing PCI boards, see the documentation provided with your computer.
- Page 108 Installing the Drivers for the IEEE 1394/Firewire Interface Board (Windows Only) After installing the interface board in a PCI slot, closing the computer’s case, and reconnecting the cables, turn the computer on and install the board drivers as described below. Windows 98 SE Step 1 The first time the computer is powered on with the board in place,...
- Page 109 The dialog shown at right will be displayed. Click Finish. Step 8 Insert the Nikon Scan 3 CD into the CD-ROM drive. Double click on the My Computer icon and open the CD-ROM drive. Open the Microsoft folder and double-click 242975USA8.EXE. Follow the on-screen directions to complete installation.
- Page 110 Windows 2000 The first time the computer is powered on with the board in place, Windows 2000 will automatically install the board drivers. To confirm that the drivers are installed and functioning normally: Step 1 Click on the My Computer icon with the right mouse button and select Properties from the menu that appears.
-
Page 111: Appendix B: Installing The Ieee 1394 Update For Windows 98 Second Edition
Windows Me, and Macintosh computers will not need to perform this update. Step 1 Turn on your computer and insert the Nikon Scan 3 CD in the CD-ROM drive. Double click on the My Computer icon and open the CD-ROM drive. Open the Microsoft folder and double-click 242975USA8.EXE. - Page 112 Index AC inlet ..............10,22 Layout Tools ..............65 Accessories ............. 12-13,95 Adapter, IA-20 (S) ..........90,96 Macintosh computers ......... 20,44 Adapter, MA-20 (S) ..... 12,44,46,59,78,82,89,95 Media ................47 Adapter, SA-21 ....12,14,44,45,48,59,86,95 Medical Holder (FH-G1) ........90,94 Adapter, SA-30 ............. 91,96 Adapter, SF-200 (S) ..........
Need help?
Do you have a question about the Super CoolScan 4000 ED and is the answer not in the manual?
Questions and answers