Table of Contents
Advertisement
Quick Links
Advertisement
Table of Contents

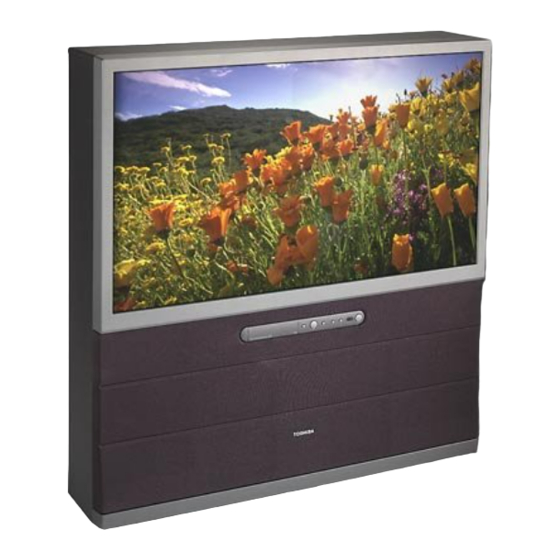
Related Manuals for Toshiba 57H82


Summary of Contents for Toshiba 57H82
-
Page 2: Safety Precautions
Dear Customer, Child S afety Thank you for purchasing this Toshiba TV. This manual will help you use the many exciting features of your new TV. Before operating the TV, please read this manual It MakesA Difference completely, and keep it nearby for future reference. -
Page 3: Important Safety Instructions
Installation,Care, and Service Important Safety Instructions Installation 1) Read these instructions. 2) Keep these instructions. Follow these recommendations and precautions and heed all 3) Heed all warnings. warnings when installing your TV: 4) Follow all instructions. 15) Never modify this equipment. Changes or modifications may void: a) the warranty, and b) the user's authority to operate this equipment under the rules of the Federal... - Page 4 (16:9)display (gray bars on left and right sides of screen). Care Service For better performance and safer operation of your TOSHIBA TV, follow these recommendations and precautions: WARNING: RISK OF ELECTRIC / | _ SHOCK! Never attempt to service the yourself.
- Page 5 (Toshiba TV models 65H82 and 65HDX82 only) Toshiba TV models 65H82 and 65HDX82 have a split cabinet Always handle and treat the top section of the TV cabinet feature that allows disassembly of the cabinet into two (with the viewing screen), which contains a glass mirror, sections during installation.
- Page 6 Failureto follow this instruction may result in damage to dommagesauxcomposantsoptiques.DETELSDOMMAGESNE the optic components. SUCH DAMAGE IS NOTCOVEREDUNDER SERAIENT PASCOUVERTS PARLA GARANTIE LIMITEE DE TOSHIBA. THETOSHIBA LIMITED WARRANTY. 6) Ne rangezni ne transportezjamais I'ensembie Iorsqu'ilest d_mont_.Le 6) Never store or transport the unit while it is disassembled.Failureto...
- Page 7 O, A grounding wire is attachedfrom the TVto the top of the speakergrille. PULLTHE GRILLEONLYA FEWINCHESFROM THE CABINET, a ndthen gently pull Toshiba TV models 65H82 and 65HDX82 only the grounding wire plug(not the In,reSiGns de d enenfage et de wire)to disconnect it from the TV.
- Page 8 Removethe six 1-1/4" screws from the cabinet front, belowthe bezel. bezel (also see fig. 2-6, page2). NE retirez AUCUNE des vis de Retirezles six vis (1414po long) du devantdu coffre. Eflessent situ@s I'eflcadrement de I'dcrae (voir aussi ci-dessous I'encadremeet de I'@rafl. figure 2-6, page 2).
- Page 9 Carefully reconnectthe wire lead clip. Reviewstep 3 for proper Move the bottom section of the TVto the desired location. reconnection. The clip is designedto fit together only one way. Mettez la partie inf_rieuredu t_l@iseur _ I'endroit dGsir& Make surethe pins in the top half of the clip align with the holes in the bottom half of the clip, andthen gently push both halves together (do notforce) until the releasetab locks onto the lower half.
- Page 10 Important Safety Information ......2-5 Using the POP double-window feature ......Introduction ..............Switching the main and POP pictures ..... Welcome to Toshiba ............Freezing the POP picture ........Exploring your new TV ........... Using the favorite channel search function ....Note...
-
Page 11: Welcome To Toshiba
Note regarding on the market. The goal of this manual is to guide you through QuickConnectGuide setting up and operating your Toshiba TV as quickly as possible. This manual applies to models 42H82, 50H82, 57H82, and 65H82. The Quick Connect... -
Page 12: Connecting Your Tv
Connecting your TV Note: Cablesare not supplied withyour 7qZ • Coaxial cable is the cable that comesin from yourantenna,cable TV service, or cable converterbox. Coaxialcable uses "F" connectors. Coaxial ( antenna) c able • Standard stereo A/V cables usually come in sets of three, and are typically color-coded according to use: yellowfor video,red for stereoright audio,and white for stereo left [or mono) audio. -
Page 13: Connecting A Cable Converter Box And Vcr
Connecting a cable converter box Note: This connection allows you to watch basic and premium cable channels. Whenyou use a converter box withyour T_, the remote control will not operate some To use the TV's features, select ANT-1. To view premium channels, features, s uch asprogramming your favorite select ANT-2, tune the TV to channel 3 or 4 (whichever channel is channels,labeling channels,and locking... -
Page 14: Connecting A Dvd Player Or Satellite Receiver And A Vcr
Connecting a DVD player or satellite receiver and a VCR Note: This connection allows you to watch DVD/satellite, VCR, and TV For the highest possiblepicture quality from programs, and record one TV channel while watching another channel. a non-ColorStream DVD player/satellite receiver,use an S-video cable between the You will need: TVand DVD player/satellite receive_ (If your... -
Page 15: Connecting A Dvd Player With Colorstream Component Video) And A Vcr
Your TV has ColorStream ® (component video) inputs. Connecting DVD playe_ Youcan connect the component your TV to a DVD player with component video (such as a Toshiba video cables from the DVD player to either DVD player with ColorStream ®) can greatly enhance picture quality ColorStreamjack on the TV(hiD 1 or HD2). - Page 16 Connecting a DTV receiverlset-top box with ColorStream ® (component video} and a VCR Note: This connection allows you to watch DTV (digital TV), VCR, and For the highest possiblepicture quality,use TV programs, and record DTV and TV programs. component video cables between the TVand Your TV has ColorStream (component video) inputs.
-
Page 17: Connecting Two Vcrs
Connecting two VCRs This connection allows you to record (dub/edit) from one VCR to another VCR while watching a videotape. You can also record from one TV channel while watching another TV channel. You will need: • two coaxial cables (one or more may be provided by your cable company) •... -
Page 18: Connecting An Audio System
Connecting an audio system Amplifier This connection allows you to use an audio amplifier to adjust the audio level. This also allows you to use external speakers. To control the audio, turn on the TV and the stereo amplifier, turn off the built-in speakers (see "Turning off the built-in... -
Page 19: Preparing The Remote Control For Use
TV converters together, even if they are different converter,or other electronic device. brands. If you will be using your TV with a Toshiba VCR, your Refer to the owner's manuals foryour other remote control is already programmed and ready to use. If you own devices to determine their availablefeatures. -
Page 20: Programming The Remote Control For Use With A Non-Toshiba Vcr Or Cable Tv Converter
Number This remote control is pre-programmed to operate Toshiba VCRs. To use VCRs or cable converters other than Toshiba models, you must Enter follow the steps below before you operate your remote control. 1. Refer to the "VCR code table" or "Cable TV converter code table"... -
Page 21: Vcr Code Table
019,060 Noblex Technics 054,181 227,228,230,231, 297,313,314,380, Teknika 019,054,056,071 Olympus Telefunken 056,067,077,123 060,206 Optimus Fisher 066,073,085,123 227,259 Optonica 052,054 Orion Toshiba 062,064,085,229, Fuji Funai 019,344 Panasonic 054,096,181,244 231,385 Garrard 054,056,057,059, Totevision 056,259 019,344 Penney 054,079,084,221 061,073,259 Unitech Go Video 251,298 Pentax... - Page 22 Century- Stargate 034,059 Citizen Starquest Colour Voice O44,O5O Sylvania Comtronics Teleview 059,079 Contec Texscan T0com 031,032,078 Dae Ryung Eastern TOshiba Focus "lhsa Garrard Unika 041,172 United Artists GC Electronics 035,075 United Cable Gemini 034,089 General Instrument Universal 041,058,075,096, 030,295 GoldStar...
-
Page 23: Learning About The Remote Control
Learning about the remote control mid off POWER turns the "IV on RECALL d isplays screen infi)rmadon (page 52) LIGHT i lluminates the keypad fi)r five secmads TIMERsets the'KV to turn off at a spedfic time (page 47) TV/VlDEO sdects video input muree (p_ MUTE mutes the sound (page 48) TV/CABLE/VCR s-_4tchesbetween "KV,Cable and VCR (pages 15-16) ChannelA V cycles through programmed chamlels (page 24) -
Page 24: Setting Up Your Tv
Setting up your TV Learning about the menu system Note regarding After you have inst,-dled the batteries ,'rod programmed the remote QuickConnect Guide control, you will need to set some preferences on the "I_Vusing the menu system. You can access the menu using the buttons on your "I_V TheQuick Connect Guide or remote control. -
Page 25: Selecting The Antenna Input
Changing the on-screen display language AT4_ You can choose from three different langu_es (English, French and TV front panel Spanish) R)r the on-screen display of adjustment menus and messages. "lb select a language: 1. Press MENU, and then press `4 or _ until the SET UP menu appears. -
Page 26: Adding Channels To The Tv's Memory
Adding channels to the TV's memory Note: When you press Channel A or •, your TV will stop only on the Totune the TVto a channel not programmed channels stored in the "I_V_ chmmel memory. in the channel memoo _, y ou must use the Follow the steps below and on the next page to program all active ChannelNumber buttons on the remote channels into the "i_V'smemory. -
Page 27: Using The Quick Connect Guide
3. Press A or • to highlight ADD/ERASE. AT<_ @@@©@@ TV front panel _i_i:i_ SET uP LANGUAGE ENGLISH CLOCK 00:00 ANT1/2 ANT1 TV/CABLE CABLE MENU 4. Press 4 or _ to select ADD or ERASE, depending on the function you want to perform. 5. -
Page 28: Changing Channels
Changing channels "lbchange to a specific channel (programmed or unpmgrammed): Press the Chmmel Number buttons (0-9 and 100). For chmmels 100 and higher, press the 100 button, and then the next two numbers. For example, m select channel 125, press 100, 2,5. -
Page 29: Manually Adjusting The Color Convergence
Manually adjusting the color convergence 1. Press MENU, and then press "_ or _ until the PICTURE menu appears. 2. Press A or • to highlight CONVERGENCE (below left). 3. Press "9 or _ to display the Center Convergence menu (below right). -
Page 30: Using The Tv's Features
Using the TV's features Adjusting the channel settings Switching between two channels using Channel Return "l_e Chmmel Return feature allows you to switch between two channels without entering an actu_ channel number each time. 1. Select the first channel (or video modc) you want to vicw. 2. - Page 31 Notes: 3. Press "9 or I_ to display the FAVORITE CH1 menu, for example. CH INPUT will be highlighted. . The FAV Ti buttons operate as MENU _I I_ buttons when a menu is on- ®@@©@@ screen. o The favorite channel feature is not available in ANT2 mode.
-
Page 32: Labeling Channels
Labeling channels Channd labels appear above the on-screen channel number display each time you turn on the "I_V,change a ch,-mnel, or press RECALL You can choose any four characters m identify a channel. "lb create channel labels: 1. Press MENU, and then press 4 or !1_ until the CUSTOM menu appears. -
Page 33: Viewing The Wide-Screen
5. Press • tohighlight ®@@©@@ CLEAR. g cosToo 6. Press _ orI_toerase the chmmel label. TIMER VAVORI 7. Repeat steps 4 -6 toerase other c hannel labels. Viewing the wide-screen picture formats _2)u can vic_v programs that have the convention_ TV picture _)rmat PIC SIZE (4:3 aspect ratio) ,'rod the wide-screen format (16:9 aspect ratio) in a... - Page 34 Theater Wide 1 Note: • Theater Wide 1 enlarges the picture non-uniformly--the center Youcan also change the Theater V_de I, Z 3 of the picture remains close to its true proportion, but the left using the menu s}_tem. SelectPICTURE and right edges are stretched wider m fill the screen. SIZE in the THEATERmenu.
-
Page 35: Receiving A 1080I Signal Source
Receiving a 1080i signal source Natural NOTICE OF POSSIBLE ADVERSE Select Natur,-d sizc to vic-_v a convention,al 1080i source in wide-screen EFFECTSON "IV PICTURE TUBE _)rmat (16:9 aspect ratio). Avoid displaying stationary images on your TVscreen for extended periods of time. -
Page 36: Scrolling The Theater Wide Picture [Theater Wide 2 And 3 Only]
Scrolling the Theater Wide picture [Theater Wide 2 and 3 only] 1. Press PIC SIZE m select the Theater Wide 2 or 3 mode. 2. Press MENU, and then press "9 or _ until THEB;FER menu appears. 3. Press A or • to highlight PICFURE SCROLL. -
Page 37: Feature
Note: Using the POP double-window feature . The POP buttons on the remote c_ntrol The POP (picture-out-picture) feature splits the screen into a double (SOURCE POP,STILL, and SWAP,) window that _lows you to watch two programs at the same time. The operate the TV'sPOP features. -
Page 38: Switching The Main And Pop Pictures
Switching the main and POP pictures Press SWAP while you are using the POP feature to switch the main and POP pictures. Freezing the POP picture STILL Press STILL while you are using the POP feature. The POP picture will become a still picture. "lb return to the moving picture, press STILL again. -
Page 39: Using The Locks Menu
Using the LOCKS menu The LOCKS menu includes the V-Chip, CH ix)ck, Video Ix)ck, ,'rod Nc-,v PIN Code functions. _fm can use these functions after entering the correct PIN code. Entering the PIN code 1. Press MENU, and then press "I or I1_ until the LOCKS menu appears. -
Page 40: Using The V-Chip
Using the V-CHIP menu Some "I_Vprograms and movies include signals that classify the LOCKS menu content of the program (violence, sex, di_og, language). The V-CHIP @@@©@@ conml feature in this "I_Vdetects the signals and blocks the programs according m your selections. "lb use this feature, perform the following setup. -
Page 41: Blocking Option
M PAA RATI N G (Independent rating system for movies) 1. From the LOCKS menu, select MPAA RATING. LOCKS menu 2. Press "9 or i_ to display the MPAA RATING menu, then press • @@@©@@ or A to highlight MPAA RKI_ING. LOCKS ®@@©@@ OH i P... -
Page 42: Locking Channels
Unlocking programs temporarily 1. If you try to watch a TV progr,_ that exceeds the rating limits you set, the "IY enters program lock mode. After 4 seconds, the "I_Vstarts the law)rite chmmel search function (see page 34). _m can either unlock the program temporarily (see steps 2-4) or select an unlocked program to watch. -
Page 43: Locking Video Inputs
"lb unlo& individual channels: 1. I_om the LOCKS menu, select CH LOCK. 2. Press 41 or !) to display the CH LOCK menu. 3. Press ,iiV41 !) m highlight the channel you want m unlock, then press ENTER. ®@@©@@ ®@@©@@ Ct"tl VGHI ENABLEBLOCK... -
Page 44: Using The Front Panel Lock Feature
Using the front panel lock feature TV front panel h)ck the front panel buttons to prevent the buttons from being pressed accidentally (by children, for example). When the front panel lock is ON, all control buttons on the "I_Vfront panel (except POWER) do not operate. -
Page 45: Selecting The Picture Mode
Adjusting the picture Selecting the picture mode Note: You can select your desired picture type from four picture modes: If you select one of the factoo,-setp_cture modes (SPORTS,STANDARDS,or MOVIE.) Sports, Standard, Movie, and Preference. and then change a picture quality setting (for example, increasethe contrasO,the picture Sports Bright and dynamic picture (factory setting) -
Page 46: Saving New Preference
Saving new preference _(_mcan save the PICTURE qu_ities (contrast, brightness, color, tint, and sharpness) you adjusted in the picture preference mode. "lb save your new preferences: 1. Press MENU, and then press "9 or _ until the PICTURE menu appears. 2. -
Page 47: Using The Flesh Tone Feature
Using the flesh tone feature This feature displays natur_ flesh tones by automatically adjusting the dnt. "ib turn on the flesh tone feature: 1. Press MENU, and then press "9 or _ until the PICTURE menu appears. 2. Press A or • to highlight FLESH TONE. 3. -
Page 48: Resetting Picture Adjustments
Resetting picture adjustments The RESET function adjusts the picture qualities to the R)llowing factory settings: Contr&st ....m_ (100) Color temperature ..Cool CableClear DNR .... Auto Brightness .... center (50) Color ....center (50) Mode ......Sports Tint ....... center (0) Sharpness ..... -
Page 49: Selecting The Video Input Source
Selecting the video input source Note: Press the TV/VIDEO on the remote control or the'lY to vicxva sigmal . When ColorStreamHE) l or HE)2 is coming from another device connected to your TV, such &sa VCR or selected, the video OUTjack does not video disc player (see illustrations bdow). -
Page 50: Using The Closed Caption Feature
Using the closed caption feature The closed caption feature has two options: • Captions--An on-screen display of the dialogue, narration, and sound effects of TV programs and videos that are closed captioned (usu_ly marked as "CC" in TV listings). • "l_xt An on-screen display of information not related to the current program, weather or stock data (when provided... -
Page 51: Setting The Sleep Timer
Setting the sleep timer Note : "ib set the sleep timer m mm the "I_Voff automatically: Todisplaythe amount of time left und/ the TV 1. Press TIMER m set the length of time until the TV turns off_ turns off automadcally,press TIMER once. TIMER Every time you press the button, the time display will increase by 10 minutes, up m 180 minutes. -
Page 52: Adjusting The Sound
Adjusting the sound Muting the sound Press MUTE to temporarily reduce (1/2 MUTE) or turn off (MUTE) the sound. While the sound is off, the screen will display "1/2 RECALL MUTE" or "MUTE" in the lower right comer. Each time you press MUTE, the mute mode will chmage in the following order: [-"... -
Page 53: Adjusting The Sound Quality
Using the SRS 3D surround sound feature Note: The SRS 3D surround sound feature expands the audio listening field If the broadcast is monaural, the SRS 3D wider and deeper m create exception_ sound quality from the "l_V's effect does not work: speakers. -
Page 54: Using The Sub-Bass System (Sbs)
Resetting your audio adjustments The RESET function returns the audio adjustments to the following factory settings: Bass ....center (50) "Deble ....center (50) B,_ance .... center (0) "lb reset the audio adjustments: 1. Press MENU, and then press 4 or _ until the AUDIO menu appears. -
Page 55: Selecting The Audio Out Sound
Turning off the built-in speakers Note: Use this feature to turn the "I_Vspeakers offwhen you connect an Make sure the volume control of your audio audio system (See "Connecting an audio system" on page 14). amplifier is set to a moderate listeninglevel. "lb turn offthe built-in speakers: 1. -
Page 56: Selecting The Background
Using the StableSound "_ feature When the signal source is changed, the StableSound feature limits the highest w)lume level to prevent extreme changes in w)lume (for example, to prevent the sudden increase in volume that often happens when a'l_V program _vitches to a commerd,_). "lb turn on the StableSound feature: 1. -
Page 57: Viewing The Demo Mode
Viewing the demo mode The demo mode automatically demonstrates sever_ of your "l_V's features. This function is provided for demonstration purposes only. "lb start the demo: Press and hold MENU on the "I_Vfront panel for 4 seconds. "lb stop the demo: Press RECALL, EXH, or POWER. -
Page 58: Specifications
Design and specifications are subject m &ange without notice, 42H82: Two 4-3/4 in&es (12 cm) round 50H82: Two 6-5/16 in&es (16 cm) round 57H82: Two 6-5/16 in&es (16 cm) round 65H82: Two 6-5/16 in&es (16 cm) round \;qdeoiAudio Terminals S-VIDEO INPUT... -
Page 59: Troubleshooting
Troubleshooting Before calling a service technician, please check the following table for a possible cause of the problem and some solutions. Problem Solution "I_Vwill not turn on • Make sure the power cord is plugged in, then press POWER. • The remote control batteries may be dead. Replace the batteries. No picture, no sound •... -
Page 60: Limited United States Warranty
U.S.A. or Puerto Rico. UNDER SUCH CIRCUMSTANCES. [4) Labor service charges for set installation, setup, adjustment FSTPU RE'_isa registered trademark el Toshiba A mericaConsamer Products, I nc. of customer controls, and installation or repair of antenna REV. M AR02... -
Page 61: Limited Canada Warranty
Limited Canada Warranty for 27" FST PURE _ and All Larger Television Models Toshiba of Canada Limited ["TCI") makes the following limited [5) Warranties extend only to defects in materials or warranties to original consumers in Canada. workmanship as limited above and do not extend to any... - Page 62 Index Picture adjustments COLOR TEMPERATURE ....A/V cables [standard) ............FLESH TONE ..............A/V receiver connection ..........Picture mode ..............ANT 1/2 .................. Picture quality ..........Antenna cables [coaxia0 ........... Picture-out-picture [POP) AUDIO OUT sound, selecting ........POP button ................ Audio system connection ..........
- Page 63 TOSHIBA AMERICA CONSUMER PRODUCTS, INC. HEAD OFFICE: 82 TOTOWA ROAD, WAYNE, NJ 07470, U.S.A. NATIONAL SERVICE DlVlSlON:1420-B TOSHIBA DRIVE, LEBANON, TN 37087, U.S.A. TOSHIBA HAWAII, INC. HEAD OFFICE: 327 KAMAKEE STREET, HONOLULU, HI 96814, U.S.A.- TEL: (808) 591-9281 TOSHIBA CANADA LTD.