Table of Contents
Advertisement
Available languages
Available languages
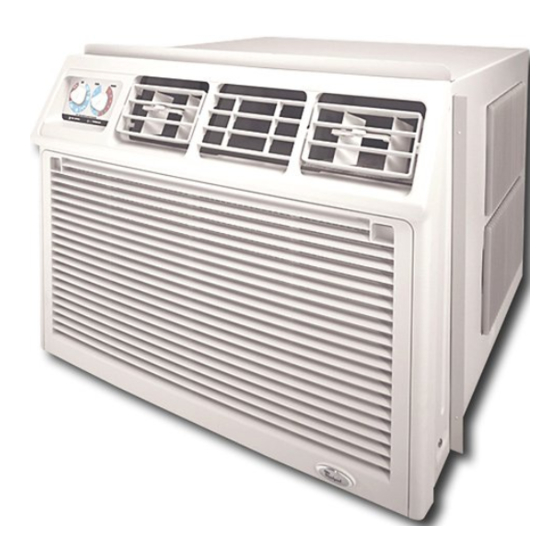
AIR CONDITIONER
For questions
about features, operation/performance,
parts,
accessories
or service, call: 1-800-253-1301
in the U.S.A.
ACONDICIONADOR
Si tiene prsguntas
respeeto alas caractsrfstisas,
funsionamiento,
rendimiento,
partes, ascssorios
o servisio teenico,
Ilame al: 1-800-253-1301
en los EE. UU.
Table of Contents/Indice
.....................................
2
1188127A
Advertisement
Table of Contents

Related Manuals for Whirlpool ACE184XS0


Summary of Contents for Whirlpool ACE184XS0
- Page 1 AIR CONDITIONER For questions about features, operation/performance, parts, accessories or service, call: 1-800-253-1301 in the U.S.A. ACONDICIONADOR Si tiene prsguntas respeeto alas caractsrfstisas, funsionamiento, rendimiento, partes, ascssorios o servisio teenico, Ilame al: 1-800-253-1301 en los EE. UU. Table of Contents/Indice ........
-
Page 2: Table Of Contents
TABLE OF CONTENTS AIR CONDITIONER SAFETY ............Starting Your Air Conditioner--Rotary Controls ......14 INSTALLATION REQUIREMENTS ..........Changing Air Direction ............... Normal Sounds ................Tools and Parts ................AIR CONDITIONER CARE ............Location Requirements ..............Electrical Requirements ............... Cleaning the Air Filter ..............Cleaning the Front Panel ............ -
Page 3: Installation Requirements
IMPORTANT SAFETY INSTRUCTIONS WARN I NG: To reduce the risk of fire, electrical shock or injury when using your air conditioner, follow these basic precautions: Do not use an extension cord. • Plug into a grounded 3 prong outlet. Do not remove ground prong. Unplug air conditioner before servicing. -
Page 4: Electrical Requirements
Window installation Window opening measurements: • 261/2 '' (66.1 cm) minimum to 40" (101.6 cm) maximum opening width. • 20" (50.8 cm) minimum opening height. Electrical Shock Hazard Plug into a grounded 3 prong outlet. Do not remove ground prong. Do not use an adapter. -
Page 5: Installation Instructions
This room air conditioner is equipped with a power supply cord Recommended ground method required by UL. This power supply cord contains state-of-the-art electronics that sense leakage current. If the cord is crushed, the This air conditioner must be grounded. This air conditioner electronics detect leakage current and power will be disconnected in a fraction of a second. -
Page 6: Installing The Cabinet In A Window
1. Remove airconditioner from carton andplace it on cardboard. 2. Remove shipping screws f rom each side wall o fcabinet. A. Shipping screws 3. Remove front panel from air conditioner and set aside. 4. Remove ground screw and ground wire from front of air conditioner base. - Page 7 Adjust the cabinet until the distance on each side is the same. Place cabinet back into the window with right filler board tight Then add 1/8"(3.2 mm) for the final measurement to be used against window channel. Insert left filler board into window channel.
- Page 8 Level cabinet 1. Use a level to check that cabinet is level side to side. 2. Use a %2" drill bit to drill 2 starter holes throuc h the 2 holes in the cabinet and into the windowsill. 3. Attach cabinet to window with 2 - #10 - 12 x %" wood screws.
-
Page 9: Installing The Cabinet Through A Wall
Handle air conditioner gently. • Use 1" (2.5 cm) or thicker lumber for wood frame. Be sure your air conditioner cabinet does not fall out of the opening during installation or removal. The place where the power cord exits the air conditioner should be no more than 4 ft (122 cm) from a grounded 3 prong outlet. -
Page 10: Complete Installation
Use a level to check that cabinet is level side to side. Check that air conditioner cabinet is tilted to the outside so that water will run to the outside. Reuse the insulation to seal opening between cabinet and frame. Use existing holes in sides and top of cabinet and 7 - #10 x 1"... -
Page 11: Air Conditioner Use
Position ground wire pointing straight up. Put excess ground wire between coil and air conditioner cabinet.... A. Green ground wire B. Ground screw 6. Push front panel straight on and then lower it slightlyto lock it into place. 7. Using the indents in top of filter door, pull door down. A. - Page 12 NOTES: Fan Speed • When the air conditioner is off, the Room indicator light is lit and the display shows the current room temperature. NOTE: The Fan Speed button will operate only when Cool, Fan • If the room temperature is below 55°F (13°C), the display will Only or Power Saver mode has been selected.
- Page 13 To change the temperature display from °F to °C: To see or change the remaining time (in hours): 1. Turn off the air conditioner. 1. Press TIMER once after it has been programmed. Hour indicator light will turn on, and display will show remaining 2.
-
Page 14: Controls
Toselect t hefanspeed(inCool,FanOnly or Power S aver Press the plus or minus button to change delay time (1 to modeonly): 24 hours). Press TURBO, HIGH or LOW. Press TIMER again or wait 10 seconds. Timer indicator light on air conditioner will remain on. Hour indicator light on air conditioner will turn off, and Room indicator light on air conditioner will turn on. - Page 15 Style 1 --Cool only air conditioner settings Style 2--Heat/cool air conditioner settings (on some models) Fan Control Fan Control Set the Fan control to the desired setting. When the air conditioner is operating at Low Cool, High Cool or Turbo Cool, Set FAN control to the desired setting.
-
Page 16: Changing Air Direction
Mo mol Ix:£ ;Os C}h(:s "sq A D ®ct:on Use the tabs to direct the air right, left or straight ahead (on some When your air conditioner is operating normally, you may hear sounds such as: models). Rotate the whole cartridge to direct air up, down or straight ahead. -
Page 17: Troubleshooting
TROUBLESHOOTING Before calling for service, try the suggestions below to see whether you can solve your problem without outside help. The air conditioner is in a heavily occupied room, or heat- Air conditioner will not operate producing appliances are in use in the room. Use exhaust vent fans while cooking or bathing and try not to use heat- •... -
Page 18: Assistance Or Service
Temperature ondisplay doesnotmatchroom Water drips from cabinet into your house ternperature The air conditioner is not properly leveled. The air When the compressor and fan motor turn off during conditioner should slope slightly downward toward the Power Saver mode, or after you turn off the unit, a lower outside. -
Page 19: Seguridaddelacondicionador Deaire
SEGURIDADDELACONDICIONADOR DEAIRE Su seguridad y la seguridad de los demas es muy importante. Hemos incluido muchos mensajes importantes de seguridad en este manual y en su electrodomestico. Lea y obedezca siempre todos los mensajes de seguridad. Este sfmbolo le llama la atenci6n sobre peligros potenciales que pueden... -
Page 20: Requisitos De Ubicaci6N
NOTAS: No deben obstruirse las rejillas del gabinete. El aire debe Piezas suministradas (en algunos modelos) circular libremente a traves de las rejillas del gabinete. Verifique que esten todas las piezas en el paquete de piezas. A. Rejillas del gabinete Instalacibn en la ventana Medidas de la abertura de la ventana:... -
Page 21: Requisitos Electricos
M_todo recomendado para la puesta a tierra Este acondicionador de aire debe set puesto a tierra. Este acondicionador de aire esta equipado con un cable de suministro de energfa provisto de un enchufe con tres terminales. Para reducir a un minimo el peligro de posibles cheques electricos, el cable debe ser enchufado en un contacto apropiado de pared de tres terminales conectado a tierra de acuerdo con todos los c6digos y reglamentos locales. -
Page 22: Instrucciones De Instalacion
3. Presione TEST (Prueba) (escuche el chasquido, el bot6n de reposici6n se atrapa y salta). 4. Presione y suelte RESET (escuche el chasquido, el bot6n de reposici6n queda asegurado y se mantiene asegurado). El cable de suministro de energia esta listo para su funcionamiento. -
Page 23: Instalaci6N Del Gabinete En Una Ventana
5. Tire de la manija para deslizar el acondicionador de aire fuera del gabinete. Coloque el acondicionador de aire sobre el cart6n. ]-rate el acondicionador de aire con cuidado. AsegOrese de que el gabinete del acondicionador de aire no se caiga de la abertura durante la instalaci6n o al quitarlo. •... - Page 24 Vista exterior Jale parte del gabinete fuera de la ventana. Fije la tabla de relleno derecha al frente de un angulo de montaje lateral con dos tornillos hexagonales de 1/2"..B C ..Vista superior A. Canal de la ventana A.
-
Page 25: Instalaci6N Del Gabinete A Traves De La Pared
Vista Frontal Vista Lateral Asegure el gabinete a la ventana 1. Fije el soporte vertical al soporte en angulo. No apriete demasiado la tuerca. Repita. A. Ancho del marco C. Obturador de espuma del B. Marco marco de la ventana D. - Page 26 • Utilice madera de 1" (2,5 cm) o mas gruesa para el marco Opcibn 1 --Adorno de madera, metal o pl&stico de madera. Cuando utilice una moldura de madera, metal o plastico, el marco de madera debe estar alineado con la pared interior como se muestra.
-
Page 27: Para Completar La Instalaci6N
3. Use un nivel para verificar que el gabinete este nivelado de lado a lado. A. Nivel Verifique que el gabinete del acondicionador de aire este inclinado hacia afuera para que el agua corra hacia afuera. Vuelva a utilizar el aislamiento para sellar la abertura entre el gabinete y el marco. -
Page 28: Uso Desuacondicionador Deaire
8. Ajuste la parte inferior delantera del panel usando 2 tornillos de cabeza redonda #8 - 18 x %". Pe[igro de Cheque EI6ctrico Cenecte el alambre verde de conexi6n a tierra al tornillo de conexi6n a tierra. No seguir esta inetrucci6n puede ocaeionar la muerte o cheque el6ctrico. -
Page 29: Control Digital
Oool (Enfriamiento) -- Enfrfa la sala. Podra ajustar la temperatura oprimiendo el bot6n de mas o menos. Usted puede seleccionar la velocidad de ventilaci6n oprimiendo FAN SPEED (Velocidad de ventilaci6n). "°' ..Fan Only ($61o ventilaci6n) -- S61o funciona el ventilador. Tu on q) Puede seleccionar la velocidad del ventilador... - Page 30 Para programar el temporizador de manera que el Temperatura acondicionador de aire se encienda manteniendo ajustes previos: Presione el bot6n de mas para aumentar la temperatura. 1. Apague el acondicionador de aire. luz indicadora Room (habitaci6n) se apagara y se encendera 2.
- Page 31 Para seleccionar la velocidad de ventilacibn (solamente en Paraponerenmarcha elacondicionador deaireconel el modo de Cool, Fan Only o Power Saver): control r emoto Oprima TURBO, HIGH (AIta) or LOW (Baja). NOTA: La apariencia del control remote puede variar. Para subir la temperatura: Presione el bot6n de mas.
-
Page 32: Controles Rotativos
Para programar el temporizador de manera que el Control de ventilacibn (en algunos modelos) acondicionador de aire se encienda manteniendo Coloque el control de ventilaci6n en la posici6n CERRADO para ajustes previos: un enfriamiento maximo continue. Jale el control de Ventilaci6n 1. -
Page 33: C6Mo Cambiar La Direcci6N Del Aire
Thermostat ('rermostato) Thermostat ('rermostato) Gire el control de THERMOSTAT a un ajuste medio. Ajuste el Gire el control de THERMOSTAT a un ajuste medio. Ajuste el funcionamiento del acondicionador de aire girando el control de funcionamiento del acondicionador de aire girando el control de Thermostat hacia la derecha para un enfriamiento maximo. -
Page 34: Cuidado Desuacondicionador Deaire
CUIDADO DESUACONDICIONADOR DEAIRE Su nuevo acondicionador de aire esta diser_ado para darle 4. Limpie el filtro de aire usando una aspiradora. Siesta muy muchos aSos de servicio confiable. Esta secci6n le ofrece la sucio, lave el filtro con agua tibia y un detergente suave. No informaci6n acerca de la limpieza adecuada y el cuidado de su lave el filtro de aire en la lavavajillas ni use limpiadores... - Page 35 • El filtro esta sucio u obstruido per escombros. Limpie el Elcable desuministro d eenergia delacondicionador de filtro. airesetraba(elbotbndereposicibn s alta) • El evaporador interno y los serpentines del condensador externo estan sucios u obstruidos por escombros. Vea Las interrupciones en la corriente el_ctrica de su casa "Mantenimiento Anual".
-
Page 36: Ayuda O Serviclo Ti_Cnico
AYUDA O SERVICIOTECNICO Por favor anote la informacibn sobre su modelo. Para evitar Ilamadas solicitando servicio innecesarias, revise la secci6n de "Solucidn de problemas". Podria ahorrarle el costo de Siempre que Ilame para solicitar servicio del aparato, necesitara una Ilamada solicitando servicio. Si aQn necesita ayuda, siga las saber el nt_mero del modelo y el nt_mero de serie completos.