Table of Contents
Advertisement
Available languages
Available languages
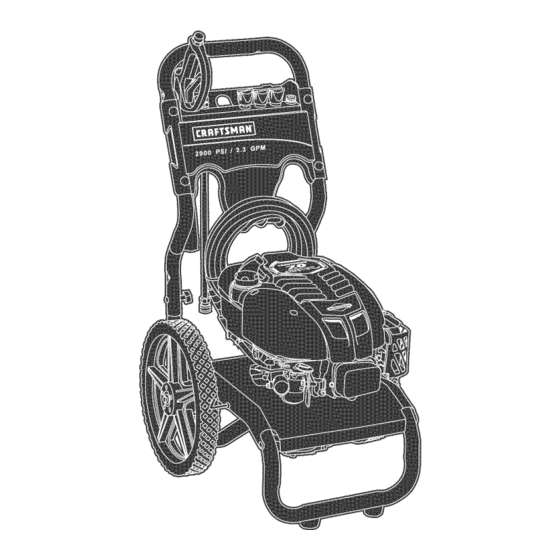
Operator's
Manual
®
7.0 HORSEPOWER
2900 PSI
2.3 GPM
Model No. 580.752410
HOURS:
Mort. = Fri. 8 a.m. to 5 p.m. (CT)
WARNING
Before using this product, read this
manuN and follow all Safety Rules
and Operating instructions.
I!]
ADVERTEN ClA
Antes de utilizar el producto, lea este
manuN y siga todas las Reglas de
Seguridad e Instrucciones de Uso.
Sears,
Roebuck
and Co., Hoffman
Estates,
IL 60179
U.S.A.
Visit our Craftsman
website:
www.craftsman.com
Part No. 195885GS Draft 5 (]l
11,2005)
o Safety
o AssemNy
o Operation
o Naintenance
o Parts
o EspaSoN
Advertisement
Table of Contents

Related Manuals for Craftsman 580.752410


Summary of Contents for Craftsman 580.752410
- Page 1 Safety Rules manuN y siga todas las Reglas de o EspaSoN and Operating instructions. Seguridad e Instrucciones de Uso. Sears, Roebuck and Co., Hoffman Estates, IL 60179 U.S.A. Visit our Craftsman website: www.craftsman.com Part No. 195885GS Draft 5 (]l 11,2005)
- Page 2 ON CRAFTSMAN PRESSURE WASHER For one year from the date of purchase, when this Craftsman pressure washer is maintained and operated according to the instructions in the operator's manual, Sears will repair, free of charge, any defect in material and workmanship.
- Page 3 WARNING WARNtNG The engine exhaust from this product contains chemicals known to the State of California to cause cancer, birth defects, or other reproductive harm. DANGER WHEN ADDING OR DRAINBNG FUEL Turn pressure washer OFF and let it cool at least 2 minutes before removing...
- Page 4 WARNING WARNING ALWAYS point in safe direction and squeeze spray gun trigger, to release pressure and avoid kickback each DO NOT touch hot surfaces and avoid hot exhaust gases. time, before starting engine. Engage trigger lock when not in use. Allow equipment to coo! before...
- Page 5 WARNING CAUTION DO NOT secure spray gun in open position. DO NOT leave spray gun unattended while machine ° Always wear eye protection when using equipment or when running. in vicinity of equipment in use. NEVER use a spray gun which does not have a trigger lock or trigger...
- Page 6 KNOW YOUR PRESSURE WASHER ii--!-!l Read the Operator's Manual and safety rules before operating your pressure washer. Compare the illustrations with your pressure washer to familiarize yourself with the locations of various controls and adjustments. Save this manual for future reference. Spray Gun ProjectPro Nozzles...
- Page 7 See "How to Use Accessory Tray". WASHER Add Engine Your Craftsman high pressure washer was mostly CAUTmON! Any attempt to crank or start the engine assembled at the factory. However, you will need to before it has been properly serviced with the...
- Page 8 4. Replace oildipstick andfullytighten. Fresh Start Fuel Cap NOTE: S eethesection "Oil"on page18toreview oil Adding fuel preserver helps keep fuel fresh and recommendations. carburetors clean for easier starting, all season long. This new fuel cap automatically drips concentrated Add Fue_ fuel preserver into your fuel tank.
- Page 9 Connect garden hose (not to exceed 50 feet in Connect Hose and Water Supply to Pump length) to water inlet. Tighten by hand. IMPORTANT: To avoid pump damage, you must assemble the nozzle extension to the spray gun and CAUTION attach all hoses before you start the engine.
- Page 10 HOW TO USE YOUR PRESSURE To Start Your Pressure Washer WASHER To start your engine-powered pressure washer for the first time, follow these instructions step-by-step. This if you have any problems operating your pressure starting information also applies whenever you start washer, please call the pressure washer helpline at the engine after you have let the pressure washer sit 1-800-222-3136.
- Page 11 9. Movethrottle leverto"Fast"position, shown here IMPORTANT: If engine floods, place choke lever in asa rabbit. "Run" position and crank until engine starts. NOTE: Always keep the throttle lever in the "Fast" 3osition when operating the pressure washer. Throttle Lever WARNING Choke Lever 10.
- Page 12 How to Use Accessory Tray CAUTION The unit is equipped with an accessory tray with places to store your ProjectPro nozzles, spray gun and nozzle extension. There is also a hook at the front of the accessory tray to hold your high pressure hose. NEVER exchange ProjectPro...
- Page 13 Formaximum rinsing(higher p ressure and Cleaning and Applying Chemical lower flow),forstubborn or hardto reach IMPORTANT: Use chemicals designed specifically surface suchassecond storysurfaces, paint for pressure washers. Household detergents could removal, oilstains,rustremoval o r other damage the pump. stubborn substances ( tar,gum,grease, w ax, CAUTION etc.),selectredMaxProjectPro nozzle.
- Page 14 Pressure Washer Rinsing C_eaning Detergent Siphoning Tube if you used the detergent siphoning tube, you must For Rinsing: flush it with clean water before stopping the engine. Apply trigger lock to spray gun. Place chemical injection siphon/filter in a bucket Remove black cleaning detergent nozzle from full of clean water.
- Page 15 ENGINE TECHNICAL INFORMATION PRODUCT SPECIFICATIONS This is a single cylinder, overhead valve (OHV), air Pressure Washer Specifications cooled engine. It is a low emissions engine. Max Outlet Pressure ..2,900 PSI In the State of California, Model Series 120000 Max Flow Rate ..... 2.7 GPM engines are certified by the California Air Resources Chemical Mix ....
- Page 16 OWNER'S RESPONSIBIUTJES Follow the houdy or calendar intervals, whichever occurs first. More frequent service is required when operating in adverse conditions noted below. MABNTENANCE SCHEDULE FILL tN DATES AS YOU SERVICE DATES COMPLETE REGULAR SERVICE SERVICE DATES Every 25 Every 50 Before MAINTENANCE TASK...
- Page 17 PRESSURE WASHER Check in-Line Fi_ter Refer to the illustration and service the in-line filter if it becomes dogged, as follows: C_ean Debris Daily or before use, clean accumulated debris from pressure washer. Keep linkage, spring and controls clean. Keep area around and behind muffler free from any combustible debris.
- Page 18 6. Reinstall nozzle andin-line filterintonozzle Tilt pressure washer to drain oil into an approved extension. container until it drips slowly from pump. 7. Reconnect nozzle extension to spraygun. Tilt pressure washer in opposite direction and empty premeasured pump oil bottle into same 8.
- Page 19 Checking OilLevel Clean area around oil fill, remove oil fill cap/dipstick. Wipe dipstick clean. Oillevel s hould bechecked priortoeachuseorat least every5 hours ofoperation. Keepoillevel m aintained. Tip your pressure washer to drain oil from oil fill 1. Makesurepressure w asher is on a levelsurface. into a suitable container making sure you tip your 2.
- Page 20 Service Spark Pmug WARNING Service the spark plug every 100 hours of operation or yearly, whichever occurs first. Clean area around spark plug. Remove and inspect spark plug. Replace spark plug if electrodes are worn, or if insulator is cracked or chipped. For replacement use either the standard resistor DO NOT touch hot surfaces and avoid hot exhaust gases.
- Page 21 AFTER EACH USE WINTER STORAGE Water should not remain in the unit for long periods of CAUTION time. Sediments or minerals can deposit on pump parts and "freeze" pump action. Follow these procedures after every use: * Failure to do so will permanently damage your pump Flush detergent siphoning tube by placing the filter...
- Page 22 LONG TERM STORAGE Protect Pump To protect the pump use Sears pump saver to prevent if you do not plan to use the pressure washer for more freeze damage and lubricate pistons and seals. than 30 days, you must prepare the engine and pump for long term storage.
- Page 23 Prob(em Correction Cause Low pressure nozz(e installed. Replace nozzle with high pressure nozzle. Water inlet is blocked. Clear inlet. )nadequate water supp(y. Provide adequate water flow. Inlet hose is kinked or leaking. Straighten inlet hose, patch leak. Pump has followingproblems: Check and clean inlet hose Clogged inlet hose strainer.
- Page 24 CRAFTSMAN 2900 PSE Pressure Washer 580.752410 Main Unit m Exploded View and Parts List Item Part # Part # Description Item Description 196614GS B3263GS ASSY, Base R196526GS HANDLE B2203GS KIT, Handle Connector 195880GS 192310GS ASSY, Billboard KIT, Vibration Mount 195964GS...
- Page 25 CRAFTSMAN 2900 PSi Pressure Washer 580.752410 Pump m Exploded View and Parts List ½ ½ ½ Item Part # Description 1tern Part # Description 190571GS CAP, Oil 193807GS KIT, SEAL SET 190574GS MANIFOLD 189971GS KIT, CHEMICAL HOSE 190578GS 193971GS KIT, PIPE FFTING...
- Page 26 ENGINE, 7 HP, Briggs and Stratton, 129612 - E×p[oded View 10221_ 238O _ 1029 635 _ 914_ 914A_ _1022 615 O 404 @ 30(_ 24 [_ 1095 VALVE GASKET SET IO22 868(_ i 163_ 51 _...
- Page 27 ENGINE, 7 HP, Briggs and Stratton, 129612 - E×p[oded View 9 _, 137__ _76z _ 259 @ 883 _ _1.2_ 190_ 977 CARBURETOR GASKET SET 633 @ 633A @...
- Page 28 ENGINE, 7 HP, Briggs and Stratton, 129612 - E×p[oded View 6s_ 5s 121 CARBURETOR OVERHAUL KiT 55 _ 592 @ 104% 276 _ ----[ 633 @ 459 _ 633A ¢_ 51A_ 127_ 1210 163 _ 592 ® 358 ENGINE GASKET SET _.o@ B68_ 1005...
- Page 29 129612 - PaAs List ENGINE, HP, Briggs and Stratton, Item Part# Description Item Part # Description 697893 Cylinder Assembly 802574 Armature-Magneto 399269 Kit-Bushing/Seal (Magneto Side) 691061 Screw (Magneto Armature) 299819 £ Seal-OH (Magneto Side) 692051 Plug-Spark 498983 Sump-Engine 692390 Wire-Stop 695276 Head-Cylinder 694090...
- Page 30 Sears, Roebuck and Co., U.S.A. (Sears), the California Air Resources Board (CARB) the United States Environmental Protection Agency (U.S.EPA) Emissions Control System Warranty Statement (Owner's Defect Warranty Rights and Obligations) The California Air Resources Board (CARB), U.S. EPA and Fuel Metering System Sears are pleased...
- Page 31 Emissions Durability Period and Air index Emissions Compliance Period On Engine Information On Your Engine Emissions Labe_ Emissions Compliance Labe_ Engines that are certified to meet the California After July 1,2000 certain Sears engines will be certified Resources Board (CARB) Tier 2 Emission Standards must...
- Page 32 OPERACION ......40_44 COMO ORDENAR PARTES . PAGINA POSTERIOR ESPECIFICACIONES ....... GARANT_A L_M_TADA DE LA MAQU_NA LAVADORA DE ALTA PRESTON CRAFTSMAN Durante un ado a partir de la fecha de compra, Sears reparara, sin cargo arguno, cualquier defecto en material...
- Page 33 , ADVERTENCIA E[ escape dei motor de este producto contiene eiementos qu[micos reconocidos en ei Estado California pot producir c&ncer, defectos de nacimiento u otros dagos de tipo reproduetivo. PELIGRO CUANDO ANADA COMBUSTIBLE O VACiE DEP6SITO Apague et lavadora de presi6n (posici6n OFF) y d6jelo enfriar al menos pot 2 minutos antes de remover la tapa de la combustible.
- Page 34 , ADVERTENCJA Antes de arrancar el motor, apunte StEMPRE con la pistota NUNCA apunte la pistola a la gente, animates o plantas. rociadora hacia una direcci6n segura y apriete et gatillo para NO permita en ningOn momento que NtNOS operen la maquina descargar la presi6n y evitar el retroceso.
- Page 35 NO asegure la pistota de rociado en la posici6n (open = abierto). NO abandone la pistota de rociado cuando la maquina est6 en NO use ropa suetta, joyas o etementos que puedan quedar funcionamiento. atrapados en el arranque o en otras partes rotatorias. NUNCA utilice una pistola de rociado que no tenga un seguro Ate para arriba el pelo largo y quite ta joyeria.
- Page 36 CONOZCA SU MAQUiNA LAVADORA DE ALTA PRESION ..Lea e[ manual de[ operario y Bas reglas de seguridad antes de porter en marcha su sistema de Hmpieza. Compare laa ilustraciones con su aistema de limpieza para familiadzarse con las ubicaciones de los diferentes controles y ajustes.
- Page 37 A PRESTON Bandeja de Accesorios". Agregue Aceite de Motor La gran mayoria de su m&quina lavadora a presi6n Craftsman ha sido ensamblada en la fabrica. Sin embargo, usted debera iPRECAUCI6N! Si intenta arrancar el motor antes Ilevar a cabo los siguientes...
- Page 38 Limpie la zona de alrededor del tapon de Ilenado de aceite nuevo la proxima temporada. Para obtener mas informacion respecto, consulte "Almacenamiento" en la paginas 51o52. y quite la vari!la de nivel de aceite. NUNCA utilice productos limpiadores para motores Con la ayuda de un embudo (opcional),...
- Page 39 Conecte la Manguera y e[ Suministro Conecte la manguera de jardin (no exceder 50 pies en Agua a la Bomba la Iongitud) a la entrada del agua. Apriete con la mano. PRECAUCION IMPORTANTE: Usted deber& conectar todas las mangueras antes de darle arranque al motor.
- Page 40 COMO USAR SU MAQUINA C6mo Darle Arranque a su M_quina Lavadora a Presi6n LAVADORA A PRESTON Para darle arranque a su maquina lavadora a presi6n Si tiene problemas operando su m&quina lavadora movida a motor por primera vez, siga estas instrucciones presion, por favor...
- Page 41 Mueva e! control de la valvula de regulacion a la Cuando arranque el motor, mueva lentamente posici6n "Rapido" ("Fast"), que se distingue con la palanca estranguladora a la posici6n "En marcha" figura de un conejo. ("Run"). Si el motor falla, mueva la palanca estranguladora...
- Page 42 C6mo Usar el Sistema de Boquillas ProjectPro El conector rapido de! pro!ongador de la boquil]a permite cambiar la boquilla y montar una de las cuatro diferentes incluye el sistema ProjectPro Las boquillas ProjectPro varian el presi6n y patron de rociado como se muestra.
- Page 43 Desplace hacia atras el ani!lo del conector rapido y tire Para un enjuagado de maxima potencia (alta de las boquillas ProjectPro Guarde las boquillas presion y bajo caudal), para superficies rebeldes ProjectPro en el soporte de la bandeja de accesorios. de difici! acceso, como superficies...
- Page 44 Limpieza y Apmicaci6n de[ Detergente Seleccione e instale la boquilla de alta presion deseada conforme alas instrucciones de la secci6n 'C6mo Usar [MPORTANTE: Utiiice detergentes dise_ados e! Sistema de Boquillas ProjectPro _M', espec[ficamente para m&quinas lavadoras a presi6n. Mantenga la pistola de rociado a una distancia segura...
- Page 45 INFORMACION Tg:CNICA SOBRE EL ESPECIFICACtONES MOTOR PRODUCTO El motor es de uno cilindros, de valvulas en cabeza (OHV), Espec!f!caciones de la M_quina Lavadora refrigerado por aire y de baja emisi6n. a 'res on En e! Estado de California, los motores de la sede 120000 Presion...
- Page 46 RESPONSABtLIDADES DEL PROPIETARIO Siga el programa de mantenimiento segOn e! n0mero de horas o seg0n e! calendario, Io que suceda primero. Se requiere de servicio con mayor frecuencia cuando opere la unidad en las condiciones adversas descritas a continuaci6n. CALENDARIO DE MANTENIMIENTO ANOTE LAS FECHAS CONFORME INTERVALO DE OPERACI6N POR HORA CUMPLA CON EL SERVICIO NORMAL...
- Page 47 Revise el FHtro en Unea MANTENIMIENTO DE LA MAQUINA LAVADORA A PRESION Consulte la ilustracion y suministre servicio a! filtro en linea si se tapa siguiendo estos pasos: Limpie los Residuos Filtro en Linea Limpie a diario, o antes de cada use, los residuos acumulados en el lavadora...
- Page 48 MANTENtMtENTO DEL MOTOR Conecte de nuevo la extensi6n de la boqui!la a la pistola rociadora. Conecte de nuevo e! suministro de agua, prenda agua, y encienda e! motor. Pruebe el lavador a presion al hacer funcionar con cada una de las boquilla de conexiones rapidas que viene...
- Page 49 Comprobaci6n de[ Nive[ de Aceite Limpie el area aJrededor de la abertura para !lenado aceite, retire la varilla de medici6n. Limpie la varilla Compruebe e! nivel de aceite antes de cada uso o cada medici6n, 5 horas de funcionamiento, como minimo.
- Page 50 Rempmace la Bu]ia ADVERTENCIA Remplace la bujia anualmente o cada 100 horas operaci6n. Limpie el area alrededor de la bujia y retirela. Retire y revise la bujia. Para el uso del reemplazo o e! bujia uniforme de la chispa de re6stato, e! Champion RC12YC o el bujia...
- Page 51 DESPUES DE CADA USO ALMACENAMtENTO PARA INWERNO No deber& haber agua en la unidad por largos periodos tiempo. Los sedimentos de minerales se pueden depositar PRECAUCION en partes de la bombay "congelar" su funcionamiento. Lleve a cabo estos procedimientos despues de cada uso: Lave el tubo de succi6n de detergente...
- Page 52 ALMACENAMIENTO PROLONGADO Protecci6n de la Bomba A protege al salvador de bomba de uso de bomba Sears Si usted no planea usar la maquina lavadora a presi6n previene congelar el da_o y lubrica embo!os y sellos. mas de 30 dias, debera preparar el motor para un...
- Page 53 Prob[ema Causa Soluci6n Esta usando la boquilla de baja presi6n Cambie la boqui!la a una de las tres (negra). boquilla de alta presi6n. La entrada de agua esta bloqueada, Limpie la entrada. Suministro de agua inadecuado. Proporcione flujo de agua adecuado, La manguera de entrada...
- Page 54 Sears, Roebuck and Co., U.S.A. (Sears), California Resources Board (Consejo de Recursos sobre e! Aire California, CARB, por sus sigJas en ingles) y United States Environmental Protection Agency (Agencia de Protecci6n Ambienta[ de EE.UU., EPA, pot sus sig[as en ingles). Declaraci6n de garantia del sistema...
- Page 55 Jnformaci6n Sobre emPeriodo Periodo de Cump_imiento de _a Normativa Durabilidad de mas Emisiones y e_ indice de Emisiones en ia Etiqueta de Aire en _a Etiqueta de Emisiones CumpHmiento de Emisiones dem Motor Motor Desde el 1 de julio de 2000, algunos motores Sears...
- Page 56 iiiiiiiiiiiiiiiii!! Voor Home ::::::::::: For repair-in your home all major brand appliances, lawn and garden equipment, or heating and cooling systems, no matter made it, no matter sold it[ ....For the replacement parts, accessories owner's manuals that you need to do-it-yourself....