Table of Contents
Advertisement
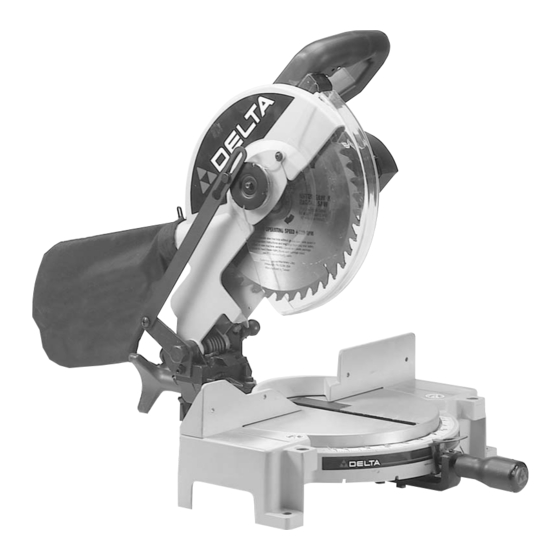
10" Compound
Power Miter Saw
(Model 36-075)
PART NO. 899908-0010
Copyright © 2000 Delta Machinery
To learn more about DELTA MACHINERY
ESPAÑOL: PÁGINA 21
visit our website at: www.deltamachinery.com.
For Parts, Service, Warranty or other Assistance,
1-888-848-5175 (
1-800-463-3582).
please call
In Canada call
Advertisement
Table of Contents

Related Manuals for Delta 36-075


Summary of Contents for Delta 36-075
- Page 1 10" Compound Power Miter Saw (Model 36-075) PART NO. 899908-0010 Copyright © 2000 Delta Machinery To learn more about DELTA MACHINERY ESPAÑOL: PÁGINA 21 visit our website at: www.deltamachinery.com. For Parts, Service, Warranty or other Assistance, 1-888-848-5175 ( 1-800-463-3582). please call...
-
Page 2: Safety Rules
Woodworking can be dangerous if safe and proper operating procedures are not followed. As with all machinery, there are certain hazards involved with the operation of the product. Using the machine with respect and caution will considerably lessen the possi- bility of personal injury. -
Page 3: Additional Safety Rules For Miter Saws
SURE THEY HAVE A NEGATIVE HOOK ANGLE. DO NOT USE BLADES WITH DEEP GULLETS AS THEY CAN DEFLECT AND CONTACT GUARD. 2. DO NOT OPERATE the miter saw until it is com- pletely assembled and installed according to the instruc- tions. -
Page 4: Assembly Instructions
3 - Wrenches for changing the blade 4 - Table lock handle ASSEMBLY INSTRUCTIONS WARNING: FOR YOUR OWN SAFETY, DO NOT CONNECT THE MITER SAW TO THE POWER SOURCE UNTIL THE MACHINE IS COMPLETELY ASSEMBLED AND YOU HAVE READ AND UNDERSTOOD THE ENTIRE OWNER’S MANUAL. -
Page 5: Moving Cuttinghead To The Up Position
Four holes are provided, two of which are shown at (A) Fig. 9, for fastening the saw to a supporting surface. When frequently moving the saw from place to place we suggest that the saw be mounted to a 3/4″... -
Page 6: Connecting Saw To Power Source
Your miter saw is wired for 110-120 volt, 60 HZ alternating current. Before connecting the miter saw to the power source, make sure the switch is in the “OFF” position. The motor provides a no-load speed of 5200 RPM. -
Page 7: Extension Cords
FOREWORD Delta Model 36-075 is a 10" Compound Power Miter Saw designed to cut wood. Compound angle and bevel cutting are easy and accurate. It can crosscut up to 5-3/4" x 2-3/8", miter at 45 both left and right 4-1/8" x 2-3/8", bevel at 45 left 5-7/8"... -
Page 8: Operating Controls And Adjustments
ICALLY AND TIGHTENED IF NECESSARY. LOCKING SWITCH IN THE “OFF” POSITION IMPORTANT: When the miter saw is not in use, the switch should be locked in the “OFF” position using a padlock (B) Fig. 14, (with 3/16" diameter shackle) through the two holes in the switch plate, as shown in (A) Fig. -
Page 9: Rotating Table For Miter Cutting
Fig. 15 ROTATING TABLE FOR MITER CUTTING Your miter saw will cut any angle from a straight 90 degree cut to 47 degrees right and left. Simply loosen lock handle (A) Fig. 15, one or two turns, depress index lever (B) and move the control arm to the desired angle. -
Page 10: Tilting Cuttinghead For Bevel Cutting
REAR SUPPORT/CARRYING HANDLE A rear support bar (A) Fig. 19, is provided to prevent the miter saw from tipping to the rear when the cut- tinghead is returned to the up position after a cut has been made. For maximum support the bar (A) should be pulled out as far as possible. -
Page 11: Adjusting Blade Parallel To Table Slot
(C). ADJUSTING FENCE 90 DEGREES TO BLADE If the fence (A) Fig. 22, is ever removed from the saw it should be adjusted so it is 90 degrees to the blade when it is replaced, as follows: 1. -
Page 12: Adjusting 90 And 45 Degree Bevel Stops
ADJUSTING 90 AND 45 DEGREE BEVEL STOPS 1. DISCONNECT THE SAW FROM THE POWER SOURCE. 2. Loosen bevel lock handle and move the cutting arm all the way to the right, then tighten the bevel lock handle. 3. Using a square (A) Fig. 25, place one end of the square on the table and the other end against the blade. -
Page 13: Locking Cuttinghead In The Down Position
4. For best results, cut at a slow, even cutting rate. WARNING: If the workpiece you are cutting would cause your hand to be within the haz- ard zone of of the saw blade, the workpiece should be clamped in place before making cut. See Fig. 30. -
Page 14: Auxiliary Wood Fence
WARNING: When performing multiple or repetitive cut-off operations that result in small cut-off pieces, one inch or less, it is possible for the saw blade to catch the cut-off pieces and project them out of the machine or into the blade guard and housing, possibly causing damage or injury. -
Page 15: Cutting Aluminum
When cutting aluminum extrusions, or other sections that can be cut with a saw blade and are within the capacity of the machine, position the material so the blade is cutting through the smallest cross- section, as shown in Fig. -
Page 16: Cutting Crown Moulding
CUTTING CROWN MOULDING One of the many features of your saw is the ease of cutting crown moulding.The following is an example of cutting both inside and outside corners on 52/38 degree wall angle crown moulding. NOTE: When cutting 45 degree... -
Page 17: Changing The Blade
2. Remove screw (A) Fig. 43, and rotate cover (B) to the rear as shown in Fig. 44. 3. To remove the saw blade, insert hex wrench (C) Fig. 45, into the hex hole located on the rear end of the arbor shaft, to keep the shaft from turning. -
Page 18: Brush Inspection And Replacement
BRUSH INSPECTION AND REPLACEMENT CAUTION: BEFORE INSPECTING THE BRUSHES, DISCONNECT THE MACHINE FROM THE POWER SOURCE. Brush life varies. It depends on the load on the motor. Check the brushes after the first 50 hours of use for a new machine or after a new set of brushes has been installed. - Page 19 NOTES...
-
Page 20: Parts, Service Or Warranty Assistance
PARTS, SERVICE OR WARRANTY ASSISTANCE All Delta Machines and accessories are manufactured to high quality standards and are serviced by • a network of Porter-Cable Delta Factory Service Centers and Delta Authorized Service Stations. To obtain additional information regarding your Delta quality product or to obtain parts, service, warranty assistance, or the location of the nearest service outlet, please call 1-888-848-5175 (in Canada call 1-800-463-3582). - Page 21 ® , THE PROFESSIONAL SELECT FLEX™, FRAME SAW™, MICRO-SET™, MORTEN™, NETWORK™, RIPTIDE™, TRU-MATCH™, WOODWORKER’S CHOICE™. Trademarks noted with ® are registered in the United States Patent and Trademark Office and may also be registered in other countries. Las Marcas Registradas con el signo de ® son registradas por la Oficina de Registros y Patentes de los Estados Unidos y también pueden estar registradas en otros países.
Need help?
Do you have a question about the 36-075 and is the answer not in the manual?
Questions and answers