Advertisement
Available languages
Available languages
Quick Links
Owner's
Manuam
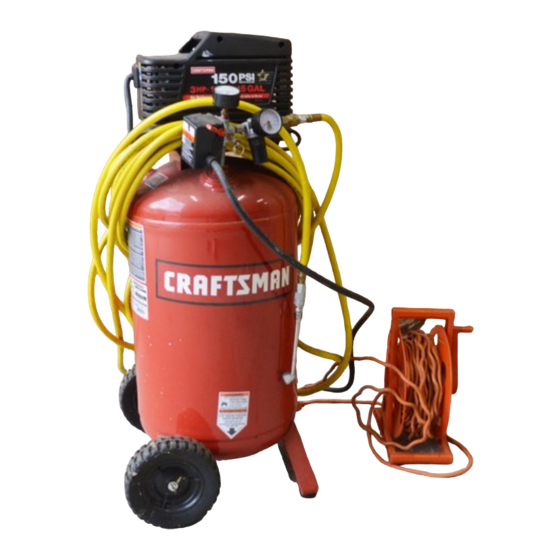
PermanentJy
Lubricated
Tank Mounted
AIR COMPRESSOR
ModeJ
No.
o
o
o
o
o
o
o
Safety
Guidelines
Assembly
Operation
Maintenance
Service
and Adjustments
Repair
Parts
CALf=['|ON:
Read the Safety Guidelines
and All instructions
CarefulIy Before
Operating.
Sears,
Roebuck
and Co., Hoffman
Estates,
mL(}0179 U.S.A.
Visit our Craftsman
website:
www, sears,com/craftsman
A09705 R_v. o 12/28/o4
Advertisement

Related Manuals for Craftsman 919.166440

Summary of Contents for Craftsman 919.166440
- Page 1 ModeJ Safety Guidelines Assembly Operation Maintenance Service and Adjustments Repair Parts CALf=['|ON: Read the Safety Guidelines and All instructions CarefulIy Before Operating. Sears, Roebuck and Co., Hoffman Estates, mL(}0179 U.S.A. Visit our Craftsman website: www, sears,com/craftsman A09705 R_v. o 12/28/o4...
- Page 2 FULL ONE YEAR WARRANTY AIR COMPRESSOR If this CRAFTSMAN Air Compressor fails due to a defect in material or workmanship within one year from the date of purchase, Sears will at its option repair or replace it free of charge. Contact your nearest Sears...
-
Page 3: Glossary
ModeB N o, 919=166440 Running HP Sore 1.875" Stroke 1.25" Voltage-Single Phase 120V/60HZ/1 PH Minimum Branch Circuit Requirement 15 amps Fuse Type Time Delay Air Tank Capacity Approx. Cut=In Approx. Cut=out SCFM @ 40 psig SCFM @ 90 psig Refer to Glossary for abbreviations. This manual contains information... - Page 4 Save these instructions Improper operation or maintenance of this product could result in serious injury and property damage. Read and understand all warnings and operation instructions before using this equipment. WARNING: Risk of e×plosion or fire How To Prevent it What Could Happen It is normal for emectricaR contacts...
-
Page 5: Accessories
111¸¸ 11!1 iiiiiiiii_, III! WARNING: Risk of Bursting Air Tank: The following conditions could lead to a weakening of the tank, and result in a violent tank explosion and could cause property damage or serious injury. How To Prevent It What Coumd Nal2pen Drain tank dally or after each use. - Page 6 WARNING: Risk of Electrical Shock Now To Prevent mt What Ceumd Happen Your air compressor is powered Never operate the compressor outdoors electricity. Like any other electrically when it is raining or in wet conditions. powered device, If it is not used Never operate compressor with...
- Page 7 WARNING: Risk of Burns Now To Prevent It What Could Hap___en Never touch any exposed metal parts Touching exposed metal such as the on compressor during or immediately compressor head or outlet tubes, can after operation. Compressor win remain result in serious burns.
- Page 8 WARNING: Risk of Serious Injury or Property Damage When Transporting Compressor (Fire, Inhalation, Damage to Vehicle Surfaces) How To Prevent What Could Happen Oil can leak or spill and could result Always pBace COMPRESSOR on a in fire or breathing hazard; serious protective mat when transporting injury or death can result,...
- Page 9 Become familiar with these terms When the tank pressure drops to a certain low level the motor will restart before operating the unit. automatically. The low pressure OFM: Cubic feet per minute. at which the motor automatically SCFM: Standard cubic feet per restarts is called "cut-in"...
- Page 10 Remove unit from carton and discard all packaging. HOW TO SET UP YOUR IMPORTANT: The outlet being used must be installed and grounded in UNmT accordance with atI local codes and ordinances. Location of the Air Compressor Locate the air compressor in a Make sure the outlet being used clean, dry and well ventilated area.
- Page 11 Extension Cords Voltage and Circuit Protection Using extension cords is not Refer to the specification chart for the recommended. The use of extension voltage and minimum branch circuit cords wilI cause voltage to drop requirements. resulting in power loss to the motor and overheating.
-
Page 12: Know Your Air Compressor
Know Your Air Compressor READ THiS OWNER'S MANUAL AND SAFETY RULES BEFORE OPERATING YOUR UNIT. Compare the illustrations with your unit to famiIiarize yourself with the !ocation of various controls and adjustments. Save this manual for future reference. Pressure Tank OutBet Switch Pressure... -
Page 13: How To Use Your Unit
Air Compressor Pump (not shown}: Plug the power cord into the Compresses air into the air tank. correct branch circuit receptacle. Working air is not available until the (Refer to "Voltage and Circuit compressor has raised the air tank Protection" paragraph in the pressure above that required at the "lnstallation"... - Page 14 How to Start: NOTE: Always operate the air compressor in wetI-ventilated areas Turn the On/Auto/Off lever free of gasoline or other combustible to "On/Auto" and allow tank vapors. Hfthe compressor is being pressure to build. Motor will used to operate a sprayer DO NOT stop when tank pressure reaches place near the spray area.
-
Page 15: Customer Responsibilities
Customer Responsibilities Before Daily each or after each [}heck Safety Valve :}rain Tank To Drain Tank Risk of Unsafe Operation, Unit Set the On/Auto/Off lever to cycmee automatically when power "Off". is on, When servicing, you may be exposed to voltage sources, Turn the regulator knob counter- clockwise to set the outlet compressed... - Page 16 AH maintenance and repair Unscrew the check valve (turn operations not misted must be counterclockwise) using a 7/8" performed by Trained Service open end wrench. Note the Technician, orientation for reassembly. Using a screwdriver, carefully push the valve disc up and down.
- Page 17 Assemble the regulator and To Replace Regulator orient as shown. Release alI air pressure from air tank, See "To Drain Tank" in the "Maintenance" section= Set the On/Auto/Off lever to "Off" and unplug unit. Remove the outlet pressure gauge and quick connect (if equipped) from the regulator.
- Page 18 Before you store the air compressor, Risk of Bursting, Water will make sure you do the following: condense in the air tank, If not Review the "Maintenance" drained, water will corrode section on the preceding weaken the air tank causing a risk pages and perform scheduled of air tank rupture,...
- Page 19 _Risk of Unsafe Operation, Unit cyc{es automatically when power is on, When servicing, you may be exposed vomtage sources, compressed air, or mov{ng parts, Before servicing unit unplug or disconnect electricaB suppmy to the air compressor, bmeed tank of pressure, and allow the air compressor to cool PROBLEM...
- Page 20 PROBLEM CAUSE CORRECTION Pressure reading it is normal for "some" If there is an excessive on the regulated pressure drop to occur. amount of pressure drop pressure gauge when the accessory is used, drops when an adjust the regulator following accessory is the instructions in the...
- Page 21 PROBLEM CAUSE CORRECTION Motor will not Fuse blown, circuit breaker Check fuse box for blown run. tripped. fuse and replace as necessary. Reset circuit breaker. Do not use a fuse or circuit breaker with higher rating than that specified for your particular branch circuit.
- Page 22 Air Compressor Model Number 919=1664,$0 A09705 22- ENG...
-
Page 23: Assembly
Nut Sleeve Assembly 5/16" CAC-1254 Isolator (4) SSF-621 Screw 1/4-14 x 5/8 (2) Pump Assembly A04851 Label, Specification (Not Shown) LA-3069 Label, Craftsman LA-3027 Label, Drain Tank Eng/Spa LA-3108 Label, Hot Surface LA-3266 Label, Warning (Not Shown) D23627 Label, Star Rating D28123... - Page 24 Air Compressor Model Number 919-166440 The picture shown is for ref_ence onRy. It may differ from actuaB unit. Torque 49-55 inqbs A09705 24-ENG...
- Page 25 Air Compressor Model Number 919=166440 Part Number Description CAC=1320 Shroud, Right D25735 Shroud, Left CAC-1196 Head CAC-1212 Tube Sea! A05346 Outlet Tube Assembly ® 6 Z-D24819 Head Gasket Z-A08548 Valve Plate Assembly ® 8 Gasket Z-A04647 Sub Pump Assembly Connecting Formed Compression Ring 9=10...
- Page 26 TOTAL DE UN ANO DEL OOMPRESOR DE AIRE Si este compresor de aire Craftsman fallase debido a defectos de materiales o de fabricaci6n dentro del aho de su fecha de compra, Sears, a su opci6n, Io reparara o reemplazara sin costo alguno.
- Page 27 Modelo N ° 919-166440 HP de Trabajo Di_metro interior 1,875 pc (47,7mm) Carrera 1,25 po (31,8mm) Tensi6n monof_sica 120V/60HZ/1 PH Circuito minimo requerido Tipo de fusibleAcci6n retardada Capacidad de aire en el tanque 15 Galones (56,8 litros) Presi6n de corte de entrada Presi6n de corte de salida SCFM a 40 psig 4,9 Calibre de libras...
- Page 28 GUARDE ESTAS |NSTRUCCiONES operaci6n o el mantenimiento inadecuados este producto podrian ocasionar sedas lesiones y dafios a la propiedad, Lea y comprenda todas advertencias e instrucciones de funcionamiento antes de utilizer este equipo, ADVERTENCIA: Riesgo de Explosi6n o mncendio puede occurrir c6mo preveniHo...
- Page 29 ADVERTENCIA: Riesgo de E×plosi6n Tanque de aire: las siguientes condiciones podfian, causar el debilitamiento del tanque, determinar su explosi6n violenta, danos a la propiedad o serias lesiones= qu_ puede occurrir c6mo preveniHo Drenaje inadecuado del agua condeneada Drene el tanque diariarnente o despu_s en eUtaaque,...
- Page 30 ADVERTENCIA: Riesgo Descarga ER_ctrica "_J puede occurrir c6mo preveniHo Su compresor de aire est& accionado Jam&s opere el compresor a la intemperie e_ectricidad. Como cualquier otro dispositivo cuando est& Hoviendo o en condiciones electrico impulsado electricamente, si no se Uo humedad=Nunca opere el compresor...
- Page 31 ADVERTENCmA: Riesgo de Quemaduras qu_ puede occurrir cbmo preveniHo Jam_s toque partee de metal e×puestas en el Tocar eUmetaU e×puesto ta_ come el cabezal compresor dumnte o inmediatamente despues del compresor o los tubes de saWa del escape, de la operacion, eUcompresor permanecer_ puede ocaeionarIe...
- Page 32 ADVERTENCIA: Riesgo de Serias Lesiones o DaSos a la Propiedad Transportar el ¢ornpresor (Fuego, inhaUaci6n, daSo a Uasuperficie de vehicuUos) puede occurrir c6mo preveniHo EUaceite puede derramaree y ello podria Depoeite el eompresor sobre uea affombrHla resultar en serias bsiones o la muerte debido al protectora cuando...
- Page 33 Familiadcese con los siguientes t6rminos, usando su accesorio. Cuando la presi6n del tanque baja al valor fijado en fgbrica antes de operar la unidad: come punto bajo, el motor volverA a CFM: (Cubic feet per minute) Pies cObicos arrancar autemAticamente. La presi6n pot minuto.
- Page 34 Desempaque Extraiga la unidad de su caja y descarte todas las partes de embalaje. C6MO PREPARAR LA UNIDAD AsegOrese de que el tomacorriente que ser9 utilizado tenga la misma configuraci6n que el enchufe de Ubicaci6n del compresor de aire conexi6n a tierra. NO UTILICE UN Ubique al compresor de aire en una ADAPTADOR.
- Page 35 Cables de e×tensi6n eU_ctrica Protecci6n del voltaje y del circuito No se recomienda la utilizaci6n de cables Acerca del voltaje y la minima cantidad de extensi6n electrica. El uso de cables circuitos requeridos, refi6rase al cuadro de especificaciones. de extensi6n el6ctrica originar_ una caJda de tensi6n, Io que determinar_ p6rdida de potencia del motor as[ come compresoree...
- Page 36 Oonozca cotn_FesoF a}re LEA ESTE MANUAL DEL PROPETARiO Y SUS NORMAS DE SEGURiDAD ANTES DE OPERAR LA UNIDAD. Compare las ilustraciones contra su unidad a fin de familiarizarse con la ubicaci6n de los distintos controles y regulaciones. Conserve este manual para referencias futuras.
- Page 37 Enchufe el cable de alimentaci6n en Bomba de compresi6n del aire {no mostrada): Comprime el aire dentro del el recept&culo del ramal del circulto tanque. El aire de trabajo no se encuentra correcto. (Referirse al p&rrafo "Protecci6n disponible hasta que el compresor haya del voltaie y del circuito"...
- Page 38 Responsabilidades dem c_iente Antes 3iariamente cada ._ luegode _ada use !erifique la v_lvula de seguridad Drenaje del tanque C6mo drenar emtanque Riesgo de Operaci6n Coloque la palanca On/Auto/Off mnsegura. Cuando se reamizan trabajes la posici6n "Off". de mantenimiento, usted puede estar Tire de la perilla del regulador y gire expuesto a fuentes...
- Page 39 Todo tipo de mantenimiento Desenrosque la v_lvula de retenci6n operaciones de reparaci6n gir_ndola hacia la izquierda usando mencionados, deber_n set efectuados una Ilave de boca de 7/8 plug. pot personal t6cnico especializado. (22 mm). Tome nota de la orientaci6n para volverla a Riesgo de ensamblar.
- Page 40 Ensamble el regulador y ori6ntelo de Para reemplazar el regulador acuerdo a Io mostrado. Libere toda la presi6n del aire del tanque. Vea "Drenaje del tanque" en la secci6n "Mantenimiento". Apagar la unidad colocando Regulador interrupter en On/Auto/Off en "Off". Usando una Ilave de tuercas ajustable retire el medidor de salida de presi6n y la conexi6N rb,pida del regulador (si...
- Page 41 Antes de guardar su compresor de aire, Riesgo de aseg0rese de hacer Io siguiente: Revise la secci6n "Mantenimiento" agua se condensa dentro deB tanque de las p_ginas precedentes y ejecute de aire. Si no se drena, ella corroer_ el mantenimiento programado debilitando la paredes...
- Page 42 Riesgo de Operaci6n Insegura. La unidad arranca autom&ticamente cuando est_ enchufada. AI hacer el mantenimiento, el operador puede quedar e×puesto a fuentes de corriente de aire comprimido o a piezas movibles. Antes de intentar hacer reparaciones, desconectar emcompresor del tomacorriente, drenar la presi6n de aire del tanque y esperar a que el compresor...
- Page 43 PROBLEMA CAUSA CORRECCION Si hubiese una caida excesiva La lectura de la Es normal que ocurra alg0n de presi6n durante el uso del presi6n sobre un descenso en la presi6n. accesorio, ajuste el regulador de man6metro acuerdo alas instrucciones de la viene equipado secci6n "Operaci6n".
- Page 44 PROBLEMA CORRECCI6N CAUSA El motor no Verifique la caja de fusibles Fusible fundido; interruptor funciona. observando la existencia de fusibles autom_tico del circuito disparado, fundidos y sustit0ya[os en caso de necesidad. Restablezcael interTuptor automatico. No use un fusible o interruptorautomaticocon va!ores que excedan los especificados para la rama de su circuito, Verifique el uso del fusible adecuado,...
- Page 45 45-SP A09705...
- Page 46 A09705 46-SP...
-
Page 47: Installation
Agreements Contratos ProteeeiSn para Reparaciones Congratulations on making a smart Felicitac/ones per hacer una compra purchase. Your new Craftsman C_) p roduct inteligente. Su nueva unidad Craftsman ® esta is designed and manufactured for years disefiada y fabricada para aries de operaci6n of dependable operation. - Page 48 Your Home For repah- in your home -of aH major brand appHiances, iiiiiiiiiiiiiiiiiiiiiiiiii_ Hawn and garden equipment, or heating and cooHing systems, iiiiiiiiiiiiiii no matter who made it, no matter who sold it! iiiiiiiiiiiiiii For the repHacement parts, accessories iiiiiiiiiiiiiii owner's manuaHs that you need to doqt-yourseHfi iiiiiiiiiiiiiii...