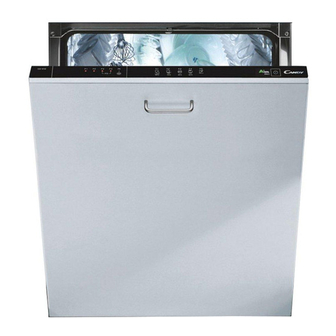
Candy CDI 1012 User Instructions
Hide thumbs
Also See for CDI 1012:
- User instructions (17 pages) ,
- User instructions (32 pages) ,
- User instructions (25 pages)
Advertisement
Advertisement
Table of Contents

Summary of Contents for Candy CDI 1012
- Page 1 User instructions CDI 1012 DISHWASHER...
- Page 2 Congratulations! CUSTOMER SERVICE AND CONTENTS GUARANTEE Thank you for choosing a Candy Safety advice pag. Your new appliance is fully guaranteed appliance; quality dishwashers which Setting up, installation pag. guarantee high performance and by the manufacturer for 12 months Technical notes for cabinet fitters pag.
- Page 3 Fuses and plugs INSTALLATION SAFETY INSTRUCTIONS WARNING ! (Technical notes) This appliance should be used only on a There are certain basic safety rules Knives and other utensils with sharp socket with a minimum rating of 13 Amp. which are valid for any domestic points must be loaded in the basket with their points down or placed in a appliance.
- Page 4 The hose can be hooked over the side of Water connection Connecting the outlet hose the sink, but it must not be immersed in water, in order to prevent water from being syphoned back to the machine IMPORTANT The outlet hose should disharge into a when this is in operation (fig.
-
Page 5: Technical Notes For Cabinet Fitters
TECHNICAL NOTES Fasten the two supplied frames with 4 of Wooden panel installation the 4 x 16 mm diameter screws, setting CABINET FITTERS them at the center of the eyelets (fig. 6). This dishwasher model is equipped with an auto-balancing system in the door and This dishwasher model can be embedded Hang the panel on the dishwasher door comes ready to mount a wooden panel of... - Page 6 Important If, after mounting the wooden panel, it is necessary to ship the machine for final installation, we recommend leaving it in its original packaging materials. For this reason the package was design to allow the panel to be mounted without having to unpack the machine completely.
-
Page 7: Water Softener Unit
use of the appliance, it should be refilled WATER SOFTENER UNIT Loading the salt If your water is at level 0, you need not use from time to time according to the any regenerating salt, nor need you make regulation of the water softener unit. any adjustment, as your water is soft. - Page 8 LOADING DISHES Salad bowls and plastic bowls may also A standard daily load is represented in figs. 1, 2 and 3. be loaded on the upper basket. It is advisable to block these in place so that Upper basket (fig. 1) the jets of water do not make them Using the upper basket A = soup plates...
- Page 9 INFORMATION FOR THE TEST LABORATORIES Half load wash upper basket General programme comparison (Ref. EN 50242 Standards) (see programmes selection) 1/2 mixed load (fig. 1) A = glasses 1. Upper basket position: low 4. Amount of detergent: B = soup plates 2.
- Page 10 LOADING THE DETERGENT After pouring the detergent into the container, the effectiveness of detergents containing Should this occur, we would recommend close the lid, firstly pushing (1) and then the built in water softener/salt depends using traditional separate products – salt, AND THE RINSE AID pressing on it (2) until you hear the click.
-
Page 11: Cleaning Filters
CLEANING THE FILTERS PRATICAL HINTS How to make savings How to get really good wash If you want the dishwasher to give a complete wash, place the dishes in the results The filter system (fig.A “4”) consists of: dishwasher at the end of each meal and if necessary turn on the COLD RINSE Before placing the dishes in the cycle to soften the food remains and... - Page 12 DESCRIPTION OF THE CONTROL CLEANING AND MAINTENANCE To clean the dishwasher outside, do not use solvents (degreasing action) neither abrasives, but only a cloth soaked with water. The dishwasher does not require special maintenance, because the tank is self-cleaning. Regularly wipe the door gasket with a damp cloth to remove any food remains or rinse aid.
-
Page 13: Program Selection And Special Functions
To start the program, press the selected PROGRAM SELECTION Fault signals IMPORTANT program button again to confirm. The AND SPECIAL FUNCTIONS To cancel the "COLD RINSE" program, relevant LED will stop blinking and simultaneously hold down If malfunctions or faults occur when a remain on and, when the door is shut, "RAPID"... -
Page 14: Programme Selection
PROGRAMME SELECTION Avarage Special function Programme contents Check list duration buttons in minutes available Programme Description (“RECOMMENDED” PROGRAMME) UNIVERSAL • • • • • • Once a day - for normal soiled pans and any • • • • 65°C other items that have been left all day for washing. -
Page 15: Identifying Minor Faults
IDENTIFYING MINOR FAULTS FAULT CAUSE REMEDY Should the dishwasher fail to operate, before contacting the Service Centre, make See causes for no. 5 Check the following checks: Bottom of saucepans have not Burnt on food remains must been washed well be soaked before putting pans in dishwasher Edge of saucepans have not... - Page 16 The manufacturer declines all responsibility in the event of any printing mistakes in this booklet. The manufacturer also reserves the right to make appropriate modifications to its products without changing the essential characteristics.


Need help?
Do you have a question about the CDI 1012 and is the answer not in the manual?
Questions and answers