Canton DIGITAL MOVIE Manual
Hide thumbs
Also See for DIGITAL MOVIE:
- Manual (69 pages) ,
- Operating instructions manual (40 pages) ,
- Owners & installation manual (29 pages)
Table of Contents
Advertisement
Available languages
Available languages
Advertisement
Table of Contents

Related Manuals for Canton DIGITAL MOVIE


Summary of Contents for Canton DIGITAL MOVIE
- Page 1 DIGITAL MOVIE pure music...
- Page 2 Deutschland / Germany Tel.: +49(0) 60 83 28 70 Phone: +1-612-706-9250 Fax: +49(0) 60 83 28 113 Fax: +1-612-706-9255 e-mail: info@canton.de e-mail: info@cantonusa.com Die Adressen der internationalen Canton-Vertriebspartner finden Sie unter: The addresses of Canton’s international distributors can be found at: www.canton.de...
- Page 3 öffnung. Schwingungen und Vibrationen können zur Beschädigung von Gegen- ständen führen. Canton kann für Schäden, die aus Nichtbeachtung der folgenden Punkte resultieren, nicht haftbar gemacht werden. Stecken Sie keine Gegenstände oder Körperteile in die Öffnung des Subwoofers.
- Page 4 Sehr geehrter Kunde, willkommen in der Canton-Familie und vielen Dank für Ihr Vertrauen, das Sie uns mit dem Kauf dieses Systems entgegenbringen. Sie haben sich für ein hochwertiges Lautsprecher-System entschieden und damit Ihren hohen Anspruch an Klang- und Verarbeitungsqualität bewiesen.
- Page 6 Platzierung der Lautsprecher Der Center-Surround Lautsprecher (DM 1) sollte unter bzw. über dem Fernsehgerät positioniert werden. Die Satelliten des DM 2 Systems dagegen platzieren Sie idealerweise links und rechts neben dem Bildwiedergabegerät. Der Abstand zwischen den Satelliten sollte 4m nicht überschreiten.
-
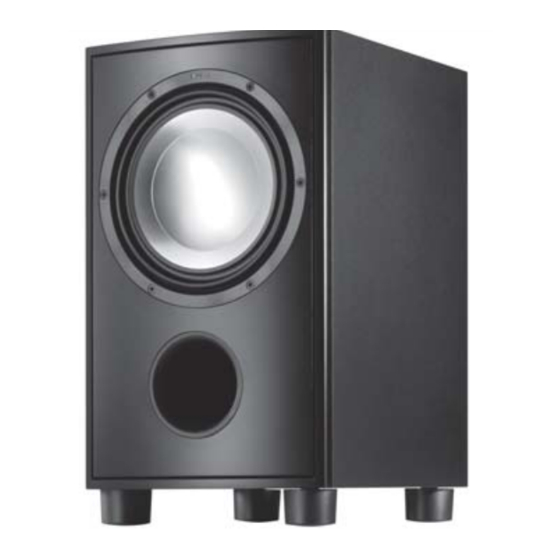
Page 7: Rückansicht Des Subwoofers
Rückansicht des Subwoofers Antennenanschluß Lautstärke anheben Umschalter SAT (optisch oder coaxial) Lautstärke absenken Wiedergabemodus Digital Eingänge für SAT und DVD Eingang auswählen Analoge Eingänge für TV, VCR und AUX (sonstiges Gerät) Ein/Standby Betriebsanzeige (rot = standby, grün = ein) 2.1/5.1 MODE Vorverstärker - Ausgang ZONE 2 / LINE OUT - Ausgang Anschlüsse für die Satelliten (links und rechts) bei DM 2 und Center-Surround bei DM 1... -
Page 8: Anschluss Der Lautsprecher
Anschluss der Lautsprecher Verwenden Sie die im Lieferumfang enthaltenen Lautsprecherkabel zum Anschluss der Lautsprecher an den Schraubklemmen „Front Left“ bzw. „Front Right“ auf der Rückseite des Subwoofers (Kabelenden ca. 1 cm abisolieren). Bitte beachten Sie die richtige Polung, rot für plus (+) und schwarz für minus (-). - Page 9 Anschluss der Quellgeräte Die Canton DM-Systeme bieten eine Vielzahl von Anschluss- möglichkeiten für alle gängigen Quellgeräte, wie zum Beispiel DVD- Player, Videorecorder, Satelliten-Receiver, Multimedia-Konsolen (Playstation®, X-Box®, ...) etc. Hierbei werden die Audioanschlüsse Ihrer Quellgeräte mit den entsprechenden Anschlüssen auf der Rückseite des Subwoofers verbunden (1) (DVD an DVD, Videorecor-...
- Page 10 Damit Sie den integrierten Tuner des DM-Systems nutzen können, müssen Sie die mitgelieferte Wurfantenne an der vorgesehenen Buchse des Subwoofers anschließen. Zum besseren Empfang sollte die Wurfantenne aufgespannt werden. Für einen optimalen Empfang empfehlen wir den Anschluss an ein Breitbandkabel oder eine Dachantenne.
- Page 11 Fernbedienung Ausgewählter Eingang (Eingang des DM-Systems) Produktidentifikation Lautstärke Dekodier-Modus Wiedergabe-Modus Funktionstasten [0,1,2,3], menüabhängige Funktionen Lautstärketasten [4,5] Nummern-Modus-Taste OK-Taste [6] Ein/Standby-Taste [9] MENU-Taste [e] Geräteauswahl-Tasten [7,8] (zu bedienende Geräte) Hinweis: Die Angaben in [x,y,..] beziehen sich auf den Nummern-Modus im IR-Modus.
-
Page 12: Inbetriebnahme Der Fernbedienung
Wenn alle Geräte miteinander verbunden sind und der Netzschalter am Subwoofer eingeschaltet ist, befindet sich das Canton DM-System im Standby-Modus. Durch einmaliges Drücken einer beliebigen Taste wird die Fernbedienung aktiviert. Wird sie länger als 30 Sek. nicht benutzt, geht sie in den Ruhezustand über. - Page 13 Über < volume > kann die Lautstärke des DM-Systems im Hauptmenü und im IR-Modus in 100 Stufen von 0..99 angepasst werden. Befindet sich das DM-System in einem der Untermenüs, kann sowohl im DM- als auch im IR-Modus die Lautstärke nicht verändert werden. Beim Einschalten startet die Fernbedienung im Hauptmenü.
- Page 14 Bedienung des DM-Systems Drücken Sie um das DM-System zu starten. Achtung Wenn Sie das DM-System wieder Bitte beachten Sie, dass mit < input > die Eingänge ausschalten möchten, drücken Sie erneut des DM-Systems umgeschaltet werden und mit Das DM-System wird in den Standby-Modus versetzt. <...
- Page 15 wählen Sie aus, ob die Tonwiedergabe im Stereo- oder Surround-Modus erfolgen soll. Das System stellt je nach Eingangs- signal automatisch den entsprechenden Dekodier-Modus ein. Im Playmode „stereo“ werden Analog Stereo oder PCM aktiviert Im Playmode „surround 1 und surround 2 / 2.1 Mode“: Virtual Dolby Digital, Virtual Dolby Pro Logic II oder Virtual DTS.
-
Page 16: Speaker Setup
Einstellen des DIGITAL MOVIE Nachdem Sie Ihr DM-System erfolgreich angeschlossen haben, sollten Sie als nächstes die einzelnen Komponenten auf Ihren Hörraum anpassen. Wenn Sie Einstellungen am DM-System vornehmen wollen, schalten Sie dieses bitte ein und wählen Sie durch ein- bzw. zweimaliges Drücken der MENU-Taste das Speaker Setup bzw. -
Page 18: Parameter Setup
Parameter Setup können die folgenden Parameter ausgewählt und mit verändert werden. Unter Output können Sie festlegen, ob der untere Vorverstärker-Ausgang auf der Rückseite des Subwoofers als Line Out (fester Lautstärkepegel für ein analoges Aufnahmegerät) oder als Zone 2 (regelbare Lautstärke für z.B. ein aktives Multiroomsystem bzw. Wireless-Lautsprecher-Systems) geschaltet ist. - Page 19 Die dynamische Basskorrektur des Subwoofers (bass expand) passt gehörphysiologisch lautstärkeabhängig die Tieftonintensität an. Bei der Wiedergabe von Kinofilmen empfehlen wir, die Einstellungen „expand normal“ oder „expand medium“ zu nutzen. Bei audiophiler Stereo- wiedergabe empfehlen wir die Einstellung „bypass“. Mit lip sync kann das Bild mit dem Ton synchronisiert werden, um z.B. Stimmen an zeitlich verzögerte Mundbewegungen anzupassen. Einstellbar ist eine Audio Signal-Verzögerung von 0 bis 70ms.
- Page 20 Tuner Die Canton DM-Systeme verfügen über einen integrierten FM-Tuner (UKW). Dieser wird über die Input-Tasten im Hauptmenü der Fernbedie- nung angewählt. Um z.B. die Radiofrequenz zu wechseln bzw. diese abzuspeichern, drücken Sie die Menu-Taste. Dadurch gelangen sie in das Tuner Setup Menü. Dort können Sie folgende Einstellungen vornehmen: Der automatische Suchlauf wird durch langes Drücken (>1 Sek.) auf die Tasten...
- Page 21 Select Die DM-Fernbedienung kann Funktionen anderer Infrarot-Fernbedienungen erlernen und somit die Steuerung der Quellgeräte übernehmen. Je nach Belegung kann man zwischen folgenden Menüpunkten wählen: Hauptmenü, DM, DVD, Sat, TV, CD, iPod Dock, Receiver. Informationen zur Programmierung finden Sie ab Seite 22. ACHTUNG: Die Funktion der Tasten <...
-
Page 22: Programmieren Der Fernbedienung
Programmieren der Fernbedienung Durch Drücken und Halten der OK-Taste und zusätzliches Drücken der NUM-Taste gelangen Sie nach max. 2 Sek. in den Lernmodus der DM- Fernbedienung. Innerhalb der Menüs können Sie mit das zu programmierende Gerät auswählen und mit bestätigen. Ein Kreuz im Kästchen vor einem Gerät zeigt an, dass dieses bereits erlernt wurde. - Page 23 War die Programmierung erfolgreich, erhalten Sie die Meldung RF Remote Control Mode (Funk) „Programming Successful“. Das werksseitig programmierte DM-System kann nicht gelöscht, bei Bedarf aber überschrieben (umprogrammiert) werden. Zum Über- schreiben drücken Sie nach Auswahl des Systems die Taste . Sie werden nun darauf hingewiesen, dass dieses Gerät bereits existiert und beim Fortfahren überschrieben würde (Device already exist –...
- Page 24 Steuerung ohne Fernbedienung Die Grundfunktionen des DM-Systems können Lautstärke anheben auch mit Hilfe der Taster auf der Rückseite des Subwoofers gesteuert werden. Dazu zählen die Regulierung der Laustärke, die Wahl des Lautstärke absenken Wiedergabe-Modus und des Quellgerätes. Außerdem kann hier das Gerät ein bzw. in den Wiedergabe-Modus (stereo/surround) Standby-Modus geschaltet werden.
-
Page 25: Startup Volume
Eigenschaften. Als Funktionen können ein 2.1 (Auslieferzustand) oder 5.1 Modus Hiermit kann die interne Steuerung des Canton-Systems zu Service- erscheinen. Im 5.1 Modus besteht die Möglichkeit ein aktives oder Zwecken ausgeschaltet werden. Ein Reaktivieren ist nach dem funkgesteuertes (wireless) Lautsprechersystem über den... -
Page 26: Problembehebung Und Optimierung
Batterien der FB für mind. 10 Sek. entnehmen FB zeigt dauerhaft „Good Bye 1. Prozessor des Sub ist beim Abschalten 1. Sub am Netzschalter für 10 Sek. auschalten Canton“ an „abgestürzt“ FB zeigt kein Bild, nur die 1. I2C wurde ausgeschaltet (I2C OFF) 1. - Page 27 Kein räumlicher Eindruck (kein 1. Der Wiedergabemodus steht auf Stereo 1. Stellen Sie den „play mode“ auf surround Virtual Surround Effekt 2. Sie befinden sich nicht mittig zwischen den 2. Stellen Sie die Entfernung zu den beiden Satelliten bzw. die Entfernungseinstellungen stimmen Satelliten und dem Sub korrekt ein (S.16) nicht mit den realen Abständen überein Ein Satellit scheint lauter als der...
- Page 28 Klang ist dumpf (zu wenig 1. Sie geben ein Stereo - Signal im Virtual Surround 1. Ändern Sie den Wiedergabemodus in Stereo Höhen) Modus wieder (S.15) 2. Ihr Raum ist akustisch stark bedämpft 2. Heben Sie den Hochtonpegel unter dem Punkt „room comp function treble“...
- Page 29 1. Wechseln Sie die Batterien automatisch vom IR Modus in DM Bedienmodus Infrarotgeräte 1. Geräte wurden nicht (korrekt) erlernt 1. Bitte programmieren Sie die Canton-FB mit (DVD,TV,SAT...) sind nicht dem Code des gewünschten Gerätes (erneut) wählbar (S.22) Gerät lässt sich nicht 1.
- Page 30 Allgemeine Pflegehinweise Einspielphase Um möglichst lange Freude an Ihren Canton Lautsprechern zu haben, beachten Sie bitte folgendes: Setzen Sie das Gehäuse der Lautspre- Um seine maximale Leistungsfähigkeit zu entwickeln, benötigt ein cher nicht direktem Sonnenlicht aus. Vermeiden Sie extreme Lautsprecher eine Einlaufzeit von ca. 15-20 Betriebsstunden. In dieser Temperaturunterschiede und schützen Sie Ihre Lautsprecher vor...
- Page 31 The correct setup and connection of the subwoofer are the responsibility of the space of 5 cm from walls and furniture must be observed when setting up the user. Canton will not accept any responsibility for damage or injuries caused equipment. Avoid heat accumulation and do not cover your subwoofer with by incorrect setup or faulty connection.
-
Page 32: System Description
Dear Customer, Welcome to the Canton family and many thanks for the trust you have shown us by purchasing this system. You have chosen a top-quality loudspeaker system, thus demonstrating the high demands you place on sound and finishing quality. - Page 34 The distance between the satellites should be no more than 4m. The subwoofer serves simultaneously as the central control unit of your digital movie system and can be placed wherever you like in the room. The preferred position, however, is one which is close to the TV and signal sources, because this enables you to keep the necessary connection cables short.
-
Page 35: Rear View Of The Subwoofer
Rear view of the subwoofer Antenna connection Raise volume SAT switch (optical or coaxial) Lower volume Play mode Digital inputs for SAT and DVD Select input Analog inputs for TV, VCR and AUX (other device) On/Standby Operational status display (red = standby, 2.1/5.1 MODE pre-amplifier output green = on) ZONE 2 / LINE OUT - output... -
Page 36: Connecting The Loudspeakers
Connecting the loudspeakers Use the supplied loudspeaker cables to connect the speakers to the screw terminals „Front Left“ and „Front Right“ on the back of the subwoofer (strip approx. 1 cm of the insulation off the cable ends). Please observe the correct polarity, red for plus (+) and black for minus (-). - Page 37 Connecting source devices The Canton DM systems offer a variety of connection options for all standard source devices, such as DVD players, video recorders, satellite receivers, multimedia consoles (Playstation®, X-Box®, ...) etc. To do so, the audio connections of your source devices are connected to the corresponding terminals on the back of the subwoofer (1) (DVD to DVD, video recorder to VCR etc.
- Page 38 To be able to use the integrated FM tuner in the DM system, you must plug the supplied throw-out antenna into the corresponding socket in the subwoofer. The antenna should be stretched open for better reception. We recommend connection to a broadband cable or roof antenna for optimum reception.
-
Page 39: Remote Control
Remote Control Selected input (DM system input) Product identification Volume Decoding mode Play mode Function keys [0,1,2,3], menu-dependent functions Volume keys [4,5] Numbers mode key OK key [6] On/Standby key [9] MENU key [e] Device selection keys [7,8] (devices to be operated) N.B.: The information in [x,y,..] relates to the numbers mode in the IR mode. -
Page 40: Using The Remote Control
Once all of the devices have been connected with one another and the mains switch on the subwoofer is switched on, the Canton DM system is in standby mode. The remote control is activated by pressing any key once. - Page 41 The volume of the DM system can be regulated in 100 increments from 0..99 via < volume > in the main menu and in the IR mode. If the DM system is in one of the sub-menus, the volume cannot be altered in the DM or IR mode.
- Page 42 Operating the DM System Press to start the DM system. Important Please note that the DM system inputs are switched over with < input > while <select> If you want to switch the DM system off, press regulates the devices to be controlled remotely. again to put the DM system into standby mode.
- Page 43 to select whether the sound is to be reproduced in the stereo or surround mode. The system sets the corresponding decode mode automatically, depending on the input signal. Stereo or PCM are activated as analog sound in the „stereo“ play mode, Virtual Dolby Digital, Virtual Dolby Pro Logic II or Virtual DTS in the „surround 1 und surround 2 / 2.1 mode“...
- Page 44 Setting the DIGITAL MOVIE Once you have successfully connected your DM system, you should then adapt the individual components to your listening area. If you want to adjust the settings of your DM system, please switch it on and select Speaker Setup or Parameter Setup by pressing the MENU key once or twice respectively.
- Page 46 Parameter Setup The following parameters can be selected with and altered with You can determine under Output whether the lower pre-amplifier output on the back of the subwoofer is switched as Line Out (fixed volume level for an analog recording device) or as Zone 2 (adjustable volume for an active multi-room system or wireless loudspeaker system, for example).
- Page 47 The dynamic bass regulator on the subwoofer (bass expand) adjusts the intensity of the bass tones to the physiological properties of human hearing depending on the volume. When playing movies, we recommend the „expand normal“ or „expand medium“ settings. When playing audiophile stereo recordings, we recommend the „bypass“...
- Page 48 Tuner The Canton DM systems have an integrated FM tuner which is selected via the input keys in the main menu of the remote control. The menu key is used to change or memorize the radio frequency. This takes you to the Tuner Setup menu, where you can adjust the following settings: The automatic search function is activated by pressing and holding (>1 sec.) the...
- Page 49 Select The DM remote control can learn the functions of other infrared remote controls, thus assuming control over the source devices. Depending on the configuration, you can choose between the following menu items: Main menu, DM, DVD, Sat, TV, CD, iPod Dock, Receiver. You will find information on programming on Page 50.
-
Page 50: Programming The Remote Control
Programming the remote control The learn mode of the DM remote control is accessed in max. 2 sec by pressing and holding the OK key while simultaneously pressing the NUM key. In the menu, you can select the device to be programmed with and confirm it with . - Page 51 If the programming was successful, you will receive the message RF Remote Control Mode (Wireless) „programming successful“. The DM system parameters set at the factory cannot be deleted, but they can be overwritten (reprogrammed) if necessary. To do so, press after selecting the system.
- Page 52 Operating without a remote control The basic functions of the DM system can also be controlled using the keys on the back of the subwoofer. These include regulation of the Raise volume volume, selection of the play mode and the source device.
-
Page 53: Service Setup Menu
2.1 (delivery status) or 5.1 mode can appear as functions. The This is used to switch off the internal control of the Canton system for servicing. After automatic shut-down of the remote control, option exists in 5.1 mode of operating an active or wireless loudspeaker system via the „2.1 MODE/5.1 MODE“... -
Page 54: Troubleshooting And Optimization
RC for min. 10 sec RC permanently displays 1. Sub processor crashed when switching off 1. Disconnect sub from mains for 10 sec „Goodbye Canton“ RC shows no image: only 1. I2C switched off (I2C OFF) 1. Switch off sub for 10 sec background lighting is active 2. - Page 55 No Virtual Surround effect 1. Play mode set to stereo 1. Set play mode to surround 2. You are not at the mid-point of the 2 satellites 2. Rectify the distance to the two satellites and and/or the distance settings do not match up with sub (p.
- Page 56 Sound is too dull (not enough 1. You are producing a stereo signal in Virtual Surround 1. Change the play mode to stereo (p. 43) treble) mode 2. Raise the treble level as described in „room comp 2. Your room is heavily sound insulated function treble“...
- Page 57 Unfortunately, there is no memorized solution to this problem. 4. Please program the Canton RC with the code of the desired device (p. 50) No sound when recording 1. Output set to „zone 2“ and „zone vol“ set to min. or 1.
- Page 58 General Care Notes Play-In Phase To enjoy your Canton loudspeakers for as long as possible, please To develop its maximum performance, a loudspeaker requires a observe the following: do not expose loudspeaker housings to direct running-in period of approx. 15-20 operating hours. During this sunlight.
- Page 59 Dolby, Pro Logic, and the double-D symbolareregistered trademarksofDolbyLaboratories. Manufactured under license under U.S. Patent #’s: 5,451,942; 5,956,674; 5,974,380; 5,978,762; 6,487,535 & other U.S. and worldwide patents issued & pending. DTS is a registered trademark & the DTS logos and Symbol are trademarks of DTS, Inc. © 1996- 2007 DTS, Inc.
- Page 60 Schadensfall bitte an ihn oder direkt an den Canton Service. WARRANTY Canton provides a 5 year warranty against factory defects for all passive loudspeakers. There is a 2 year warranty against factory defects for active subwoofers and semi-active speakers. The warranty period starts with the purchase and applies only to the first purchaser.
Need help?
Do you have a question about the DIGITAL MOVIE and is the answer not in the manual?
Questions and answers