Table of Contents
Advertisement
Please read this guide before operating this product.
After you finish reading this guide, store it in a safe place for future reference.
Overview of Machine Functions
Set Up the Machine to Suit Your Purposes
Set Up the Machine
Make Fax Settings (D1180/D1170/D1150 Only)
Set Up Network Connection
Set Up Computers and Software
Appendix
Advertisement
Table of Contents

Related Manuals for Canon imageCLASS D1120


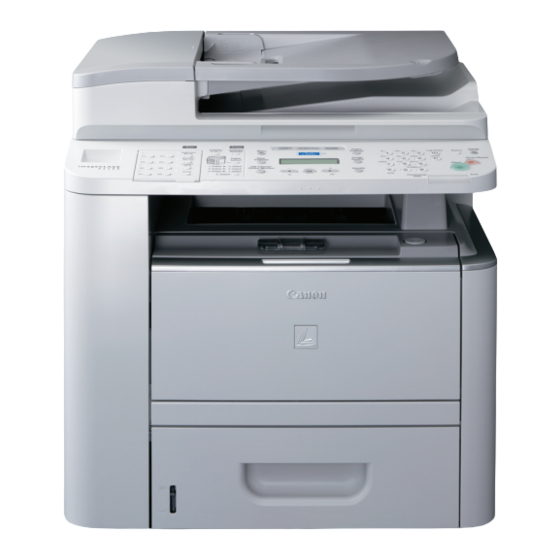
Summary of Contents for Canon imageCLASS D1120
- Page 1 Set Up the Machine Make Fax Settings (D1180/D1170/D1150 Only) Set Up Network Connection Set Up Computers and Software Appendix Please read this guide before operating this product. After you finish reading this guide, store it in a safe place for future reference.
-
Page 2: Table Of Contents
Contents Overview of Machine Functions ........................1 Available Features ................................1 Set Up the Machine to Suit Your Purposes ....................... 2 Set Up the Machine ............................... 3 Items Included with the Machine ..........................3 Optional Items ..................................3 Installation Space ................................... 3 Manuals for the Machine.............................. -
Page 3: Overview Of Machine Functions
Overview of Machine Functions This manual describes how to set the required settings to set up the machine and install the software. After you set up the machine, you can use the functions described in the illustration below. For the details of each function, refer to the Basic Operation Guide and e-Manual. -
Page 4: Set Up The Machine To Suit Your Purposes
Set Up the Machine to Suit Your Purposes Determine which machine functions (Copy, Fax, Scan, PC Print, PC Fax, Scan to File Server, E-Mail, Remote UI, I-Fax (Receive)) you intend to use, and make the settings according to the flowchart below. -
Page 5: Set Up The Machine
Document) e-Store Sheet ● Basic Operation Guide ● User Manual CD-ROM ● User Software CD-ROM ● Limited Warranty Notice ● Registration Card ● Destination Labels* ● * Not available for the D1120 Optional Items CASSETTE FEEDING UNIT-U1 ● Installation Space... -
Page 6: Manuals For The Machine
Set Up Paper Cassette and Load Paper This section describes how to set the paper size for the paper cassette and how to load the paper. Pull out the paper cassette. Hold the paper cassette with both hands and remove it from the machine. - Page 7 – Make sure to set the guides to the mark for the size of the paper to be loaded correctly. If the guides are positioned incorrectly, it may cause paper jams, dirty prints, etc.
- Page 8 2 Set Up the Machine Push the paper cassette as far as it will go. – Be careful not to get your fingers caught. – The default paper size/type is set to <LTR> and <PLAIN PAPER> in the setting menu. When you load other size...
-
Page 9: Connect Power Cord And Turn On The Machine
[I] side of the main power switch (A) to turn ON. C O U N T R Y / R E G I O N U N I T E D S T A T E –... -
Page 10: Make Fax Settings (D1180/D1170/D1150 Only)
This section describes the fax settings. Connect Telephone Cables Connect the supplied telephone cable to the telephone line jack (A) on the back side of the machine and the wall jack. ● If you want to connect your own external telephone or telephone with built-in answering machine, connect it to external ●... -
Page 11: Register User Telephone Number And Unit Name
3 Make Fax Settings (D1180/D1170/D1150 Only) Register User Telephone Number and Unit Name Before sending documents, you MUST register your fax or telephone number, unit name, and the current date and time in the machine. Information About the Keys Use the keys below to enter information in the machine. - Page 12 [OK]. The display returns to the standby mode: ● The machine may enter the standby mode (Auto Clear function) while you are setting it up. Make the setting again from the main menu. T X / R X C O M M O N S E T .
-
Page 13: About Sender Information
3 Make Fax Settings (D1180/D1170/D1150 Only) About Sender Information The sender information you register in the machine appears in the header of each page received by your recipient. -
Page 14: Set Date And Time
3 Make Fax Settings (D1180/D1170/D1150 Only) Set Date and Time Before using the machine, you MUST set the current date and time. The current date and time settings are used as standard timer settings for functions that require them. Entering Information ●... -
Page 15: Select The Receive Mode That Suits Your Needs
Answer the call. machine rings and records voice messages. For details, see “Methods for Receiving Faxes, ” of “Fax, ” in the e-Manual and “Introduction to Using Fax Functions, ” of Chapter 6, “Fax (D1180/D1170/D1150), ” in the Basic Operation Guide. - Page 16 Your machine automatically monitors incoming calls and the ring pattern, to let you know if the call is a fax or voice call. Set the ring patterns assigned by your telephone company for a fax or voice call.
-
Page 17: If You Need To Use Pulse Dialing
3 Make Fax Settings (D1180/D1170/D1150 Only) If You Need to Use Pulse Dialing By default, the telephone line type on the machine is set to tone dialing. If you use tone dialing, skip the following procedure. If you use pulse dialing, perform the procedure below and change the telephone line type setting on the machine to pulse dialing. -
Page 18: Set Up Network Connection
10Base-T/100Base-TX port on the back of the machine and the other end to a network router or a hub. – A LAN cable is not included with the machine. – If you use the machine as a local printer, connect the machine directly to a computer using a USB cable. -
Page 19: Connect The Machine To Network
Automatic Setting By default, the IP address is assigned to the machine automatically by the DHCP server. Therefore, all you need to do when using DHCP is just to connect the network cable. After connecting the LAN cable, wait until the machine gets the IP address. -
Page 20: Manual Setting
<10. SYSTEM SETTINGS> → <5. NETWORK SETTINGS> → <1. TCP/IP SETTINGS> → <1. IP ADDRESS AUTO> → <OFF> → <2. REG. IP ADDRESS> → <1. IP ADDRESS> → Enter the IP address → <2. SUBNET MASK> → Enter the subnet mask → <3. GATEWAY ADDRESS> → Enter the gateway address → Press [Stop/Reset] →... -
Page 21: Set Up Computers And Software
Network Connection (For details about the set up, see p. 22.) The following functions are available with Network Connection: PC Print, Remote UI, PC Fax, E-Mail/I-Fax (Receive), Scan to File Server For details on how to use each function with network connection, refer to the following: PC Print →... -
Page 22: About User Software Cd-Rom
Memory: 128MB or more Memory: 512MB or more Microsoft Windows XP Microsoft Windows Server 2008* CPU: Intel Pentium/Celeron series CPU: Intel processor 1GHz (×86 processor), 1.4GHz (×64 processor) or 300MHz or faster faster Memory: 128MB or more Memory: 512 MB or more... -
Page 23: Bundled Programs
To install ScanSoft OmniPage and Presto! PageManager, load the User Software CD into a computer, click on the [Custom Installation] button on the CD-ROM Setup screen, click on the [Next] button for USB connection , then perform... -
Page 24: Network Connection
• The following procedure is described using sample screens from Windows XP Professional. • The screen may differ according to the operating system, as well as the type and version of the printer driver. • Log on as an Administrator to install the software. - Page 25 5 Set Up Computers and Software [Printer Canon D1100 Series PCL5e/ If the firewall is applied to the Driver Canon D1100 Series PCL5e] is operating system, the dialog box displayed only for the D1180. below appears. Click [Yes] and continue the installation.
-
Page 26: Check Installation
Verify that the driver has been installed successfully and that the machine has been set as the default printer. If the name of the machine is selected on the [Printer] screen from an application, it is set as the default printer. -
Page 27: Usb Connection
The following procedure is described using sample screens from Windows XP Professional. • The screen may differ according to the operating system, as well as the type and version of the printer driver. Do not connect the USB cable before installing the software. If you connect the USB cable •... - Page 28 5 Set Up Computers and Software The machine has a cap (A) that covers the USB port on the back of the machine. Remove the cap (A) by pulling the string. After restarting your computer, connect the machine and your computer with a USB cable (A).
- Page 29 5 Set Up Computers and Software Remove the User Software CD-ROM. Installation is complete.
-
Page 30: Check Installation
Verify that the driver has been installed successfully and that the machine has been set as the default printer. If the name of the machine is selected on the [Printer] screen from an application, it is set as the default printer. -
Page 31: Appendix
A display with the resolution of 1024 x 768 pixels or higher is required. – The User Manual CD-ROM (e-Manual) may not operate correctly if Flash Player is not installed or a version of Flash Player earlier than Flash Player 8.0 is installed on your computer. -
Page 32: Using The User Manual Cd-Rom (E-Manual)
Windows 2000: double-click [My Computer] on the Windows desktop. Right-click on the CD-ROM icon and select [Open], then double-click start.exe. – Depending on the operating system you are using, a security protection message may be displayed. In this case, allow the contents to be displayed. - Page 33 When you start the e-Manual, the screen below is displayed. If you are using a browser such as Internet Explorer for Windows XP, ActiveX blocks pop-ups in the background. If the e-Manual is not displayed properly, look for an information bar at the top of the page and click the information bar.
- Page 35 Contacting Service Center When you have a problem with your machine and you cannot solve it even if you refer to the manuals or online help, please contact our Canon Authorized Service Facilities or the Canon Customer Care Center at 1-800-828- 4040 between the hours of 8:00 A.M.
- Page 36 CANON AUSTRALIA PTY. LTD. 1 Thomas Holt Drive, North Ryde, Sydney, N.S.W. 2113, Australia CANON CHINA CO., LTD. 15F Jinbao Building No.89 Jinbao Street, Dongcheng District, Beijing 100005, China CANON SINGAPORE PTE. LTD. 1 HarbourFront Avenue #04-01 Keppel Bay Tower, Singapore 098632 CANON HONGKONG CO., LTD.
Need help?
Do you have a question about the imageCLASS D1120 and is the answer not in the manual?
Questions and answers