Table of Contents
Advertisement
Quick Links
Advertisement
Table of Contents

Related Manuals for Innova 3030h


Summary of Contents for Innova 3030h
-
Page 2: Table Of Contents
ERASING DIAGNOSTIC TROUBLE CODES (DTCs) ..... ABOUT REPAIRSOLUTIONS® ..........ADDITIONAL FUNCTIONS THE MAIN MENU ..............EVAP TEST ................VIEWING MONITOR ICON DESCRIPTIONS ......VIEWING THE LED MEANING ..........ADJUSTMENTS AND SETTINGS ........... WARRANTY AND SERVICING LIMITED ONE YEAR WARRANTY .......... SERVICE PROCEDURES ............3030h... -
Page 3: You Can Do It
Codes, I/M Readiness status and Freeze Frame data are displayed on the Scan Tool’s display screen. System status is indicated by LED indicators. Easy To Define ..Read code definitions from the Scan Tool’s display View Freeze Frame data. 3030h... -
Page 4: Safety Precautions Safety First
Don't wear loose clothing or jewelry when working on an engine. Loose clothing can become caught in the fan, pulleys, belts, etc. Jewelry is highly conductive, and can cause a severe burn if it makes contact between a power source and ground. 3030h... -
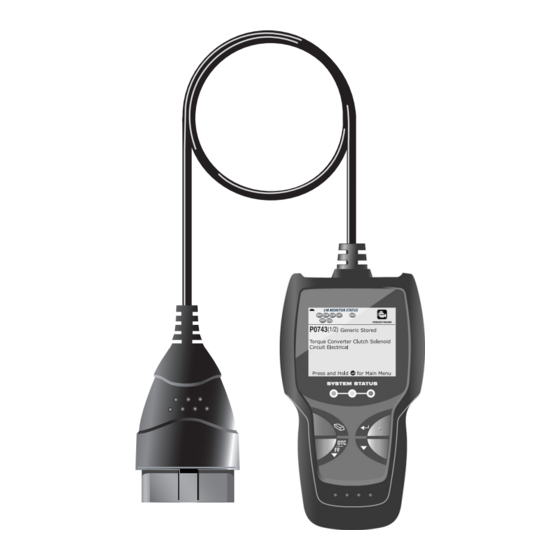
Page 5: About The Scan Tool
On some Asian and European vehicles the DLC is located behind the “ashtray” (the ashtray must be removed to access it) or on the far left corner of the dash. If the DLC cannot be located, consult the vehicle’s service manual for the location. 3030h... -
Page 6: Controls And Indicators
ENTER button - When in MENU mode, confirms the selected option or value. 5. GREEN LED - Indicates that all engine systems are running normally (all Monitors on the vehicle are active and performing their diagnostic testing, and no DTCs are present). 3030h... -
Page 7: Display Functions
Vehicle icon - Indicates whether or not the Scan Tool is being properly powered through the vehicle's Data Link Connector (DLC). A visible icon indicates that the Scan Tool is being powered through the vehicle's DLC connector. 3030h... -
Page 8: Display And Settings
The first time the unit is connected to a vehicle, you must select the desired display language (English, French or Spanish) and unit of measurement (USA or Metric) as follows: 1. Use the DOWN button to highlight the desired display language. 3030h... - Page 9 The Firmware Screen displays for three seconds. After the initial language and unit of measurement selections are performed, these, as well as other settings, can be changed as de- sired. Proceed to ADJUSTMENTS AND SETTINGS on page 40 for further instructions. 3030h...
-
Page 10: Onboard Diagnostics Computer Engine Controls
By switching from mechanical to electronic engine controls, vehicle manufacturers are able to control fuel delivery and spark timing more precisely. Some newer Computer Control Systems also provide control over other vehicle functions, such as transmission, brakes, charging, body, and suspension systems. 3030h... - Page 11 EGR valve or Ignition Module to perform these actions. TYPICAL COMPUTER OUTPUT DEVICES CONTROL SYSTEM Fuel Injectors Idle Air Control EGR Valve Ignition Module On-Board Computer INPUT DEVICES Coolant Temperature Sensor INPUT DEVICES Throttle Position Sensor Oxygen Sensors Fuel Injectors 3030h...
- Page 12 The California Air Resources Board (CARB) conducted studies on OBD1 equipped vehicles. The information that was gathered from these studies showed the following: A large number of vehicles had deteriorating or degraded emissions-related components. These components were causing an increase in emissions. 3030h...
- Page 13 (Scan Tools, Code Readers, etc.) and the vehicle’s on-board computer. OBD2 Terminology The following terms and their definitions are related to OBD2 systems. Read and reference this list as needed to aid in the understanding of OBD2 systems. 3030h...
- Page 14 “Off.” Since each of the fifteen monitors is designed to run diagnostics and testing on a different part of the engine or emissions system, the “Trip Drive Cycle” needed for each individual Monitor to run and complete varies. 3030h...
-
Page 15: Diagnostic Trouble Codes (Dtcs)
The 1st character is a letter (B, C, P or U). It identifies the “main system” where the fault occurred (Body, Chassis, Powertrain, or Network). The 2nd character is a numeric digit (0 thru 3). It identifies the “type” of code (Generic or Manufacturer-Specific). 3030h... - Page 16 Auxiliary Emission Control System Vehicle Speed Control and Idle Control System Computer Output Circuits Transmission 8 - Transmission 9 - Transmission A - Hybrid Propulsion B - Hybrid Propulsion Hybrid Propulsion Identifies what section of the system is malfunctioning 3030h...
- Page 17 If the failure is not found on the second Trip, the Pending DTC is erased from the computer’s memory. The MIL will stay lit for both Type “A” and Type “B” codes until one of the following conditions occurs: 3030h...
-
Page 18: Obd2 Monitors
Continuous Monitors Three of these Monitors are designed to constantly monitor their associated components and/or systems proper operation. Continuous Monitors run constantly when the engine is running. The Continuous Monitors are: Comprehensive Component Monitor (CCM) Misfire Monitor Fuel System Monitor 3030h... - Page 19 In this case, the signal would fail the rationality test. The CCM is supported by both “spark ignition” vehicles and “compression ignition” vehicles. The CCM may be either a “One-Trip” or a “Two-Trip” Monitor, depending on the component. 3030h...
- Page 20 The computer checks the efficiency of the catalytic converter by monitoring the oxygen sensors used by the system. One sensor is located before (upstream of) the converter; the other is located after (downstream 3030h...
- Page 21 Fumes are carried from the fuel tank to the charcoal canister by hoses or tubes. The fumes are stored in the charcoal canister. The computer controls the flow of fuel vapors from the charcoal canister to the engine via a purge solenoid. The computer energizes or de-energizes the purge 3030h...
- Page 22 14.7 parts of air to one part of fuel. The oxygen sensor must reach a temperature of at least 600-650°F, and the engine must reach normal operating temperature, for the computer to enter into closed-loop operation. The oxygen sensor only 3030h...
- Page 23 Pending Code. The computer does not command the MIL on at this time. If the fault is sensed again on the second trip, the computer commands the MIL “On,” and saves the code in its long-term memory. 3030h...
- Page 24 Pending Code. The computer does not command the MIL on at this time. If the fault is sensed again on the second trip, the computer commands the MIL “On,” and saves the code in its long-term memory. 3030h...
- Page 25 Number of trips needed, with no faults present, to erase a Pending Number and type of trips or drive cycles needed, with no faults present, to turn off the MIL Number of warm-up periods needed to erase the DTC from the computer’s memory after the MIL is turned off 3030h...
- Page 26 Once per 3 trips trip NOx Adsorber Once per 3 trips Monitor trip Boost Pressure Once per 3 trips System Monitor trip Exhaust Gas Sensor Once per 3 trips Monitor trip PM Filter Monitor Once per 3 trips trip 3030h...
-
Page 27: Preparation For Testing
Motor Publications - 5600 Crooks Road, Suite 200 , Troy, MI 48098 Phone: 800-426-6867 Web: www.motor.com FACTORY SOURCES Ford, GM, Chrysler, Honda, Isuzu, Hyundai and Subaru Service Manuals Helm Inc. - 14310 Hamilton Avenue, Highland Park, MI 48203 Phone: 800-782-4356 Web: www.helminc.com 3030h... -
Page 28: Using The Scan Tool Code Retrieval Procedure
DLC connector. Check your fuse panel and replace any burned-out fuses. If replacing the fuse(s) does not correct the problem, consult your vehicle’s repair manual to identify the proper computer (PCM) fuse/circuit, and perform any necessary repairs before proceeding. 3030h... - Page 29 Frame Data retrieved from the vehicle’s computer memory. The Scan Tool will display a code only if codes are present in the vehicle’s computer memory. If no codes are present, a “No DTC’s or Freeze Frame data presently stored in the vehicle’s computer” message is displayed. 3030h...
- Page 30 9. Read and interpret the Diagnostic Trouble Codes using the LCD display and the green, yellow and red LEDs. The green, yellow and red LEDs are used (with the LCD display) as visual aids to make it easier to determine engine system conditions. 3030h...
- Page 31 DTC’s that start with “P0”, “P2” and some “P3” are considered Generic (Universal). All Generic DTC definitions are the same on all OBD2 equipped vehicles. The Scan Tool automatically displays the code definitions (if available) for Generic DTC’s. 3030h...
- Page 32 Freeze Frame data. Saved engine conditions include, but are not limited to: engine speed, open or closed loop operation, fuel system commands, coolant temperature, calculated load value, fuel pressure, vehicle speed, air flow rate, and intake manifold pressure. 3030h...
-
Page 33: Erasing Diagnostic Trouble Codes (Dtcs)
2. Turn the ignition on. DO NOT start the engine. The Scan Tool will automatically link to the vehicle’s computer. 3. Once codes have been retrieved, press and release the Scan Tool’s ERASE button. A confirmation message shows on the display. 3030h... - Page 34 (and the check engine light will illuminate) as soon as the vehicle is driven long enough for its Monitors to complete their testing. 3030h...
-
Page 35: About Repairsolutions
RepairSolutions® lets you view, save, and email the diagnostic data retrieved from a vehicle’s on-board computer(s) using an Innova Scan Tool. At the core of RepairSolutions® is an extensive knowledge database, developed by compiling and analyzing years worth of “real world”... - Page 36 The Portal page gives you an overview of your RepairSolutions® account. It shows your Account Status and provides access to the reports you have most recently generated using a registered Innova tool. Innova Account The Innova Account section lets you manage the vehicles and tools you’ve registered with your account and manage your personal...
- Page 37 (report #, VIN, etc.) you specify. Registered Devices – You can register all of your Innova tools with your RepairSolutions® account. The Registered Devices page shows all the tools registered to your account along with the date on which the device was activated.
- Page 38 Shop Locator – Whether you want to purchase parts to make a repair yourself or find a local repair shop, the Shop Locator will return a list facilities near your location based on the Zip Code you provide. Hardware Requirements: Innova Scan Tool Minimum System Operating Requirements: Windows® OS Requirements - Windows®...
- Page 39 Accessing RepairSolutions® 1. Link your Scan Tool to a vehicle and retrieve diagnostic data. 2. Visit www.innova.com, download and install the latest PC-Link soft- ware for your Scan Tool. Select the Support tab, then choose Manuals and Software. Use the drop-down menu provided to select your tool Category and tool Model to download the latest PC- Link software.
-
Page 40: Additional Functions
The vehicle manufacturer determines the criteria and method for stopping the test once it has been started. BEFORE using the EVAP Test function, refer to the vehicle's service repair manual to determine the procedures necessary to stop the test. 3030h... -
Page 41: Viewing Monitor Icon Descriptions
Monitor icons, along with the full name for each icon. Use the DOWN button, as necessary, to scroll the list. 2. When you have finished viewing the Monitor icon descriptions, press the ENTER button to return to the Main Menu. 3030h... -
Page 42: Viewing The Led Meaning
2. Use DOWN button, necessary, to highlight the desired display language. 3. When the desired display language is highlighted, press ENTER button to save your changes and return to the Main Menu (shown in the selected display language). 3030h... - Page 43 1. Use the DOWN button, as neces- sary, to highlight Footer in the Main Menu, then press the ENTER button. The Footer screen displays. 2. Use DOWN button, necessary, to highlight On of Off as desired. 3030h...
- Page 44 3. When the desired unit of measurement value is selected, press the ENTER button to save your changes and return to the Main Menu. Exiting the MENU Mode Press and hold the ENTER button to exit the Menu mode. 3030h...
- Page 45 Notes 3030h...
- Page 46 Notes 3030h...
-
Page 47: Warranty And Servicing
UPDATES and OPTIONAL ACCESSORIES, please contact your local store, distributor or the Service Center. USA & Canada: (800) 544-4124 (6:00 AM-6:00 PM PST, Monday-Saturday) All others: (714) 241-6802 (6:00 AM-6:00 PM PST, Monday-Saturday FAX: (714) 241-3979 (24 hr.) Web: www.innova.com 3030h... - Page 48 1054...
Need help?
Do you have a question about the 3030h and is the answer not in the manual?
Questions and answers