
Related Manuals for Gtech AirRAM AR50


Summary of Contents for Gtech AirRAM AR50
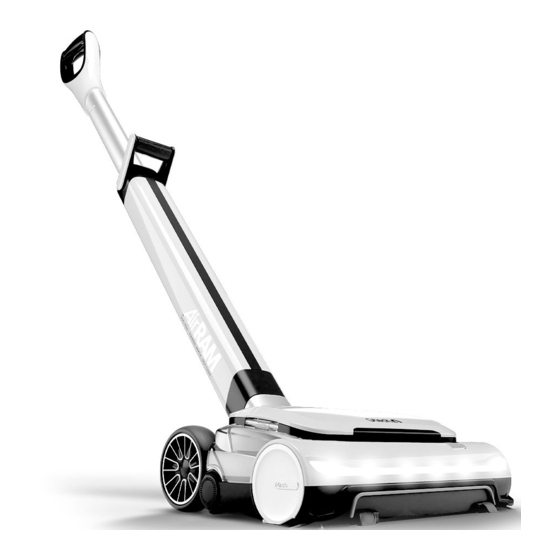
- Page 1 Model number: AR50 OPERATING MANUAL 5649_AirRAM3_manual_no_voice_aw.indd 1 5649_AirRAM3_manual_no_voice_aw.indd 1 17/01/2024 13:27 17/01/2024 13:27...
-
Page 2: Important Safeguards
• This appliance includes Li-Ion batteries; do • Only use batteries and chargers supplied not incinerate batteries or expose to by Gtech. high temperatures, as they may explode. • Never modify the charger in any way. • Liquid ejected from the battery may cause •... -
Page 3: Intended Use
• Only use replacement parts or accessories • Never use the appliance without the provided or recommended by Gtech. filter fitted. FOR HOUSEHOLD USE ONLY 5649_AirRAM3_manual_no_voice_aw.indd 3 5649_AirRAM3_manual_no_voice_aw.indd 3... -
Page 4: What's In The Box
Thank you for choosing Gtech “Welcome to the Gtech family. I started Gtech to create sensible, easy to use products that do a great job, and hope you get many years of trouble-free performance from your new product.” Nick Grey –... - Page 5 Assembly Insert the upper handle into the lower handle. Locate the handle onto the steering pivot on It will slide down and click into place. the head. Push the handle down until it clicks securely into place. The upper handle can be set to a range of Push the battery into the head until it clicks into height positions.
-
Page 6: Removing The Battery
Storage Removing the battery The handle can be lowered for storage and Press the release button and pull to remove raised for use. the battery. Press the button and raise or lower the handle until it locks into position Dis-assembly Should the upper handle need to be removed, Should the handle need to be removed, press press the button and use a suitable tool to press... -
Page 7: Operation
Operation Place your foot on the side of the head (1) and The power button is located on the left hand pull the handle back (2). side of the head. Press the power button with your foot to turn the product on. Press the power button with your foot to turn the product off. -
Page 8: Emptying The Bin
Emptying the bin Pull the bin handle to lift the bin out of the Hold the bin over a rubbish bin and slide the product. lever to open the bin door and empty the dirt. Pull the lever fully back. Close the bin door. - Page 9 Emptying the bin (contd.) Fit the bin into the product. Never use the product without the bin and filter fitted. Filter regeneration seconds The product has a filter regeneration function To activate filter regeneration during use press to maintain performance. The regeneration will and hold the power button for 3 seconds.
-
Page 10: Battery Charge Status
Battery charge status When in use the headlights will be on. When there is no power left the headlights will flash red. The battery needs recharging. Charging the battery Plug the charging stand into a wall socket. Place the product on the charging stand. 5649_AirRAM3_manual_no_voice_aw.indd 10 5649_AirRAM3_manual_no_voice_aw.indd 10 17/01/2024 13:27... - Page 11 Front LED battery charge indicator Battery level 0% - 10% Battery level 10% - 40% Battery level 40% - 70% Battery level 70% - 98% Battery level 98% - 100% The battery can be charged from flat in 3 hours. While charging, the headlights will progressively pulse until all 4 are white.
- Page 12 Brush bar jam seconds If the brush bar jams during use, the product The product will not re-start until the red will stop and the headlights will appear red. lights go out. This will take 5 seconds. Press You will need to clean the brush bar and the power button with your foot to turn the remove any blockage.
- Page 13 The brush bar can be removed from the end To remove hair from the brush bar, run the hair cap for more thorough cleaning removal tool down the groove to cut the hair, then use the comb remove it. While the brush bar is removed you can take Note to assemble the matching end when the opportunity to remove any hair from the re-fitting the brush bar to the end cap.
- Page 14 Push the brush bar into the product until Replace the battery. it clicks into place. Check the brush bar is Never operate the product without the engaged onto the drive spindle. brush bar in place. 5649_AirRAM3_manual_no_voice_aw.indd 14 5649_AirRAM3_manual_no_voice_aw.indd 14 17/01/2024 13:27 17/01/2024 13:27...
- Page 15 Cleaning and removing the edge brushes The edge brushes can be removed for cleaning Carefully insert a small flat bladed screwdriver or replacement. or similar tool into the gap around the edge Before cleaning and removing the edge brush. brushes switch off and remove the battery. Use the tool to push the edge brush up and away from the housing.
-
Page 16: Product Care
Product care Your product doesn’t need much maintenance: keep the filters clean, keep the brush bar tangle- free and charge the battery. Wipe it with a dry cloth if it gets dirty, including under the bin. To maintain optimum battery life store the battery in clean, dry conditions, within a recommended temperature range of 0 - 25°C. -
Page 17: Troubleshooting
If these initial tips do not solve your problem we please visit our support area where you can find troubleshooting help including online manuals, FAQs and how-to-videos, as well as genuine spares and replacement parts compatible with your product. Visit: www.gtech.co.uk/support Online Live chat support support@gtech.co.uk... -
Page 18: Technical Specification
To find your nearest centre and discover how Gtech products are marked with the symbol easy it is to recycle electrical products visit indicating they can be recycled, and are covered www.recycle-more.co.uk... -
Page 19: Warranty Registration
If your product is within its warranty and has a fault that cannot be resolved from the troubleshooting section or online support, please do the following: • Contact our Gtech Customer Care Helpline on UK: 08000 308 794, who will go through any troubleshooting with you to identify the fault. - Page 20 Grey Technology Limited Brindley Road, Warndon, Worcester WR4 9FB, UK email: support@gtech.co.uk telephone: 08000 308 794 www.gtech.co.uk 5649_AirRAM3_manual_no_voice_aw.indd 20 5649_AirRAM3_manual_no_voice_aw.indd 20 17/01/2024 13:27 17/01/2024 13:27...
Need help?
Do you have a question about the AirRAM AR50 and is the answer not in the manual?
Questions and answers