
Related Manuals for Homebase STARDOM


Summary of Contents for Homebase STARDOM
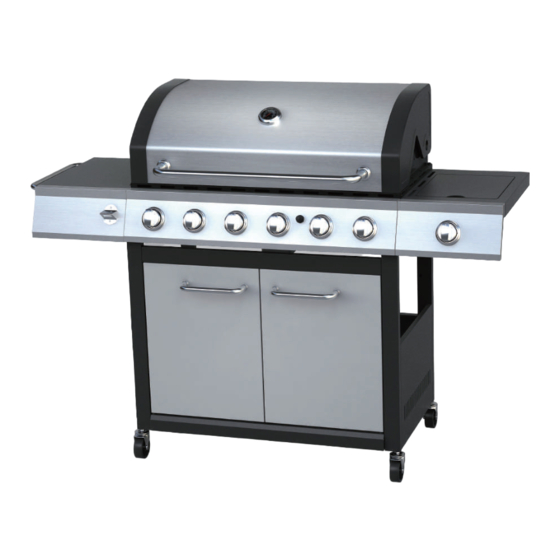
- Page 1 STARDOM 6 BURNER GAS BBQ INSTRUCTION MANUAL IMPORTANT: Please read these instructions before using the product and retain for future use. HHGL Limited, MK9 1BA V1_2023 HHGL (ROI) Limited, D02 X576...
-
Page 2: General Information
GENERAL INFORMATION Safety and Care Advice IMPORTANT: Please read these instructions fully before using the appliance. • Assembly time: approx. 45 minutes. • Retain these instructions for future reference. • This product is for outdoor use only. Do not use indoors. •... - Page 3 The maximum dimension of the gas bottle is dia. 31.5cm and height 58cm. 1= maximum diameter 2= maximum height Never mount the gas bottle under the barbecue on the base shelf, as this could result in serious injury to the user, other people and/or property.
-
Page 4: Operation
OPERATION Warning • Before proceeding, make certain that you understand the IMPORTANT INFORMATION section of this manual. • Your barbecue is not designed to be used with more than 50% of the cooking area as a solid plate — this includes baking dishes. - Page 5 • Push in and turn the control knob anti-clockwise until you feel resistance and pause for 4 seconds. Then continue turning the control knob until a click is heard and the burner is lit. • If the burner fails to ignite after the above procedure, turn the knob to the 'OFF' position and close the gas valve. Wait 5 minutes and then repeat the above steps.
- Page 6 When flare-ups do occur, they can usually be extinguished by applying baking soda or salt directly onto the flame tamer. Always protect your hands when handling anything near the cooking surface of the barbecue and take care to protect yourself from the flames. If a fat fire occurs, please see the instructions given below.
- Page 7 COOKING SURFACES AND WARMING RACK When the barbecue has cooled, clean with hot soapy water. To remove any food residue, use a mild cream cleaner on a non-abrasive pad. Do not use scouring pads or powders, as they can permanently damage the finish. Rinse well and dry thoroughly.
- Page 8 Barbecue Hood Or Lid Use a non-abrasive cloth or pad and clean with hot soapy water. Do not use scouring pads or powders as they can permanently damage the finish. Trolley Wipe with a cloth wrung out in hot soapy water and dry. Fixings All screws and bolts, etc., should be checked and tightened on a regular basis.
-
Page 9: Component Parts
Please check you have all the components and fittings listed. If you find any missing or damaged parts, please contact our customer services team on 0333 003 7084 between 09:00 & 18:00, or use the contact form on our website www.homebase.co.uk Part No. Description Illustration... - Page 10 Part No. Description Illustration Quantity Side burner assembly Grease tray Grease cup Door handle Left cart assembly Left door Side burner Door transom Side burner grate...
- Page 11 Part No. Description Illustration Quantity Rear panel Bottom shelf Front bracket Magnet Locking castor Castor Right door Right cart assembly...
- Page 12 Please check you have all the components and fittings listed. If you find any missing or damaged parts, contact our customer services team on 0333 003 7084 between 09:00 & 18:00, or use the contact form on our website www.homebase.co.uk M6*16mm Bolt x 36 M6 Plain washers x 16 M6 Spring washers x 16...
- Page 13 ASSEMBLY INSTRUCTIONS Remove all packaging. Step 1 Fix the Front bracket to the Bottom shelf using M6*16mm bolts Step 2 Fix the Left cart assembly and Right cart assembly on the Bottom shelf using M6 plain washer M6 spring washer and M6*16 bolt AA BB CC...
- Page 14 Step 3 Apply the Castor and Locking castor to the leg of the Left cart assembly and the Right cart Assembly Step 4 Fix the Rear panel on the Left cart assembly and Right cart assembly using M6 Plain washer Spring washer and M6*16 bolt BB CC...
- Page 15 Step 5 Attach the Door transom to the front legs of the Left cart assembly and Right cart assembly using M6 Plain washer M6 Spring washer and M6*16 bolt BB CC A B C Step 6 Fix the Magnet on the Bottom shelf using M4*10 bolt...
- Page 16 Step 7 Fix the front door handle on the left front door and right front door using M6*16mm bolts Step 8 Fix the left front door on the front bracket and door transom using door upper hinge pin Repeat above to fix the right door.
- Page 17 Step 9 Fix the lid handle on the lid of the grill assembly using M6 plain washer M6 spring washer , M6 wingnut Step 10 Fix the temperature gauge on the lid of the grill assembly...
- Page 18 Step 11 Set the grill assembly onto the left cart assembly and the right cart assembly using M6*16mm bolts Step 12 Fix together the side table handle and side table using M6*16mm bolt...
- Page 19 Step 13 Apply 2 of the M6*16mm bolts to the left of the grill assembly Have half of the bolt threads go into the bolt holes. Do not tighten the bolts at this stage. Align the M6*16mm bolts properly with the side table assembly .
- Page 20 Step 15 Fix the knob bezel on the side burner assembly using M4*10mm bolts Step 16 Place the side burner into the side burner assembly Align the side burner venture against the valve. Make sure the valve tip goes into the burner venture completely with good alignment.
- Page 21 Step 17 Place the side burner grate on the side burner assembly and align with the holes. Step 18 Attach the control knobs to the valve stems. Then remove the igniter cap, insert the 1.5V AA battery (not included) into the igniter body with the positive ‘+’ end facing out, replace the igniter cap. AA battery AA电池...
- Page 22 Step 19 Place the heat tent on the grill assembly Step 20 Place the cooking grill and warming rack on the grill assembly...
- Page 23 Step 21 Place the grease tray and grease cup at the bottom of the grill assembly Step 22 Assembly complete Your barbecue is ready to be used. ALL JOINTS AND CONNECTIONS MUST NOW BE LEAK TESTED BEFORE USING THE BARBECUE. Leak test annually, and whenever the gas bottle is removed or replaced.
-
Page 24: Technical Specification
TECHNICAL SPECIFICATION Model Number KS17600 Gas Category 3+(28-30/37) Type of Gas Butane Propane Gas Pressure 37 mbar 28-30 mbar Pin Number 0359BU1015/2575DM29972 Injector Size (Main Burner) 0.89mm Injector Size (Side Burner) 0.94mm Total Heat Input 22.7 kW 6 Burner Heat Input 19.2 kW Side Burner Heat Input 3.5 kW... -
Page 25: Troubleshooting
TROUBLESHOOTING Problem Possible Cause Solution Burner will not light using LPG cylinder is empty Replace with full cylinder the ignition system Faulty regulator Have regulator checked or replaced Obstructions in burner Clean burner Obstructions in gas jets or gas hose Clean jets and gas hose Electrode wire is loose or disconnected on Reconnect wire...
Need help?
Do you have a question about the STARDOM and is the answer not in the manual?
Questions and answers