
Related Manuals for Homebase DOUBLE OIL DRUM CHARCOAL BBQ


Summary of Contents for Homebase DOUBLE OIL DRUM CHARCOAL BBQ
- Page 1 DOUBLE OIL DRUM CHARCOAL BBQ INSTRUCTION MANUAL IMPORTANT: Please read these instructions before using the product and retain for future use. HHGL Limited, MK9 1BA V1_2023 HHGL (ROI) Limited, D02 X576...
-
Page 2: General Information
GENERAL INFORMATION Safety and Care Advice IMPORTANT: Please read these instructions fully before starting assembly and using the appliance. WARNING: Whilst every effort has been made in the manufacture of your barbecue to remove any sharp edges, care should be taken in handling to avoid any accidental injury. • Failure to follow these instructions could result in death, serious personal injury and/or property loss. - Page 3 HOW TO START YOUR CHARCOAL BARBECUE Method 1. Charcoal and Lighting Fluid/Gel Set up your charcoal barbecue in a safe location. Place enough charcoal in the charcoal grate to a depth of 3-5cm. • Taking care not to spill any liquid/gel onto your hands or clothes, carefully apply the lighting fluid/gel over the charcoal.
- Page 4 Food safety Do not cook before the fuel has a coating of ash. The barbecue shall be heated up and the fuel kept red hot for at least 30 minutes prior to first cooking. • Thoroughly defrost frozen meat and poultry in the refrigerator before cooking. Keep raw meat and poultry separate from cooked food.
-
Page 5: Component Parts
Please check you have all the components and fittings listed. If you find any missing or damaged parts, please contact our customer services team on 0333 003 7084 between 09:00 & 18:00, or use the contact form on our website www.homebase.co.uk Part No. Description Illustration... - Page 6 Part No. Description Illustration Quantity Stretching leg brace Lid support holder Right front/rear leg Right leg support Wheel Left front/rear leg Left leg support Front frame Left/right frame Bottom shelf...
- Page 7 Part No. Description Illustration Quantity Back frame Lid brace Lower cooking grill Upper cooking grill Slide bracket Warming rack...
- Page 8 Please check you have all the components and fittings listed. If you find any missing or damaged parts, please contact our customer services team on 0333 003 7084 between 09:00 & 18:00, or use the contact form on our website www.homebase.co.uk Part No. Description Illustration...
- Page 9 ASSEMBLY INSTRUCTIONS Remove all packaging material. Step 1 Fix the left leg support and right leg support with the fire bowl using M6*40mm bolts and M6 nuts Step 2 Insert the left legs and the right legs into the left leg support and the right leg support Pay attention to the axle spacer on the left front leg and ensure it is facing the front, while the axle spacer on the left rear leg is facing the back.
- Page 10 Step 3 Fix the left legs and right legs with the fire bowl using M6*40mm bolts and M6 nuts 13 13 Step 4 Fix the wheels to the left legs using the axles and R pins Pay attention to the axle spacer on the left front leg and ensure it is facing the front, while the axle spacer on the left rear leg is facing the back.
- Page 11 Step 5 Fix the front frame with left/right frame and back frame using M6*15mm bolts and M6 nuts Fix the bottome shelf on the frame. Step 6 Fix the bottom shelf assembly on the left front/rear leg and right front/rear leg using M6*40mm bolts M6 nuts...
- Page 12 Step 7 Fix the lid support holder on the fire bowl assembly using M6*15mm bolt and M6 nut Fix the henge pin on the fire bowl using M6*15mm bolt . Step 8 Fix the lid support cushion on the lid support using M6*35mm bolts and M5 nuts Fix the stretching leg brace...
- Page 13 Step 9 Fix the lid supports into ring on the back frame Step 10 Fix the dampers on the lid using M5*10mm bolts and M5 nuts Put the washer between the lid handle and the lid Then fix the lid handle on the lid using M6*15mm bolts...
- Page 14 Step 11 Fix the charcoal tray support on the fire bowl using M5*15mm bolts Fix the slide bracket on the fre bowl using M5*15mm bolts and M5*20mm bolts Step 12 Fix the hinge pin on the lid assembly using M6*15mm bolt and M6 nuts...
- Page 15 Step 13 Align the holes on the lid brace with the holes on the lid assembly and the fire bowl assembly properly. Fix the lid brace using M5*12mm shoulder bolts and M5 nut Step 14 Put the warming rack on the lid assembly and fire bowl...
- Page 16 Step 15 Put the charcoal tray into the fire bowl Set the lower cooking grill and the upper cooking grill on the fire bowl. Step 16 To increase cooking surface, please follow below steps: Release the lid support from the lid support holder and set the stretching legs on the floor.
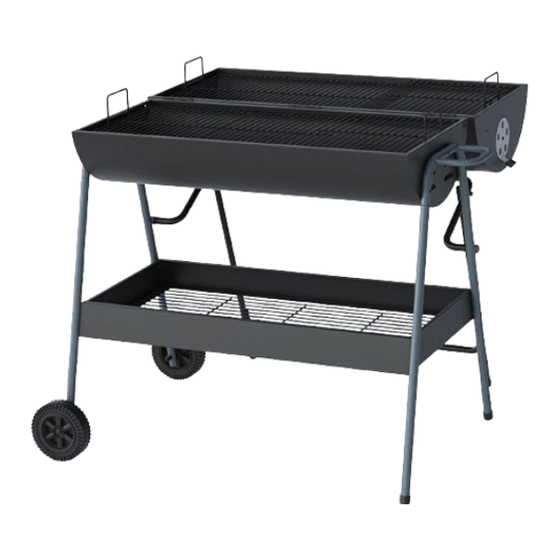
- Page 17 Step 17 Assembly is complete. Your barbecue is now ready to use.
Need help?
Do you have a question about the DOUBLE OIL DRUM CHARCOAL BBQ and is the answer not in the manual?
Questions and answers