
Related Manuals for Homebase TEXAS FRANKLIN PRO


Summary of Contents for Homebase TEXAS FRANKLIN PRO
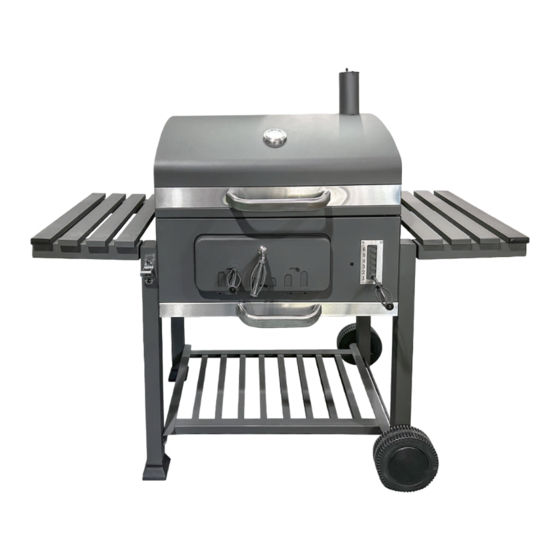
- Page 1 TEXAS FRANKLIN PRO CHARCOAL BBQ INSTRUCTION MANUAL IMPORTANT: Please read these instructions before using the product and retain for future use. HHGL Limited, MK9 1BA HHGL (ROI) Limited, DO2 X576 V3_2023...
- Page 2 Please check you have all the components and fittings listed. If you find any missing or damaged parts, please contact our customer services team on 0333 003 7084 between 09:00 & 18:00, or use the contact form on our website www.homebase.co.uk...
- Page 3 Screw M6x12 x 38 Screw M6x18 Screw M6x25 x 38 Screw M6x35 Screw M6x40 Screw M4x10 Nut M4 Lock D6 x 23 Nut M6 Lock D6 x 25 Splint D1.4 Washer D6 Wing nut M6 For your safety DANGER! This grill gets very hot and should not be moved during operation! Do not use in closed rooms. DANGER! Do not use alcohol or gasoline to light or relight! Only use lighting aids from dealers in accordance with DIN-EN1860-3.
- Page 4 Intended use The grill can only be used for grilling. All specifications in this manual must be observed. The grill is for private use only. Use this grill only as described in this manual. Any other use is considered improper and may result in property damage or personal injury. The manufacturer accepts no liability for damage caused by improper use of the product.
- Page 5 Assembly Instructions Step 1- Attaching the body of grill. Attach the back wall (1) and 2 side walls (2) and the front wall (3) using 8 screws (A). Step 2- Installing the ventilation. Attach 2 ventilation discs (12) to the side wall using 2 nuts (I) and 2 screws M6x12 (A).
- Page 6 Step 3- Attaching the stand. Attach 2 stands (6) to the supporting leg, front right (4) and the supporting leg, back right (5). Step 4- Attaching the legs. Attach the supporting leg,front right (4) and the supporting leg, back right (5) and support leg,front left bottle opener (7) and support leg, back left (8) to the side wall using 8 screws M16x12 (A).
- Page 7 Step 5- Installing wheels and wheel caps and lower shelf. Attach the lower shelf (9) to the leg using 4 screws M16x12 (A). Attach 2 wheels (10) to the axis (11) using the 2 splint (K). Attach 2 hubcaps (32) to 2 wheels. Step 6- Attaching back wall and leg.
- Page 8 Step 7- Installing the oven door. Install the oven door (16) to the back wall using 4 screws M4x10 (F) and 4 nuts M4 (G). Step 8- Installing the handle for oven door. Installing the handle for oven door ventilation (17) to the oven door. Attach then oven door handle (18) and the pad for oven door handle (19) and the oven latch (20) to the oven door using the wing nut M6 (M) and the washer (L).
- Page 9 Step 9- Installing the charcoal grate. Installing the charcoal grate (21) inside body of grill using 4 screws M6x12 (A). Step 10- Installing coal grate lever. Install the coal grate lever (22) using 2 splints (K) and 2 locks D6x35 (H).
- Page 10 Step 11- Installing the hood handle and upper hinge. Attach the hood handle (27) to the hood using 2 washers D6 (L) and 2 screws M6x25 (C). Attach the upper hinge (28) to the hood using 4 washers D6 (L) and 4 nuts M6 (I). Step 12- Installing the thermometer and chimney.
- Page 11 Step 13- Attaching the hood and body of grill. Attach the upper hinge (28) and lower hinge (15) using 2 splints (K) and 2 locks D6x35 (J). Then repeat this step for the remaining upper hinge. :...
- Page 12 Step 14- Installing side shelf. Attach the side shelf with four hooks (25) to the side wall using 8 screws M6x18 (B).
- Page 13 Step 15- Attaching the handle for ash collecting tray. Attach the handle for ash collecting tray (24) to the ash collecting tray (23) using 2 screws M6x16 (A). Step 16- Installing the collecting tray. Insert the ash collecting tray (23) under the body of grill.
- Page 14 Step 17- Installing the warming grid and grill grate and grate insert. Position the warming grid (31) and grate insert (31.1) and warming grid (30) inside the body of grill. 31.1 The grill is now ready for use! Before using the appliance, please carefully read the safety instructions and the notes on lighting the grill!
-
Page 15: Operation
Operation DANGER: Risk of burning! The grill, the charcoal and barbecue become very hot during use. Any contact can result in serious burns. 1. Before using the grill, place it on a secure, level surface. 2. The grill must be heated up before it is used for the first time and the fuel must be allowed to glow for at least 30 minutes. - Page 16 Every care has been taken in the production process to eliminate sharp edges on your grill. Please handle the parts with care so as to avoid accidents or injury during assembly and when in use. Take careful note before use. Always select a safe and even location in a space suited for a charcoal barbecue.
Need help?
Do you have a question about the TEXAS FRANKLIN PRO and is the answer not in the manual?
Questions and answers