dji Osmo Pocket 3 User Manual
Hide thumbs
Also See for Osmo Pocket 3:
- Safety manuallines (12 pages) ,
- User manual (5 pages) ,
- User manual
Table of Contents
Advertisement
Advertisement
Table of Contents

Related Manuals for dji Osmo Pocket 3


Summary of Contents for dji Osmo Pocket 3
- Page 1 User Manual v1.0 2023.10...
- Page 2 This document is copyrighted by DJI with all rights reserved. Unless otherwise authorized by DJI, you are not eligible to use or allow others to use the document or any part of the document by reproducing, transferring or selling the document. Users should only refer to this document and the content thereof as instructions to operate DJI UAV.
-
Page 3: Using This Manual
3. User Manual It is recommended to watch all the tutorial videos on the official DJI website or in the DJI Mimo app and read the safety guidelines before using for the first time. Make sure to review the Quick Start Guide and refer to this User Manual for more information. -
Page 4: Table Of Contents
Contents Using this Manual Legends Read Before Use Download DJI Mimo App and Watch the Tutorial Videos Introduction Overview Accessories Using for the First Time Inserting the microSD Card Powering on Activation Charging the Battery Basic Operations Button Features Operating the Touchscreen... -
Page 5: Introduction
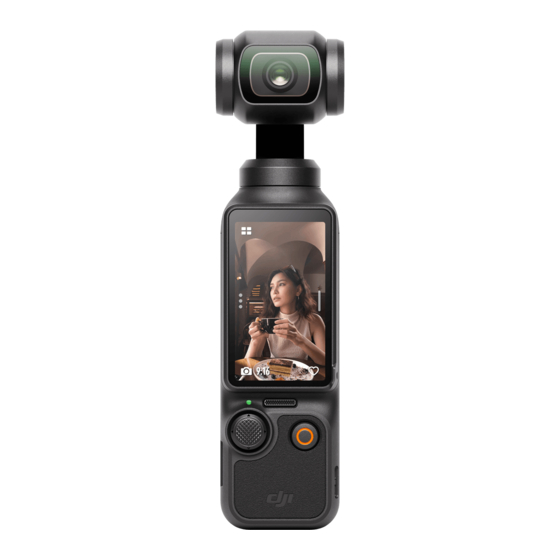
The rotatable touchscreen of Osmo Pocket 3 allows users to check the live view of the camera, rotate to start recording, tap to adjust the settings, and can also be used to switch between horizontal and vertical shooting modes. -
Page 6: Accessories
When mounting, connect the handle to the USB-C port at the bottom of Osmo Pocket 3. The USB-C port on the rear of the handle can be used for charging, or connecting external audio devices such as wired digital headphones, wired microphones, and the wireless microphone receiver. - Page 7 • Make sure the battery handle is properly insulated to prevent fire hazards. DO NOT drop or strike the battery handle. • It is recommended to use the DJI 65W Portable Charger or DJI 30W USB-C Charger (not included) to charge the battery handle.
- Page 8 Both the handle and battery handle have a 1/4" screw hole at the bottom, which can be used to install the Osmo Mini Tripod. The mini tripod enables the Osmo Pocket 3 to stand on a flat surface and shoot footage from a fixed position.
-
Page 9: Using For The First Time
Using for the First Time Inserting the microSD Card The footage shot on Osmo Pocket 3 can only be stored on a microSD card (not included). A UHS-I Speed Grade 3 rating microSD card is required due to the fast reading and writing speeds necessary for high-resolution video data. -
Page 10: Activation
DJI Osmo Pocket 3 User Manual Osmo Pocket 3 will start capturing footage as soon as you rotate the touchscreen and power on the camera. The shooting mode is subject to the users selection in the Screen Rotate & Capture function settings. -
Page 11: Charging The Battery
Use the Type-C to Type-C PD cable (included) to connect a USB-C charger (not included) to the USB-C port at the bottom of Osmo Pocket 3. It is recommended to use the DJI 65W Portable Charger, DJI 30W USB-C Charger, or other USB-C Power Delivery chargers. When charging in the power-off state, the power status can be checked on the touchscreen. -
Page 12: Basic Operations
DJI Osmo Pocket 3 User Manual Basic Operations Button Features Shutter/Record Button Operation Descriptions Press once when in live view Take a photo or start/stop recording. Press once when powered off Power on Press and hold for 1 second Power off... -
Page 13: Operating The Touchscreen
DJI Osmo Pocket 3 User Manual Operating the Touchscreen After the handheld gimbal camera is powered on, the touchscreen displays the live view and other information such as the shooting mode, the battery level, and the microSD card information. Tap or swipe on the touchscreen to interact with the handheld gimbal camera. - Page 14 : displays the current battery level. Tap the icon to view more detailed information. When the Osmo Pocket 3 Battery Handle is mounted, tap the icon to view the battery level of the handheld gimbal camera and the battery handle.
- Page 15 Tap and select TX1 or TX2 to link with the wireless microphone using Bluetooth. Once successfully linked, related parameters can be set. Note that linking via Bluetooth is only supported with the DJI Mic 2 Transmitter. Refer to the Microphone Connection section for more information. ...
- Page 16 Tap twice on the screen to recenter the gimbal. Swipe up to exit Wearable mode. In Wearable mode, it is recommended to use the gimbal camera together with the Osmo Pocket 3 Expansion Adapter (not included) to get a better first-person view shooting experience.
- Page 17 Tap to turn the status LED on or off. Continue Last Tap to continue the livestream according to the settings of the Livestream last time livestream. Note that Livestream is only available on DJI Mimo. Language Tap to set the language.
- Page 18 Swipe right from the left edge of the screen to view the last taken footage. Swipe left from the right edge of the screen to go back to live view. After connected to DJI Mimo, the favorite photos or videos can be viewed from Favorites of the DJI Mimo Album.
- Page 19 Glamour Enable or disable the glamour effects. After enabled, the user can view and Effects adjust the effect via DJI Mimo. Footage downloaded via DJI Mimo can be automatically beautified. Colors There are three options: Normal, HLG, and D-Log M.
-
Page 20: Status Led
DJI Osmo Pocket 3 User Manual Status LED The status LED can be turned on and off from the camera settings. Status LED Blinking Pattern Descriptions Solid green Ready to use Temporarily off Taking a photo Blinks red slowly Recording a video... - Page 21 DJI Osmo Pocket 3 User Manual Shooting Modes Descriptions Panorama Take a panoramic photo with an ultra-wide angle view. The camera will take a group of photos for the view within the FOV and then combine them into a panoramic photo.
-
Page 22: Selecting The Gimbal Mode
DJI Osmo Pocket 3 User Manual Selecting the Gimbal Mode Swipe down from the top of the screen to enter the control menu. Tap the icon to select the gimbal mode. Roll Tilt Follow Follow is selected by default. In this mode, the pan and tilt axes follow the handle while the roll axis remains level. -
Page 23: Using Activetrack
DJI Osmo Pocket 3 User Manual Using ActiveTrack When in Photo or Video mode, tap twice on the touchscreen to select a subject and enable ActiveTrack. At this time, the gimbal camera will automatically follow the selected subject. Press the 5D joystick or tap the touchscreen to exit ActiveTrack. - Page 24 DJI Osmo Pocket 3 User Manual Face Auto-Detect Mode Camera will automatically follow the face closest to the center of camera view. Dynamic Framing Mode Select the subject position in the live view based on the golden ratio or the rule of thirds via the 5D joystick.
-
Page 25: Transferring Files
Transferring Files to a Computer Power on Osmo Pocket 3 and connect it to a computer using a USB-C cable. When connected to a computer, a pop-up will appear. Tap Transfer File/OTG Connection to download the files from the handheld gimbal camera to the computer. -
Page 26: Microphone Connection
Users can preview recorded videos after exiting the Webcam mode. Microphone Connection Osmo Pocket 3 can be linked to an external microphone, including DJI Mic, DJI Mic 2, or any third-party digital USB-C microphones that support 48K/16bit. Connecting to DJI Mic 2... - Page 27 Fully charged DJI Mic 2 Transmitter Connection Follow the steps below to connect to DJI Mic 2 (hereinafter referred to as “transmitter”). 1. Swipe down from the top of the screen and enter the control menu. Tap the settings icon and select Wireless Mic >...
- Page 28 • Osmo Pocket 3 can be linked with up to two DJI Mic 2 transmitters simultaneously. When the transmitter is linked to Osmo Pocket 3, swipe down from the top of the screen to enter the control menu. Tap the settings icon. Scroll down and tap Wireless Microphone to adjust the audio parameters of the transmitter.
- Page 29 Connecting to DJI Mic Follow the steps below to connect the DJI Mic to the camera: 1. Power on the DJI Mic receiver and transmitter, and make sure the receiver and transmitter are linked. 2. Use the USB-C mobile phone adapter (included) to connect the receiver to the USB-C port on the camera.
-
Page 30: Dji Mimo App
DJI Mimo App When used with the DJI Mimo app, users can monitor the current camera view, set the camera parameters, and control the camera with a mobile device. DJI Mimo enables the user to get the most out of the gimbal camera with functions such as transferring, editing, and sharing files, and Wi-Fi livestreaming. -
Page 31: Connecting To The Dji Mimo App
Osmo Pocket 3. • When Osmo Pocket 3 is linked with DJI Mic 2 Transmitter and working in the 2.4GHz Wi-Fi frequency band, DJI Mimo cannot connect to Osmo Pocket 3. Either change the Wi-Fi frequency band of Osmo Pocket 3 to 5.8GHz or disconnect DJI Mic 2 Transmitter... -
Page 32: Camera View
Album: manage and view footage from a mobile device or DJI device. Editor: tap to edit photos or videos on Osmo Pocket 3 or import them to and edit on a mobile device. Profile: register or log in to a DJI account. Tap the setting icon to access more settings. -
Page 33: Maintenance
The update takes approximately 2 minutes. Storing Osmo Pocket 3 can be stored in the Osmo Pocket 3 Protective Cover or the Osmo Pocket 3 Carrying Bag. Using the Osmo Pocket 3 Protective Cover Power off the handheld gimbal camera. - Page 34 Using the Osmo Pocket 3 Carrying Bag Power off the gimbal camera and store the devices in the carrying bag as shown. The carrying bag is specially designed to store the Osmo Pocket 3 Creator Combo and all of the accessories. ...
-
Page 35: Usage Notices
Optional Accessories (Not Included) Osmo Pocket 3 Black Mist Filter The Osmo Pocket 3 Black Mist Filter adopts a magnetic design and can be easily mounted to the camera lens. The 1/4 black mist filter can control highlight flares, lower image sharpness, and soften skin tones. - Page 36 DJI Osmo Pocket 3 User Manual Osmo Pocket 3 Magnetic ND Filters Set The Magnetic ND Filters Set includes ND16, ND64, and ND256 filters. The magnetic design facilitates easy attachment and detachment. Osmo Pocket 3 Expansion Adapter The expansion adapter can be used to install an action camera or other accessories using the cold shoe mount.
-
Page 37: Specifications
DJI Osmo Pocket 3 User Manual Specifications General Dimensions 139.7×42.2×33.5 mm (L×W×H) Weight 179 g Number of Microphones Touchscreen Size: 2.0 inches Resolution: 314×556 Brightness: 700 nits Supported SD Cards microSD (up to 512 GB) Recommended SanDisk Extreme Pro 32GB V30 A1 UHS-I Speed Grade 3... - Page 38 DJI Osmo Pocket 3 User Manual Max Image Size 16:9, 3840×2160 1:1, 3072×3072 Zoom Digital Zoom Photo: 3840×2160, 2x Video: 1080p, 4x; 2.7K, 3x; 4K, 2x UVC & Livestream: 1080p, 4x Slow Motion/Timelapse/Low-Light Video/Panorama: Not available Still Photography Single Shot: Approx. 9.4 MP...
- Page 39 BLE 5.2, BR/EDR [1] Tested at room temperature (25° C/77° F) and 1080p/24fps (16:9), with Wi-Fi off and screen off. This data is for reference only. [2] Tested in a laboratory environment with the DJI 65W PD charger (sold separately). ©...
- Page 40 DJI SUPPORT This content is subject to change. https://www.dji.com/osmo-pocket-3/downloads If you have any questions about this document, please contact DJI by sending a message to DocSupport@dji.com. DJI and OSMO are trademarks of DJI. Copyright © 2023 DJI OSMO All Rights Reserved.
Need help?
Do you have a question about the Osmo Pocket 3 and is the answer not in the manual?
Questions and answers