Advertisement
Quick Links
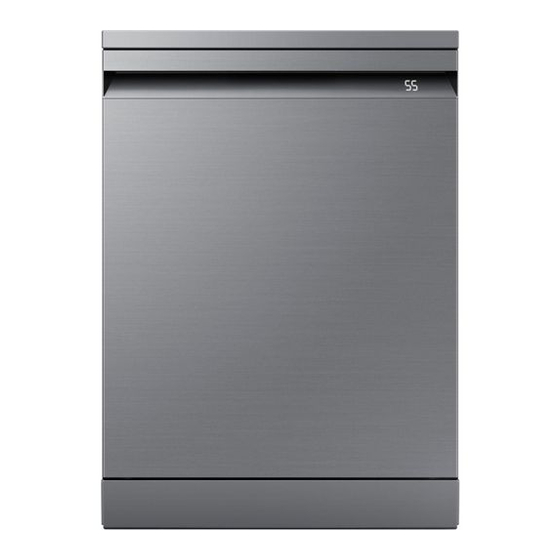
REPAIR
DISHWASHER
Basic model
: DW60M9970US
Model Name
: DW60**8***Series
Model Code
:
DW60BG850UB1
DW60BG850I00
DW60BG850I00
DW60BG850I00
DW60BG850FSL
DW60BG850FSL
DW60BG850FSL
DW60BG850B00
DW60BG830I00
DW60BG830I00
DW60BG830FSL
DW60BG830FSL
DW60BB890UAP
DW60BB890UAP
DW60BB890FAP
DW60BB890FAP
DW60BB890FAP
DW60CB895UAP
DW60CG880B00
DW60CB880FSL
Guide
DISHWASHER
DW60**7***Series
DW60BG770FSL
DW60BG770FGL
DW60BG750USL
DW60BG750SSL
DW60BG750FSL
DW60BG750FSL
DW60BG750FSL
DW60BG750FSL
DW60BG750FSL
DW60BG750B00
DW60BG750B00
DW60BG750B00
DW60BG730FSL
DW60BG730FSL
DW60BG730FSL
DW60BG730B00
DW60BB770APT
* For End User.
Advertisement

Related Manuals for Samsung DW60 8 Series


Summary of Contents for Samsung DW60 8 Series
- Page 1 DISHWASHER Basic model : DW60M9970US Model Name : DW60**8***Series DW60**7***Series Model Code DW60BG770FSL DW60BG850UB1 DW60BG770FGL DW60BG850I00 DW60BG750USL DW60BG850I00 DW60BG850I00 DW60BG750SSL DW60BG850FSL DW60BG750FSL DW60BG850FSL DW60BG750FSL DW60BG750FSL DW60BG850FSL DW60BG750FSL DW60BG850B00 DW60BG750FSL DW60BG830I00 DW60BG830I00 DW60BG750B00 DW60BG830FSL DW60BG750B00 DW60BG830FSL DW60BG750B00 DW60BG730FSL DW60BB890UAP DW60BG730FSL DW60BB890UAP DW60BG730FSL DW60BB890FAP DW60BG730B00...
-
Page 2: Important Safety Notice
Following the repair by a non-authorized service provider self-repair or non-professional repair of the product Samsung is not liable for any damage to the product any injury or any other product safety issue caused by any attempt to repair the product which does not carefully follow these repair and maintenance instructions. - Page 3 "look and feel" and arrangement of such Content, contained in this manual is owned, controlled or licensed by or to Samsung, and is protected by trade dress, copyright, patent and trademark laws, and various other intellectual property rights and unfair competition laws.
-
Page 4: Assy Cover Top
This Document can not be used without Samsung’s authorization. 1. DISASSEMBLY AND REASSEMBLY 1-1. DISASSEMBLY AND REASSEMBLY 1-1-1. ASSY COVER TOP - ASSY COVER TOP: DD97-00313E (DW60B****F** MODEL ONLY) Part Figure Description 1. Remove 2 screws at back of ASSY COVER TOP. - Page 5 This Document can not be used without Samsung’s authorization. 1-1-2. SEAL TUB PACKING - SEAL TUB PACKING: DD62-00181A Part Figure Description 1. Remove the old seal from the BRACKET SEAL TUB. WARNING SEAL TUB PACKING Be sure to remove the power plug before servicing [DISASSEMBLY] SEAL TUB PACKING...
-
Page 6: Disassembly And Reassembly
This Document can not be used without Samsung’s authorization. Part Figure Description 4. P ress the seal from the top corner toward remaining side. SEAL TUB PACKING CAUTION [ASSEMBLY] Pay attention to assemble not to deform the seal tip at the corner. If the gap is opened, it may cause steam leakage. 6 _ Disassembly and Reassembly... - Page 7 This Document can not be used without Samsung’s authorization. 1-1-3. HOUSING - ASSY HOUSING-LEFT: DD97-00555C / DD97-00712A(DW60BG***F**) - ASSY HOUSING-RIGHT: DD97-00556C / DD97-00713A(DW60BG***F**) Part Figure Description 1. Remove 4 screws at front of HOUSING 2. R elease 6 hooks at back of Dishwasher to remove HOUSING HOUSING [DISASSEMBLY] 3. Remove HOUSING from Dishwasher. CAUTION Do not do this work without safety gloves. It may cause injury from sharp edges.
- Page 8 This Document can not be used without Samsung’s authorization. Part Figure Description 1. Assemble Housing to side of Dishwasher CAUTION Do not do this work without safety gloves. It may cause injury from sharp edges. HOUSING [ASSEMBLY] 2. Secure 6 hooks at back of Dishwasher 3. Fasten 4 screws at front of HOUISNG 8 _ Disassembly and Reassembly...
-
Page 9: Door Spring
This Document can not be used without Samsung’s authorization. 1-1-4. DOOR SPRING - SPRING ETC DOOR: DD61-00763A / DD61-00761A(DW60BG***F**) - HOLDER ROPE DOOR: DD61-00742B / DD61-00742A(DW60BG***F**) Part Figure Description Preparation: Disassemble HOUSING from Dishwasher 1. T urn SHAFT-ADJUSTER counter clockwise to loosen spring 2. T o loosen the force on the hinge, pull the rope down DOOR SPRING... - Page 10 This Document can not be used without Samsung’s authorization. 1-1-5. ASSY DOOR - ASSY DOOR: DD97-00694A / DD97-00711A(DW60BG***F**) - GUIDE HINGE: DD61-00483A Part Figure Description Preparation: Disassemble HOUSING from Dishwasher 1. R emove 1 screw at SUPPORT HINGE-RIGHT to remove Ground wire from the door 2. Disassemble 3 connectors from the door 3. Release 2 hooks and disassemble COVER WIRE WARNING Do not do this work without safety gloves. It may cause injury from sharp edges. 4. Pull out wires from dishwasher...
- Page 11 This Document can not be used without Samsung’s authorization. Part Figure Description 1. I nsert ASSY DOOR to dishwasher Door hinge must fit on shaft 2. I nsert GUIDE HINGE to lock door Do the same assembly on the other side 3. P ull the rope down, and assemble HOLDER ROPE DOOR at hinge Do the same assembly on the other side check rope and spring are assembled as picture ASSY DOOR [ASSEMBLY] 4. Insert wires and COVER WIRE to inside of dishwasher 5. A ssemble COVER WIRE to FRAME FRONT Secure 2 hooks 6. A ssemble 3 connectors...
- Page 12 This Document can not be used without Samsung’s authorization. 1-1-6. PANEL CONTROL / SUB PBA - ASSY PANEL CONTROL: DD97-00668A / DD97-00671B (DW60BG***F**) - ASSY PBA MODULE-SUB: DD92-00082E / DD92-00082B (DW60BG***F**) Part Figure Description 1. O pen the door completely to prevent losing screws. Before removing the parts, place a cushioned mat on the floor to prevent the parts from being scratched.
- Page 13 This Document can not be used without Samsung’s authorization. Part Figure Description 6. D isconnect wires of ASSY MODULE 7. R elease 2 hooks and separate ASSY MODULE 8. S eparate ASSY LAMP LED from DOOR OUTER Release hook and pull ASSY LAMP LED LED DISPLAY ASSY BUZZER 9. S eparate wires of W-LAN MODULE and ASSY MODULE W-LAN MODULE ASSY MODULE (wifi module) (SUB PBA) 10. R elease 2 hooks and separate ASSY PANEL CONTROL...
- Page 14 This Document can not be used without Samsung’s authorization. Part Figure Description 1. F asten a screw to LED DISPLAY 2. C onnect wire to LED DISPLAY 3. L ock hook of W-LAN MODULE 4. Connect wire of W-LAN MODULE 5. Lock hook of ASSY BUZZER 6. C onnect wire of ASSY BUZZER 7. I nsert ASSY PANEL CONTROL to DOOR OUTER...
- Page 15 This Document can not be used without Samsung’s authorization. Part Figure Description PANEL CONTROL / 11. F asten 14 screws to DOOR OUTER and DOOR INNER SUB PBA Use Torx T20 driver to fasten it [ASSEMBLY] Disassembly and Reassembly _ 15...
- Page 16 This Document can not be used without Samsung’s authorization. 1-1-7. GASKET(ASSY CASE BRAKE) - GASKET: DD63-00072A Part Figure Description Preparation: D isassemble HOUSING-LEFT Remove BASKET-LOWER from dishwasher 1. T urn CAP OUTLET DRY counter-clockwise to unlock Use Handle of Plier to grab CAP GASKET 2. M ake ASY CASE BRAKE come out from hole of TUB (ASSY CASE BRAKE) [DISASSEMBLY] 3. Remove the GASKET BRAKE from the CASE BRAKE assembly.
- Page 17 This Document can not be used without Samsung’s authorization. 1-1-8. GASKET(ASSY COVER DRAY) - GASKET: DD63-00072A Part Figure Description Preparation: D isassemble HOUSING-RIGHT Remove BASKET-LOWER from dishwasher 1. T urn CAP OUTLET DRY counter-clockwise to unlock. Use Handle of Plier to grab CAP. WARNING Be sure to remove the power plug before servicing. GASKET (ASSY COVER DRY) [DISASSEMBLY] 2. S eparate ASSY COVER DRY (WATER TANK) from hole of TUB.
- Page 18 This Document can not be used without Samsung’s authorization. 1-1-9. ASSY DUCT MAIN - ASSY DUCT: DD93-01019C Part Figure Description Preparation: Remove all BASKETs from dishwasher . 1-1. R emove a Cap first. 1-2. R emove a screw with Torx T20 driver. 2. R elease hooks holding ASSY DUCT MAIN at the top of ASSY DUCT MAIN [DISASSEMBLY] 3. R elease hooks holding ASSY DUCT MAIN at 4. Pull Out DUCT MAIN from TUB...
-
Page 19: Fine Filter
This Document can not be used without Samsung’s authorization. 1-1-10. ASSY ROTOR/FILTER - ASSY ROTOR: DD97-00646B (DW60B*8******) / DD97-00646C (DW60B*7*****) - FILTER MICRO: DD63-00383A - FILTER COARSE: DD63-00384A - COVER FILTER: DD63-00388A - FILTER FINE: DD63-00387A Part Figure Description Preparation: D isassemble HOUSING LEFT, RIGHT... - Page 20 This Document can not be used without Samsung’s authorization. Part Figure Description 1. A ssemble COVER FILTER-BOTTOM at SUMP 2-1. F asten 6 screws at SUMP Use Torx T20 head driver to fasten. 2-2. F asten 2 Caps at Sump. 3. I nsert HOUSING into COVER FILTER-BOTTOM 4. T urn HOUSING clock wise to lock it ASSY ROTOR / FILTER Use flat head driver to turn it. Position the driver in the position of the arrow. [ASSEMBLY] * HOUSING must be turned to the end.
- Page 21 This Document can not be used without Samsung’s authorization. Part Figure Description ASSY ROTOR / FILTER 8. A ssemble ASSY ROTOR to HOUSING. [ASSEMBLY] Disassembly and Reassembly _ 21...
- Page 22 This Document can not be used without Samsung’s authorization. 1-1-11. ASSY BASKET LOWER - ASSY BASKET LOWER: DD97-00697* Part Figure Description 1. Pull out ASSY BASKET LOWER from Dishwasher. 2. Push 2 hooks at ASSY ROLLER. 3. Take off ASSY ROLLER from BASKET. ASSY BASKET LOWER [DISASSEMBLY] 4. P ush hook with flat head driver to take off HANDLE...
- Page 23 This Document can not be used without Samsung’s authorization. Part Figure Description 6. P ull the upper side of ASSY PLASTIC SUPPORTOR to take off it. ASSY BASKET LOWER [DISASSEMBLY] 7. R otate and take off the ASSY PLASTIC SUPPORTOR. Disassembly and Reassembly _ 23...
- Page 24 This Document can not be used without Samsung’s authorization. Part Figure Description 1. A ssemble HANDLE BASKET at BASKET. Front side Back side <Plastic Handle model> Front side Back side <STS Handle model> 2. Assemble ASSY ROLLER at BASKET Secure hook to lock it. * Match wire and center of ASSY ROLLER. ASSY BASKET LOWER [ASSEMBLY] 3 . H ang the one side rail of ASSY PLASTIC SUPPORTOR by...
- Page 25 This Document can not be used without Samsung’s authorization. 1-1-12. ASSY BASKET MIDDLE - ASSY BASKET MIDDLE: DD97-00698* Part Figure Description 1. Pull out ASSY BASKET MIDDLE from Dishwasher 2. Release hook and push ASSY DUCT MIDDLE ASSY BASKET MIDDLE 3. Move ASSY DUCT MIDDLE to direction of arrow [DISASSEMBLY] 4. P ull out ASSY DUCT MIDDLE 5. C lamp SUPPORT CUP-HOLDER, using plier And Pull out SUPPORT CUP from HOLDER 6. R emove SUPPORT CUP-HOLDER from BASKET...
- Page 26 This Document can not be used without Samsung’s authorization. Part Figure Description 7. P ush hook with flat head driver to take off HANDLE BASKET 8. P ull handle and adjust BRACKET RAIL to lower position ASSY BASKET MIDDLE [DISASSEMBLY] 9. P ush out lower part of ASSY BASKET ADJUSTER 10. R emove ASSY BASKET ADJUSTER from BASKET 26 _ Disassembly and Reassembly...
- Page 27 This Document can not be used without Samsung’s authorization. Part Figure Description 1. A ssemble BRACKET RAIL and ASSY BASKET ADJUSTER at BASKET 2. A ssemble ASSY BASKET ADJUSTER at BASKET 3. A ssemble HANDLER BASKET at BASKET ASSY BASKET MIDDLE Front side [ASSEMBLY] Back side 4. A ssemble 2 HOLDER SUPPORT CUP at BASKET 5. C lamp HOLDER SUPPORT CUP with plier and and assemble SUPPORT CUP...
- Page 28 This Document can not be used without Samsung’s authorization. Part Figure Description 6. A ssemble arm of ASSY DUCT MIDDLE at BASKET Arm is assembled between 4 and 5 row 7. S lide ASSY DUCT MIDDLE to direction of arrow SUPPORT CUP at BASKET 8. Push ASSY DUCT MIDDLE and secure hooks ASSY BASKET MIDDLE [ASSEMBLY] 9. [ Only for DW60B*73****] Assemble arm of SUPPORT KNIFE at BASKET. The first arm(from the front side) is assembled between 2 and 3 row 10. [ Only for DW60B*73****] Tilt the SUPPORT KNIFE to the counter-clockwise direction.
- Page 29 This Document can not be used without Samsung’s authorization. 1-1-13. ASSY BASKET 3RD Part Figure Description 1. R emove 2 pieces of HOLDER RAIL 3RD FRONT from the rail. 2. Take off ASSY BASKET 3RD from the rail. 3. T ake off BASKET 3RD-UP from the BASKET 3RD with removing 4 holders. ASSY BASKET 3RD (DW60*89*/ DW60*88*/ 4. P ull the HANDLE BASKET 3RD-TRAY from the BASKET DW60*85* ) 3RD.
- Page 30 This Document can not be used without Samsung’s authorization. Part Figure Description 6. B end 5 hooks of DECORATION HANDLE-BASKET with pointed tool. 7. P ush hooks to take off DECORATION HANDLE-BASKET. Tool WARNING Be careful not to hurt from sharp edge. Must wear gloves and use tool. ASSY BASKET 3RD (DW60*89*/ DW60*88*/ DW60*85*) [DISASSEMBLY] 8. Take off DECORATION HANDLE-BASKET with rotate. 9. Take off COVER DECO HANDLE from the BASKET 3RD. BASKET 3RD COVER DECO HANDLE 30 _ Disassembly and Reassembly...
- Page 31 This Document can not be used without Samsung’s authorization. Part Figure Description 1. Assemble COVER DECO HANDLE to the BASKET 3RD. CAUTION Pay attention to the locations of each hook. BASKET 3RD COVER DECO HANDLE 2. A ssemble DECORATION HANDLE-BASKET to the BASKET 3RD. CAUTION Pay attention to the locations of each hook. ASSY BASKET 3RD (DW60*89*/ DW60*88*/ DW60*85*) [ASSEMBLY] 3. B end 5 hooks to assemble DECORATION HANDLE- BASKET with BASKET 3RD with pointed tool. WARNING Be careful not to hurt from the sharp edge.
- Page 32 This Document can not be used without Samsung’s authorization. Part Figure Description 5. A ssemble HANDLE BASKET-3RD TRAY with BASKET 3RD-UP. CAUTION Pay attention to the direction of HANDLE. BASKET 3RD-UP HANDLE BASKET-3RD TRAY 6. A ssemble BASKET 3RD-UP with BASKET 3RD. ASSY BASKET 3RD (DW60*89*/ DW60*88*/ DW60*85* ) [ASSEMBLY] 7. I nsert ASSY BASKET 3R to the rail, and assemble HOLDER RAIL 3RD. CAUTION P ay attention to the direction of the holder.
- Page 33 This Document can not be used without Samsung’s authorization. 1-1-14. GASKET(ASSY COVER DRAY) - GASKET: DD63-00072A Part Figure Description PREPARATION: D isassemble HOUSING-RIGHT Remove BASKET-LOWER and BASKET_MIDDLE from dishwasher 1. D isassemble hose by loosening clamp - B esure Mop is prepared under the water tank, water come out from the hose. 2. D isconnect wire from ASSY COVER DRY WARNING Be sure to remove the power plug before servicing.
- Page 34 This Document can not be used without Samsung’s authorization. Part Figure Description GASKET (ASSY COVER 4. A fter connecting the hose, fasten the clamp DRY) [ASSEMBLY] 5. C onnect wire to ACTUATOR THERMAL 6. M ake sure Wire is assembled In ASSY COVER DRY. DW60C*8*** MODEL ONLY 34 _ Disassembly and Reassembly...
- Page 35 This Document can not be used without Samsung’s authorization. 1-1-15. GASKET(ASSY DUCT DRAY) - GASKET: DD63-00072A Part Figure Description PREPARATION: D isassemble HOUSING-LEFT Remove BASKET- LOWER and BASKET_MIDDLE from dishwasher 1. D isconnect wire from ASSY DUCT DRY FAN WARNING Be sure to remove the power plug before servicing. GASKET (ASSY DUCT DRY) 2. T urn CAP HEATFAN OUTER counter-clockwise to unlock [DISASSEMBLY] Use Handle of Plier to grab CAP DW60C*8*** 3. T urn CAP HEATFAN INNER counter-clockwise to unlock...
- Page 36 This Document can not be used without Samsung’s authorization. Part Figure Description 1. Assemble ASSY DUCT DRY to Assy Tub - Besure Position is correct as picture. 2. C onnect to Fan Wire. CAUTION BE CAREFUL NOT TO MISS THE GASKET 3 EA GASKET 3. T urn CAP HEATFAN INNER and CAP HEATFAN OUTER clock (ASSY DUCT DRY) wire to lock. [ASSEMBLY] - B esure CAP HEATFAN OUTER has Guide hole to check assemble.
-
Page 37: Checkpoints After Finishing Service
This Document can not be used without Samsung’s authorization. 1-2. CHECKPOINTS AFTER FINISHING SERVICE 1. Check the safety device Check the operation of the door lock switch. Make sure that it is locked while the dishwasher is running and that it is unlocked when the dishwasher stops. 2. Use authenticated parts only If any part is not authenticated, replace it with an authenticated part. 3. Handling wires Check if any wires are loose or too tight, if they are connected correctly, if they are well bound with tape, and if they are properly clamped. 4. The state of screws and nuts Check if the screws and nuts are fastened correctly. - Page 38 North & Latin America gspn3.samsungcsportal.com China china.samsungportal.com This Service Manual is a property of Samsung Electronics Co.,Ltd. © 2023 Samsung Electronics Co.,Ltd. Any unauthorized use of Manual can be punished under applicable All rights reserved. International and/or domestic law.